Dynamic form
The dynamic form allows you to freely design your forms within the supply chain module. These forms contain steps and fields that can be customized as required to meet the objective of the form or to obtain the desired information from suppliers or internal questions.
Steps
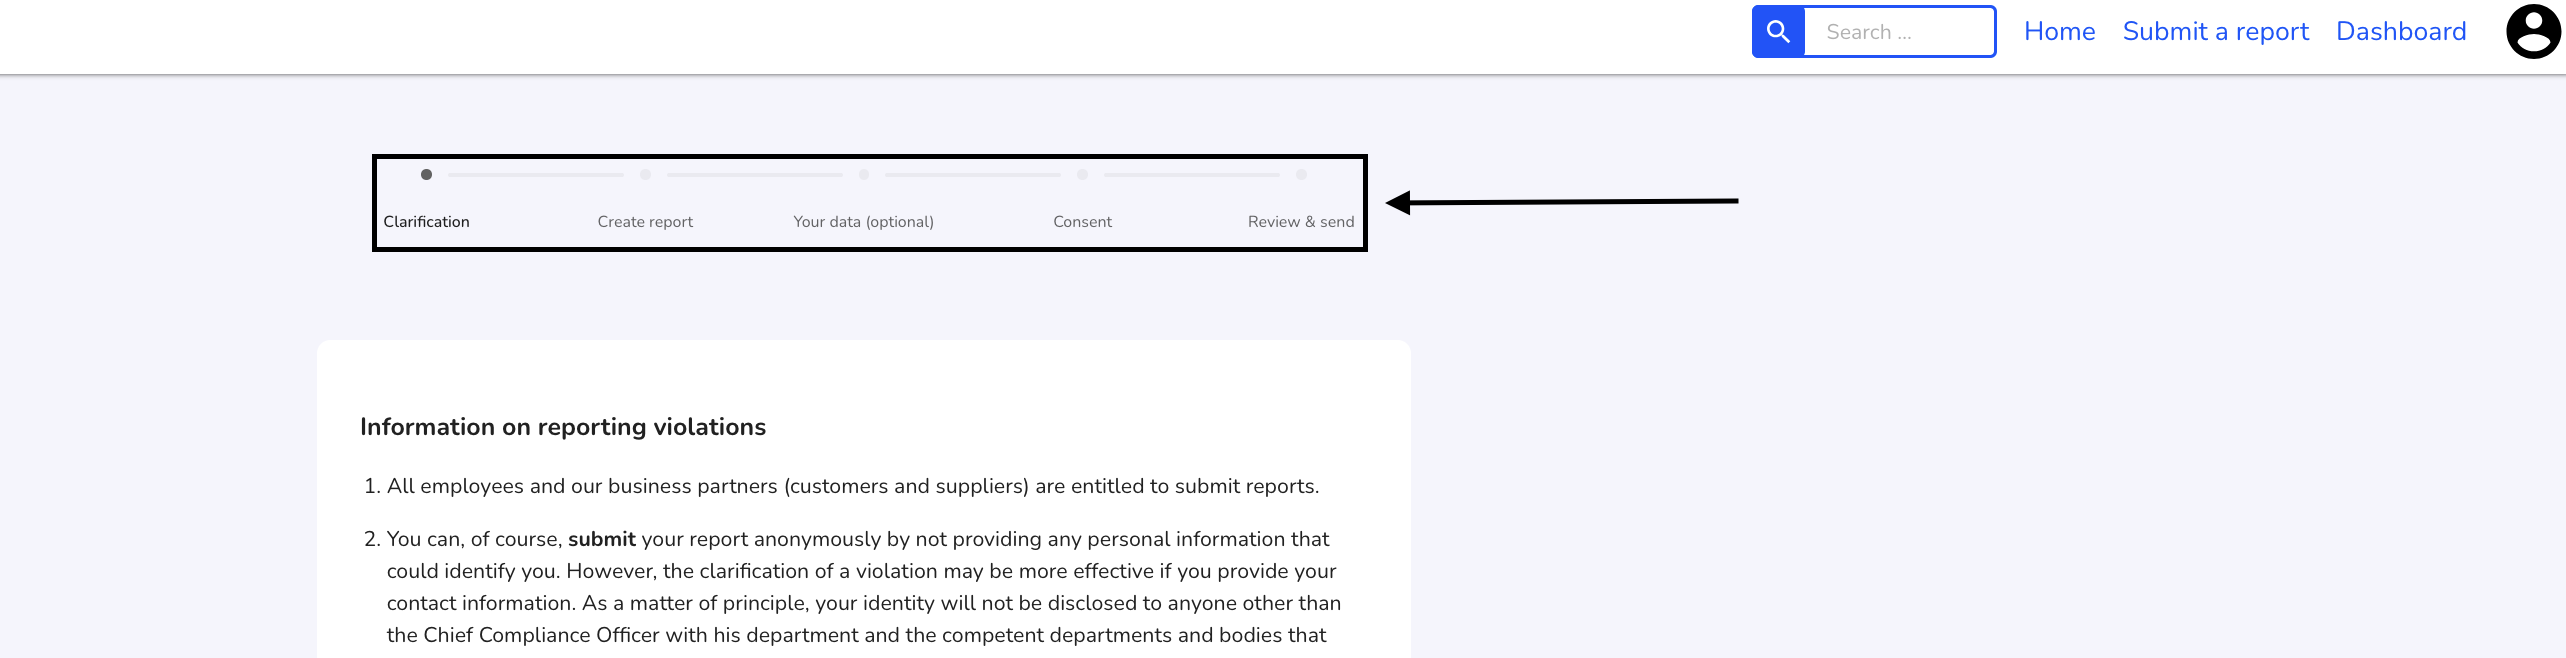
A form can consist of several steps. The standard forms in the Supply Chain module usually consist of just one step. An example form with several steps could look like this:
Create steps
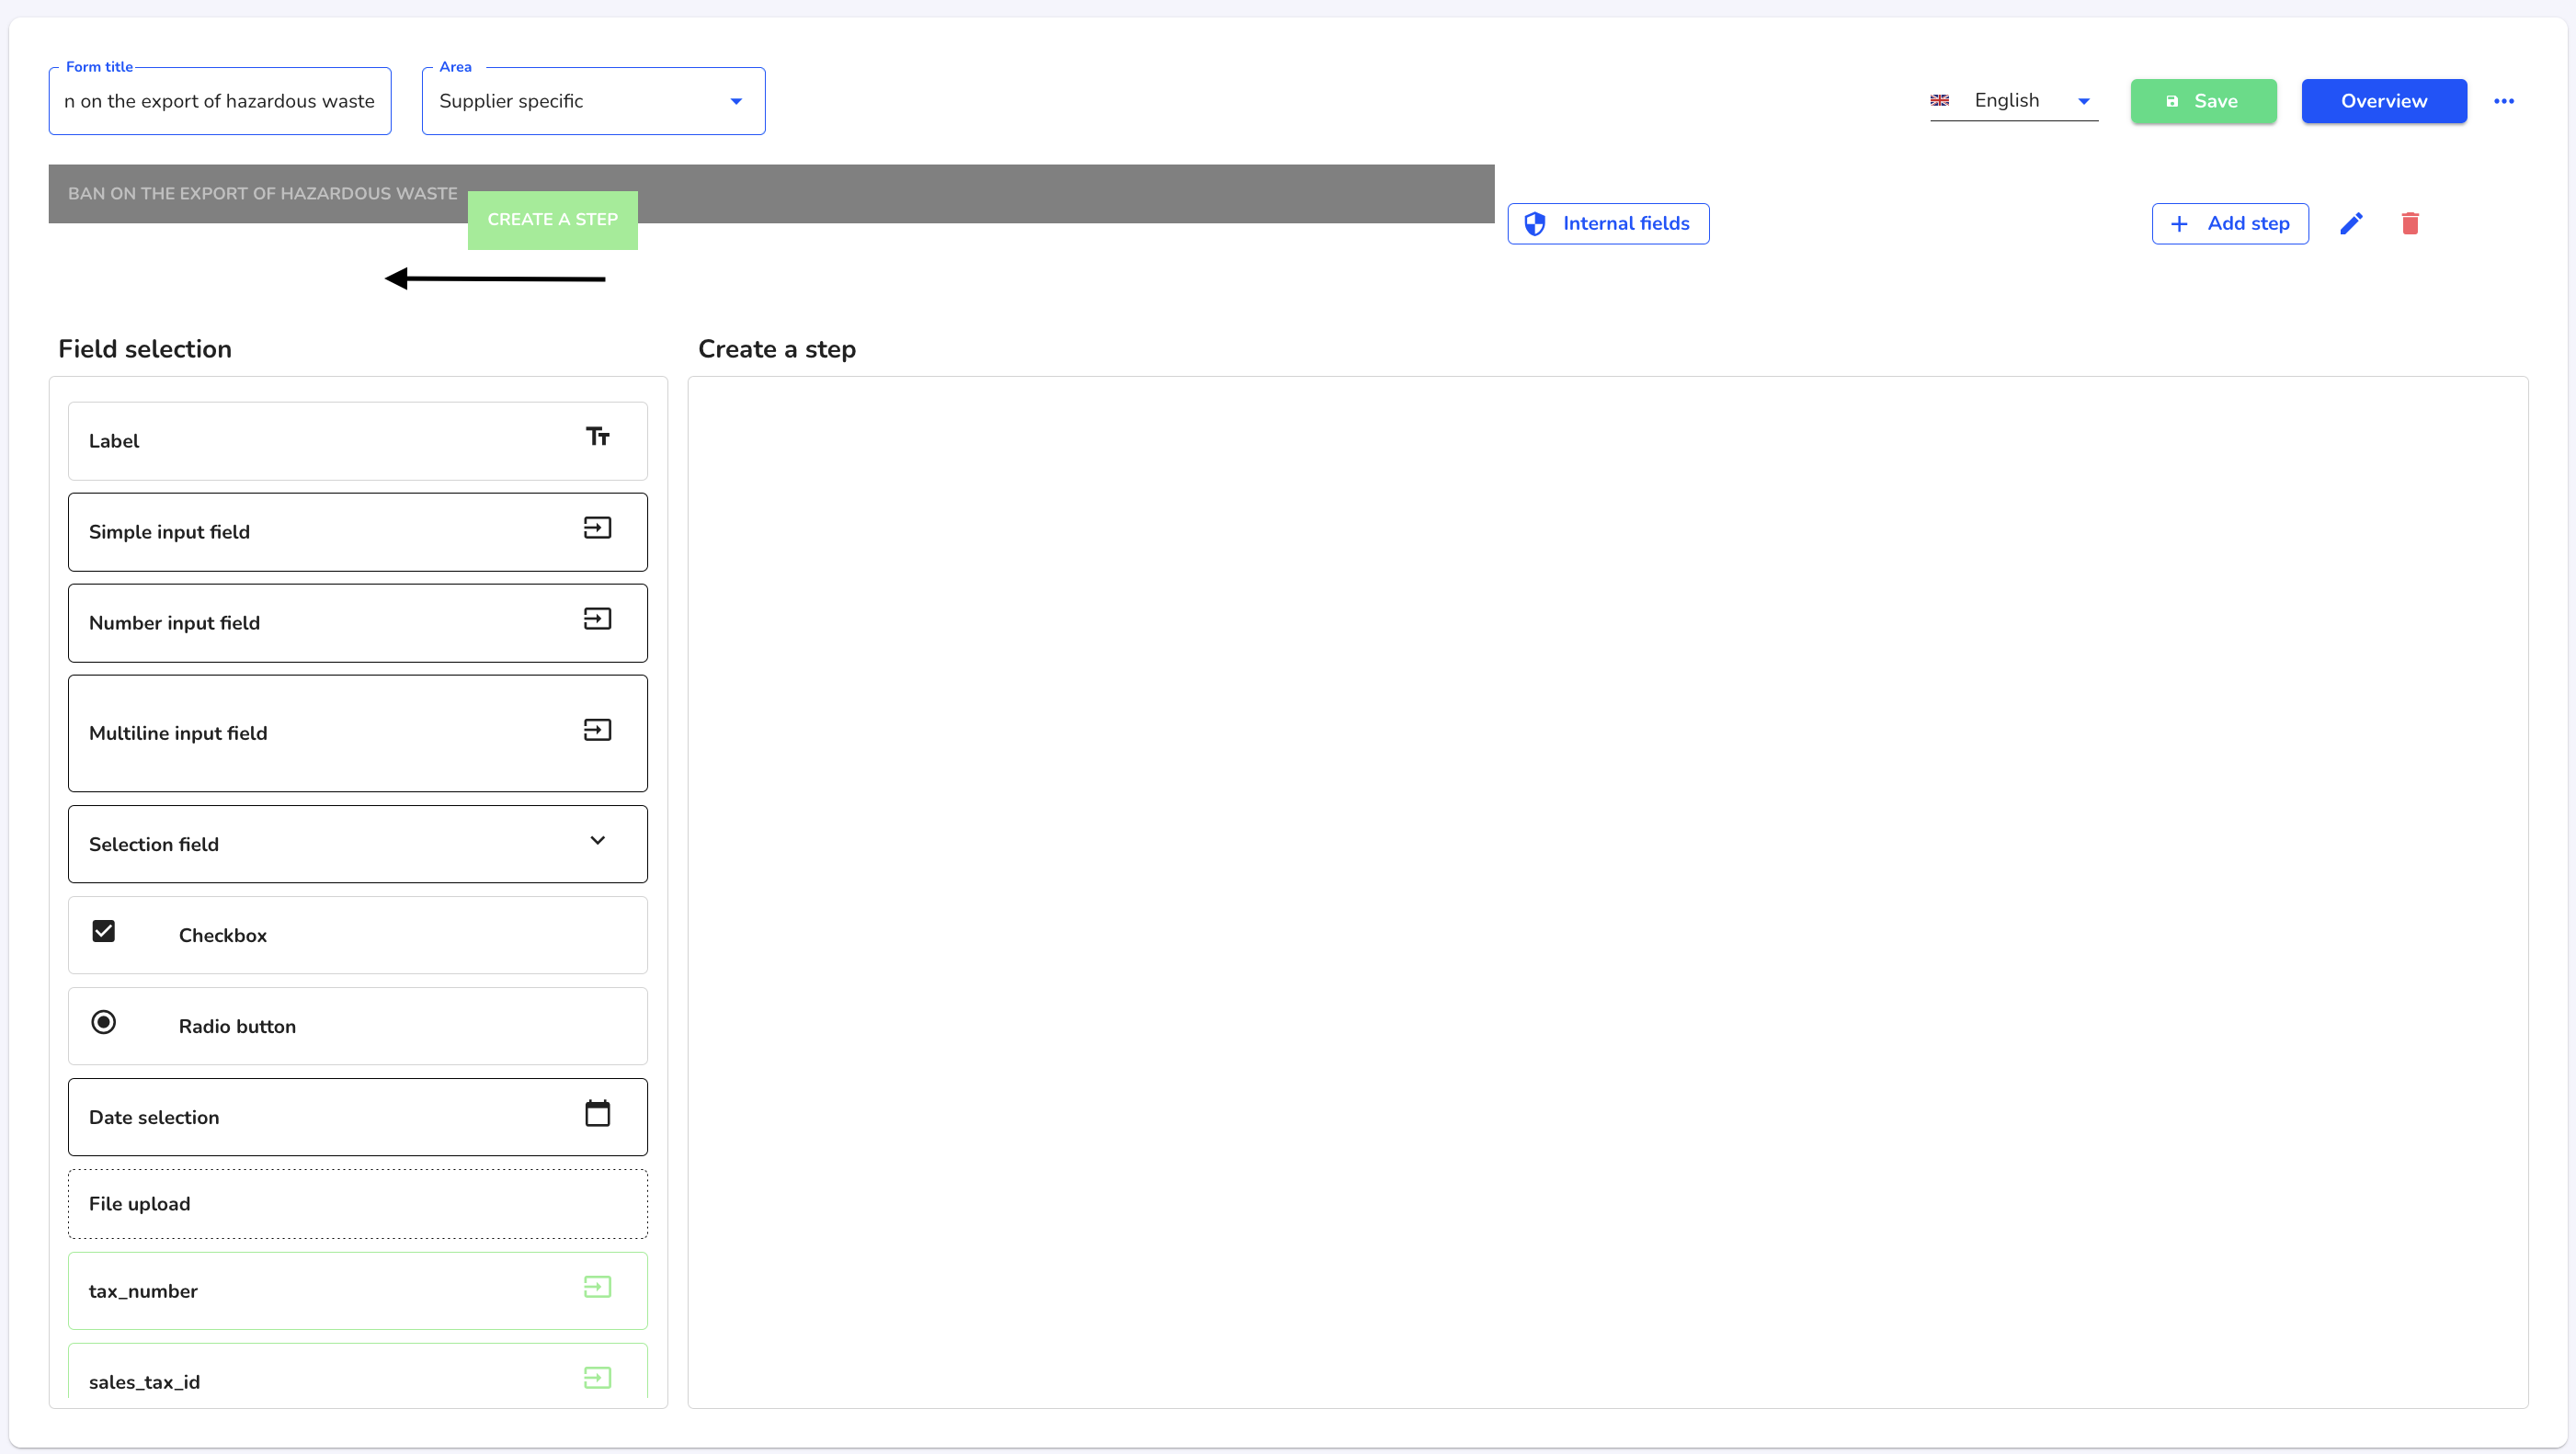
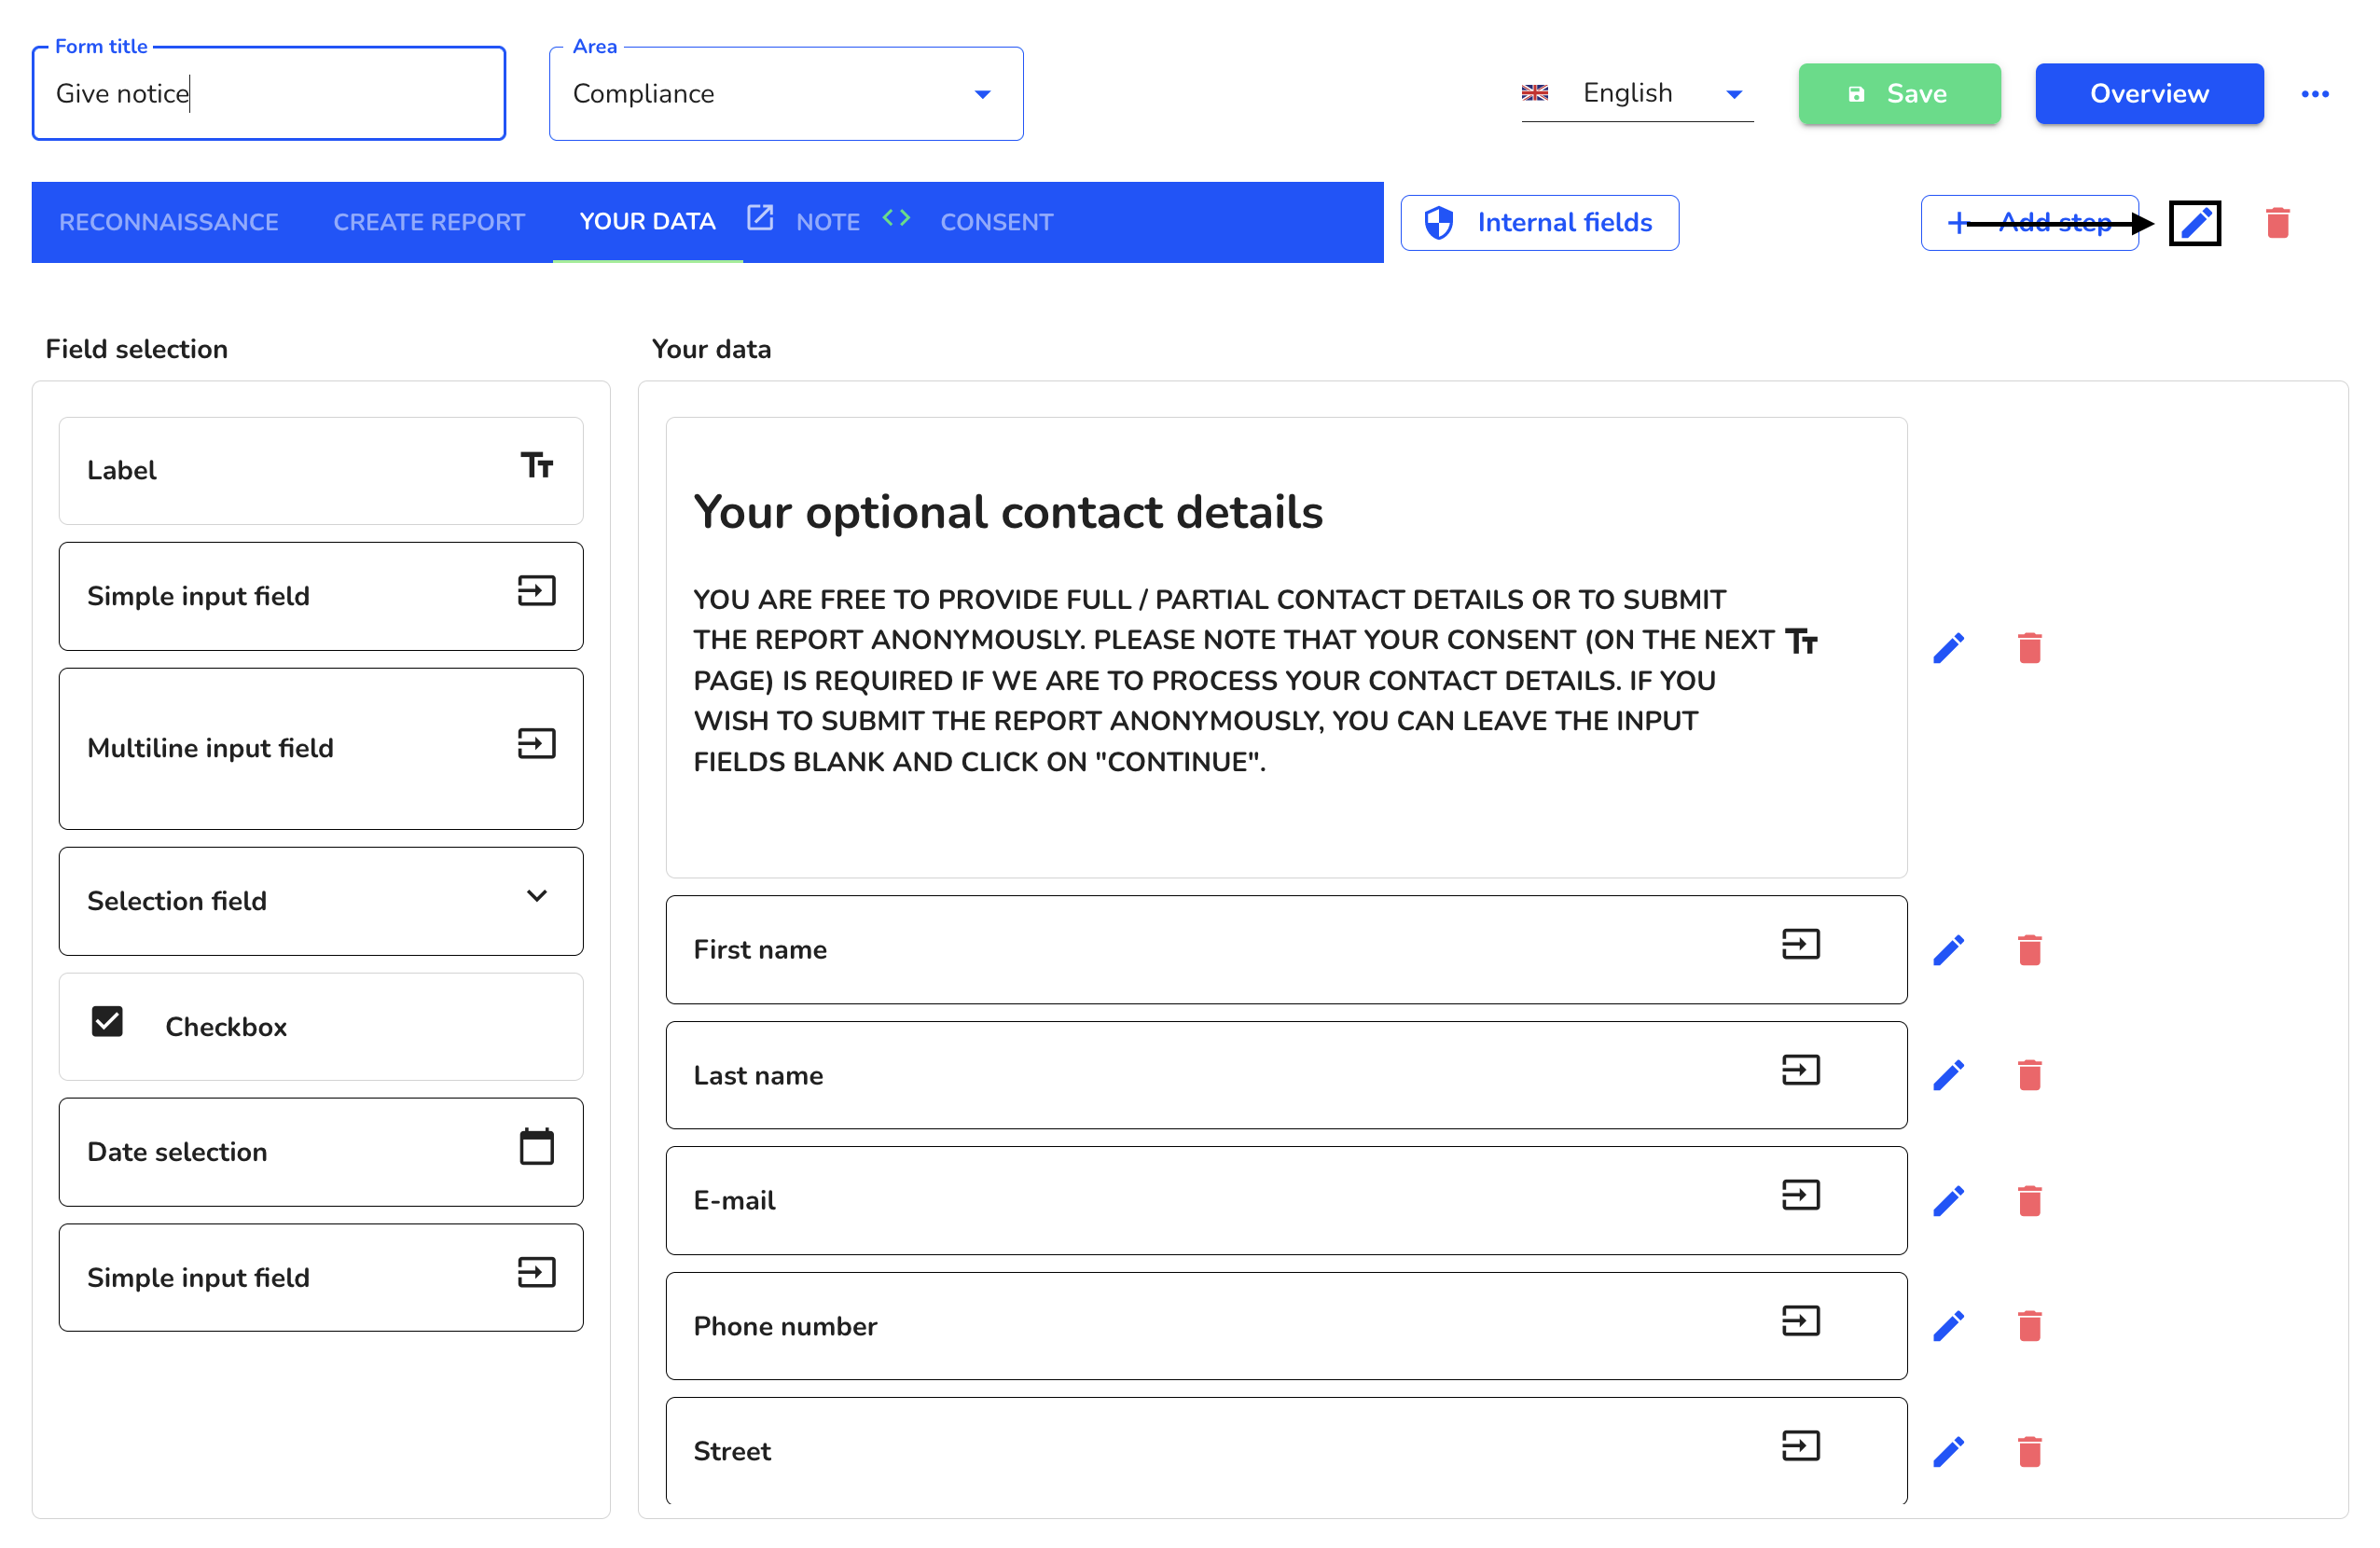
To create a step, first navigate to the form administration.
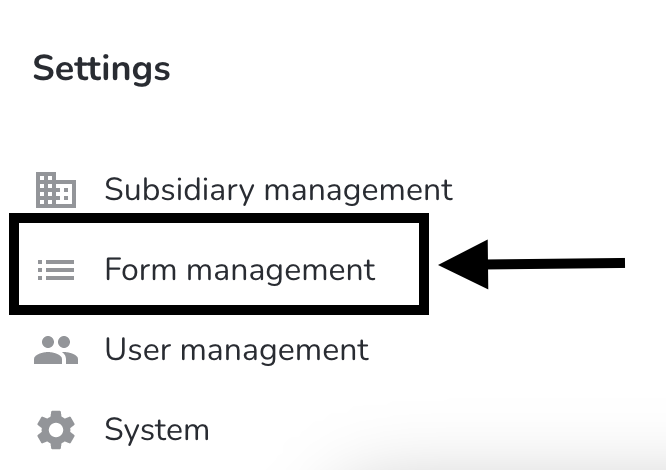
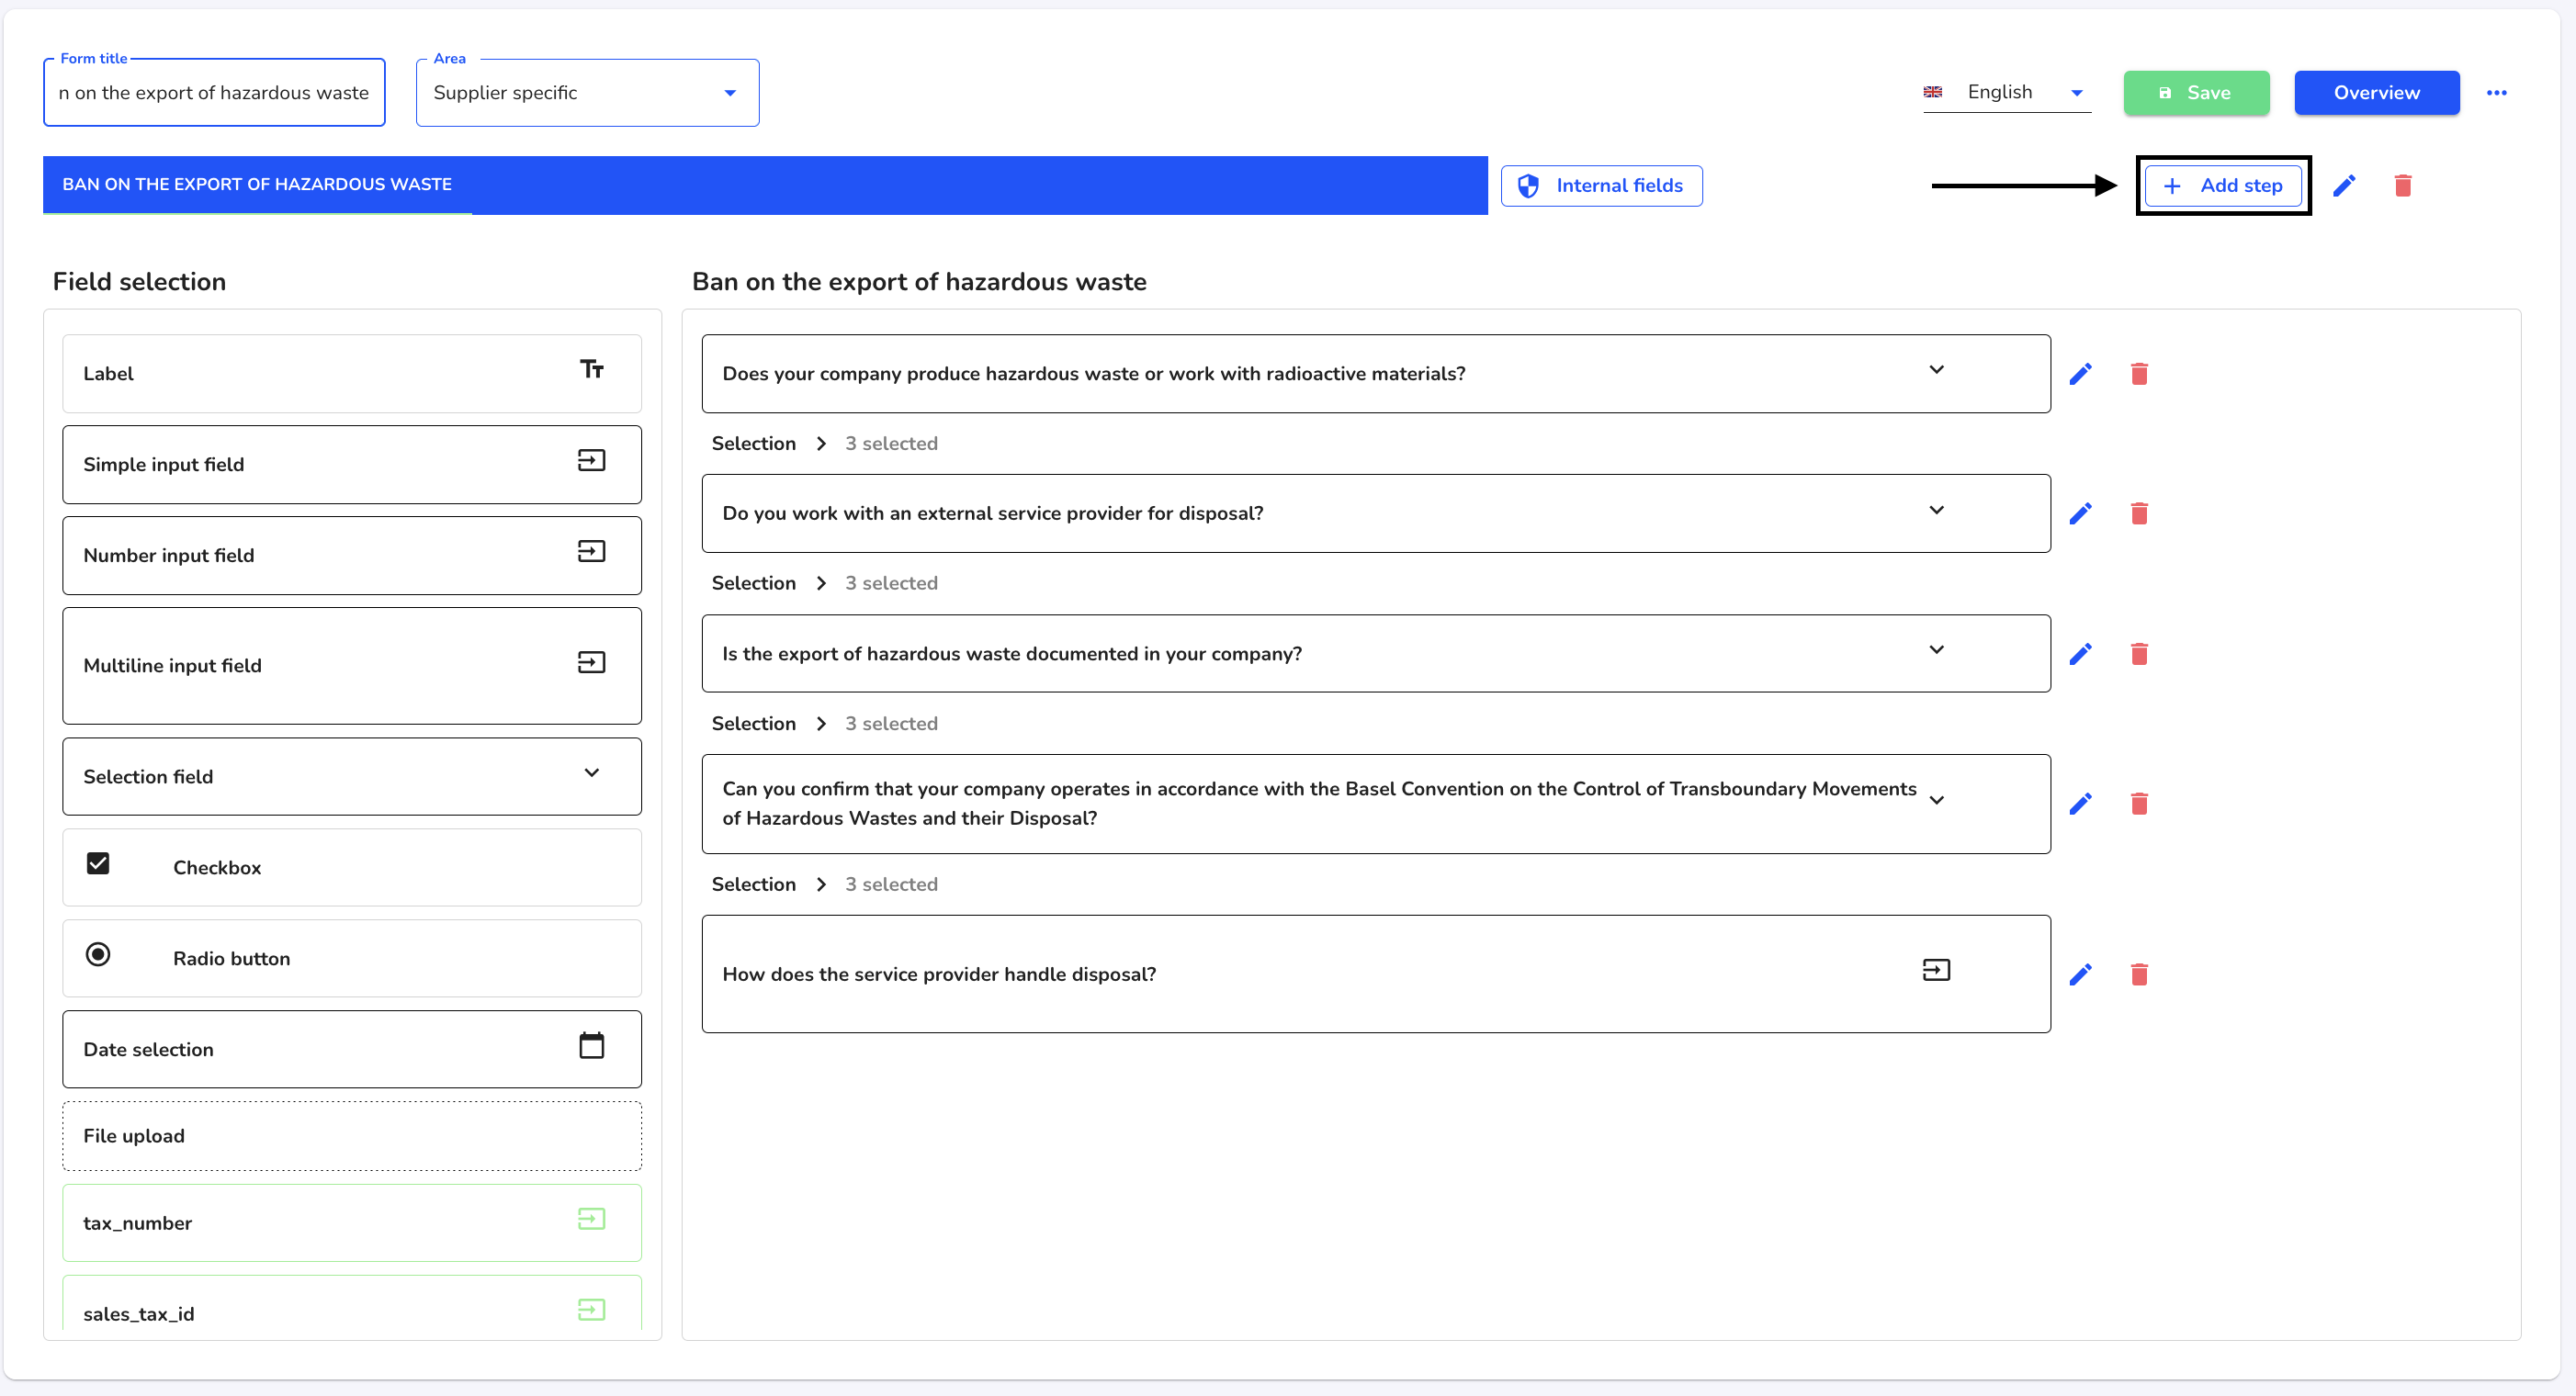
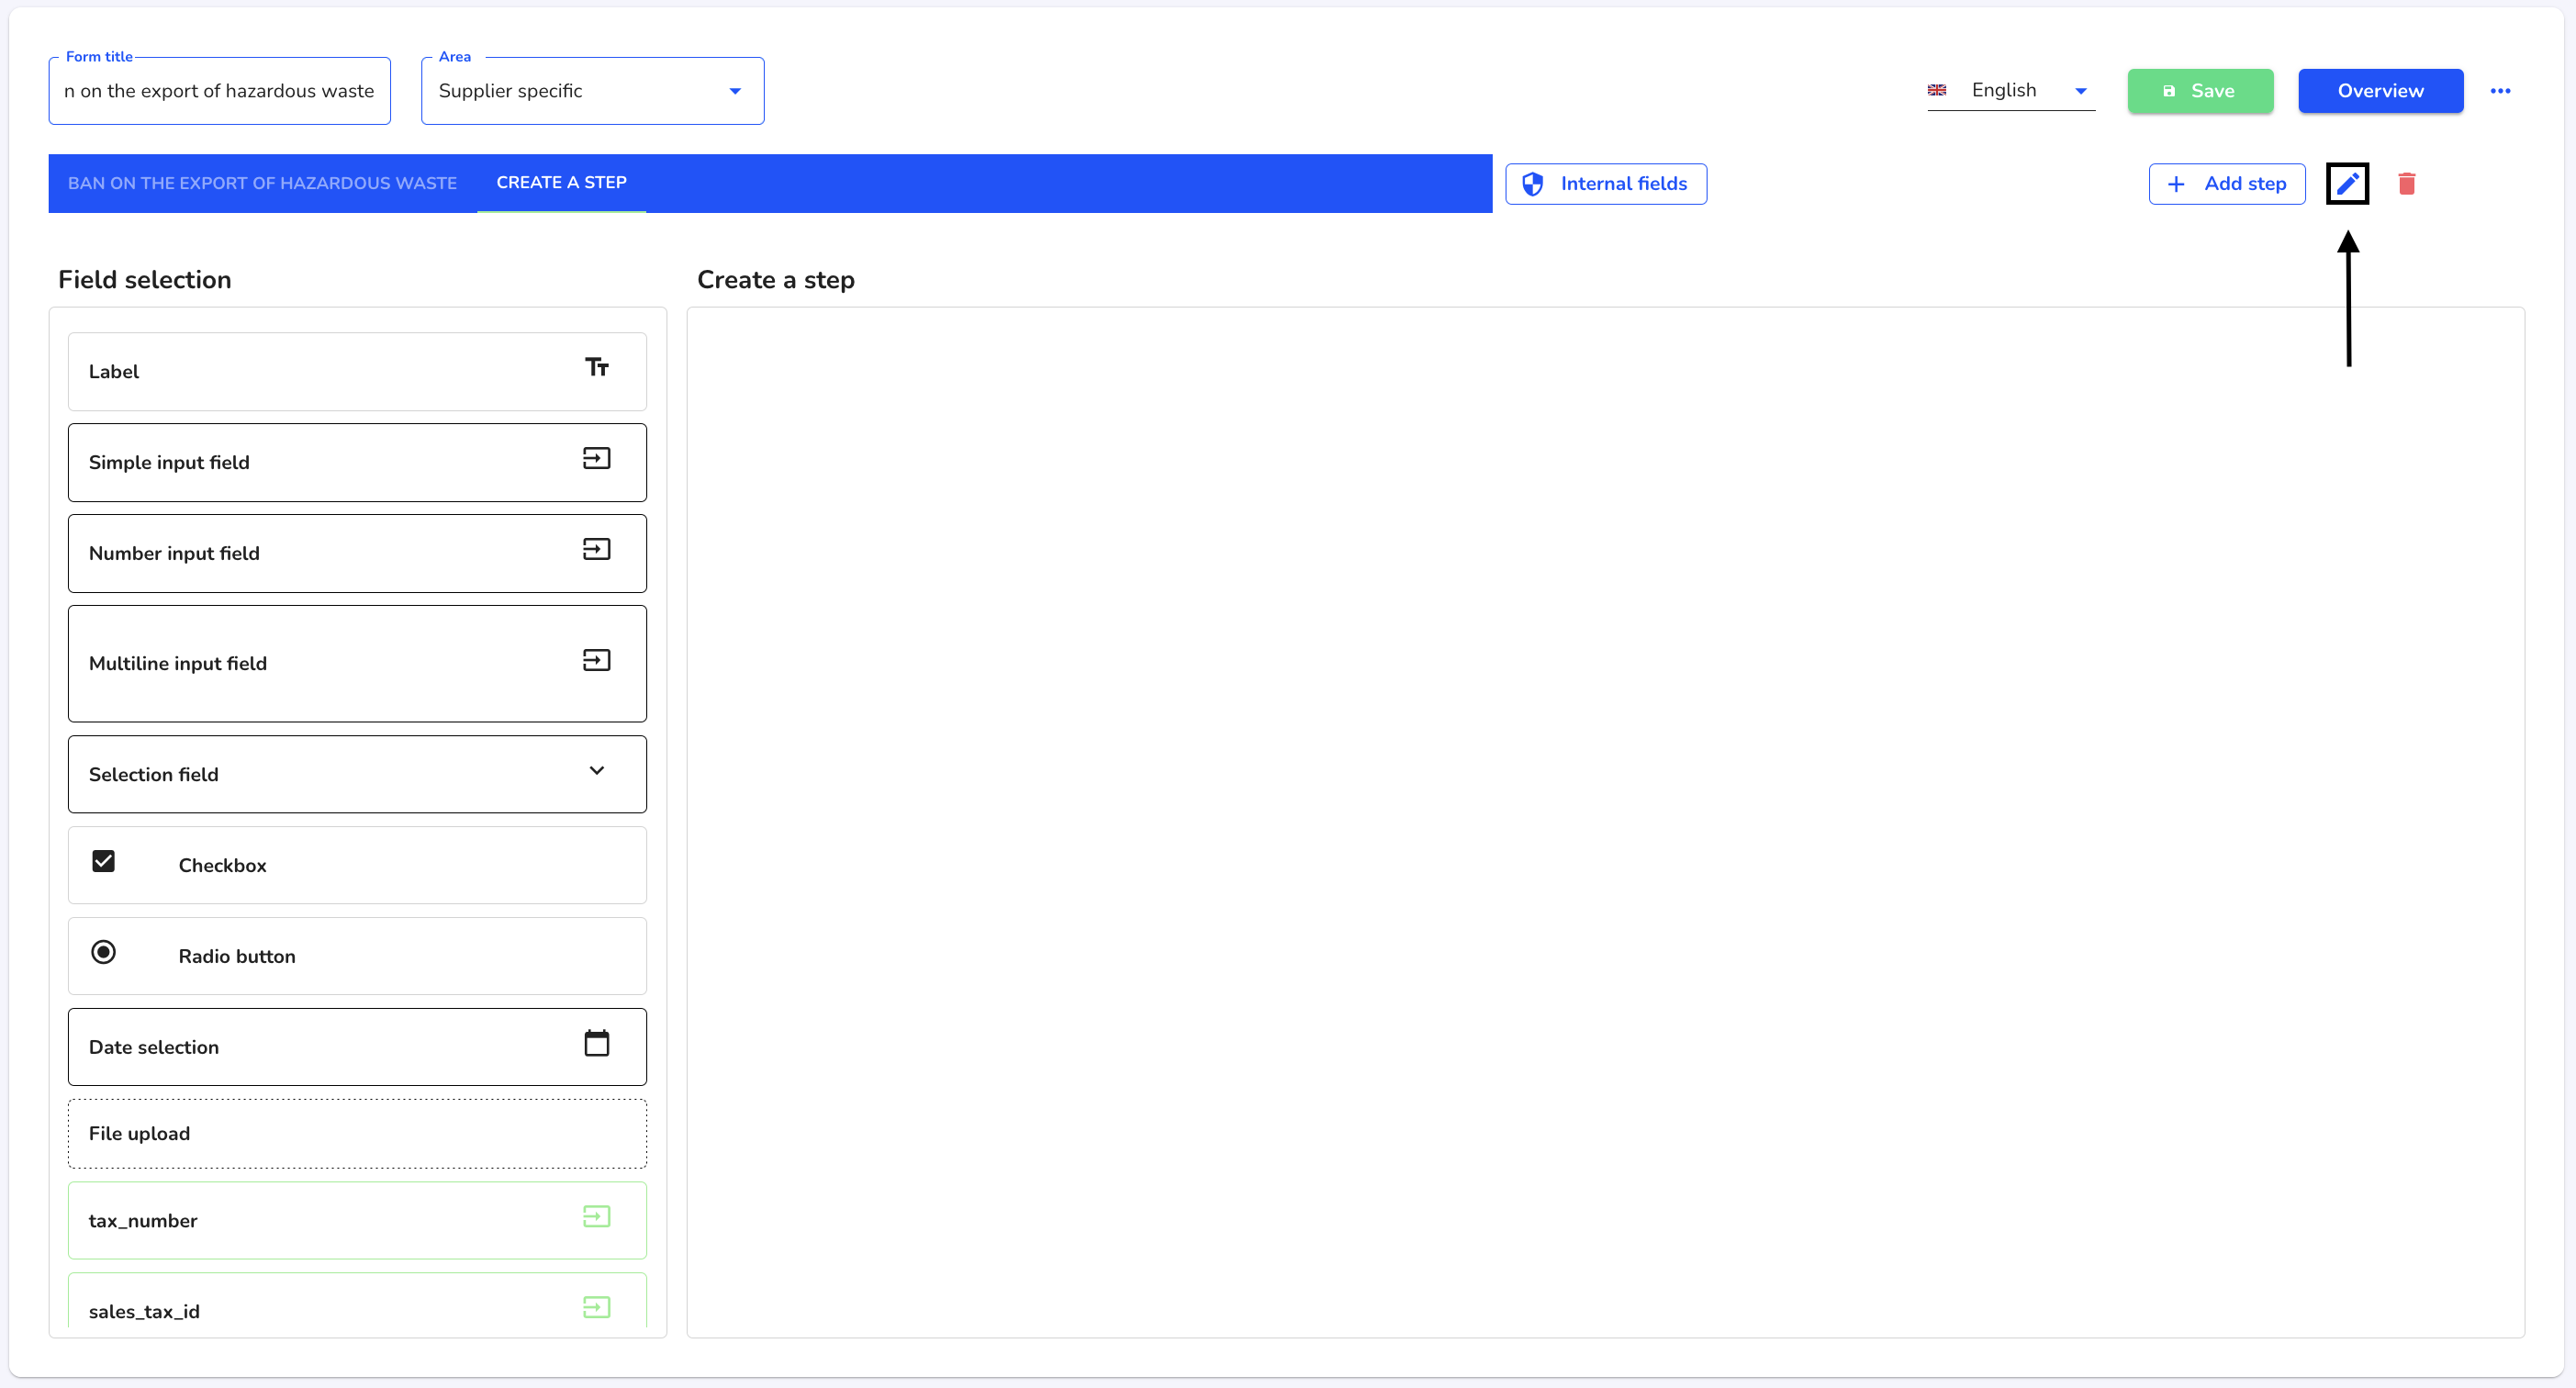
Click on the editing pencil next to the relevant form.

Click on Add step.
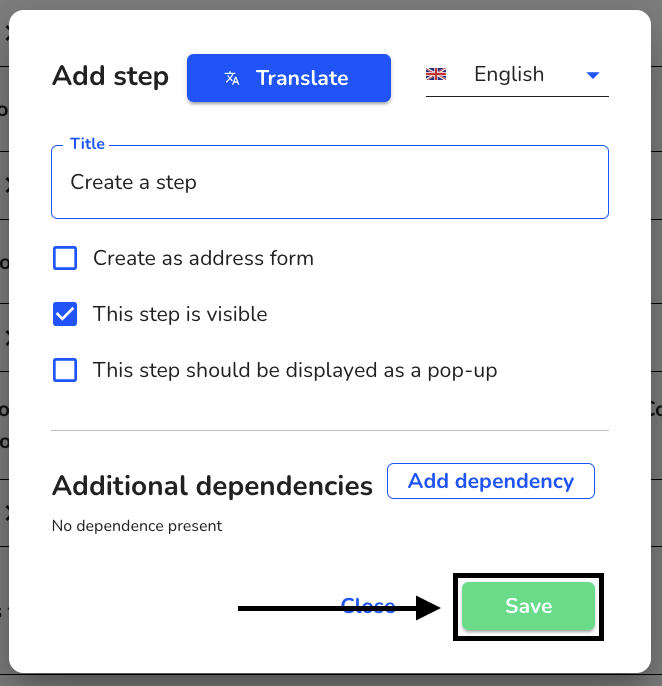
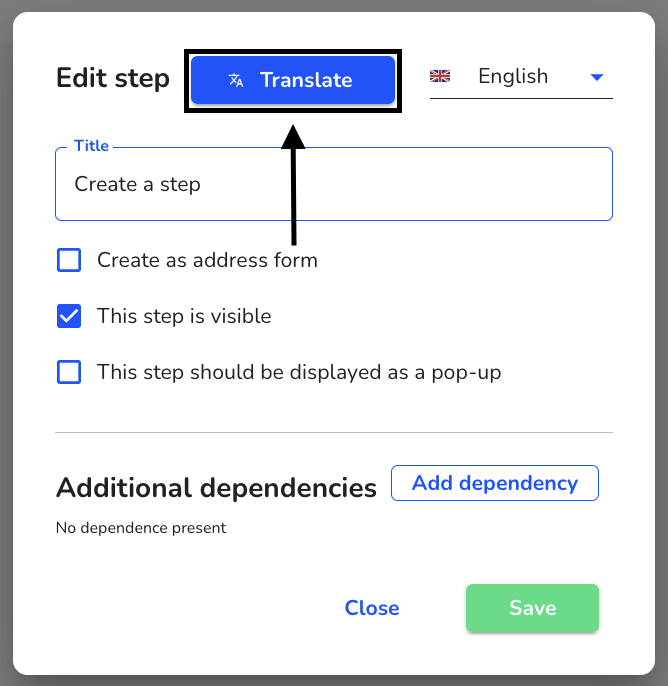
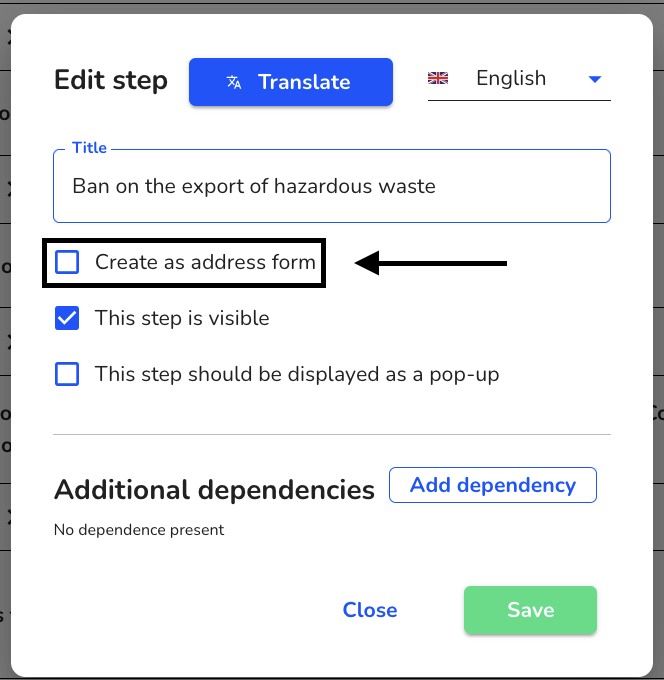
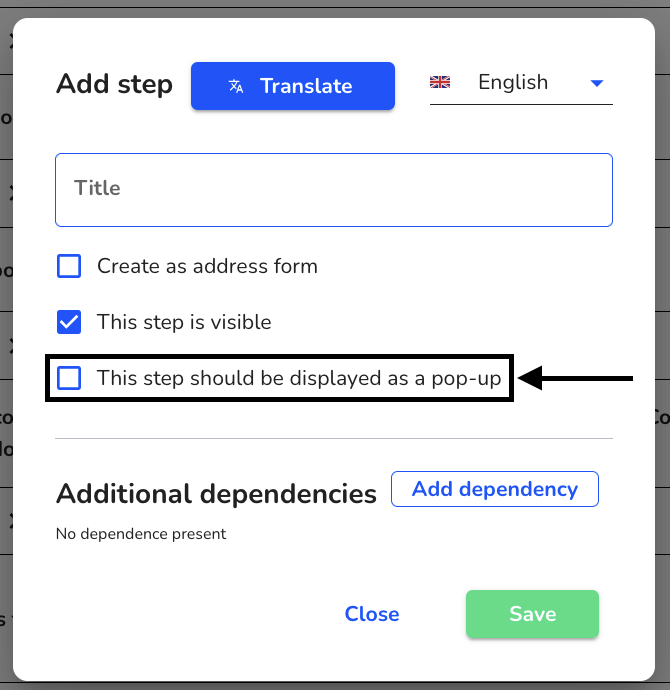
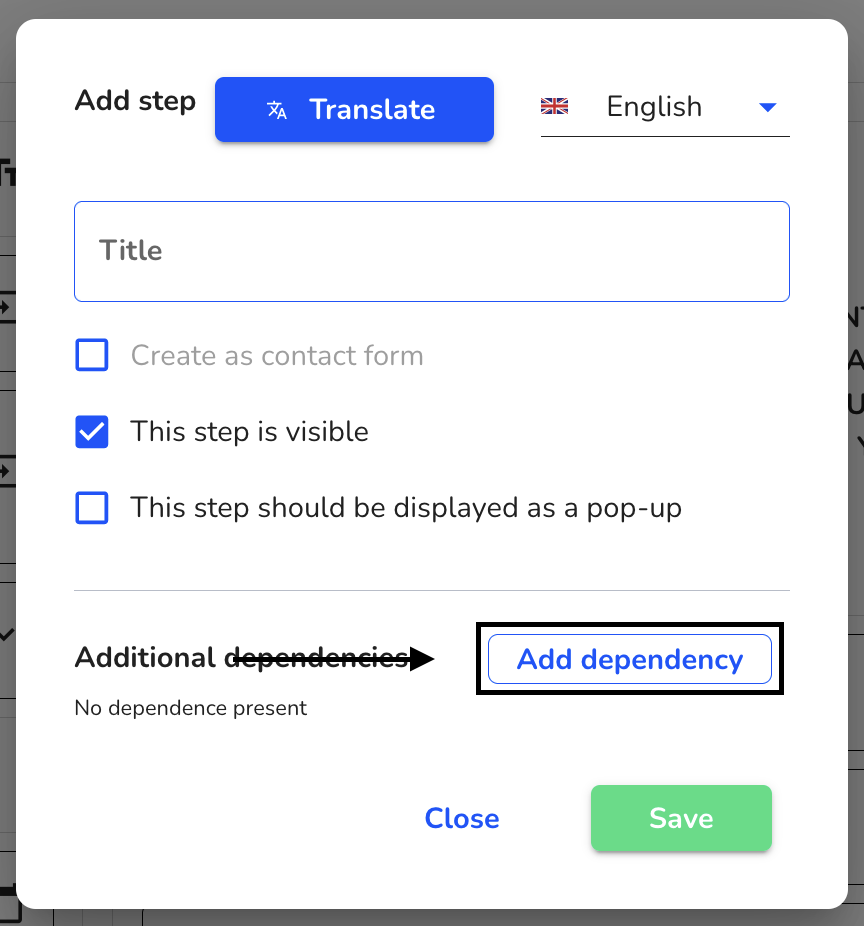
A dialog will open. Fill in the relevant fields and tick the required checkboxes.
Title: Each step has a title, which is displayed to the whistleblower when the case is submitted.
Add as address form: If a step is a contact step, you can also use the input fields (first name, last name, e-mail, telephone number, street, house number, city, country).
Visibility: Only one visible step is displayed to the whistleblower when the case is submitted.
Pop-up: A pop-up step is displayed in the case submission as a small information window.
Dependencies: Steps can also be set in relation to each other.
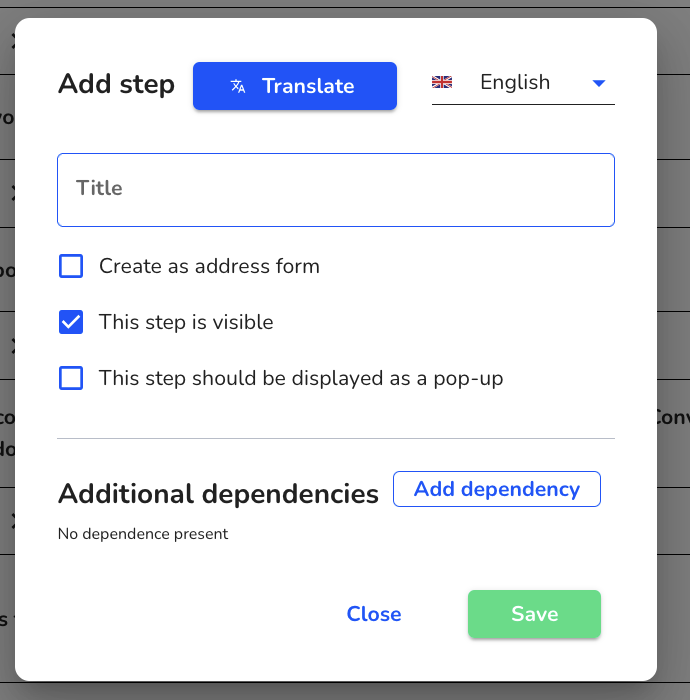
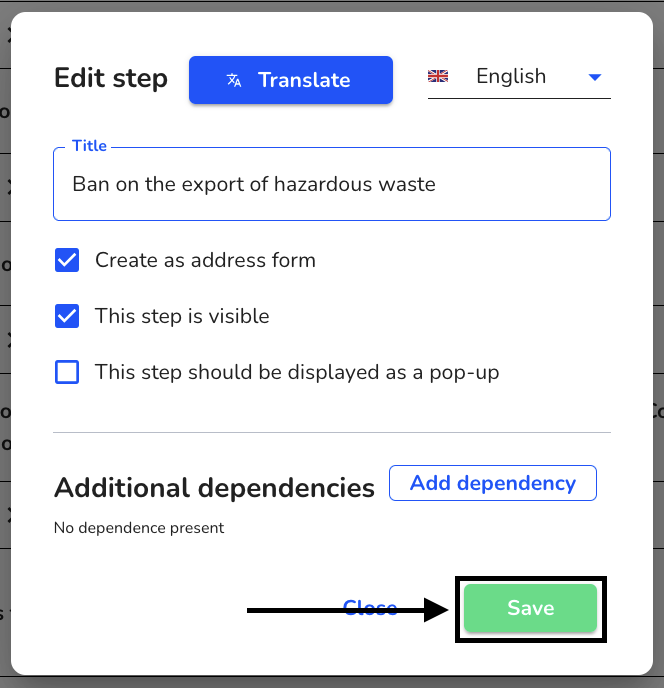
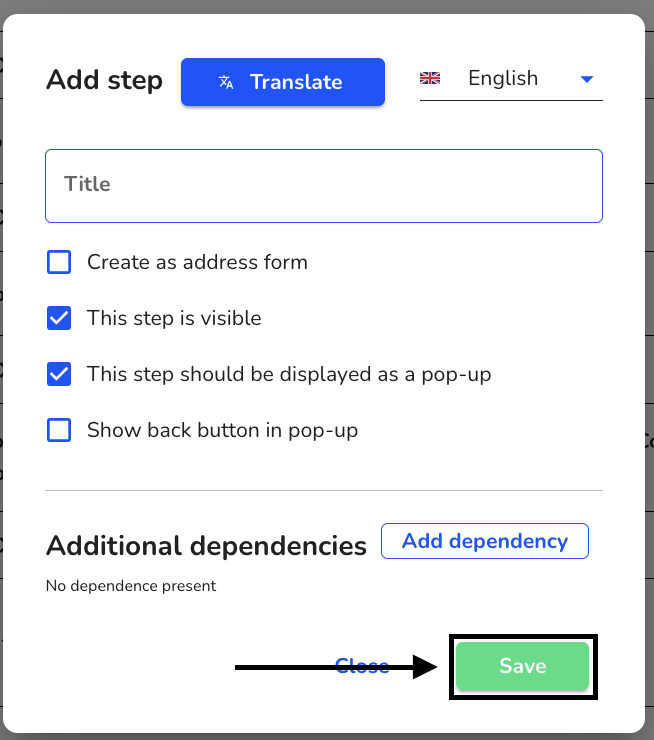
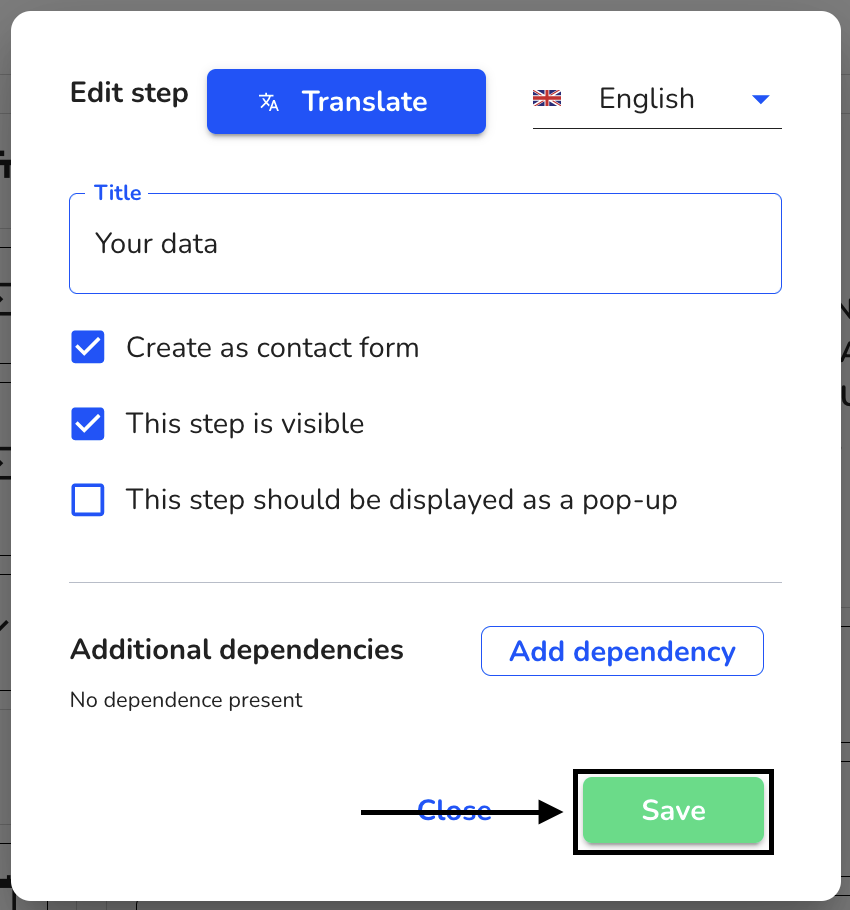
Click Save.
The step has been created and can be filled with fields. What are fields and how can they be added to a step? You can find out more here.
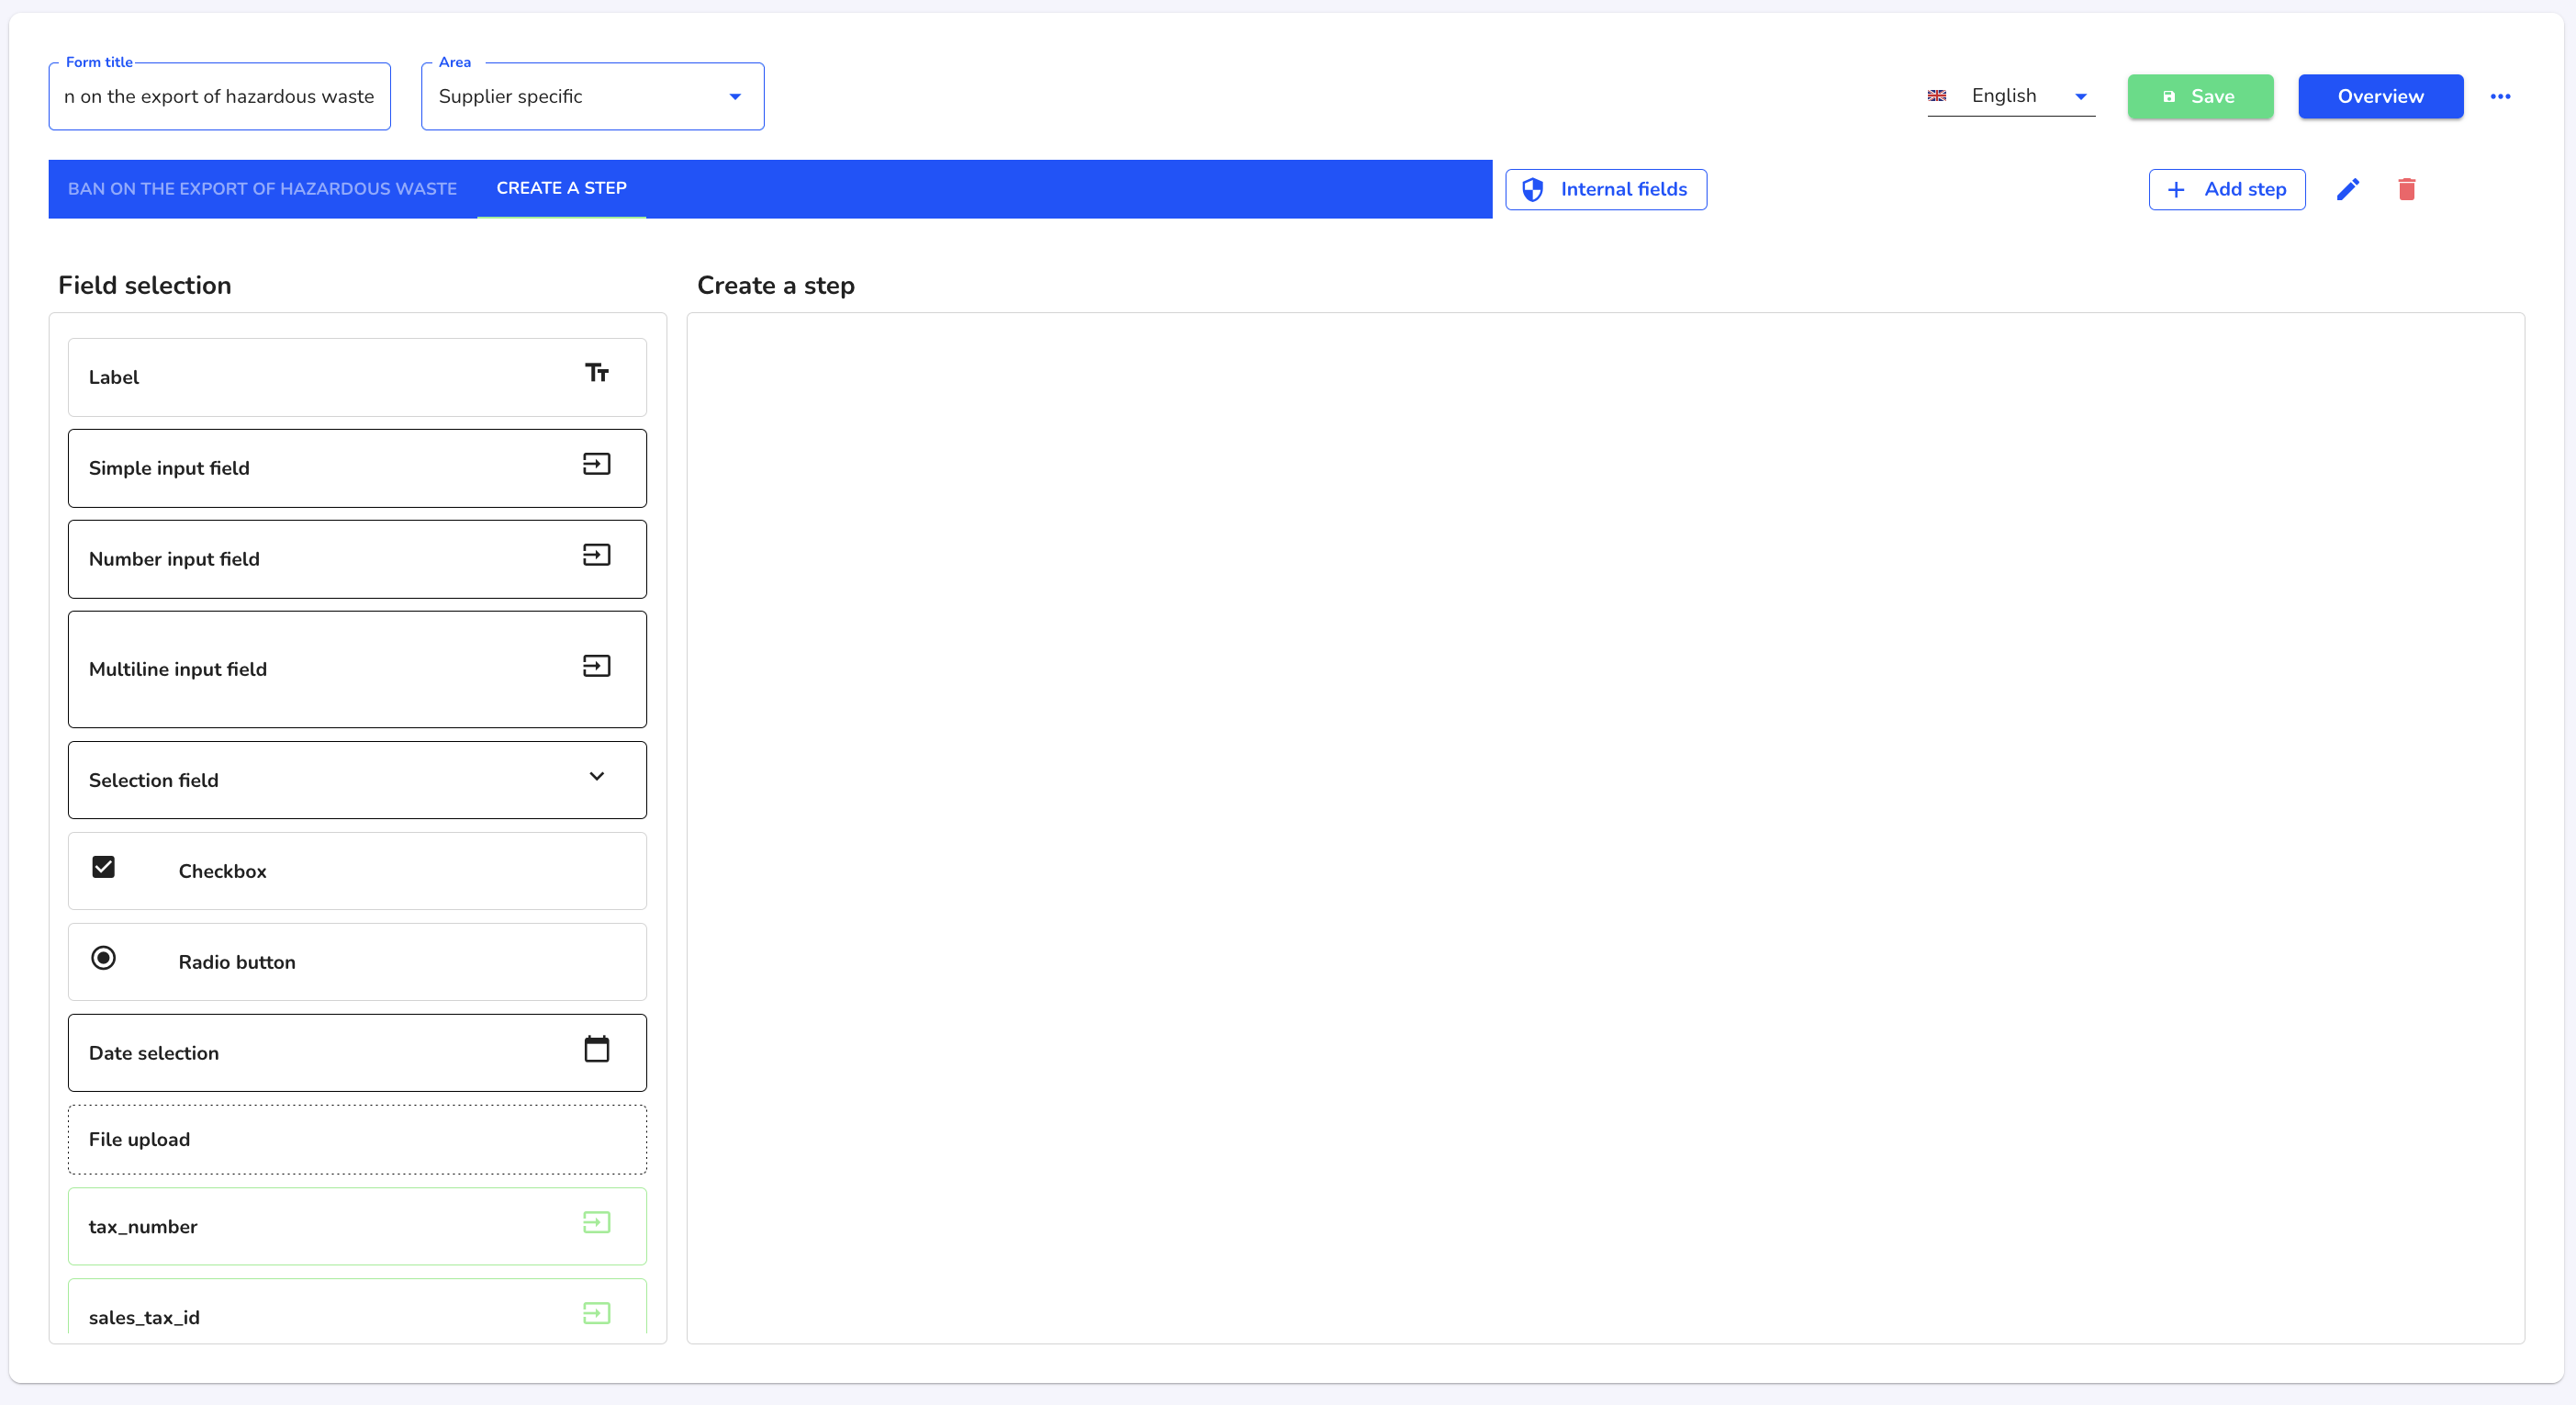
Save the form.
Changing the sequence of steps
To change the sequence of steps in a form, first navigate to the form administration.
Click on the editing step for the corresponding form.
You can hold down a step with the mouse and drag it to a new position.
Once you have moved the step to a new position, click on Save to apply the change.
Edit steps
To edit a step, first navigate to the form administration.
Click on the editing step for the relevant form.
Select the step to be edited.

Click on the editing pencil.
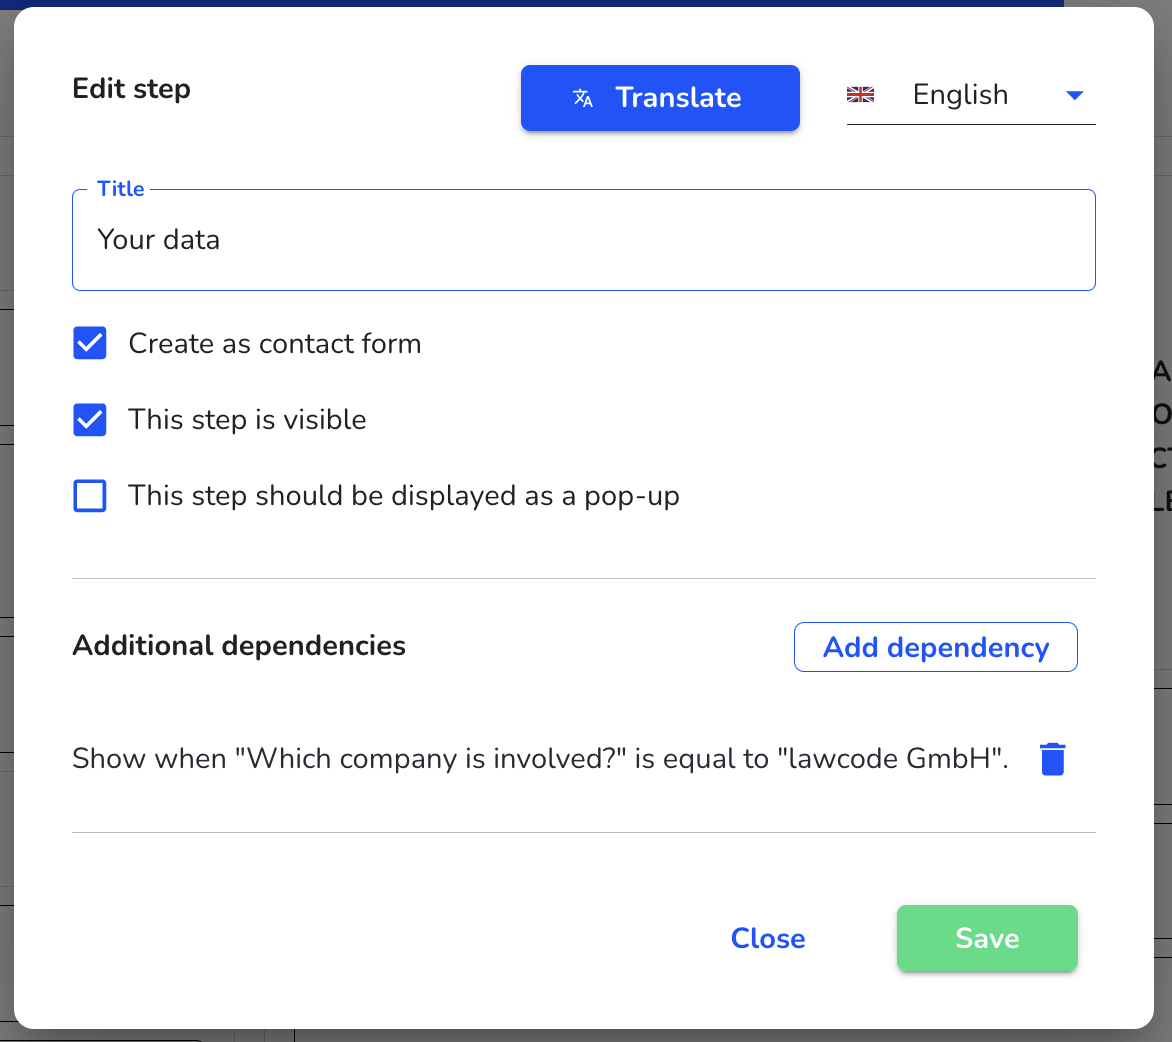
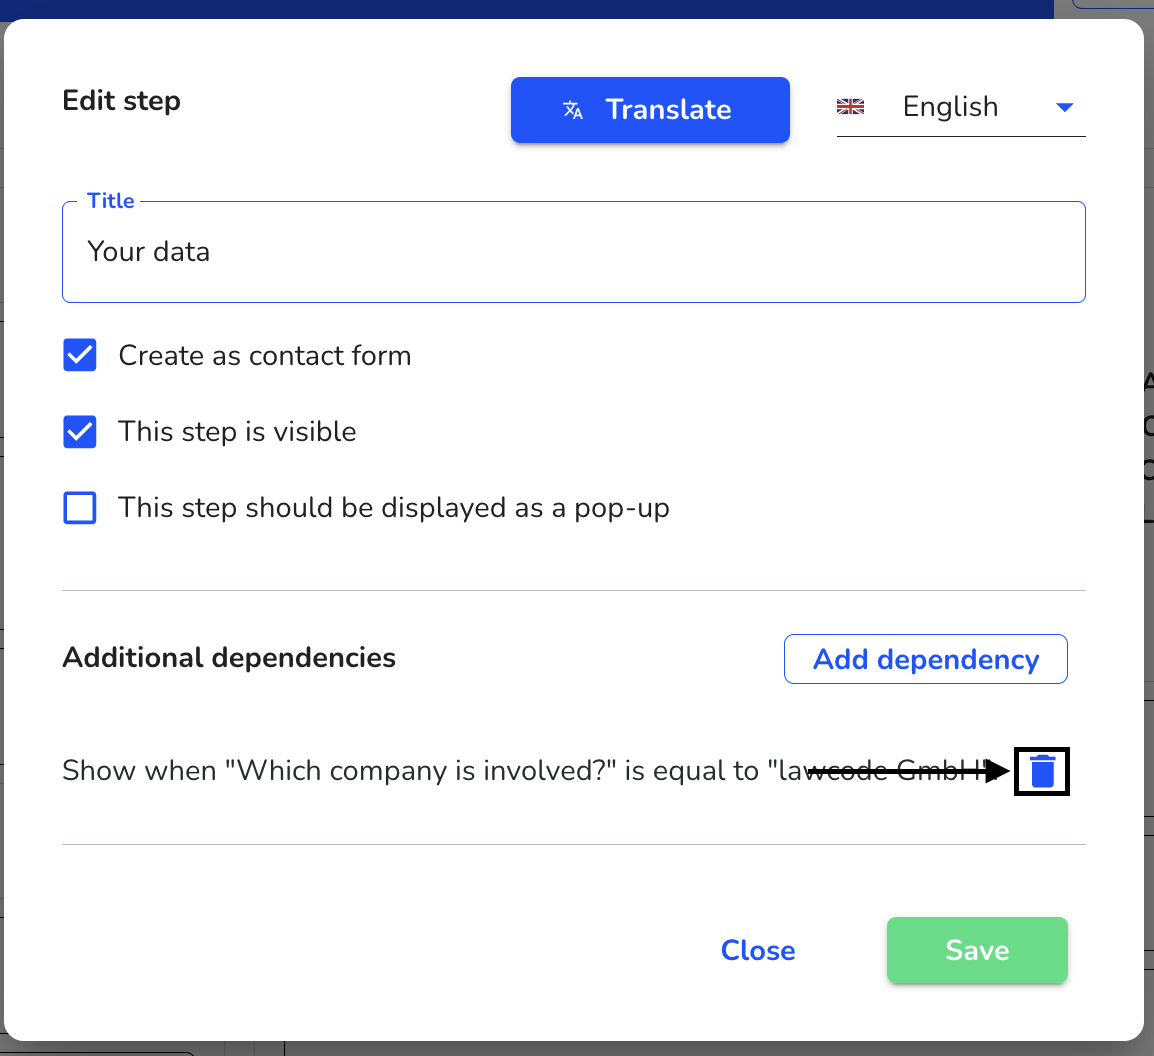
A dialog will open. Fill in the relevant fields and tick the required checkboxes.
Title: Each step has a title, which is displayed to the whistleblower when the case is submitted.
Add as address form: If a step is a contact step, you can also use the input fields (first name, last name, e-mail, telephone number, street, house number, city, country).
Visibility: Only one visible step is displayed to the whistleblower when the case is submitted.
Pop-up: A pop-up step is displayed in the case submission as a small information window.
Dependencies: Steps can also be set in relation to each other.
If you have made the desired adjustments, click on Save.
Save the form.
Translate steps
When translating a step, a distinction is made between the translation of the title of the step and the entire active step.
To translate a step, first navigate to the form administration.
Click on the editing pencil next to the relevant form.
Select the step to be edited.
Click on the editing pencil to translate the title of the step.
Click on Translate.
Select the languages in which you want to translate the title of the step and click on Translate now.

Click on Save.
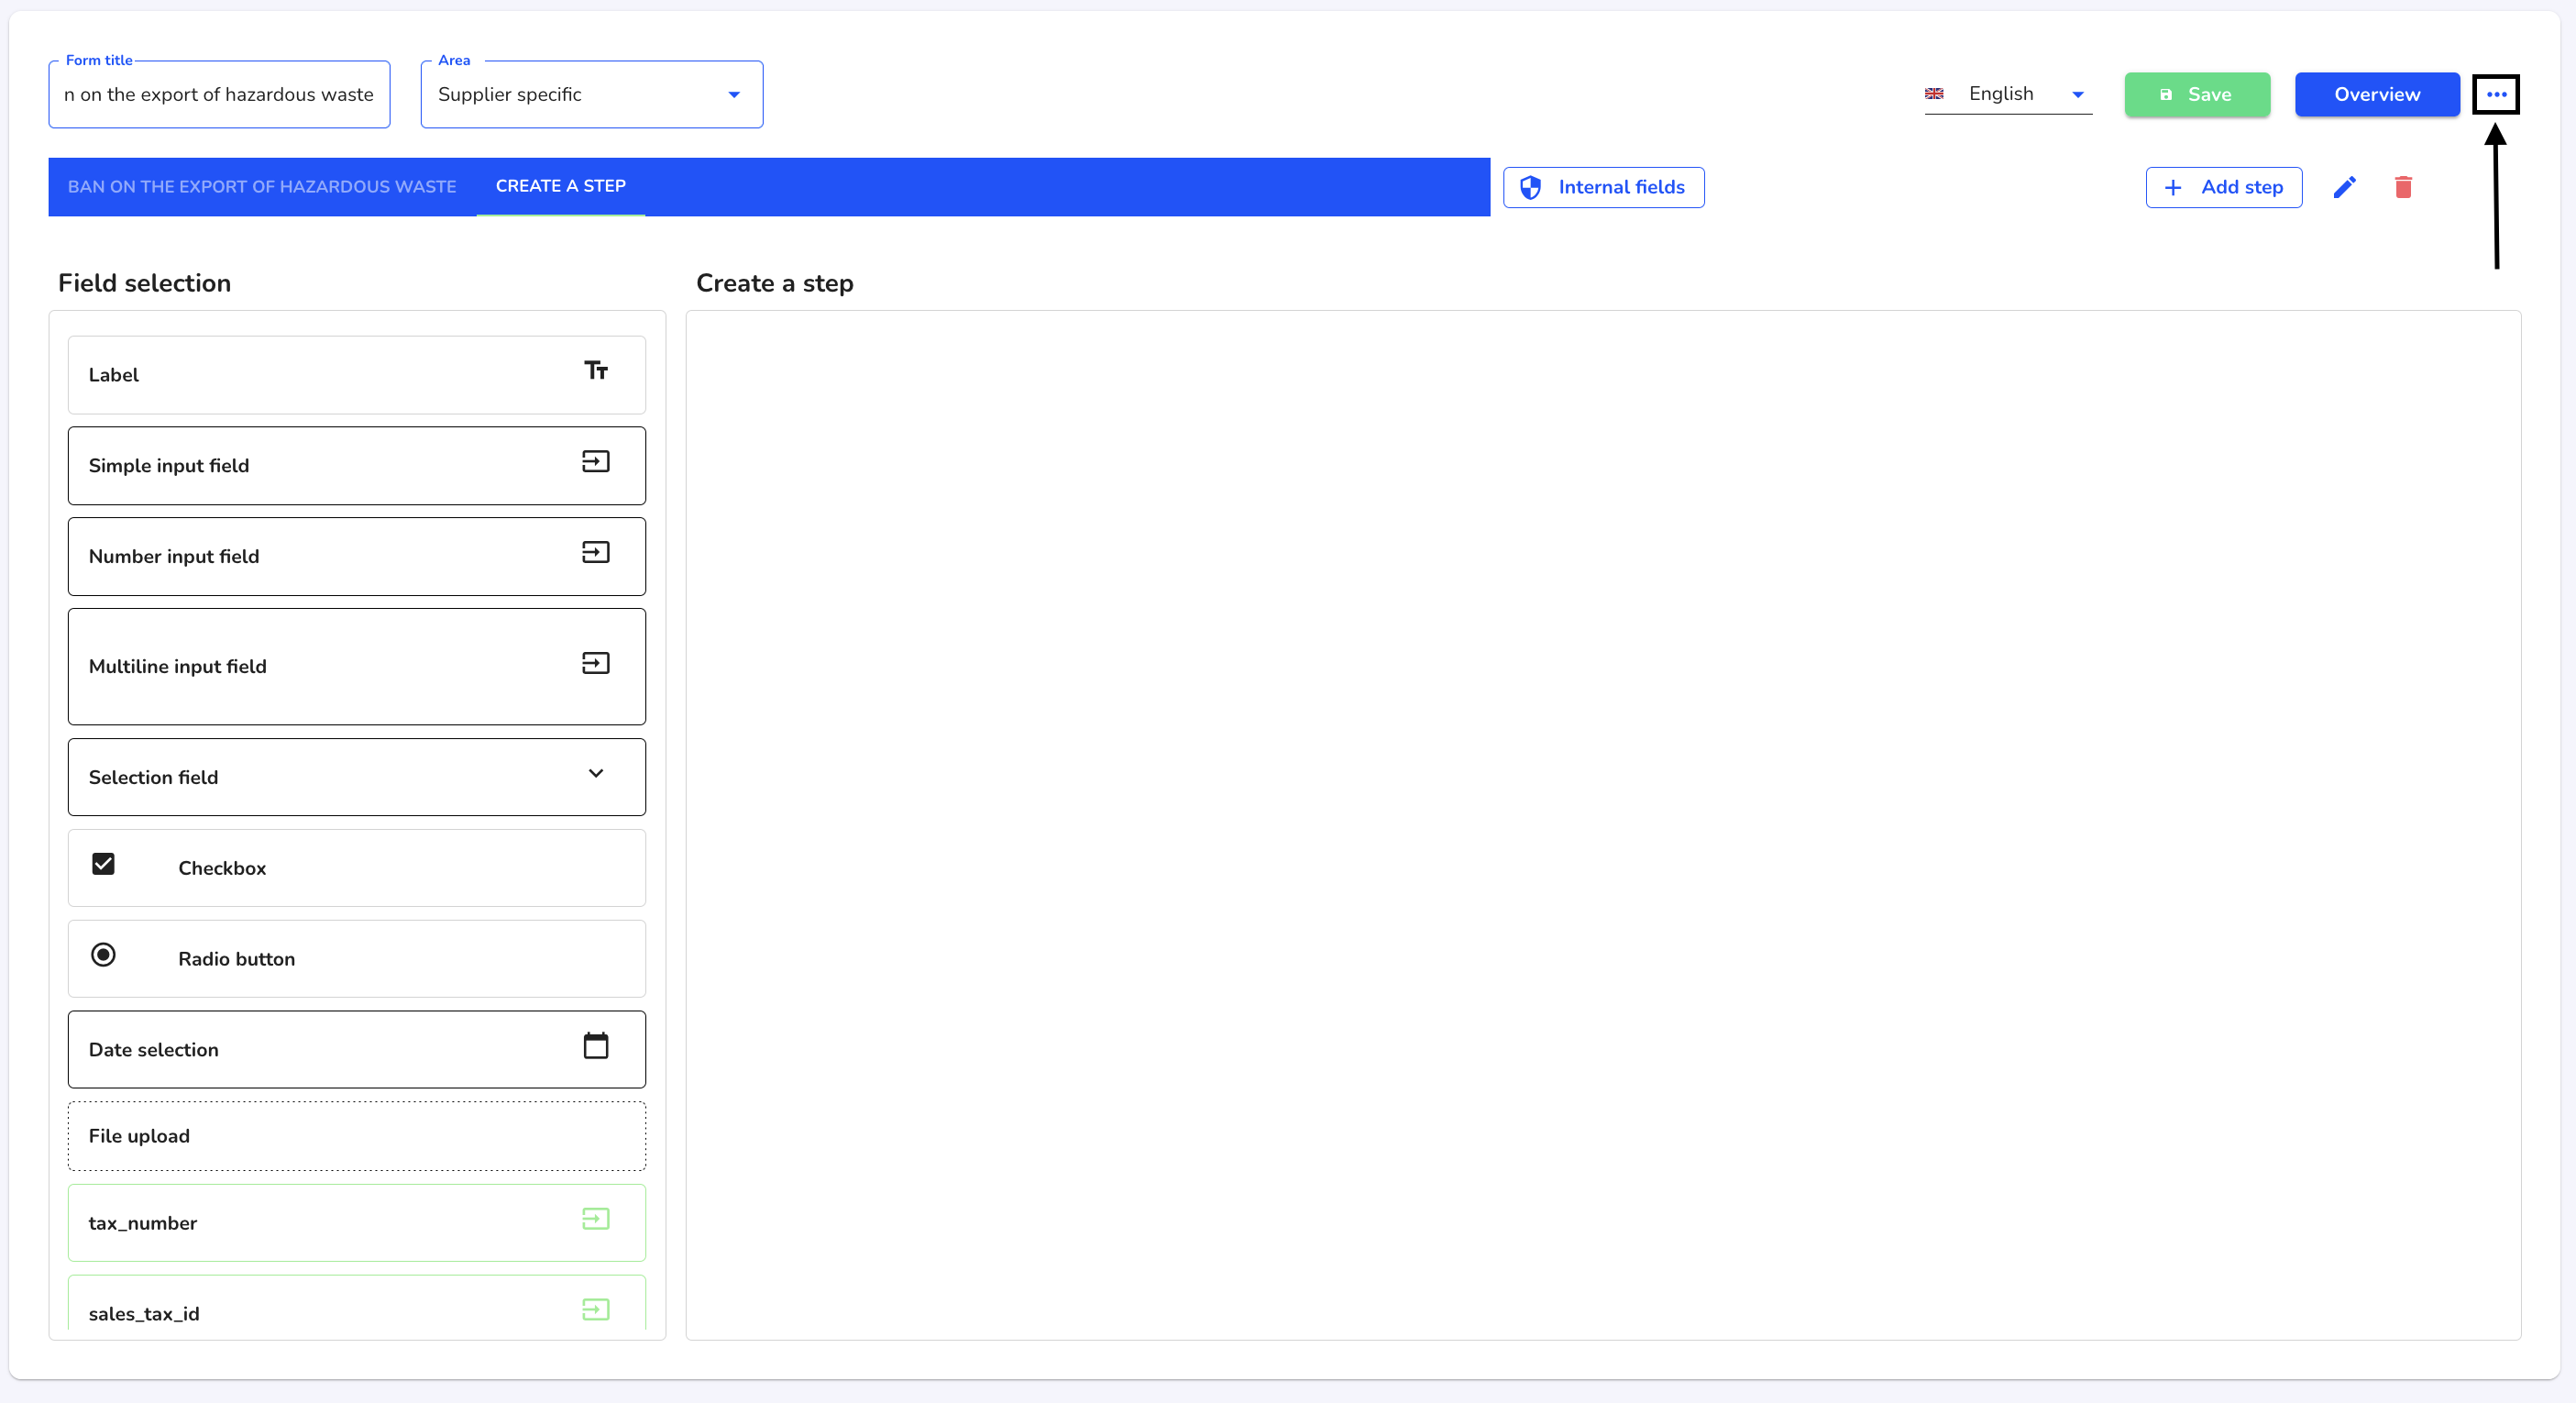
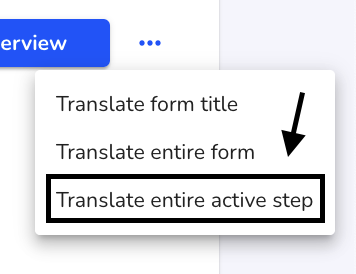
To additionallytranslate the content of the step, click on the three dots.
Select Translate entire active step in the list.
Select the languages in which you want to translate the step and click on Translate now.
Save the form to apply the changes.
Delete steps
To delete a step, first navigate to the form administration.
Click on the editing pencil next to the relevant form.
Select the step to be deleted.
Click on the delete symbol.

Save the form.

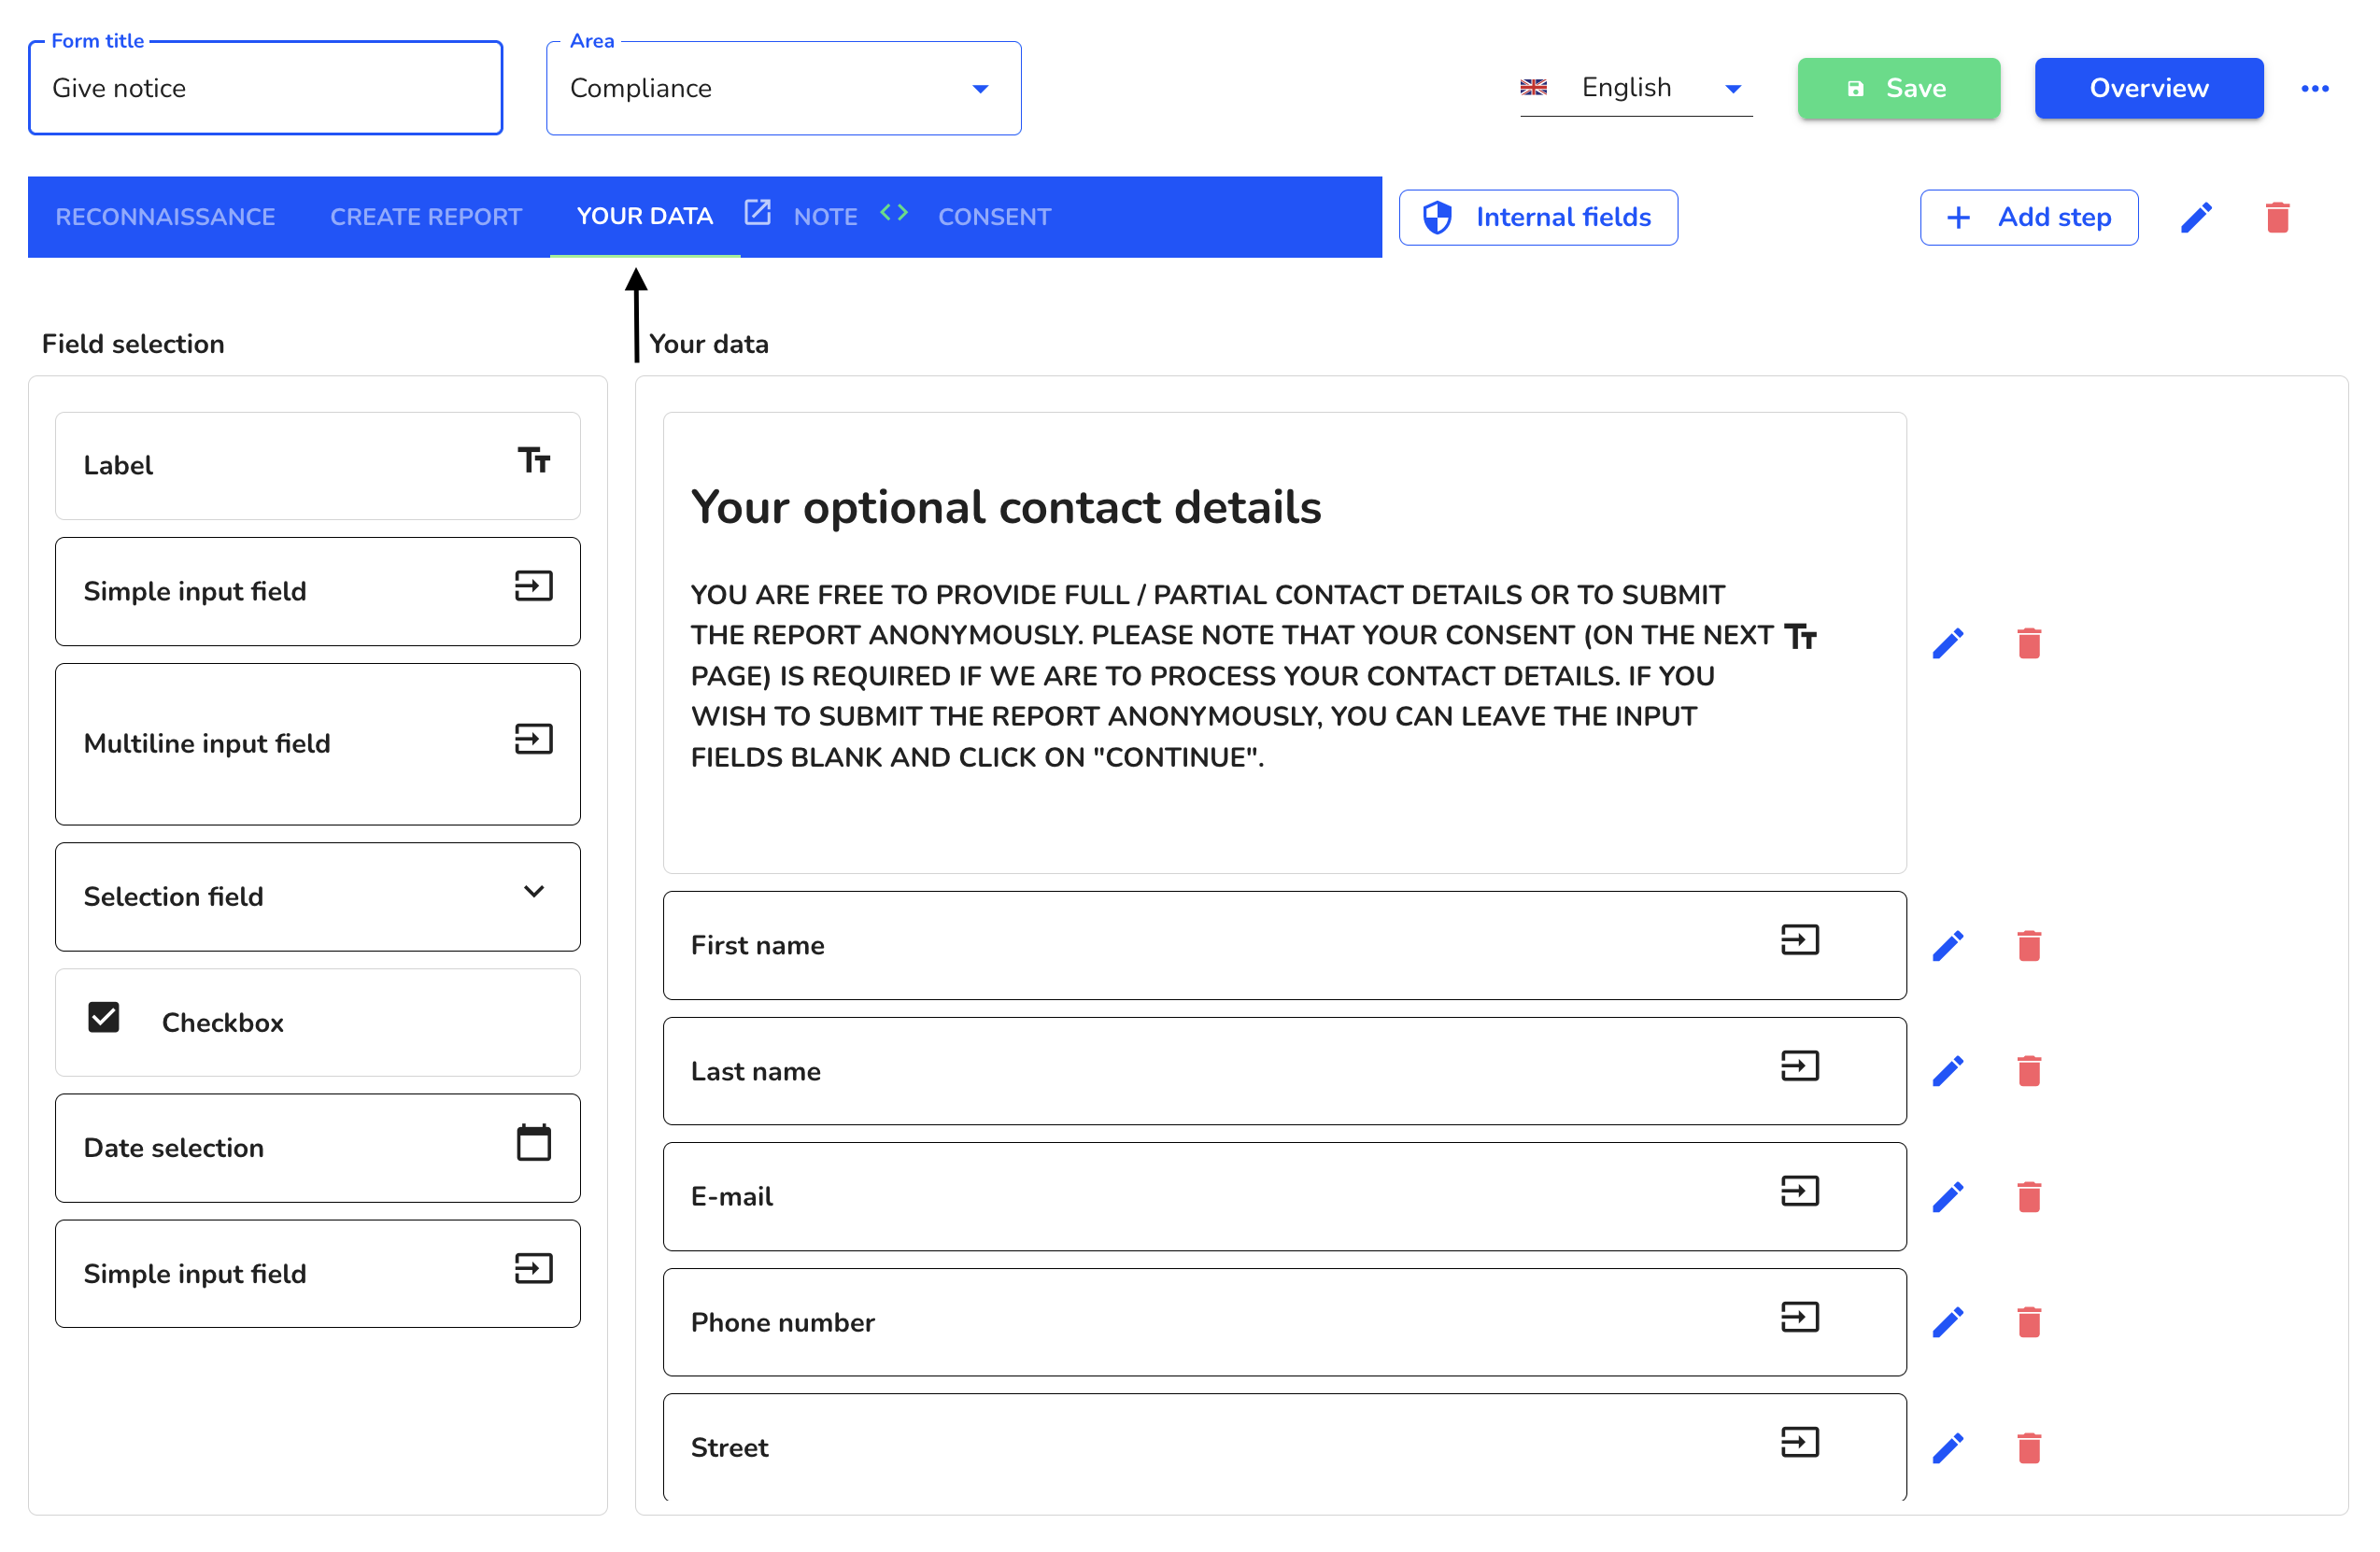
Create steps as address form
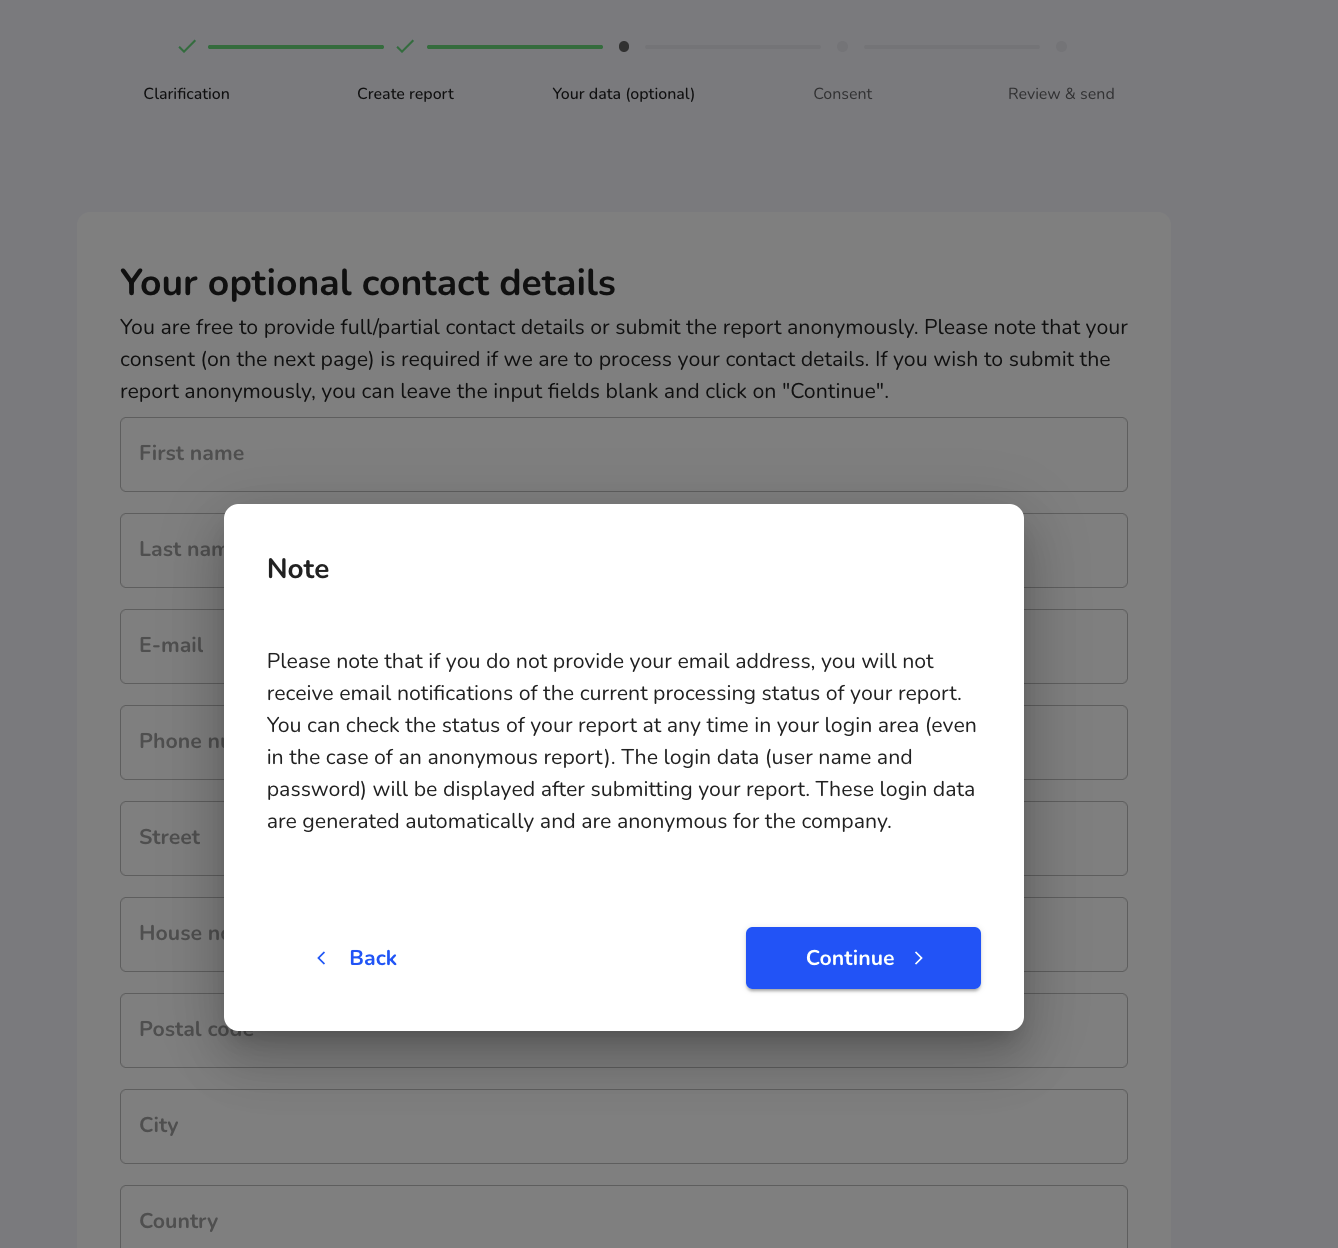
A maximum of one step can be assigned to a form as an address form. In this step, in addition to the normal fields, there is also the option of entering contact information such as: First name, last name, e-mail, telephone number, street, house no., zip code, city, country and the checkbox Are you an employee? If the desired person completes this step, you will be assigned to them as contact information. This can be viewed on the report and in the user administration.

To create a step as an address form, first navigate to the form administration.
Click on the editing pencil next to the relevant form.
Create a new step (link) or edit an existing step (link). Click on the "Create as address form" checkbox.
Click on "Save".
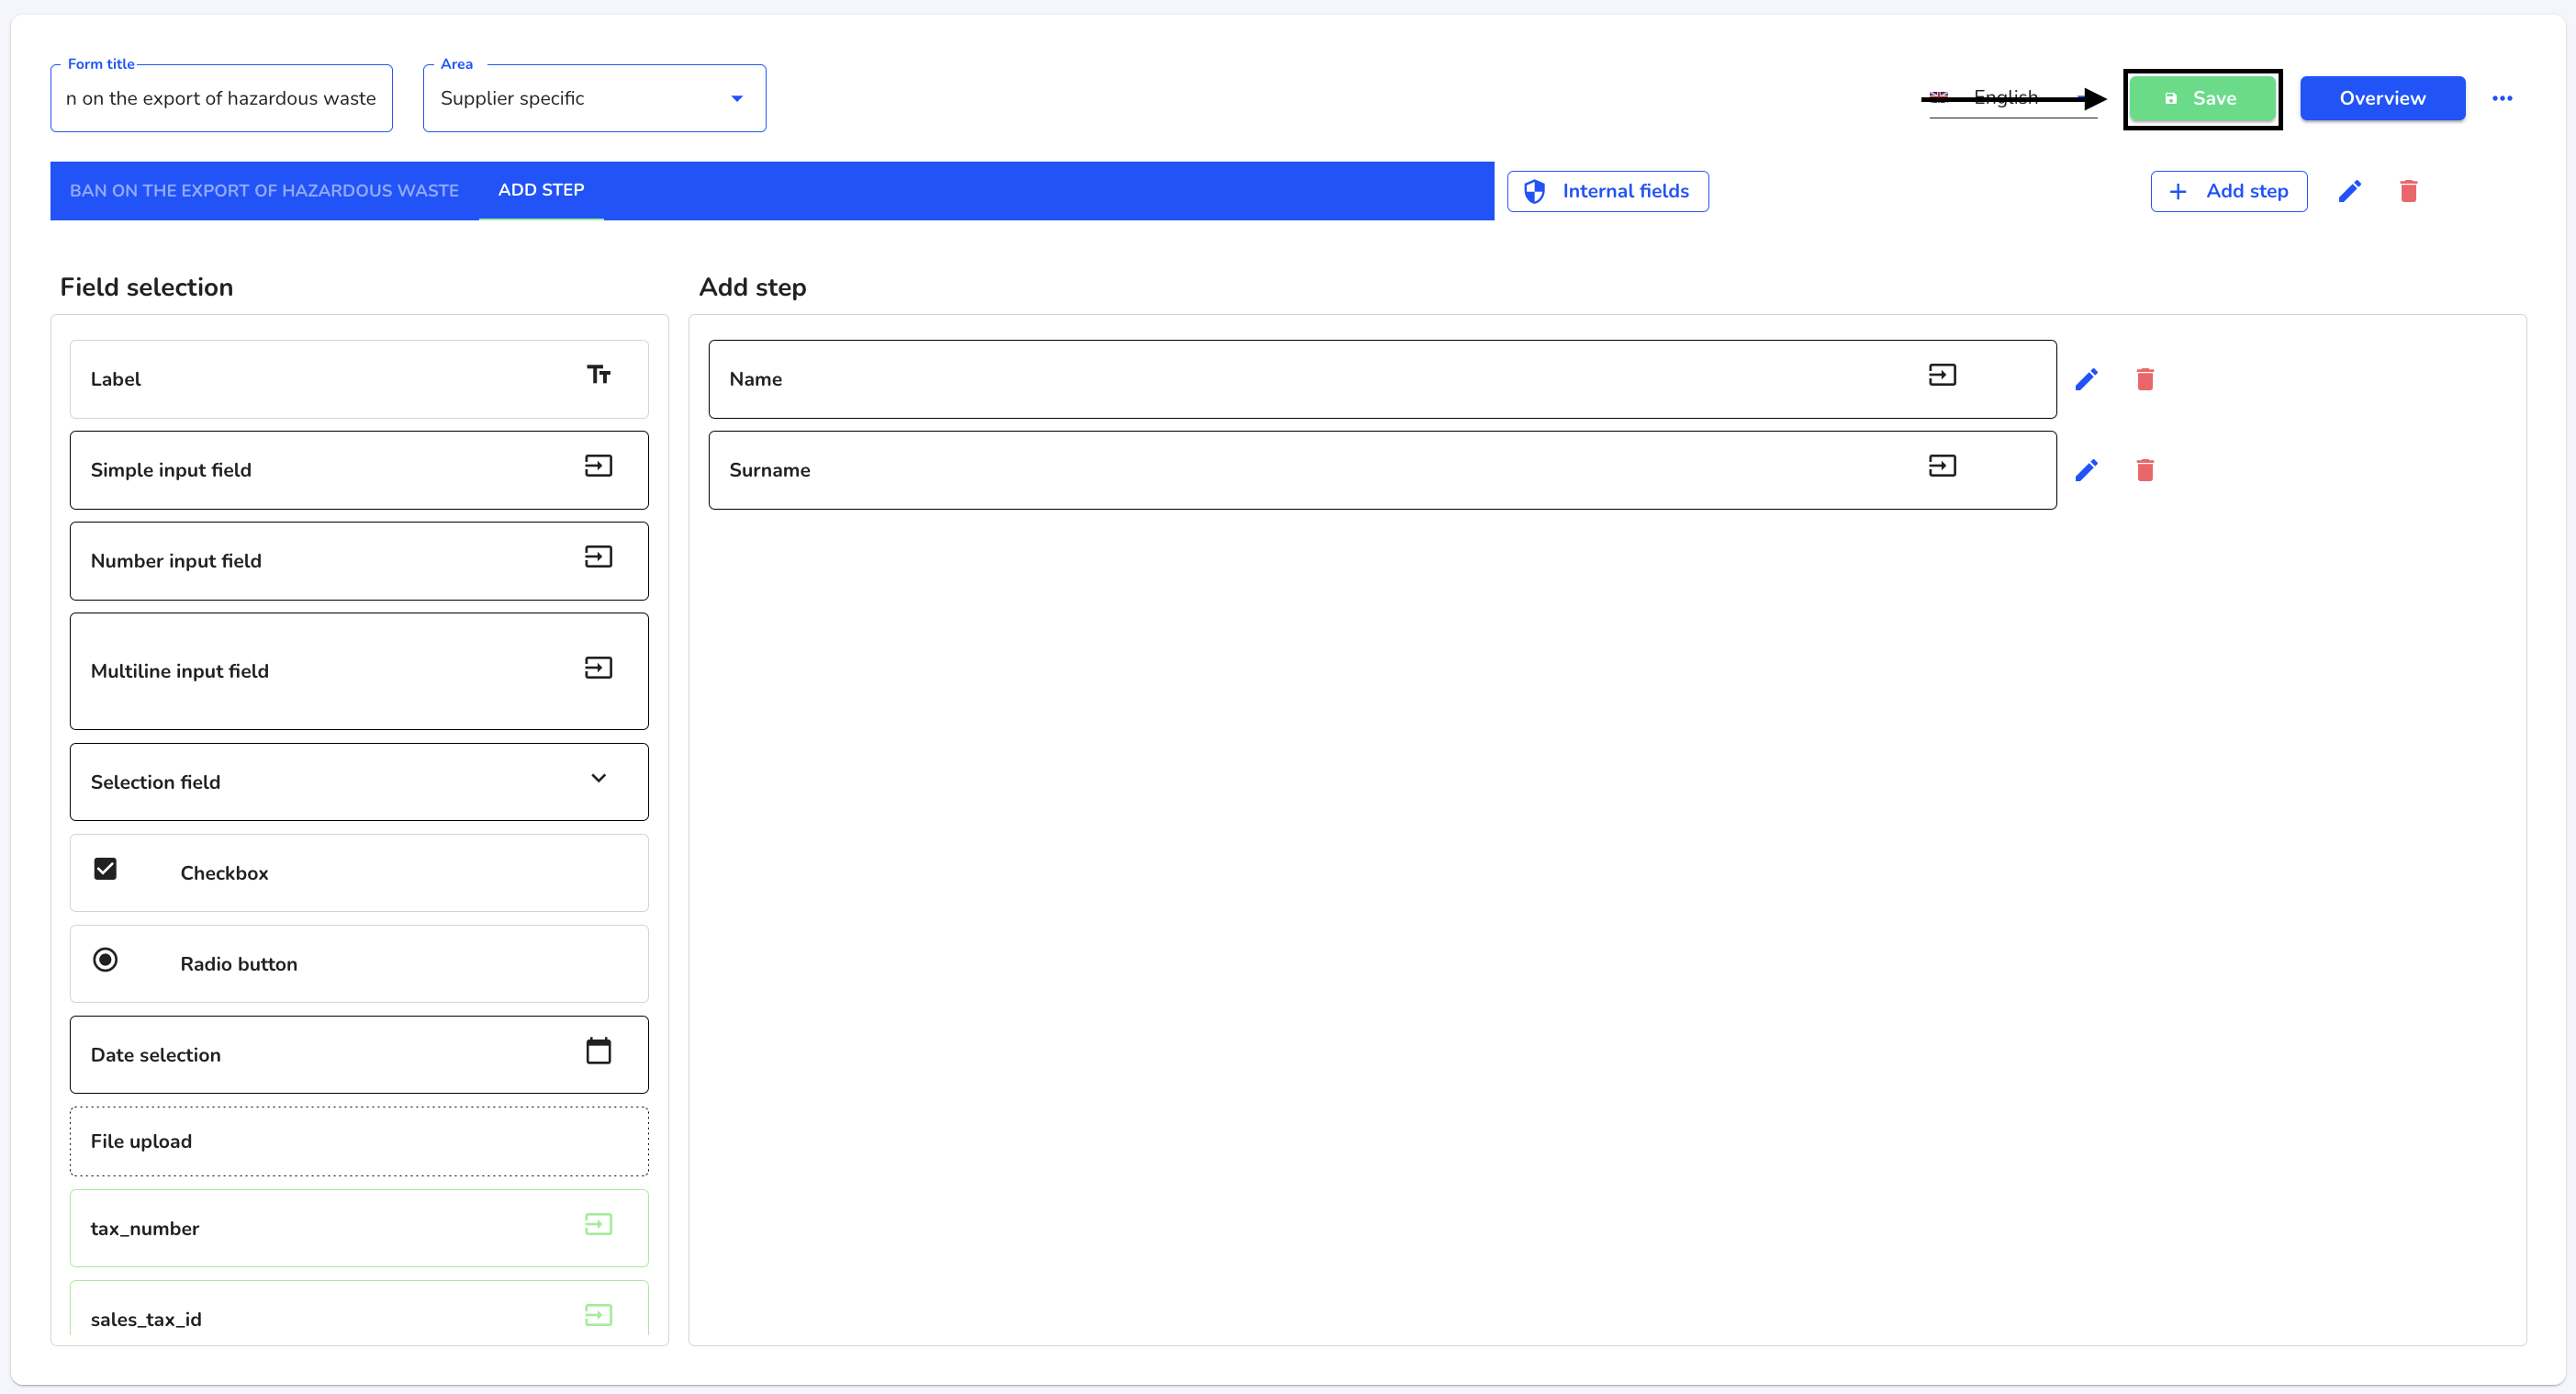
Use the fields to add the desired address information to your form and click Save.
Create step as pop-up step
A pop-up step looks like this when the information is given.
To create a step as a pop-up, first navigate to the form administration.
Click on the editing pencil.
Create a new step or edit an existing step. Click on the Create step as pop step checkbox.
Once the checkbox has been set, you can add a "Back button" to the pop-up step. Click on Save to add the step.
Save the form.
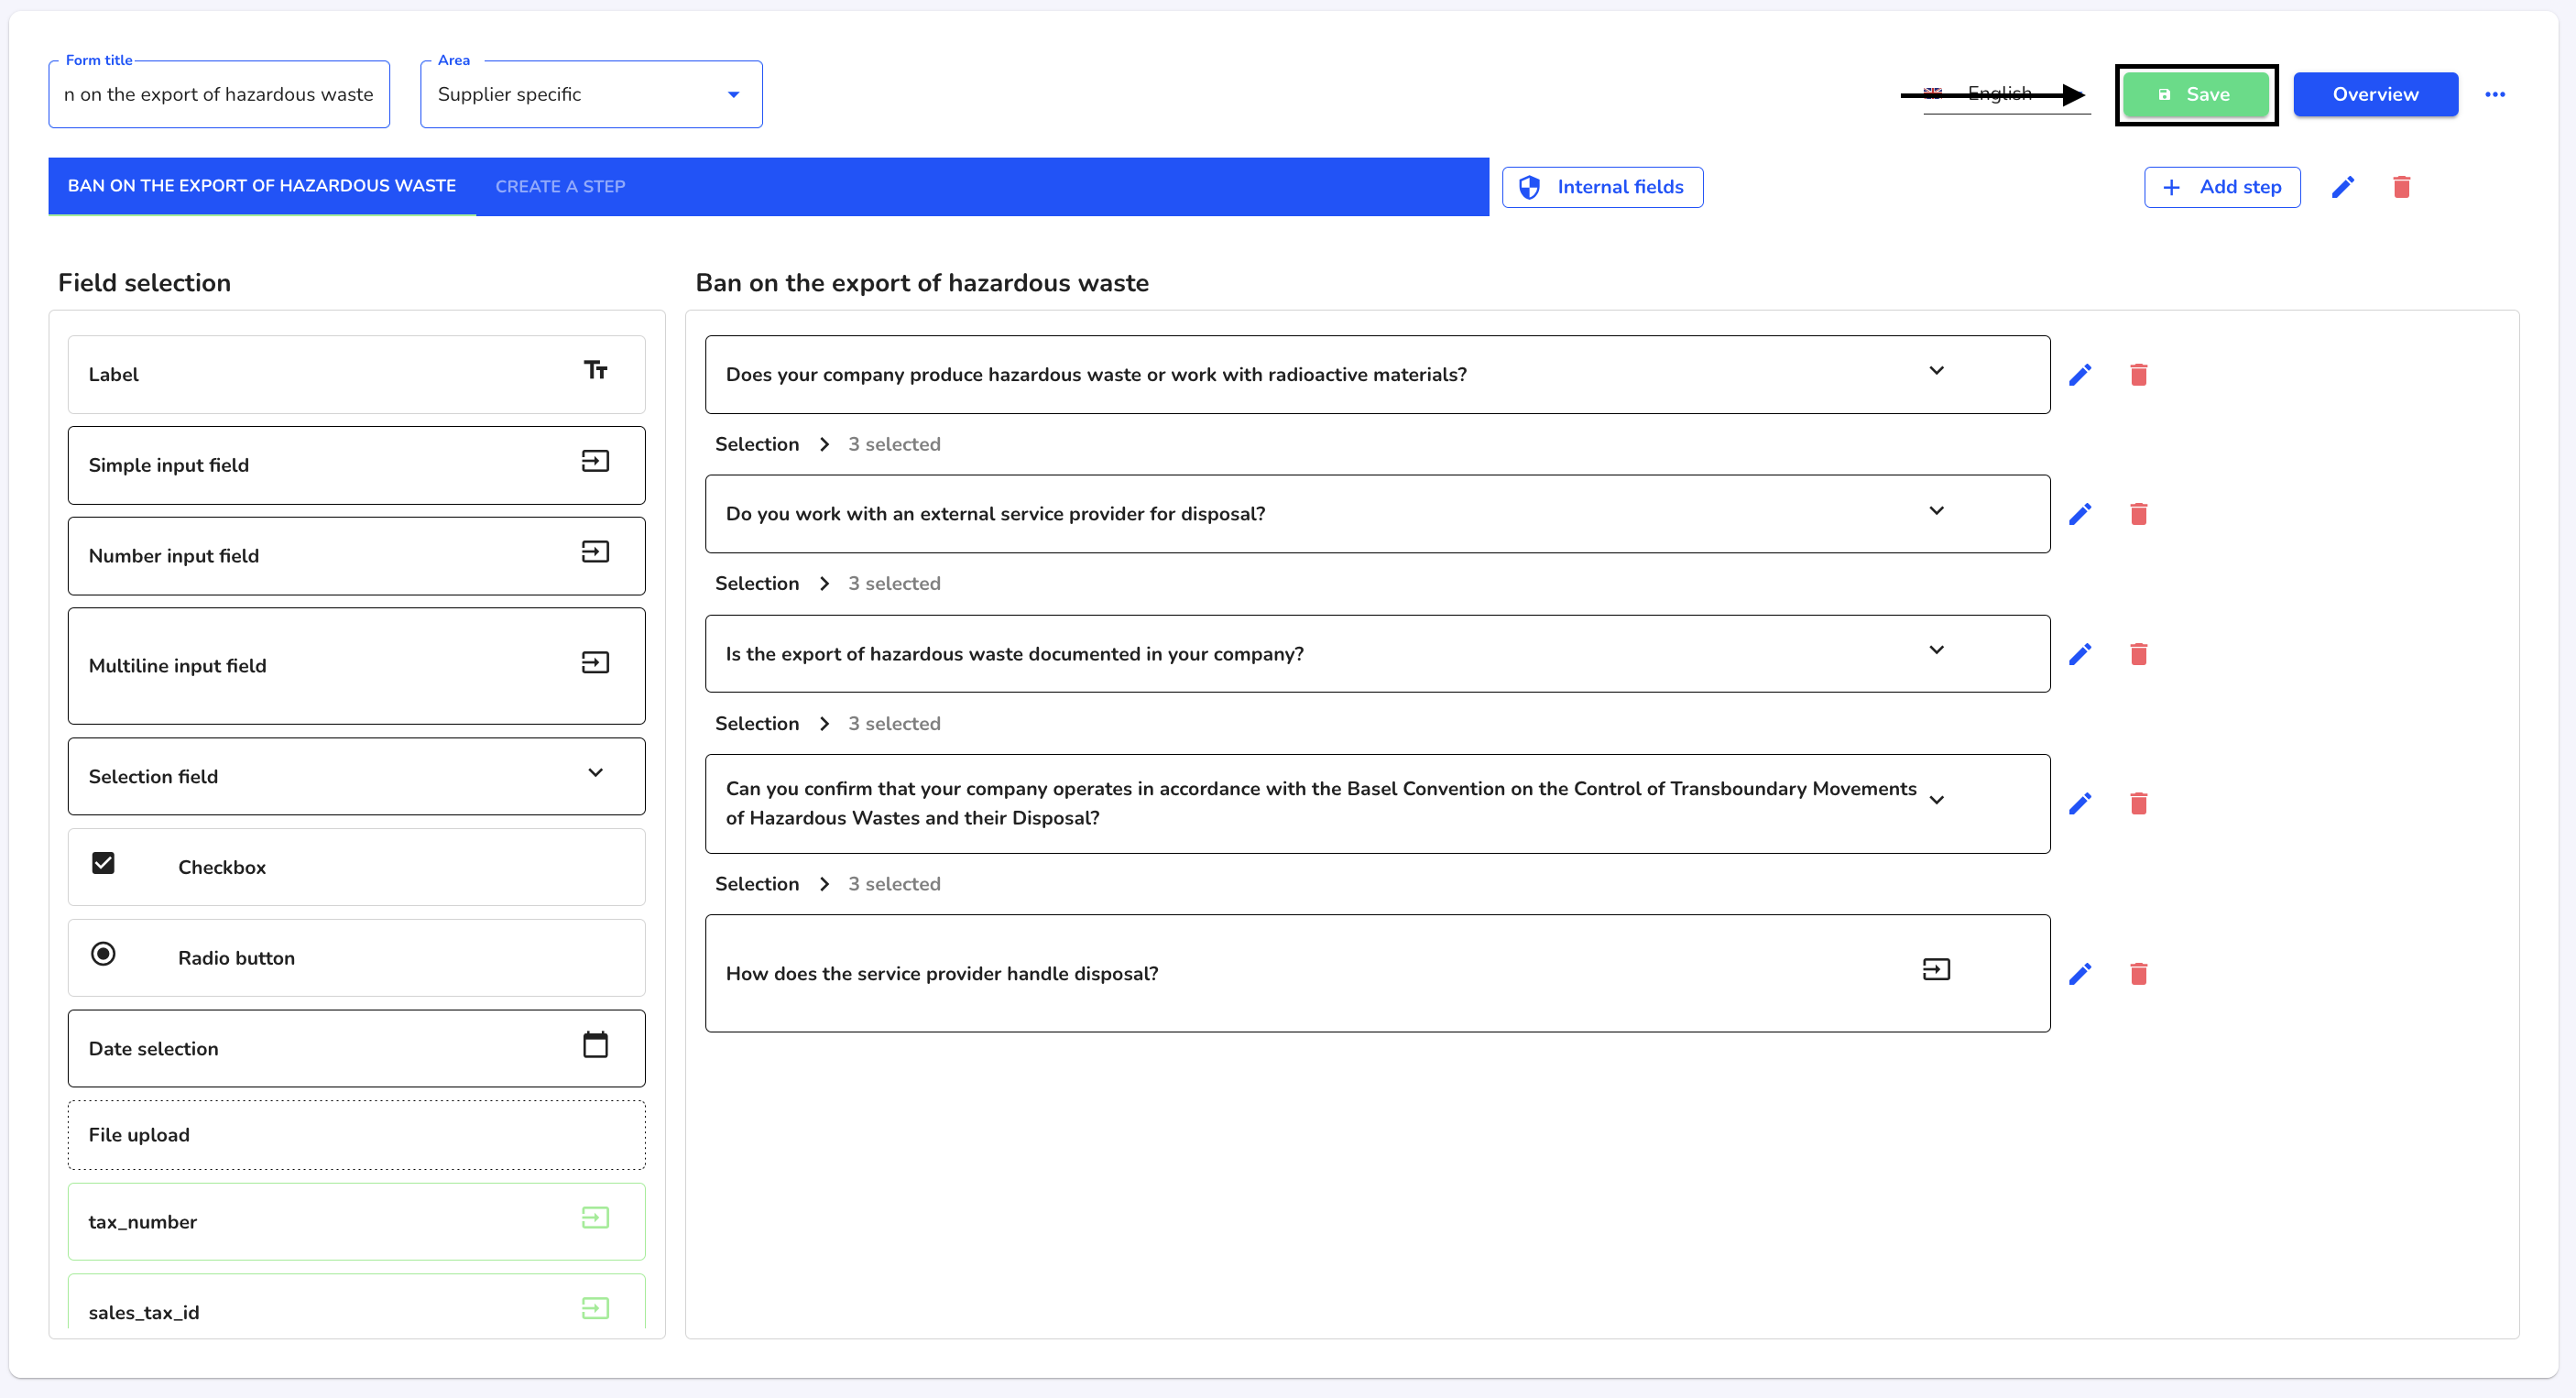
Fields
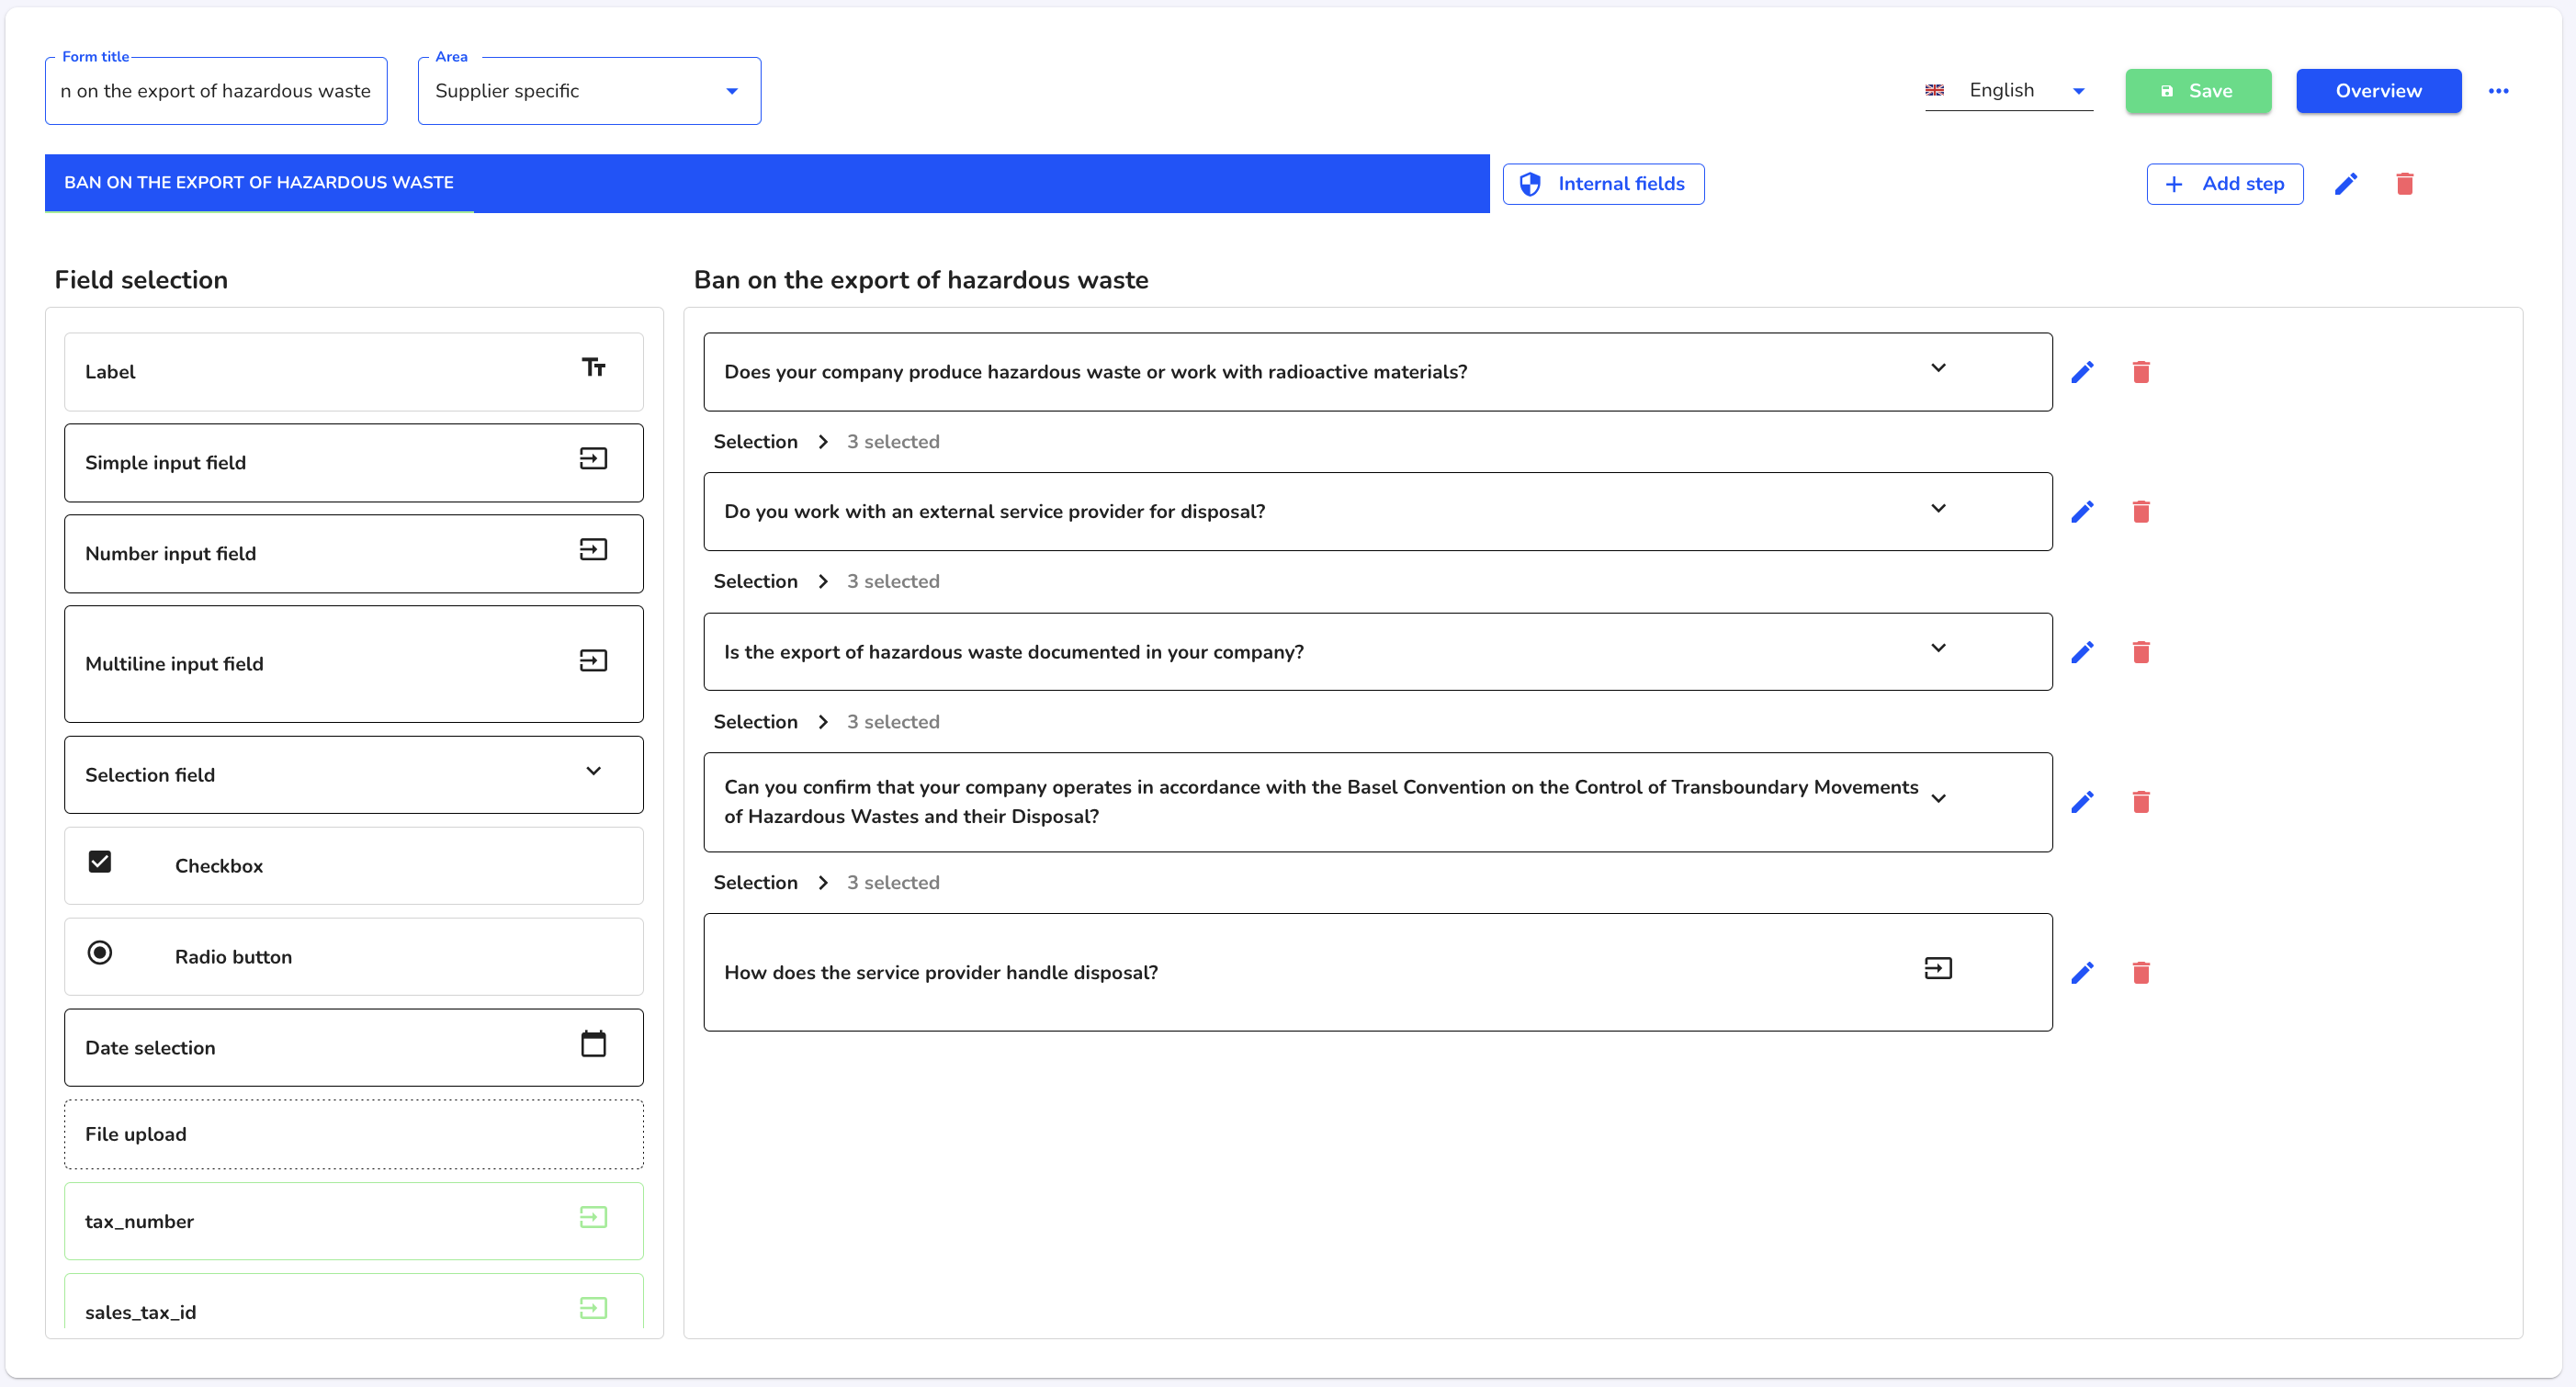
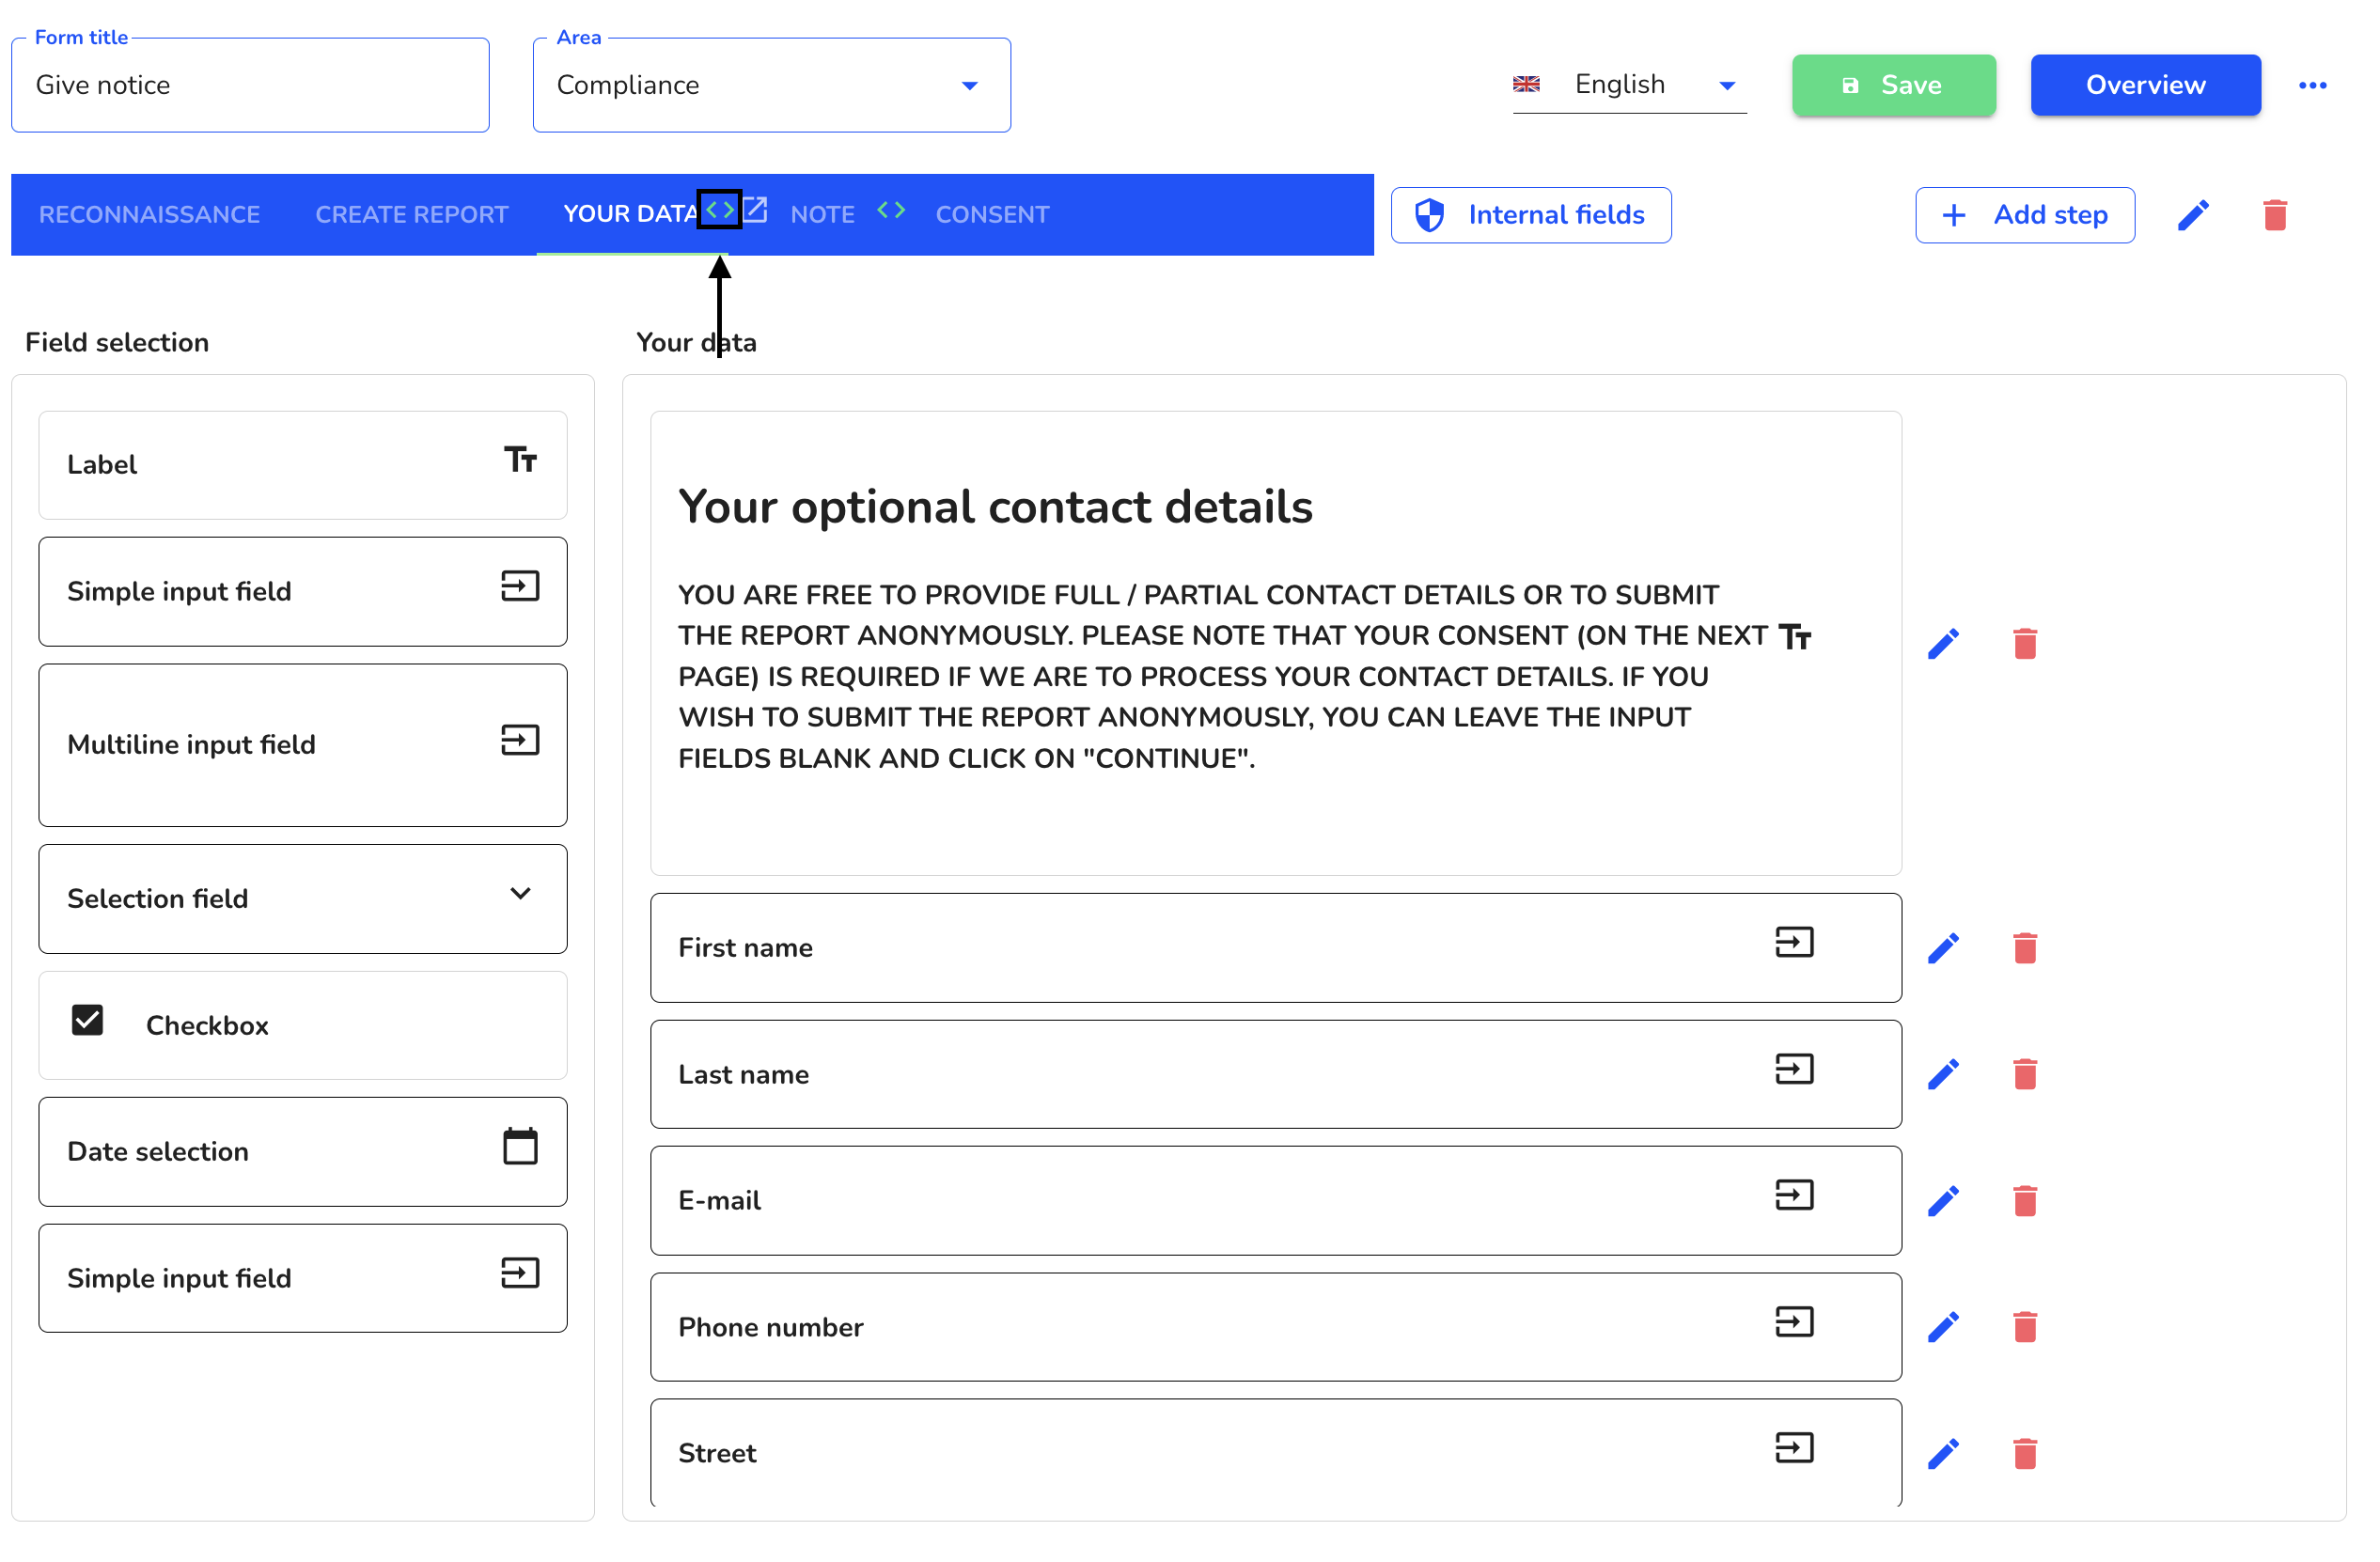
Fields are used in the Supply Chain module to design the form and add different types of fields to perform the question. There are 9 different types of fields that you can use in the spring selection: Label, simple input field, input field for numbers, multiline input field, selection field, checkbox, radio button, date selection and file upload. In this chapter, we will explain the field types and point out how to add, edit, translate and delete fields. By creating different fields in your form, the start page of your form could look like this when you edit it.
Field: Label

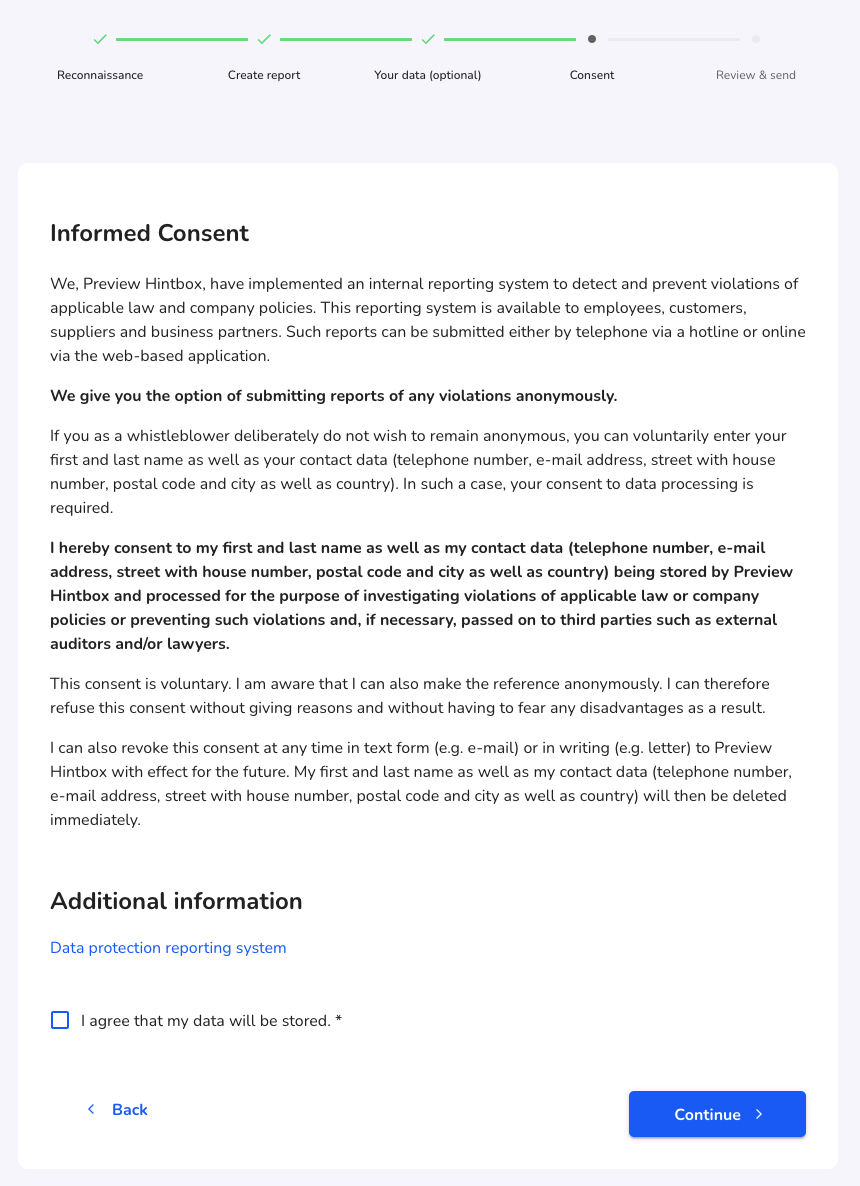
The Label field is an input field that is intended for text. This text could be used, for example, as part of a declaration of consent or other texts that you require in your form.
The field would be displayed like this while the form is being processed.
In the final form, a label field is broadcast as text.
Field: Simple input field

The Simple input field is an input field in which the reporting person leaves a text. This field can be used for detailed questions that you require in your form.
The field would be displayed like this while the form is being processed.

In the final form, a simple input field is displayed as a single-line input field.

Field: Number input field

The input field for numbers is an input field in which the reporting person can enter values. This field can have a minimum and maximum value and a specific unit.
The field would be displayed like this while the form is being processed.

In the final form, an input field for numbers is broadcast as a field to be filled in.

Field: Multiline input field

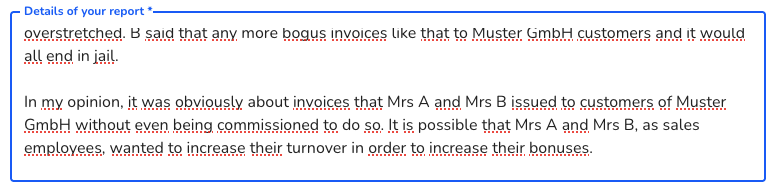
The Multi-line input field is an input field in which the person asked leaves several texts. This field can be used for detailed questions that you require in your form.
The field would be displayed like this while the form is being processed.
In the final form, a multi-line input field is displayed as a large input field.
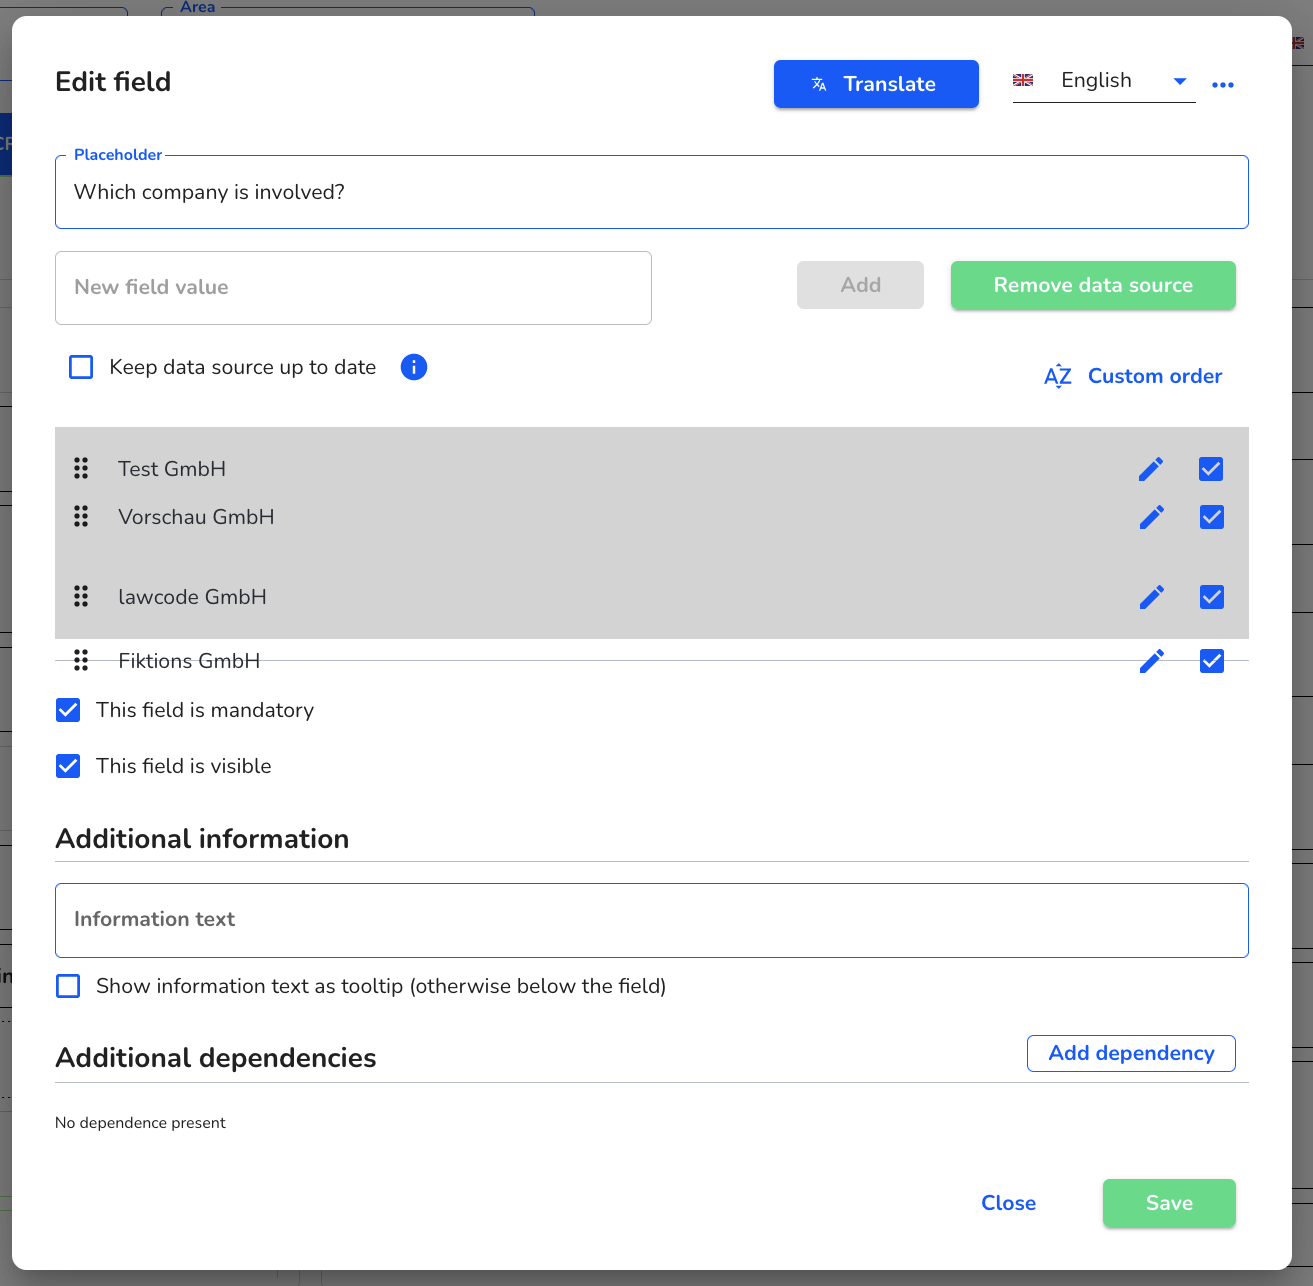
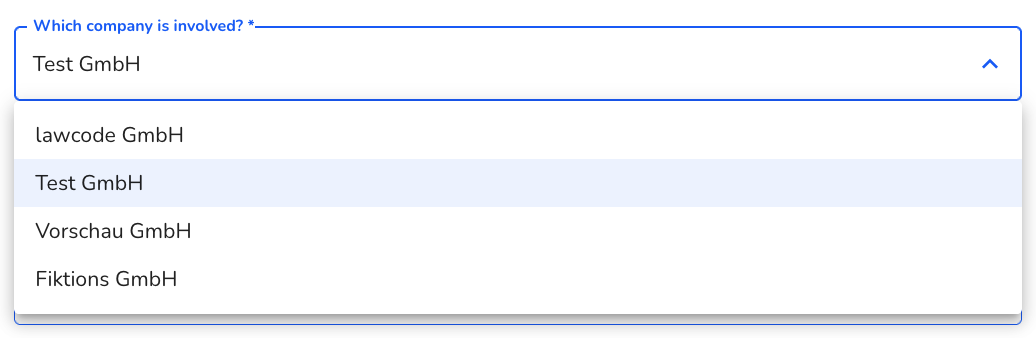
Field: Selection field

The selection field is a field in which the respondent can choose between several predefined options. This field can be used for detailed questions where there are various options that you require in your form.
The field would be displayed like this while the form is being processed.
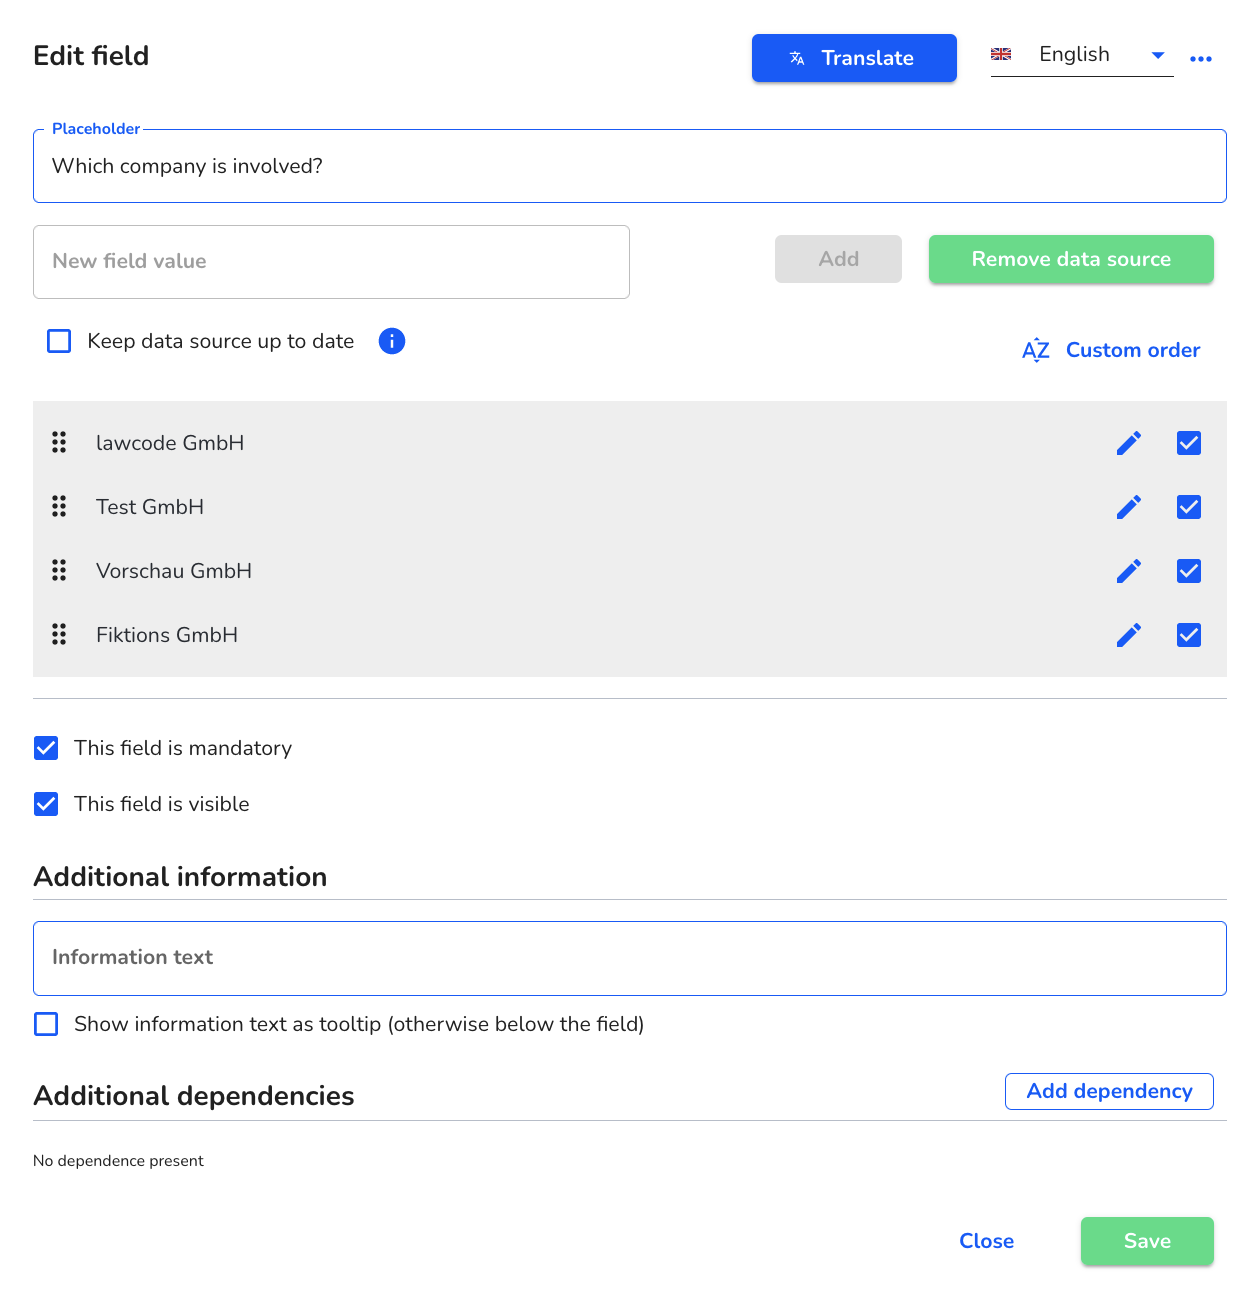
It is possible to sort selection fields.
Manual sorting
Select the desired selection field with the mouse. You can use drag-and-drop to move and sort the selection field as required.
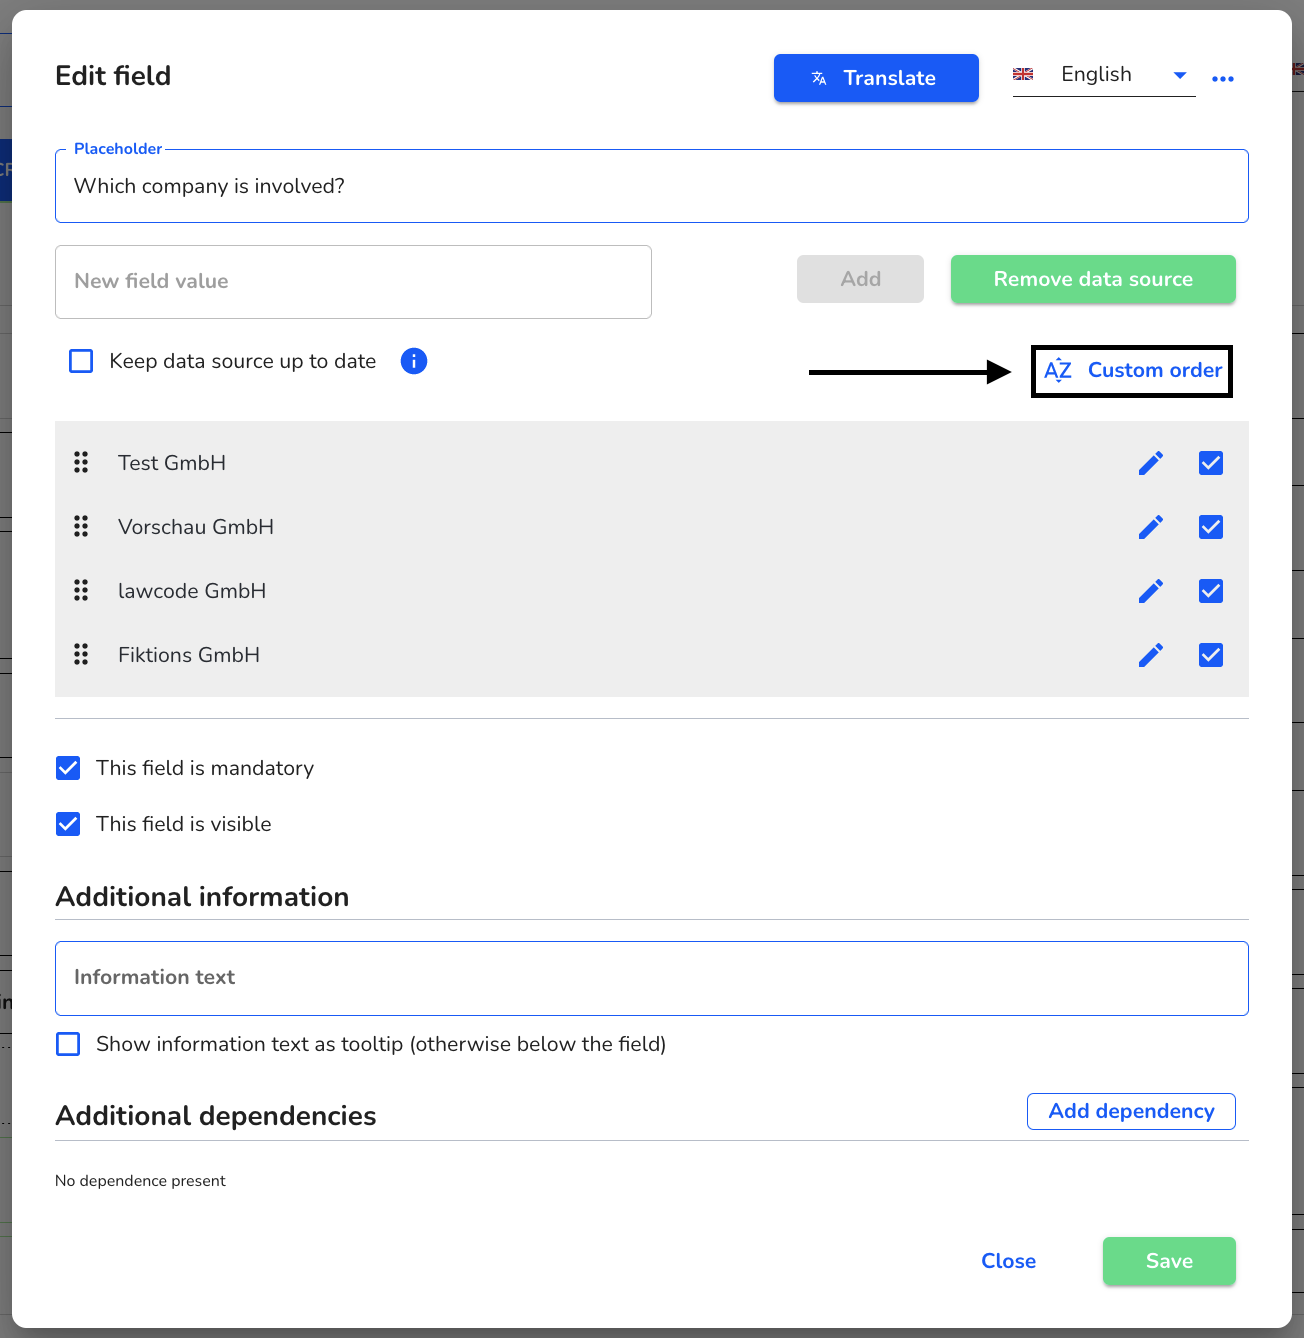
Custom order
Click on user-defined order to restore the order originally specified.
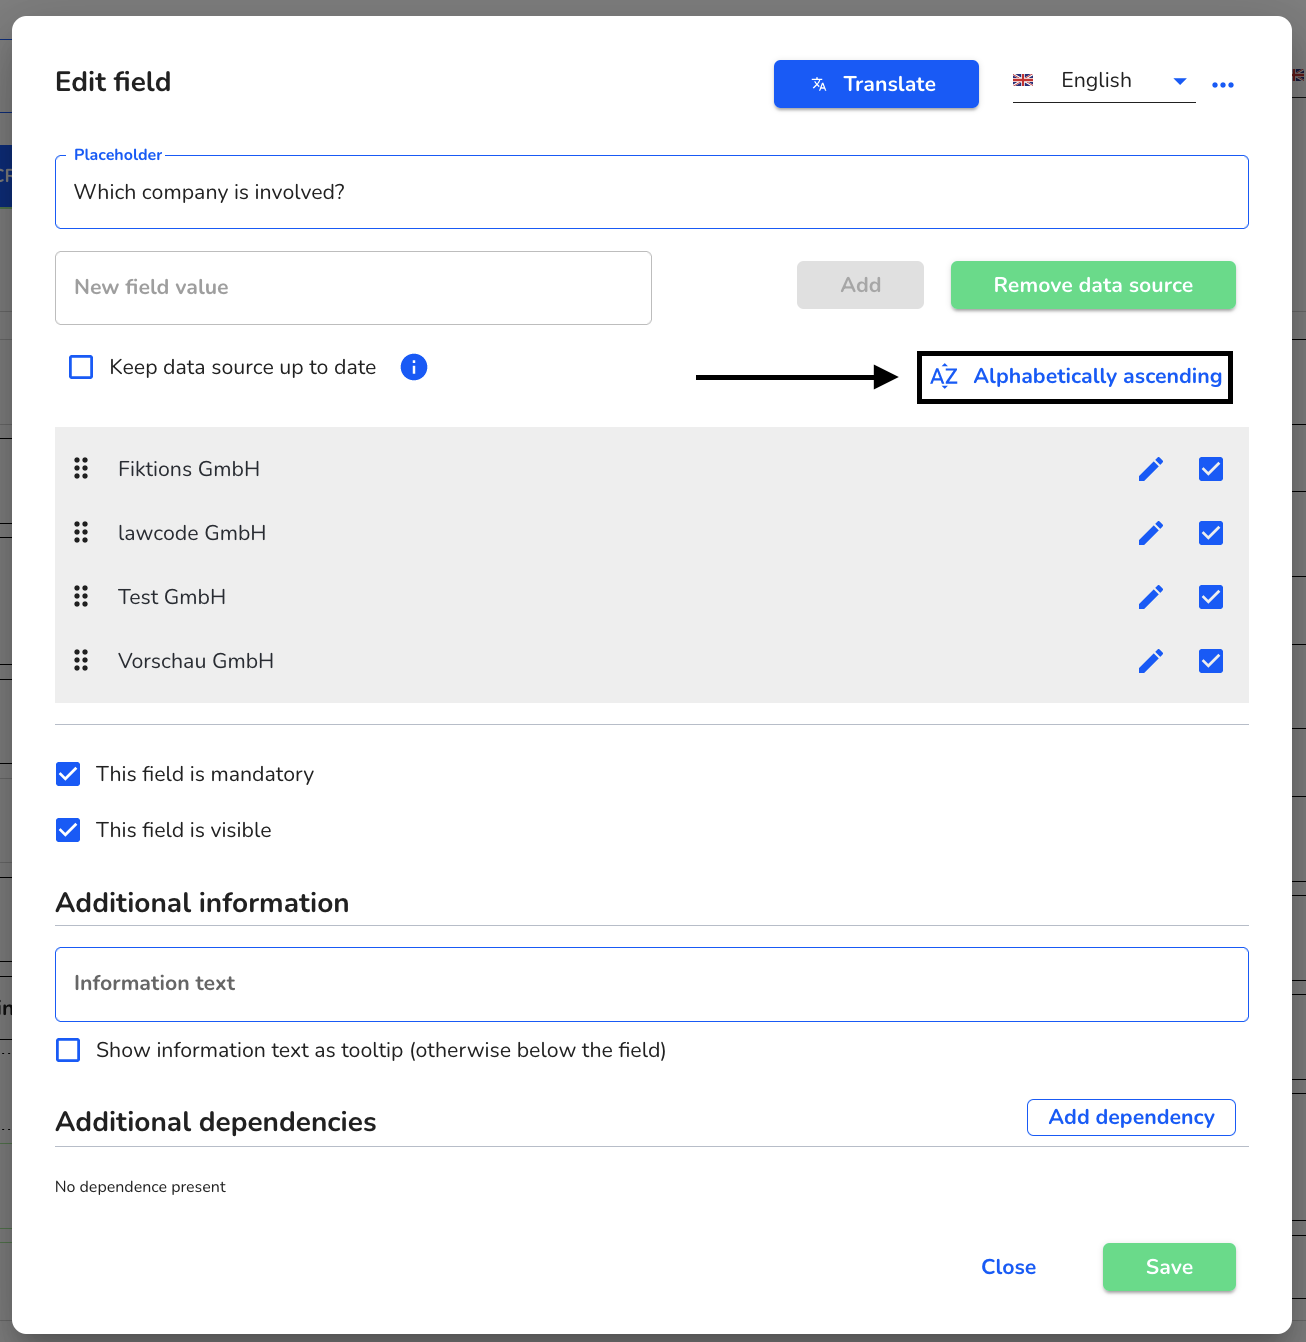
Alphabetically ascending
Click on alphabetically ascending to sort the contents of the selection field from A to Z.
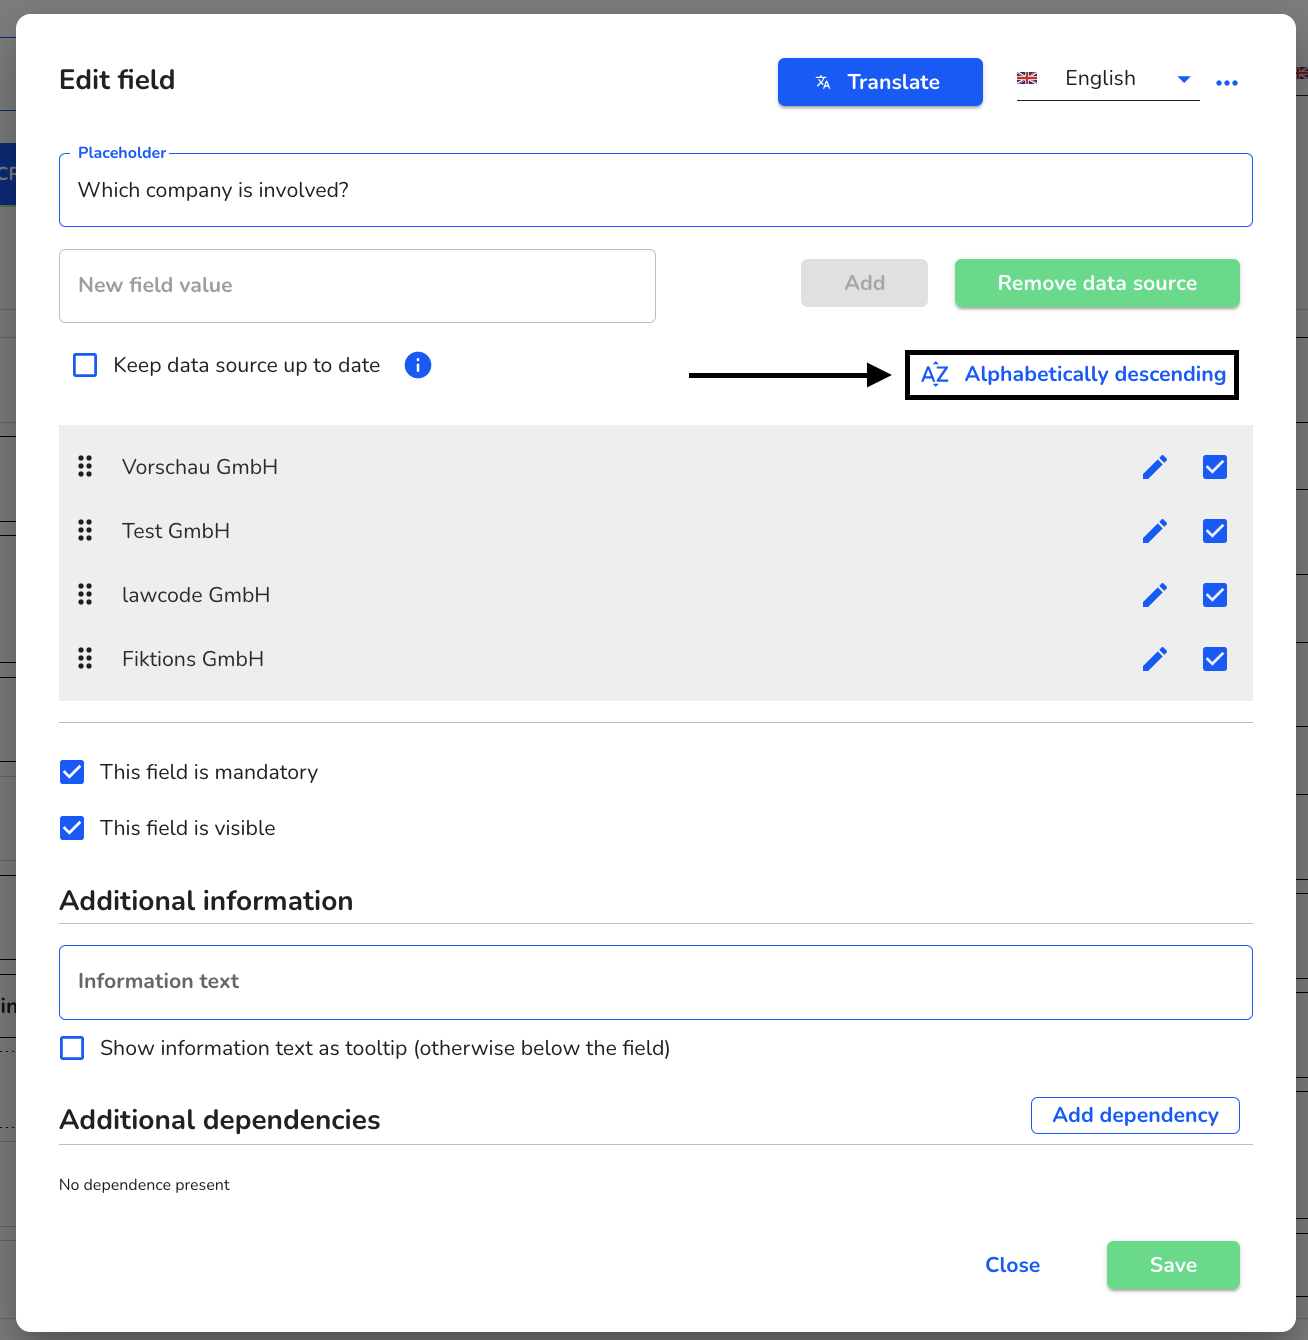
Alphabetically descending
Click on alphabetically descending to sort the contents of the selection field from Z to A.
In the final form, a selection field is displayed as a selection for various answers.
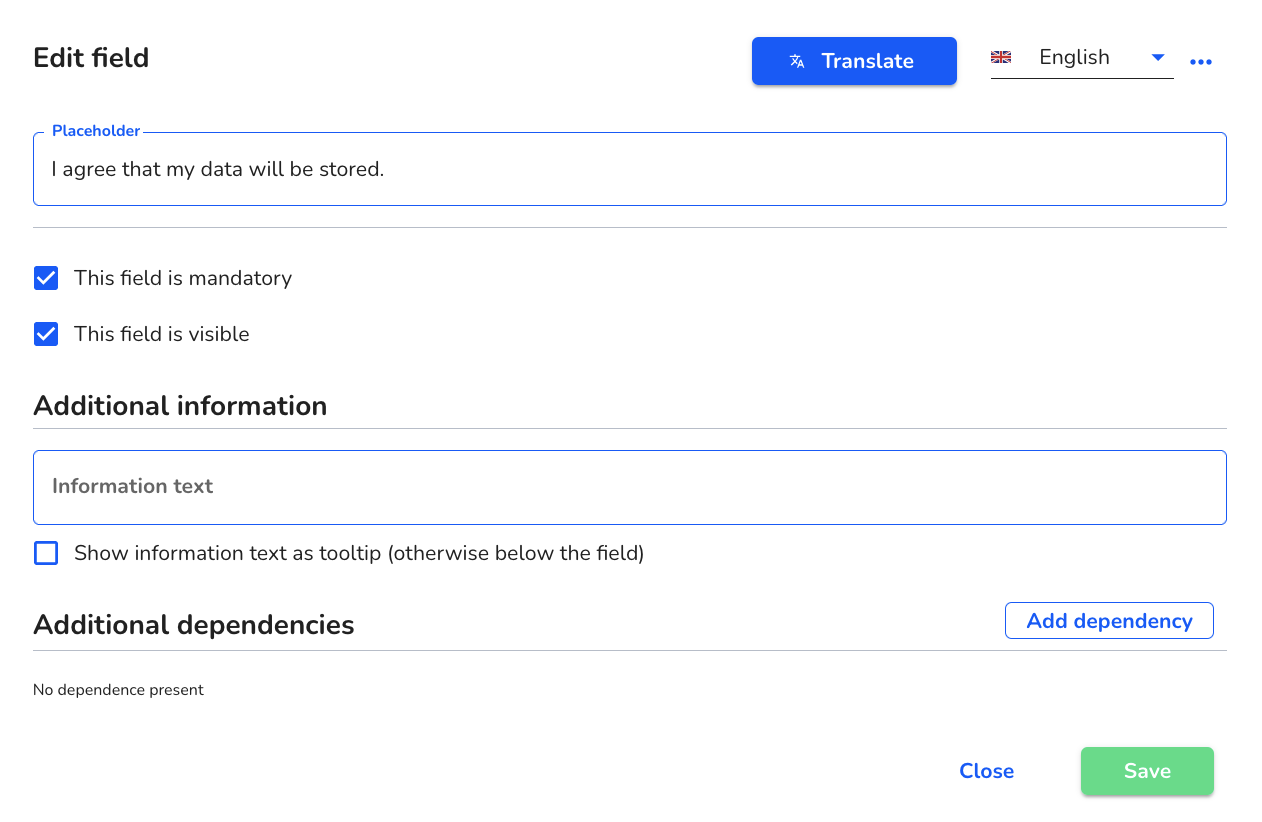
Field: Checkbox

The checkbox field is a field in which the person asked can confirm a question. This field can be used, for example, to confirm the declaration of consent that you require in your form.
The field would be displayed like this while the form is being processed.
In the final form, a checkbox is displayed as a question to be confirmed.

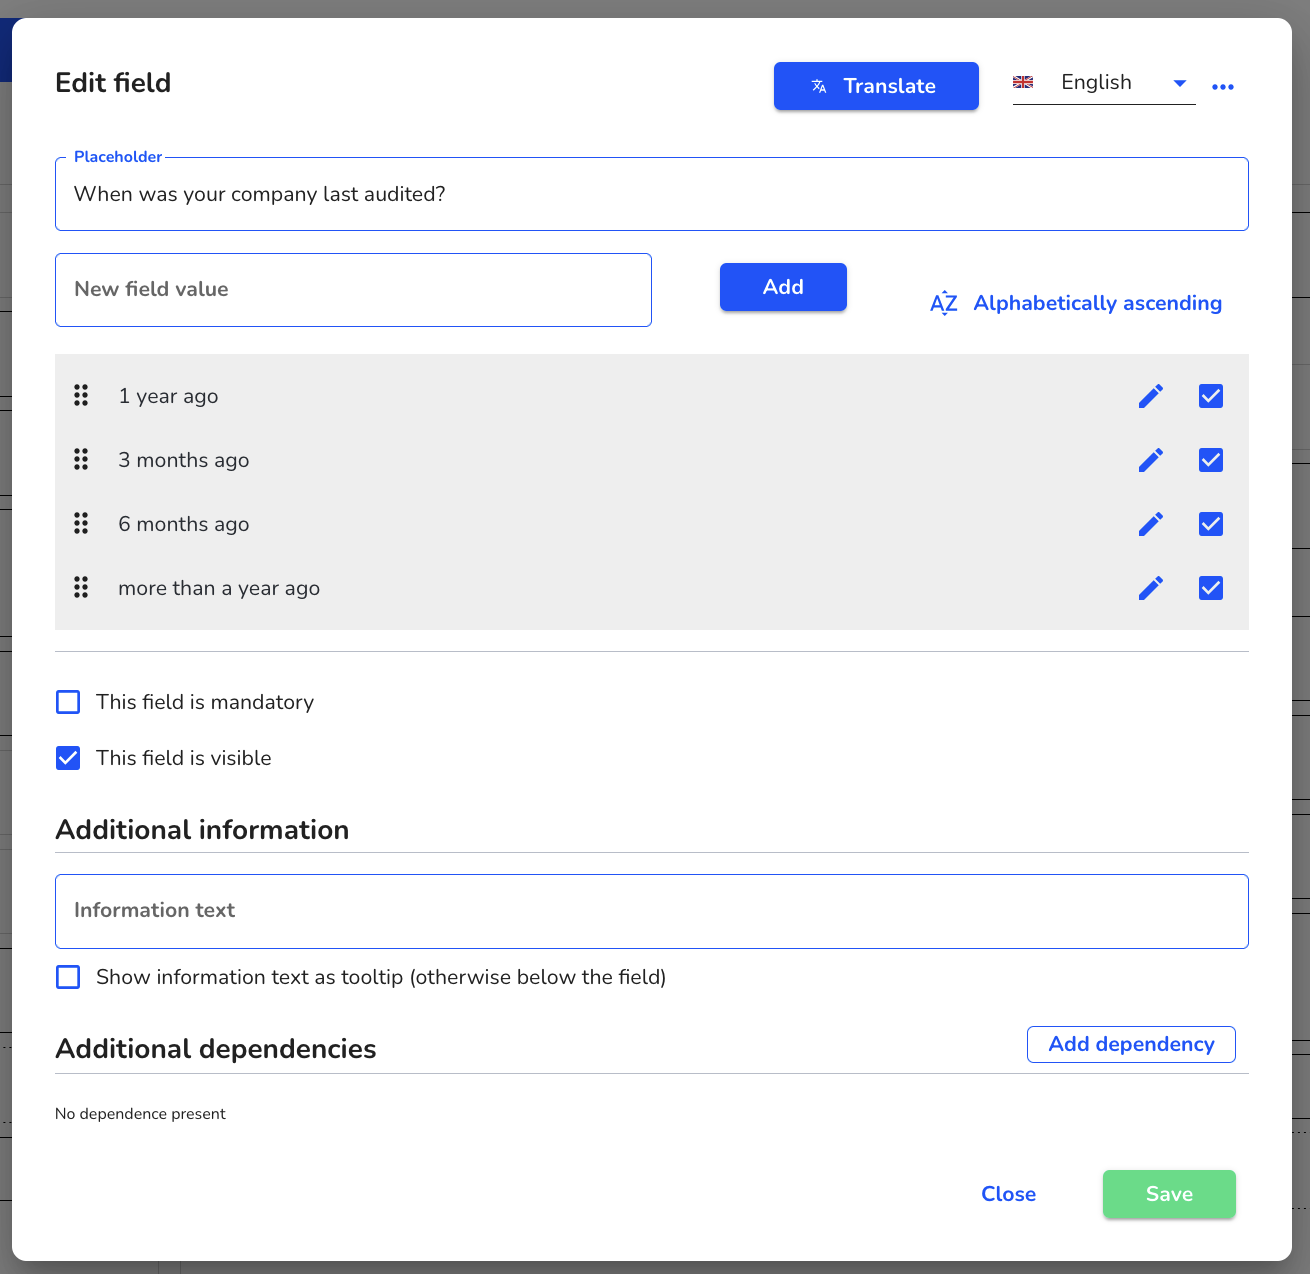
Field: Radio button

The Radio Button field is a field in which the person asked has to make a decision between various possible options. It is possible to sort the selection options like a selection field.
The field would be displayed like this while the form is being processed.
In the final form, a radio button is broadcast as a question with several possible answers.

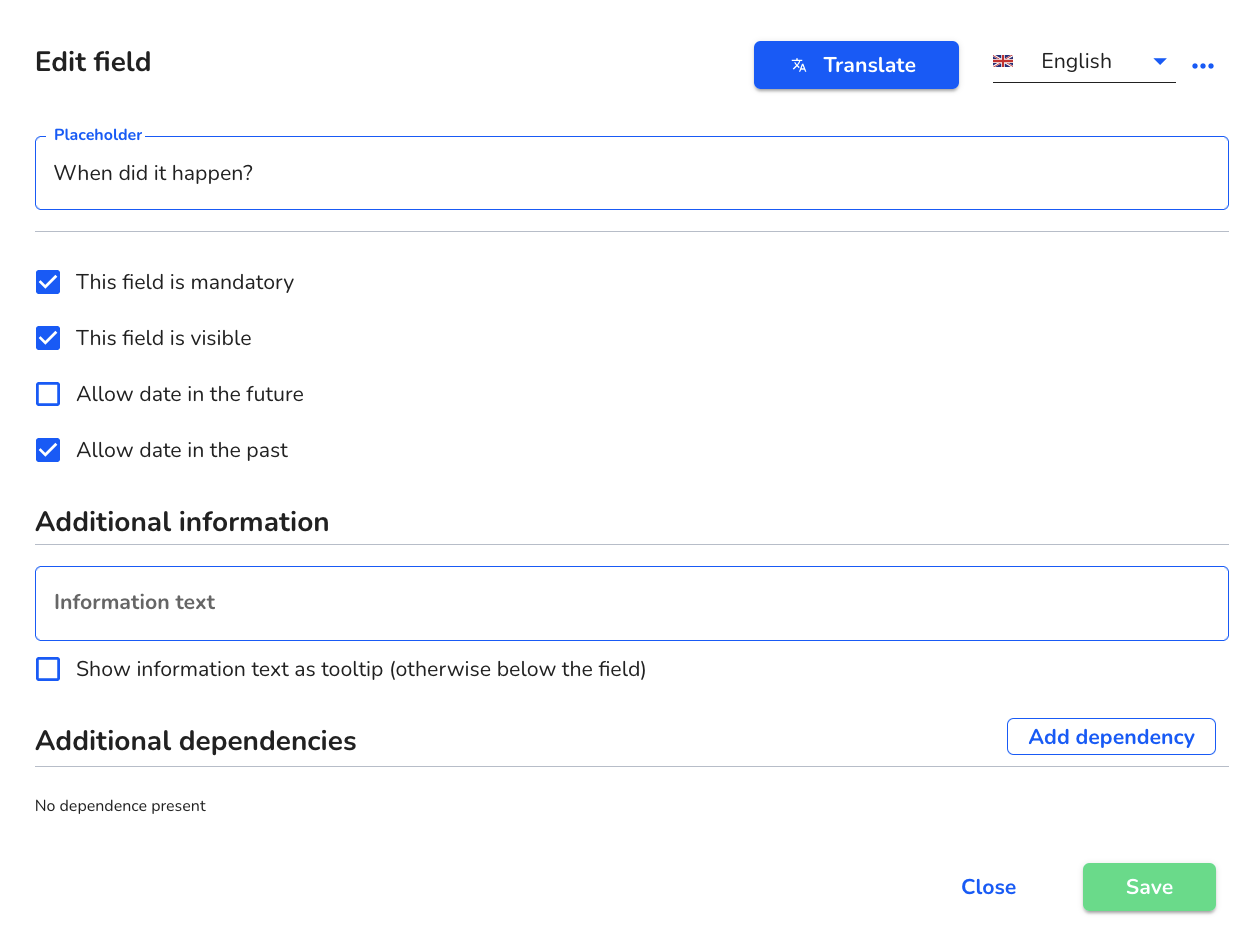
Field: Date selection

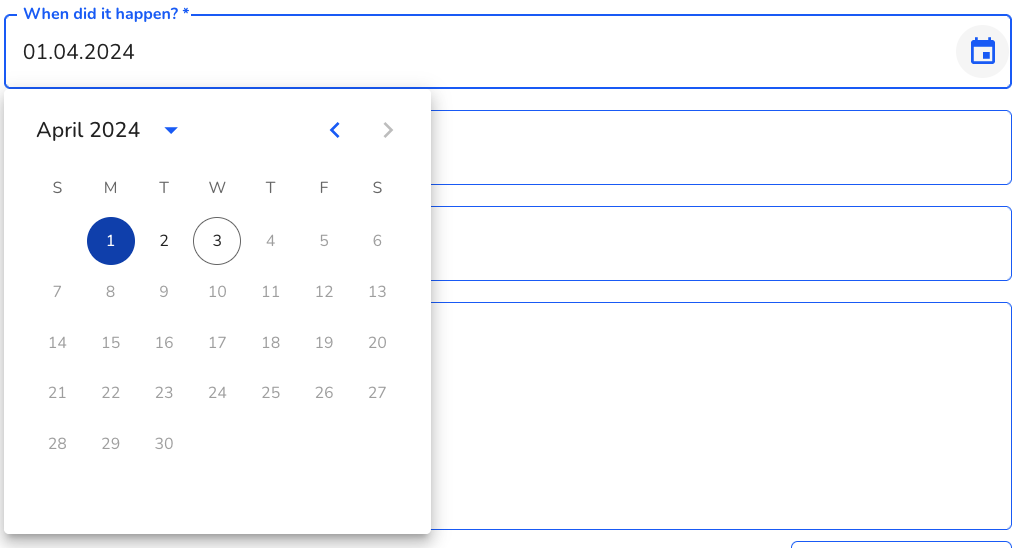
The date selection field is a field in which the reporting person should enter a date. This field can be used, for example, for an exact time of an event that you require in your form.
The field would be displayed like this while the form is being processed.
In the final form, a date selection is broadcast as a suit date.
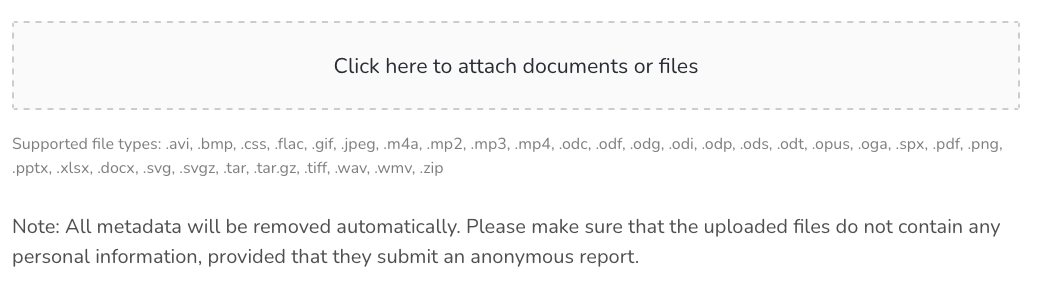
Field: File upload

The File upload field is a field in which the reporting person can add documents. All metadata is automatically removed from the uploaded files to ensure the anonymity of the origin of the files.
The field would be displayed like this while the form is being processed.

In the final form, a file upload is broadcast as a button.
Add field
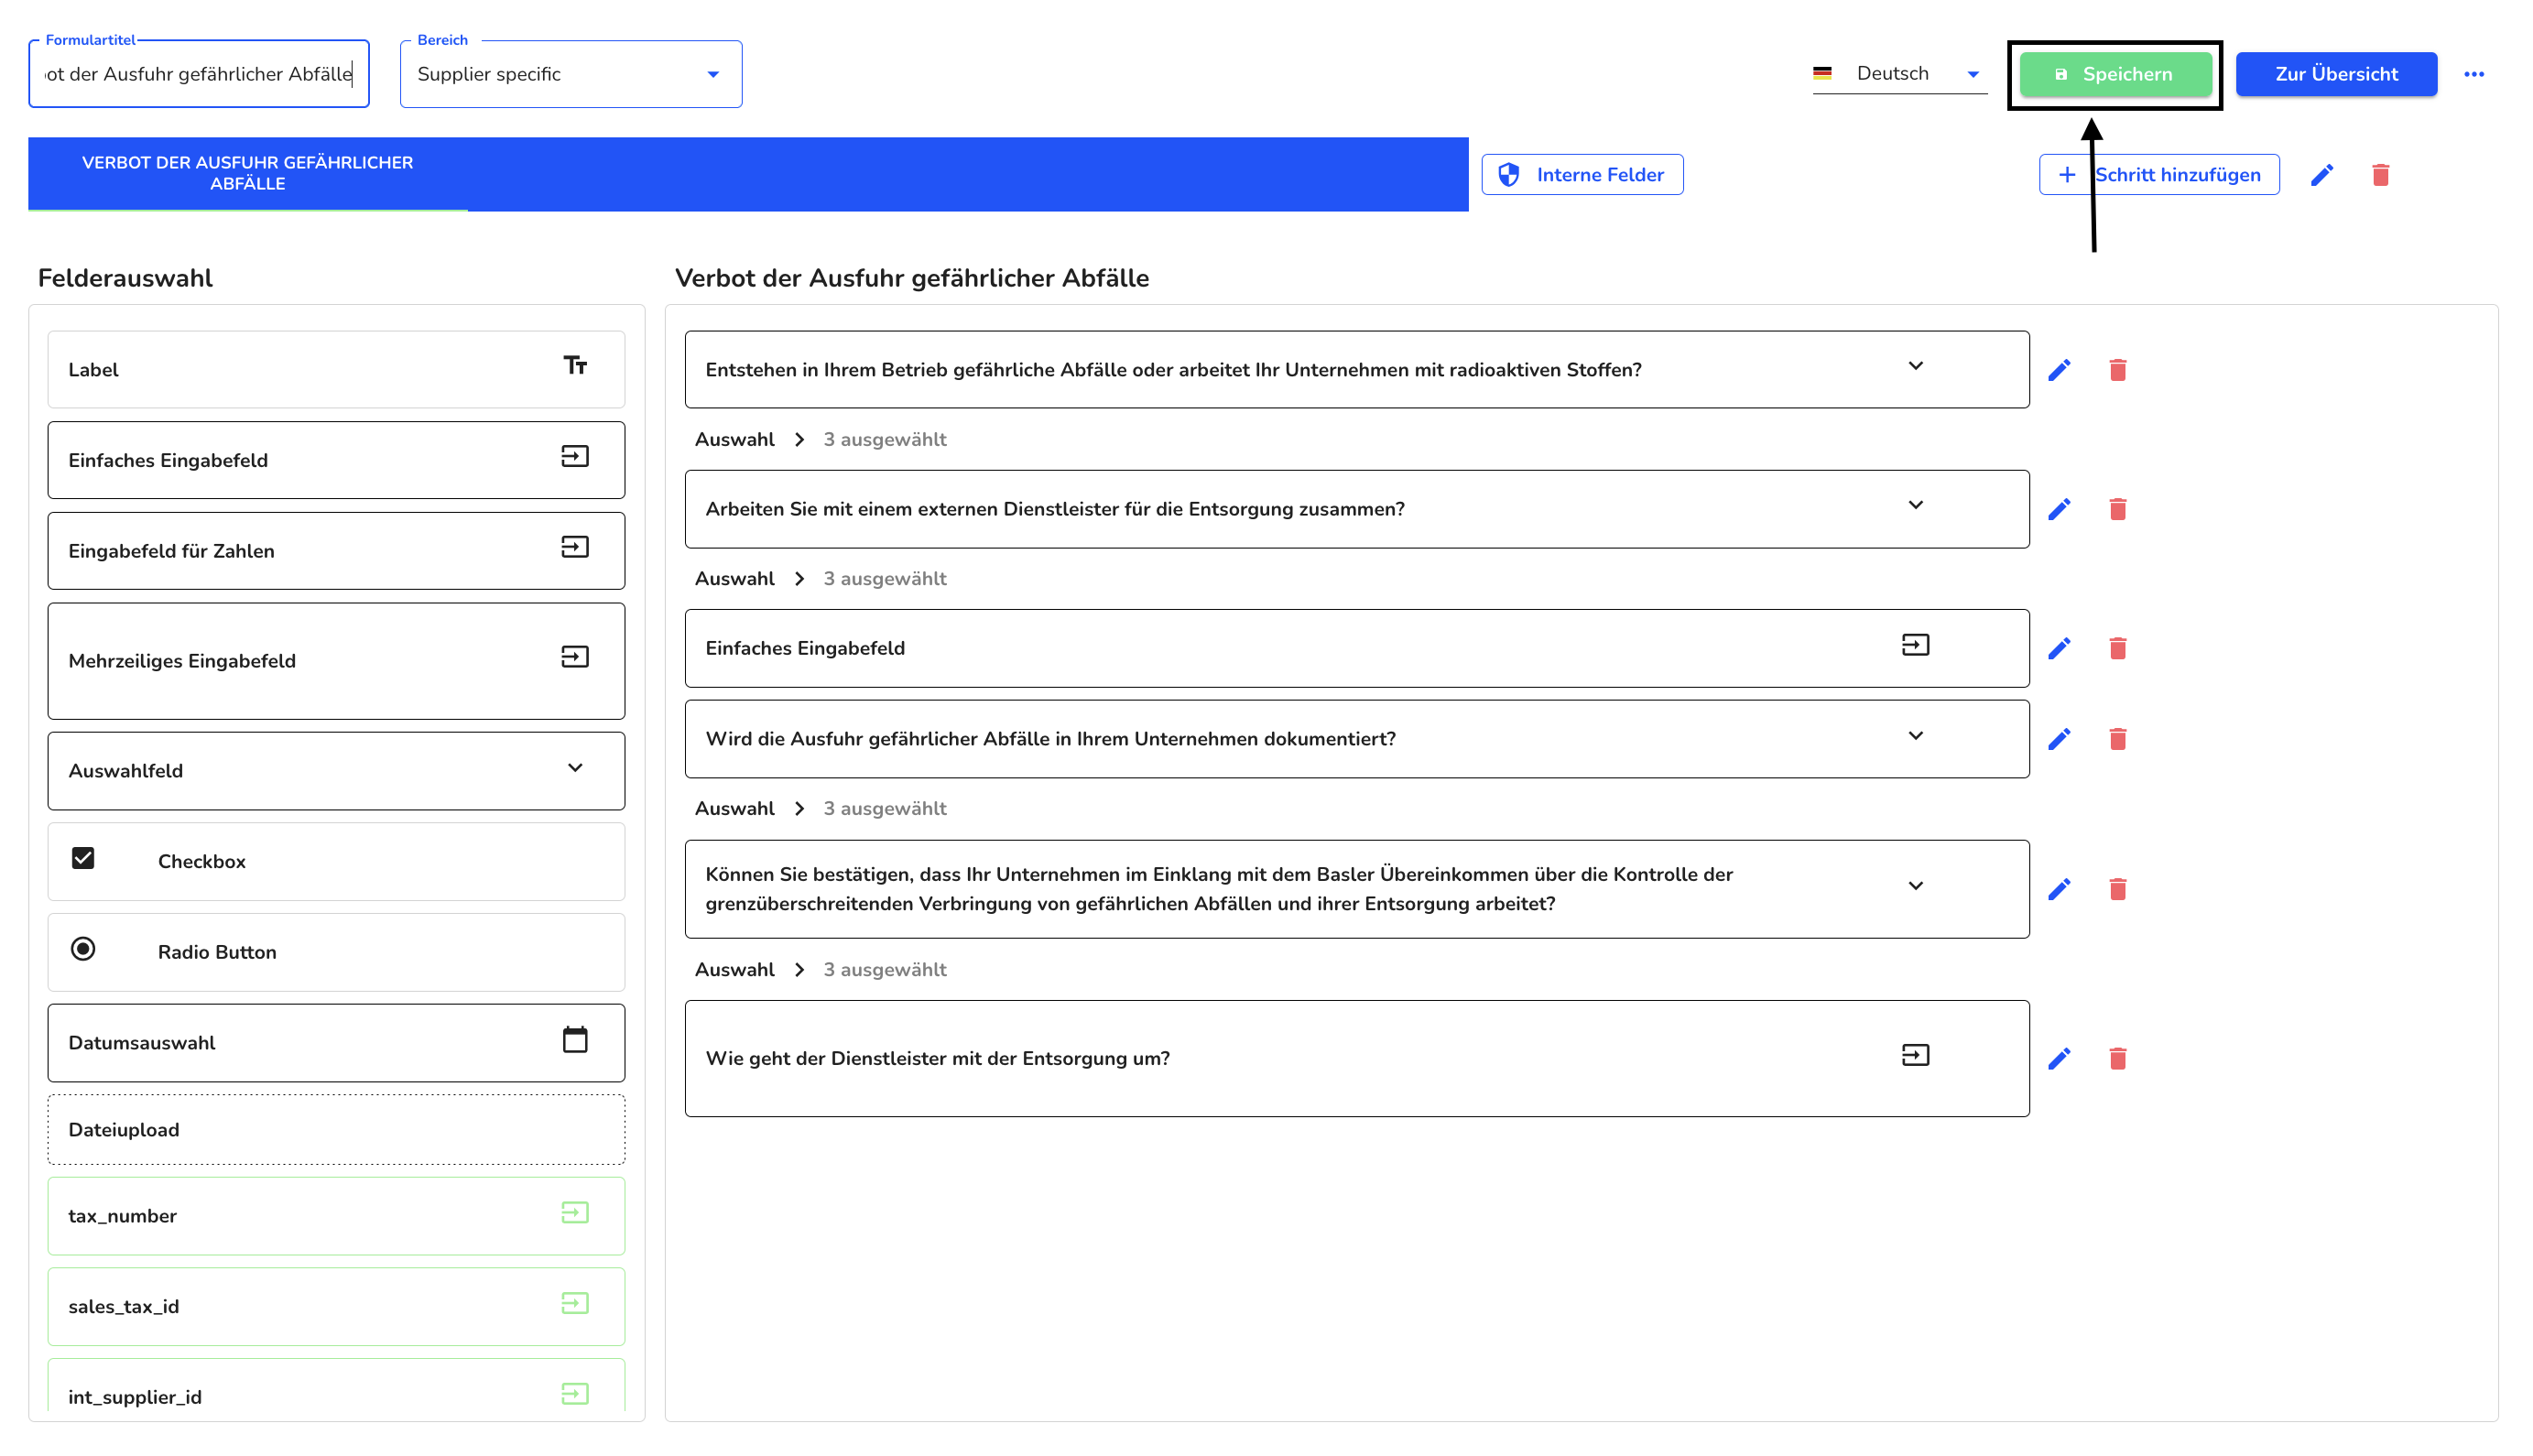
You can create as many fields as you like in the Supply Chain module. These only become visible in the edited forms after you save the entire form after making changes.
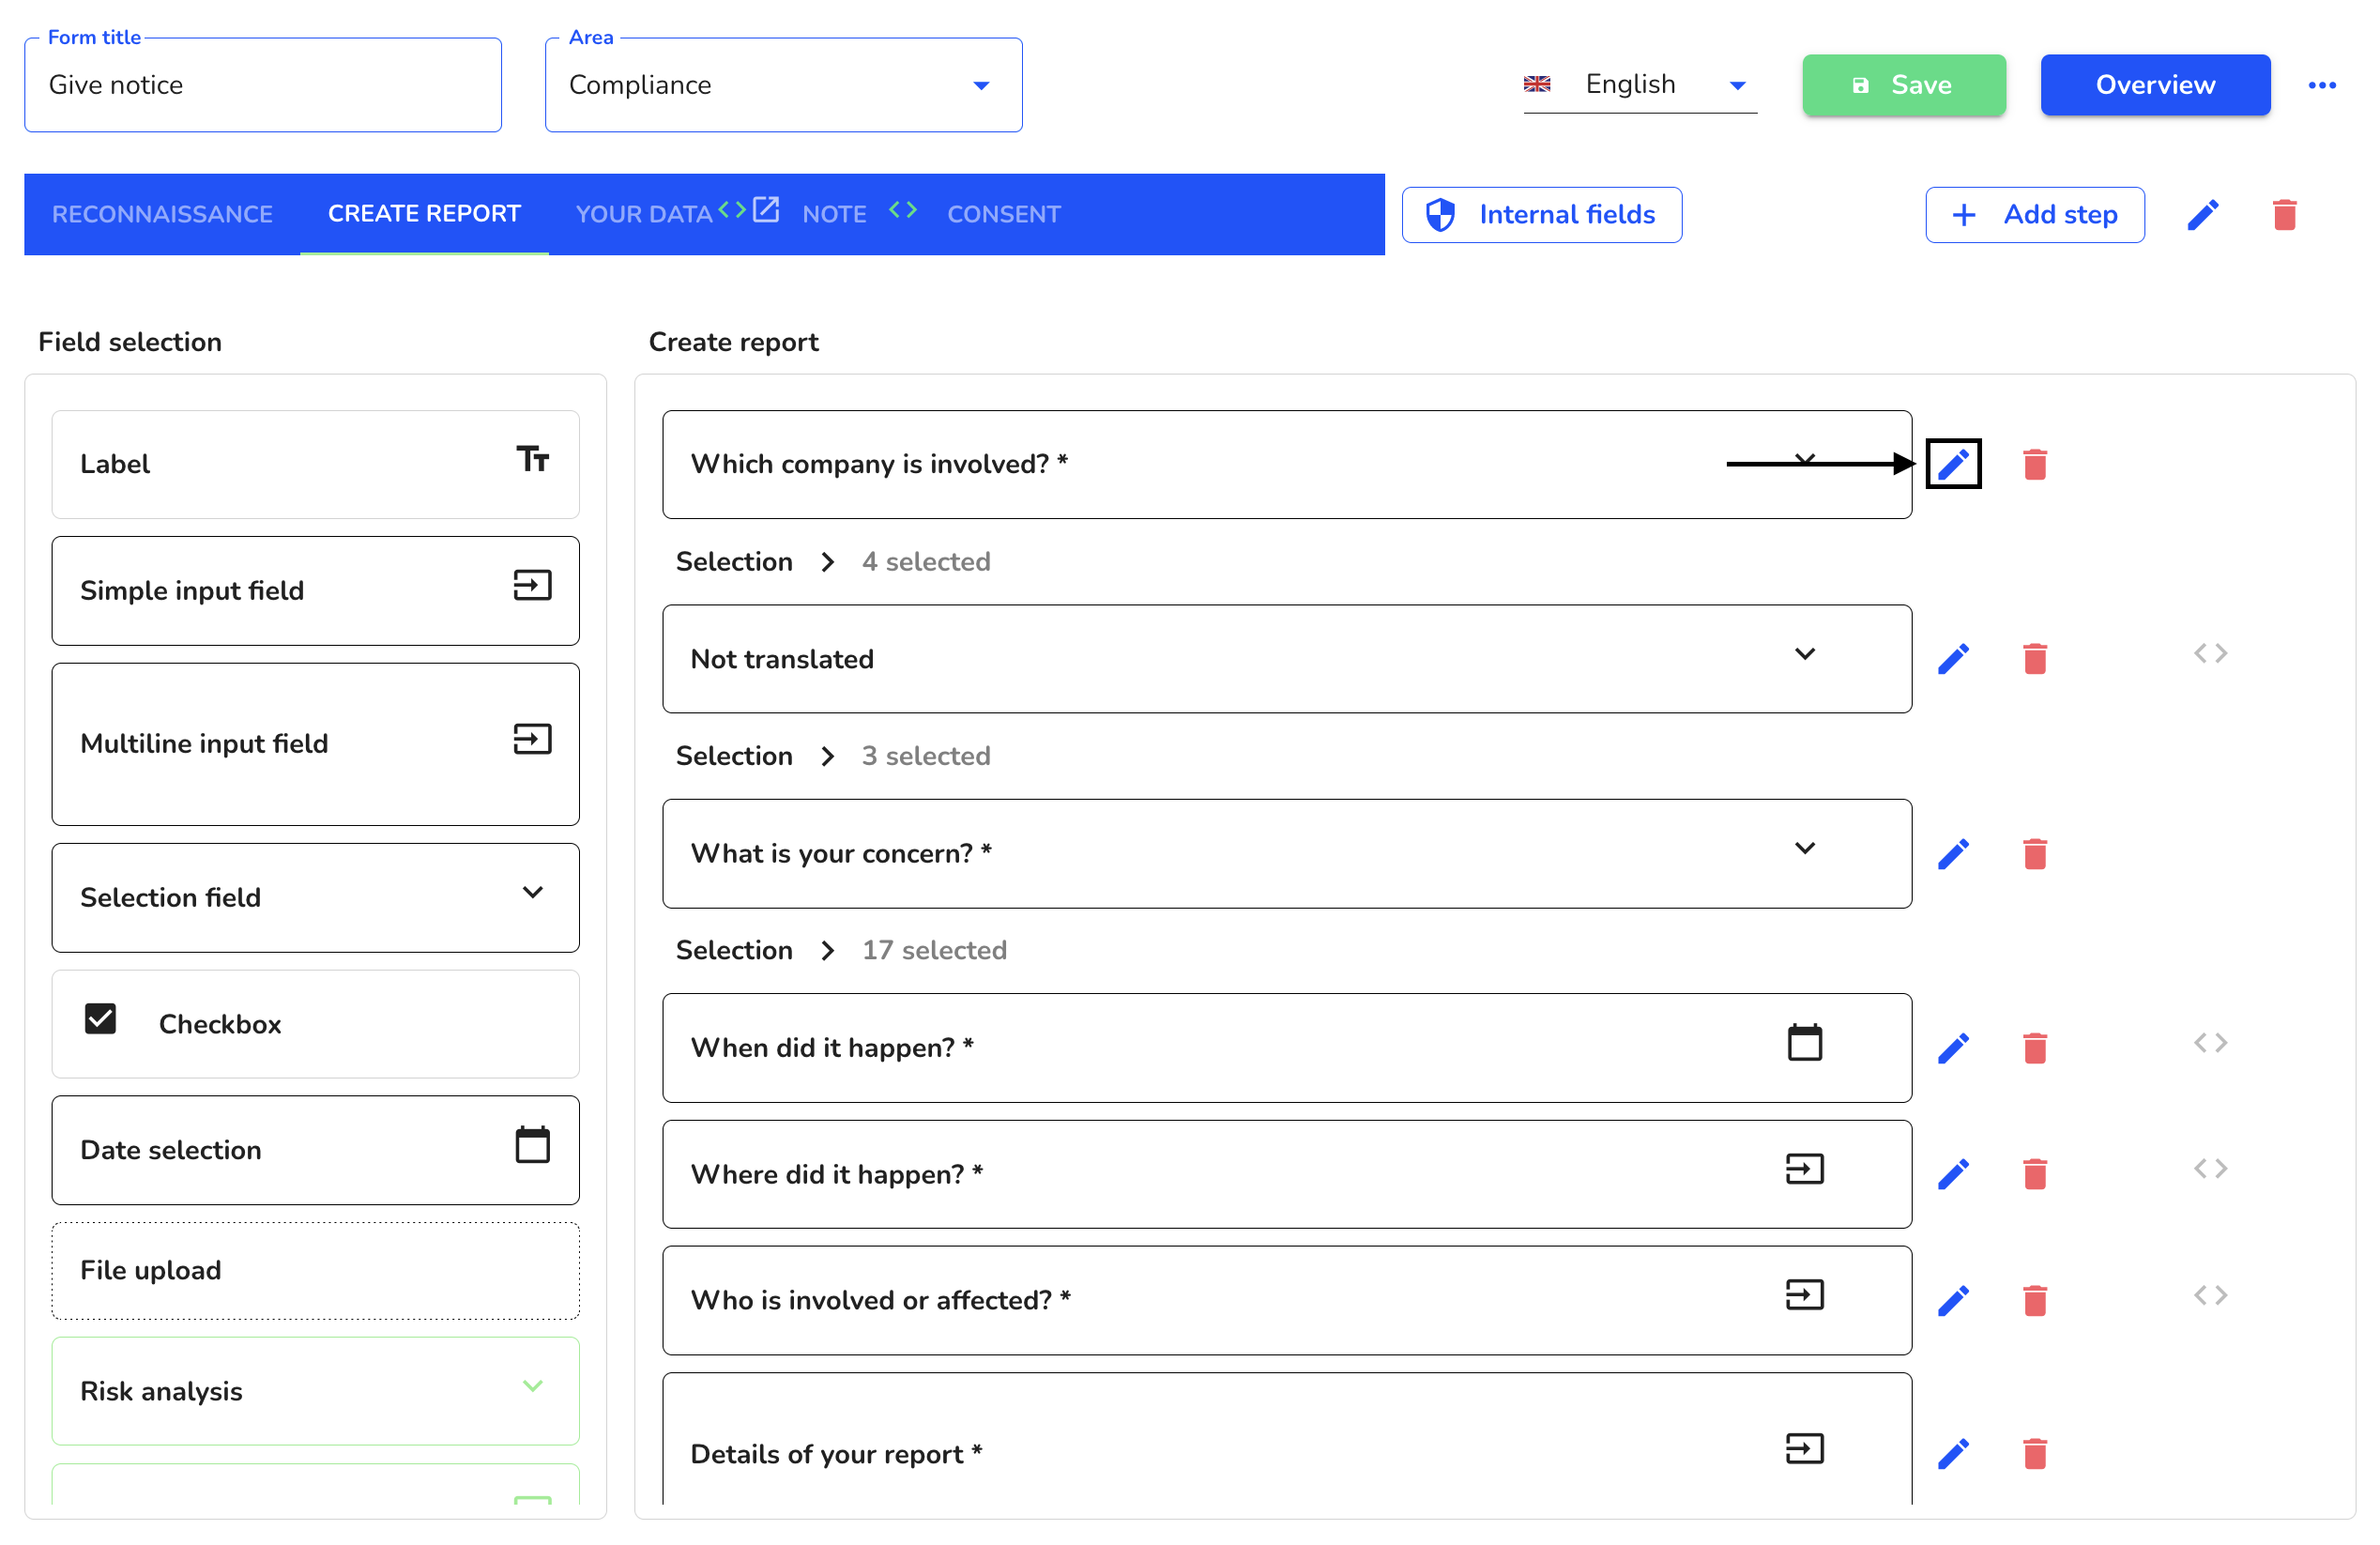
To create a field, click in the form administration.
Under Actions, click on the editing pencil of the form you want to edit.
Select the desired field by holding the field with the mouse. Move the desired field from the spring selection to the desired step.
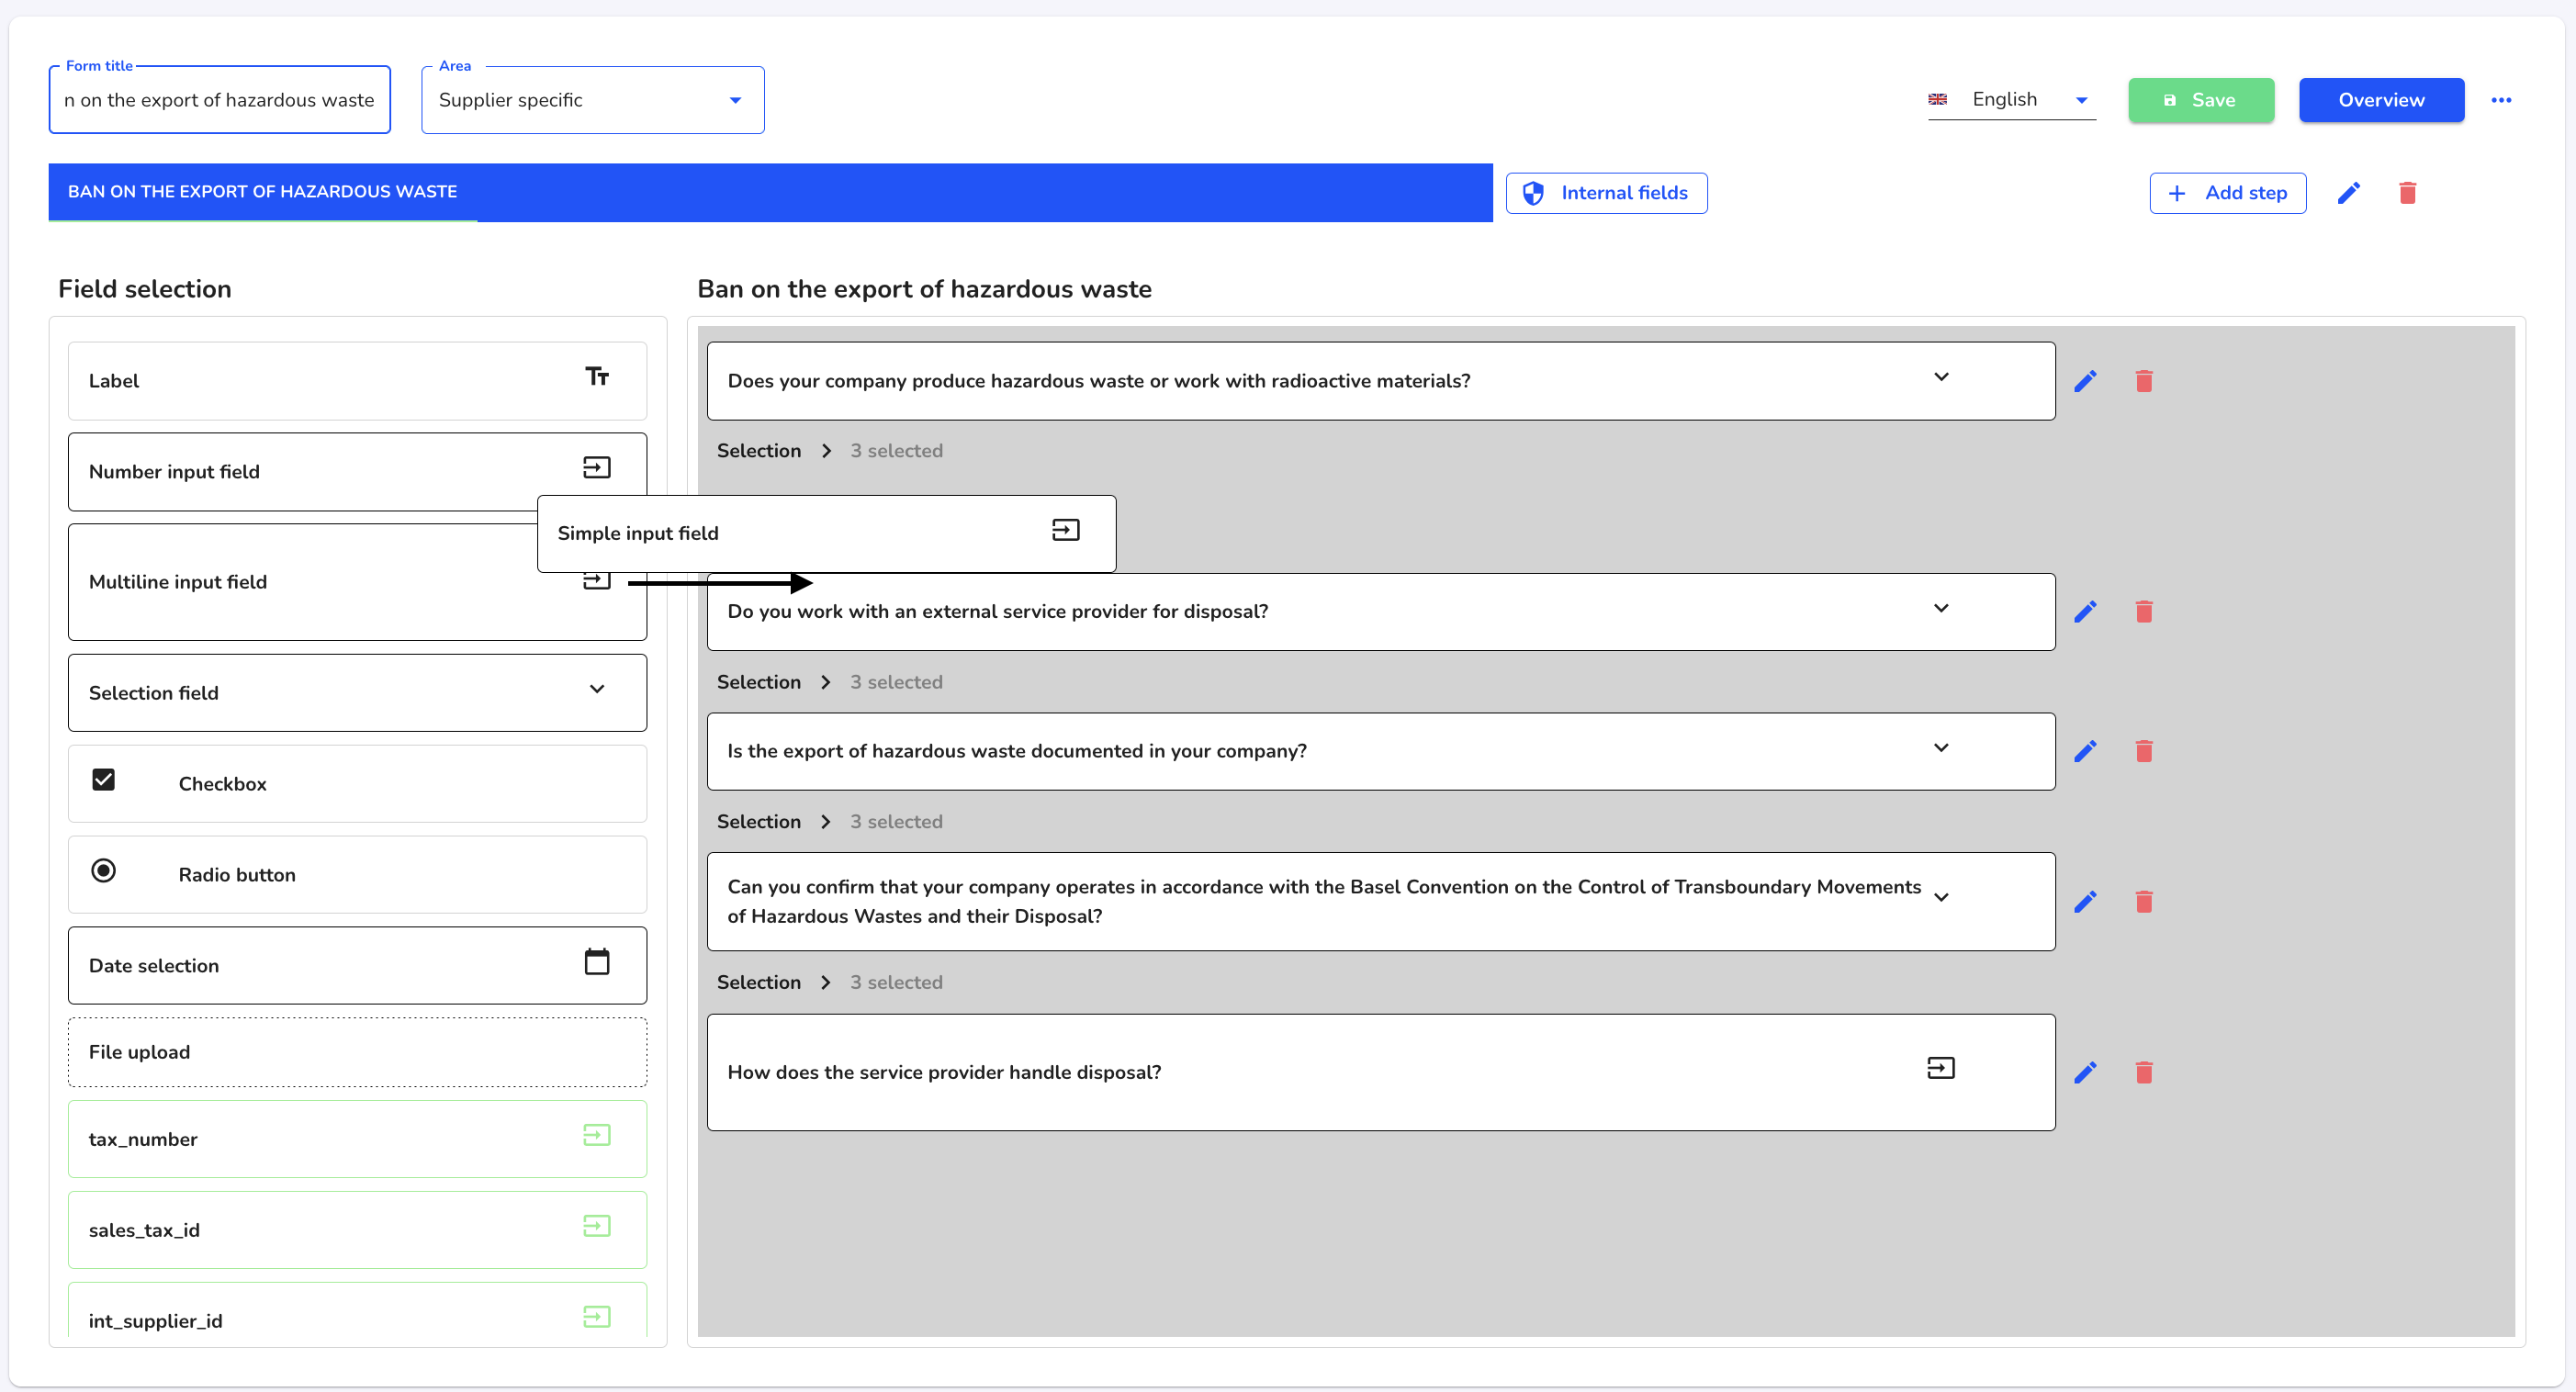
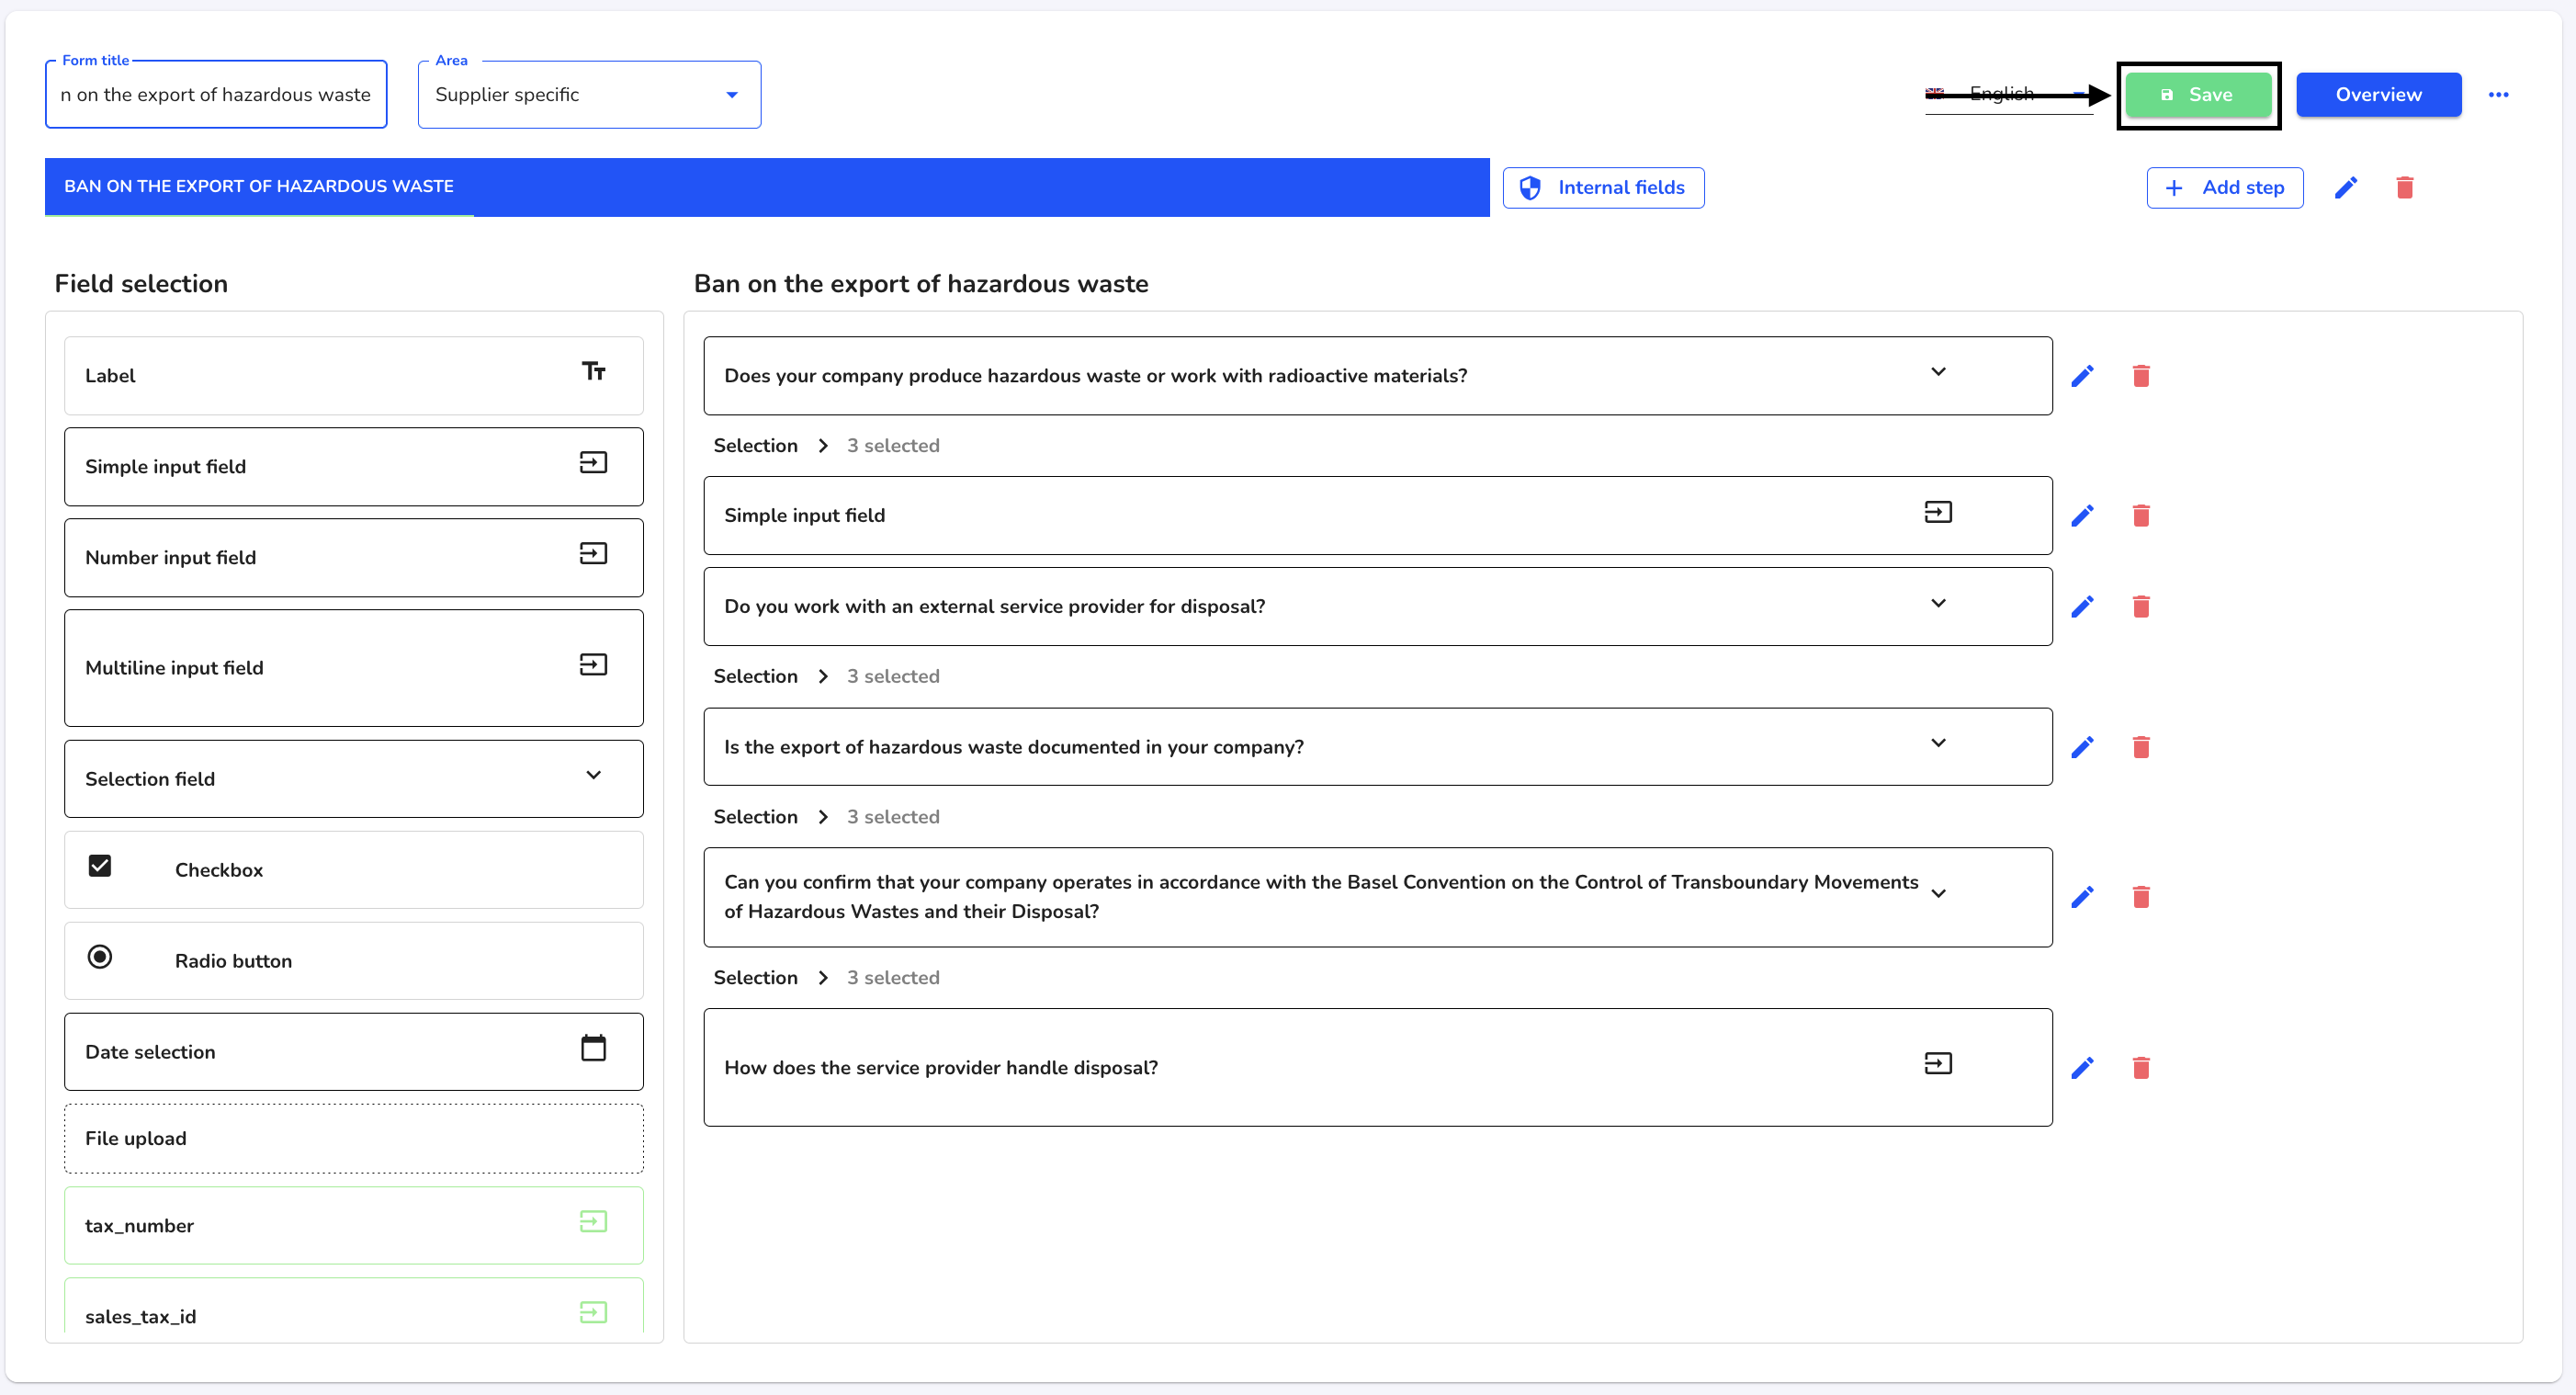
The field is now added to the step and will be displayed in the selected form after saving.
Click on Save.
Edit field
You can edit any number of fields in the Supply Chain module. These changes only become visible in the final form after you save the entire form after making changes.
To edit a field, click in the form administration.
Under Actions, click on the editing pencil of the form you want to edit.
Open the desired field for editing by clicking on the editing pencil in the step under Actions.
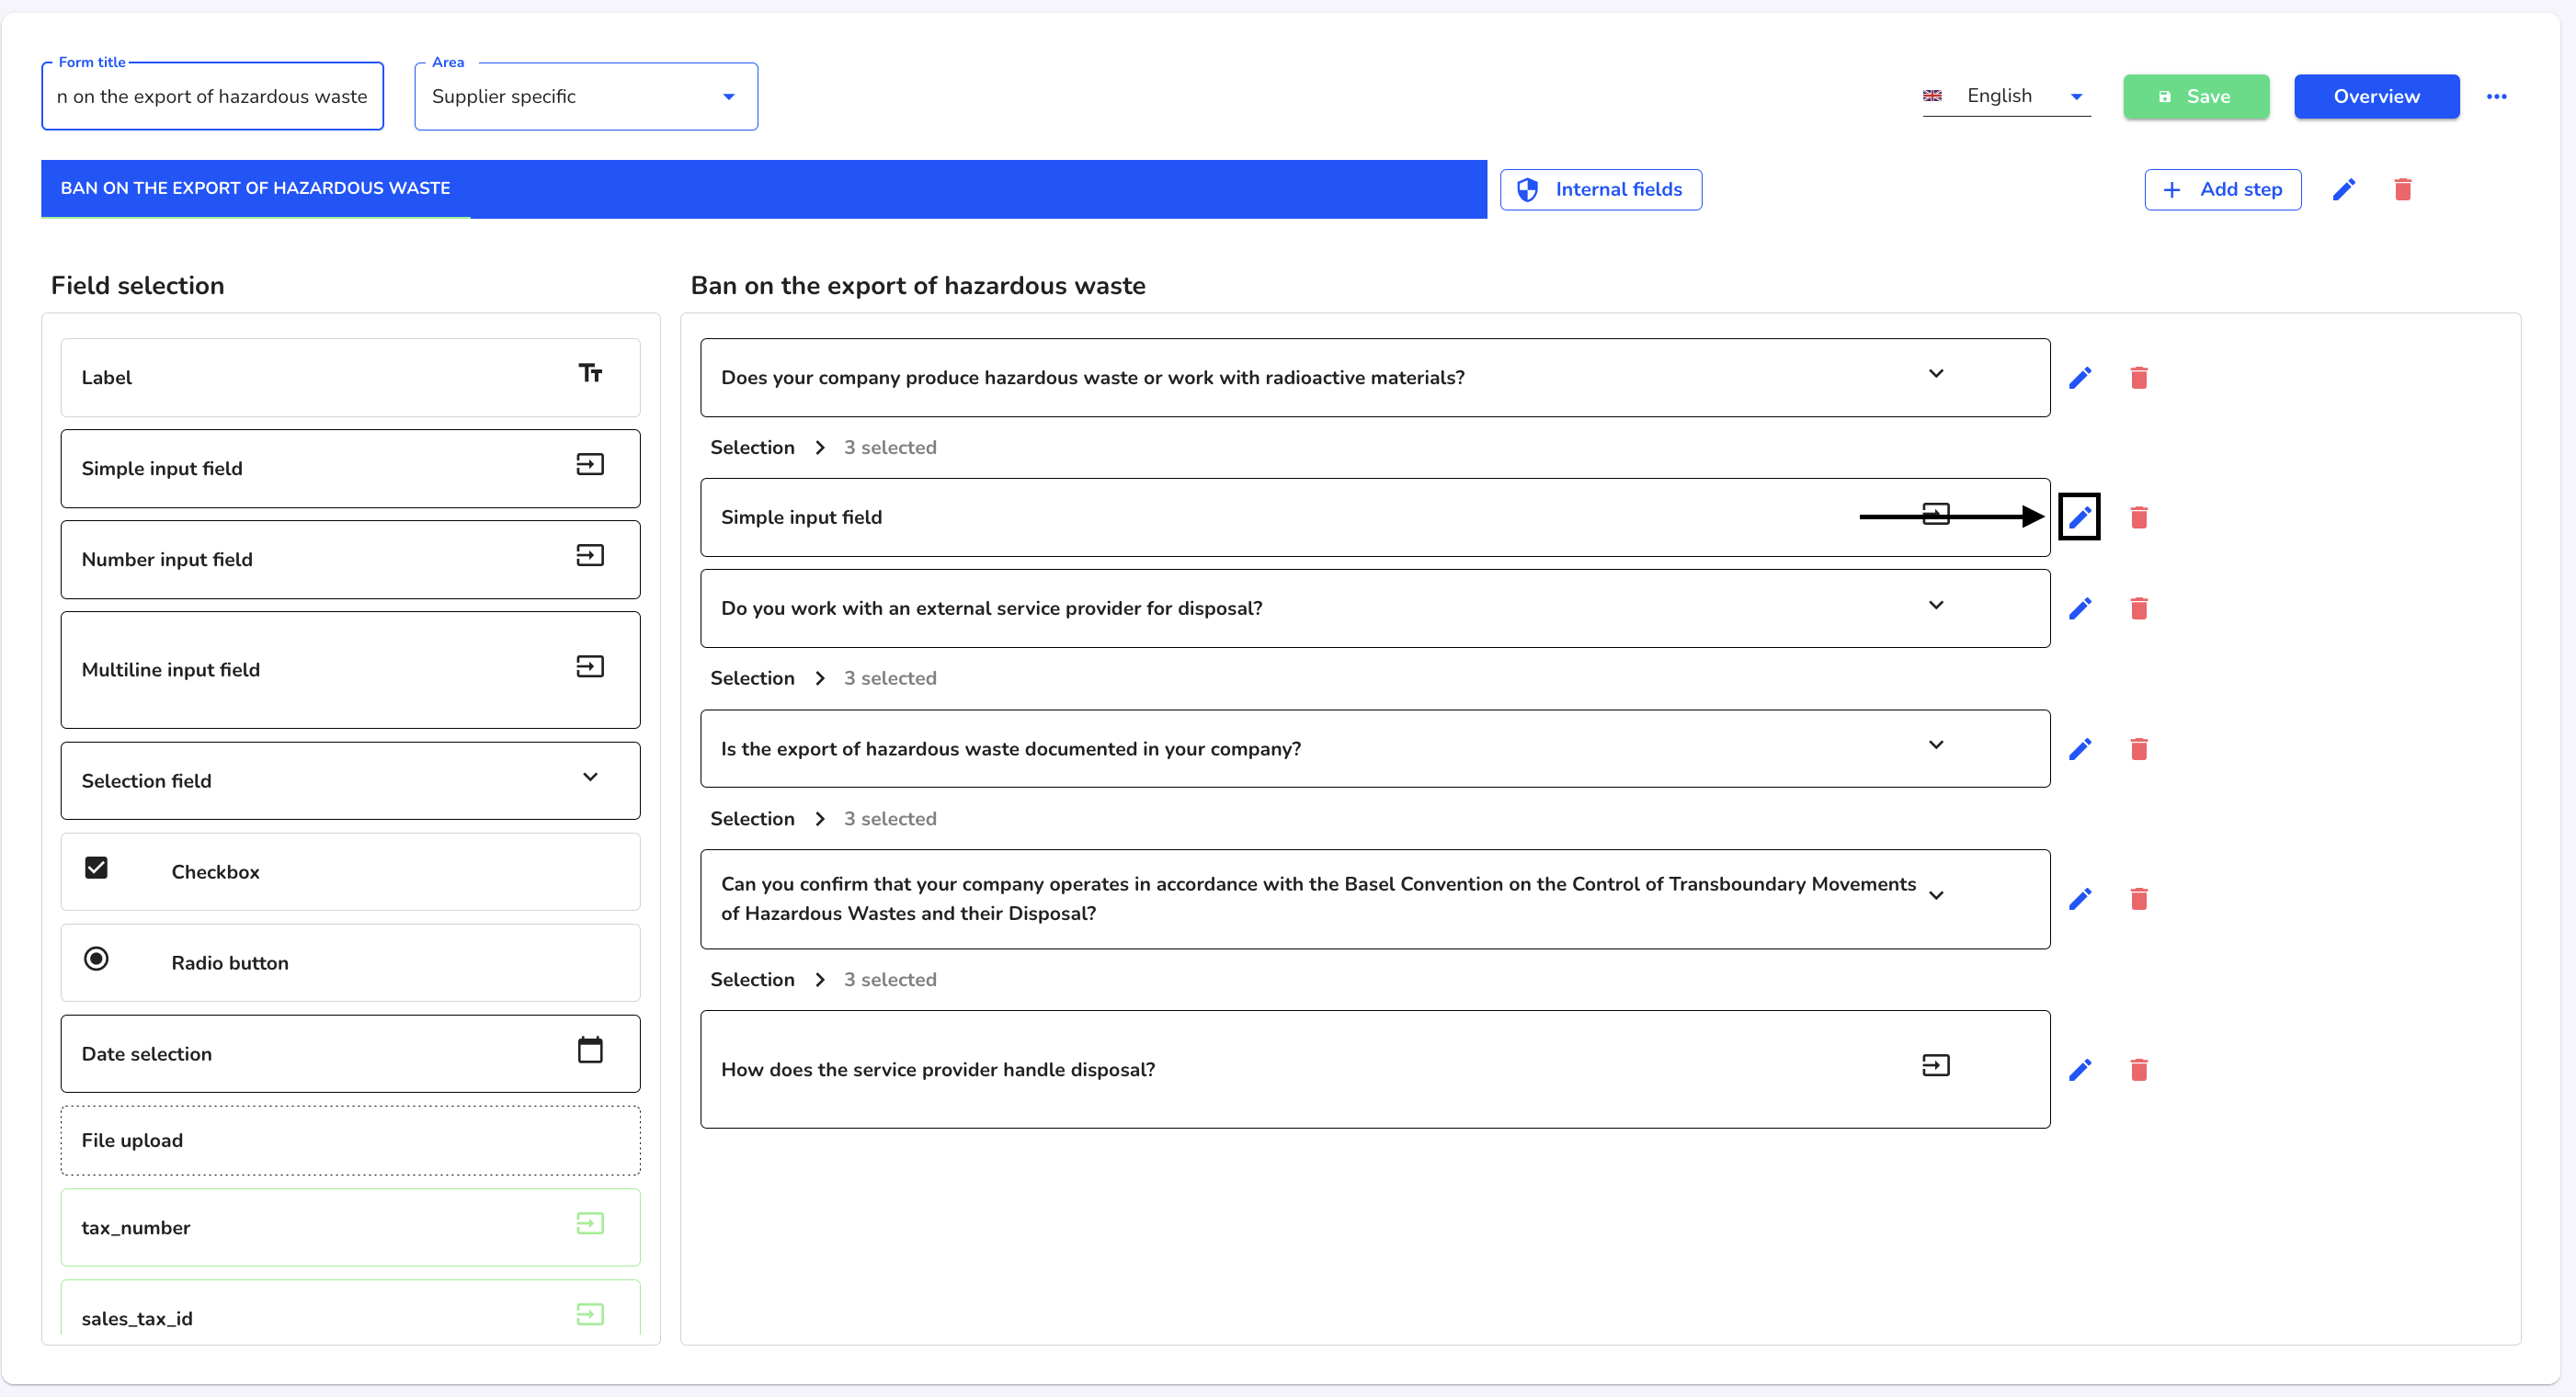
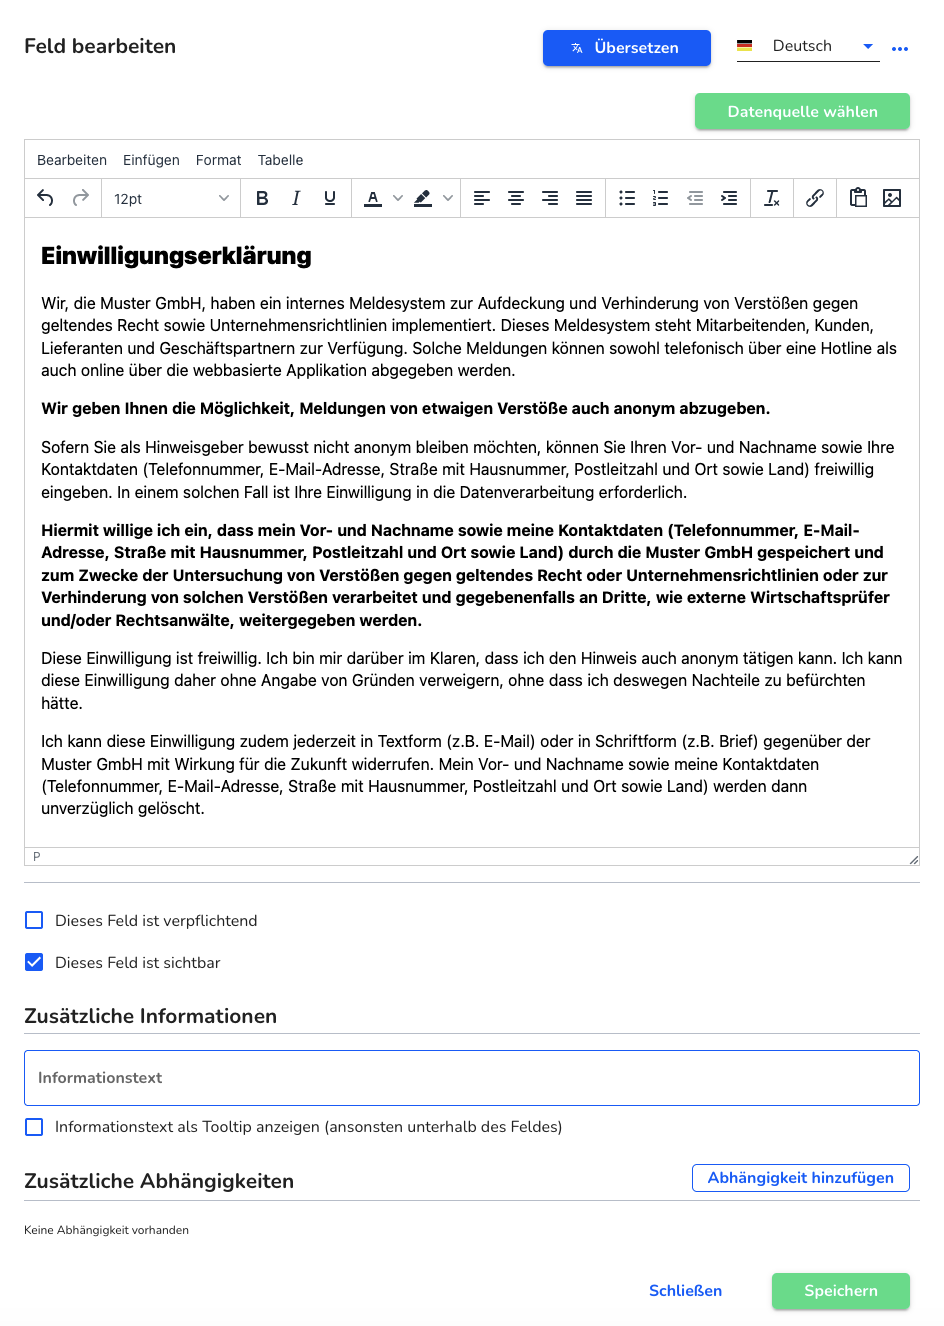
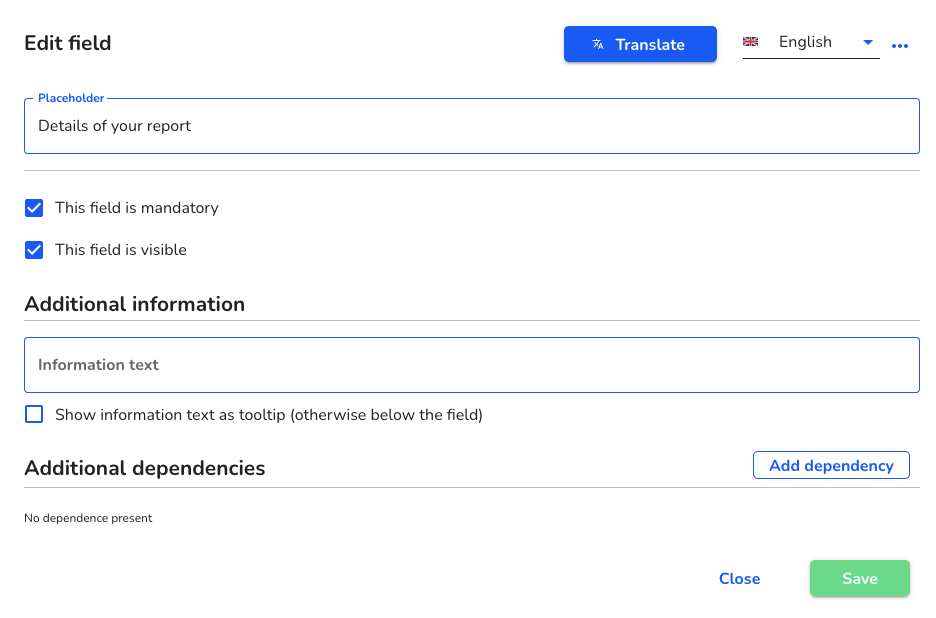
There are various ways to edit a field: Name the field, make the field mandatory, make the field visible and add information text.
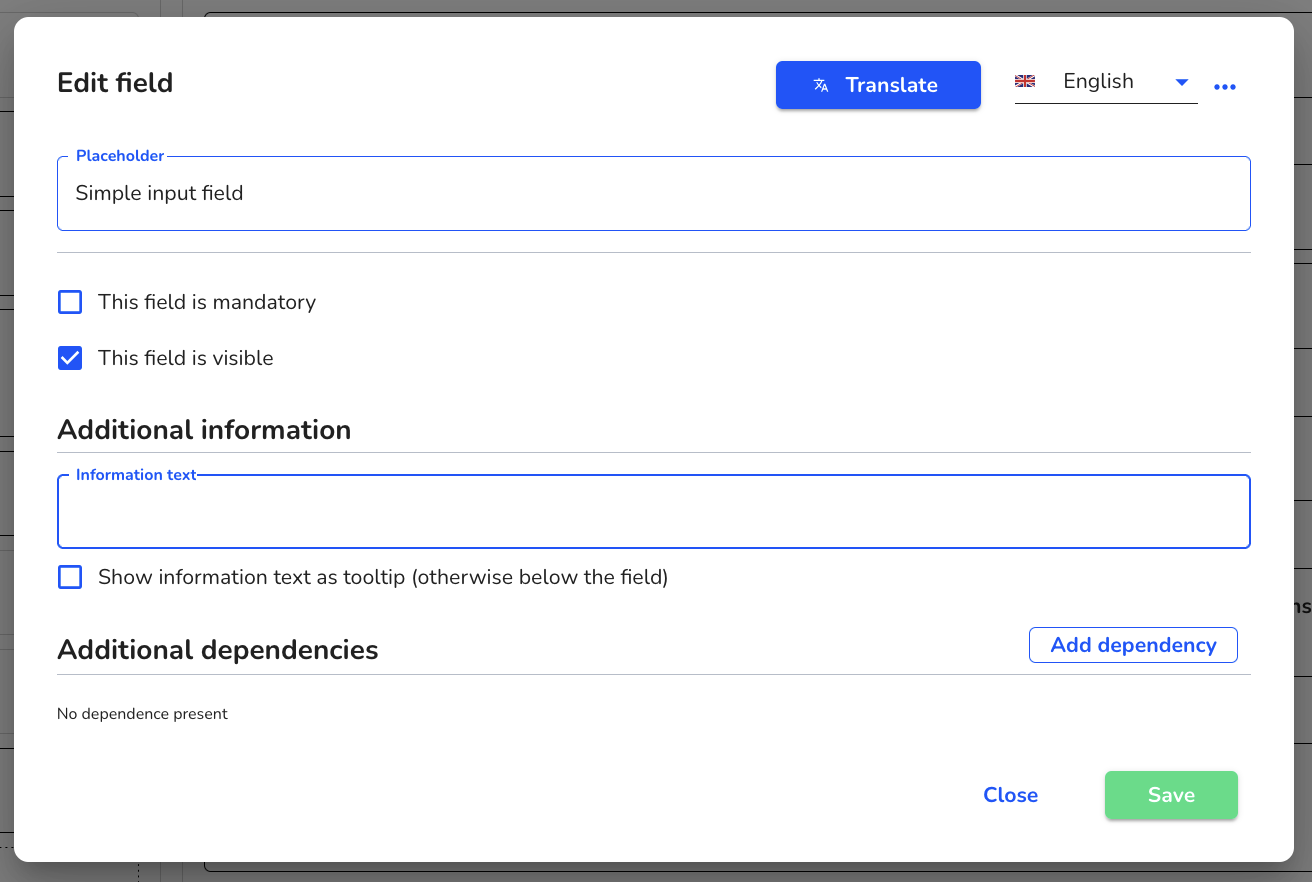
Name field
To name a field, click on the input area of the Placeholder field and enter the desired name or question.
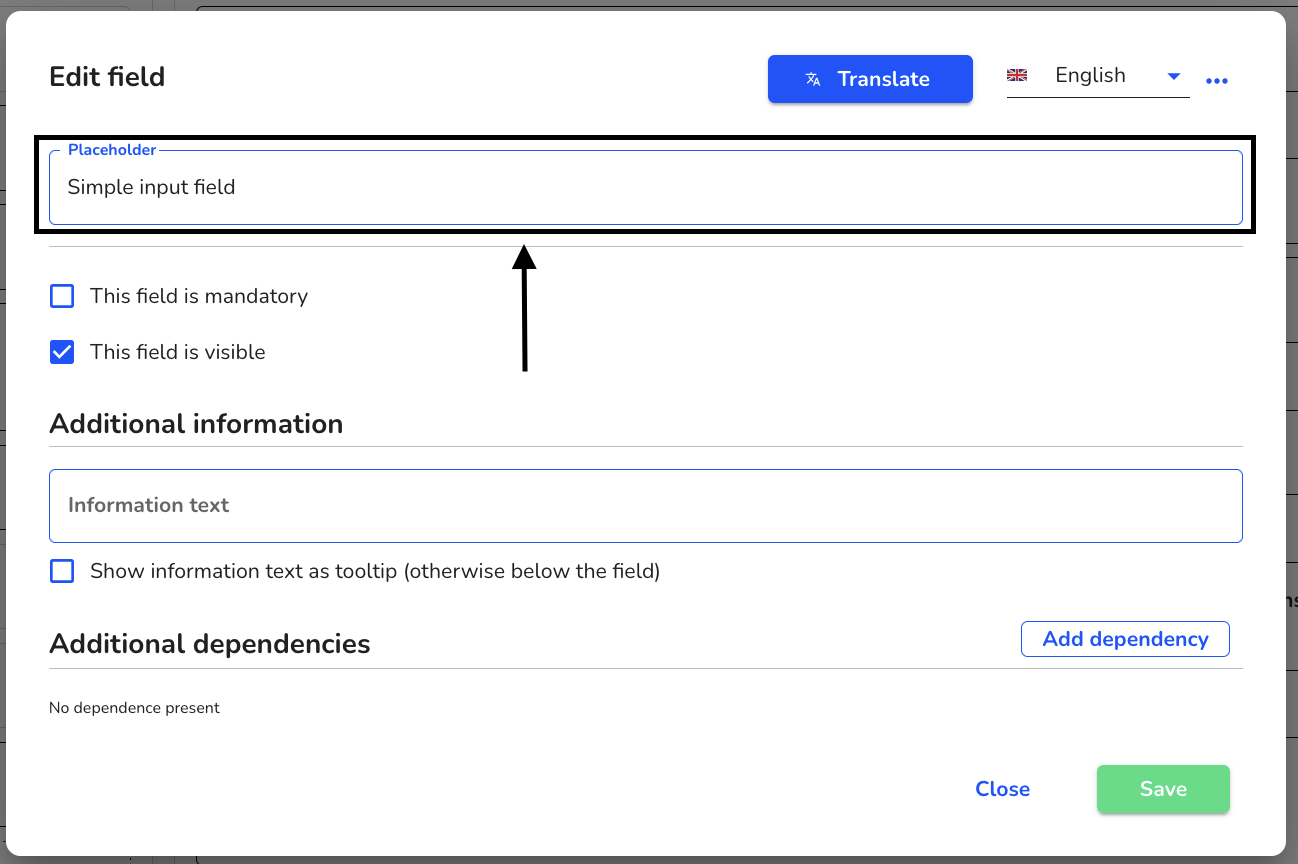
Click on Save to save the change.
Make field mandatory
If a field is mandatory, the reporting person must complete it in order to submit their report.
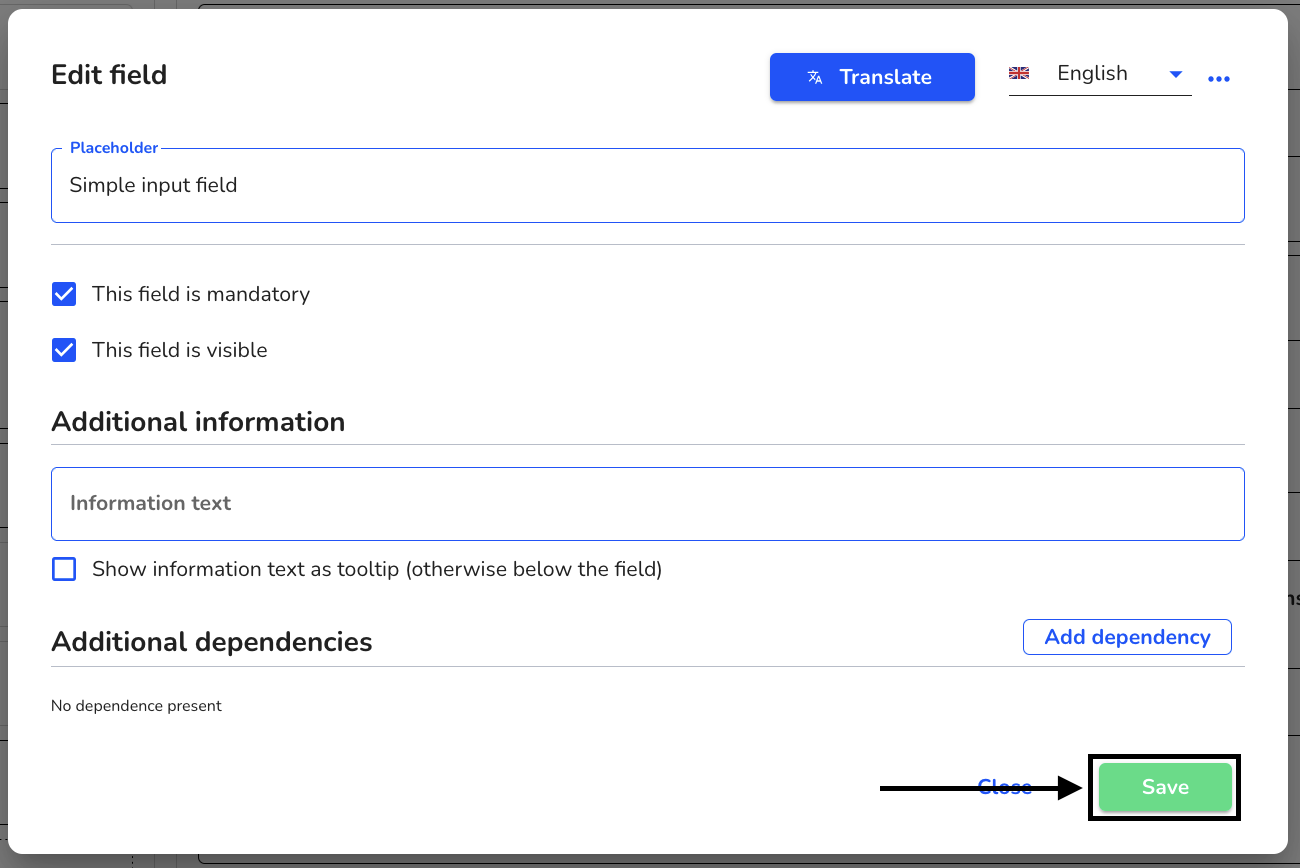
Click on the checkbox This field is mandatory to activate this function.
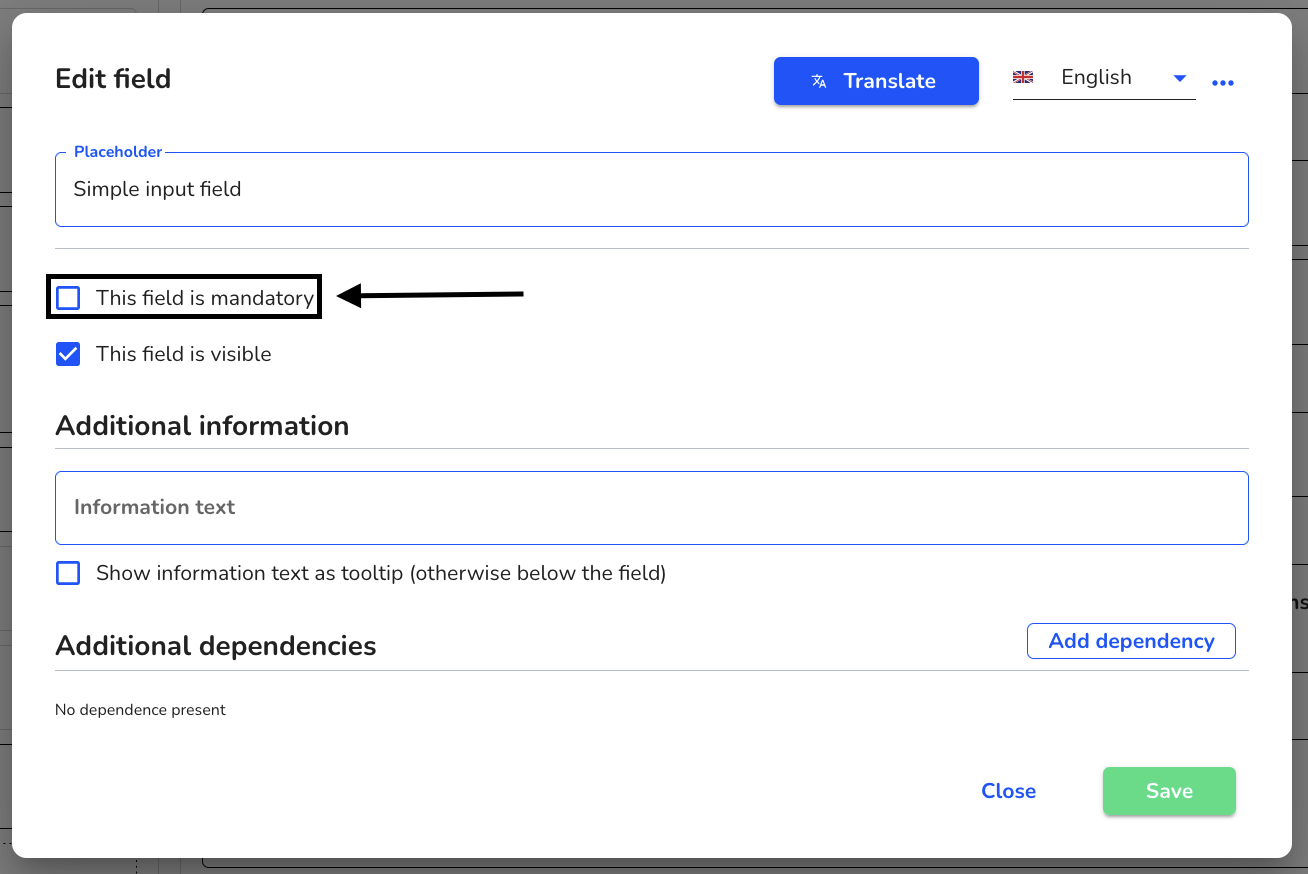
Click on Save to save the change.
Make the field visible
If a field is visible, it is always displayed in the form without dependency.
Click on the This field is visible checkbox to activate this function.
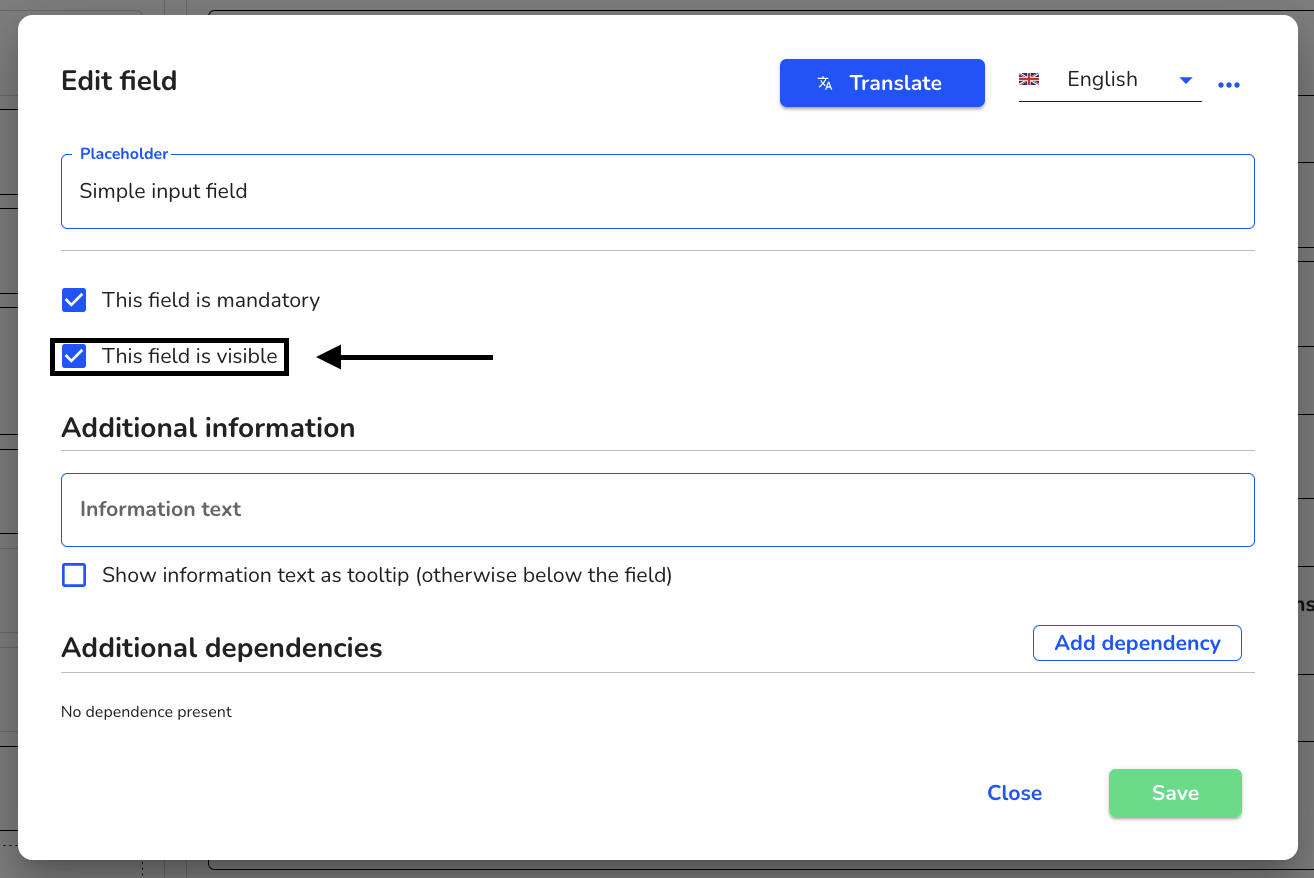
Click on Save to save the change.
Add information text
You have the option of adding an information text to add information. The information text is broadcast below the text.
Click on the Information text field to add content.
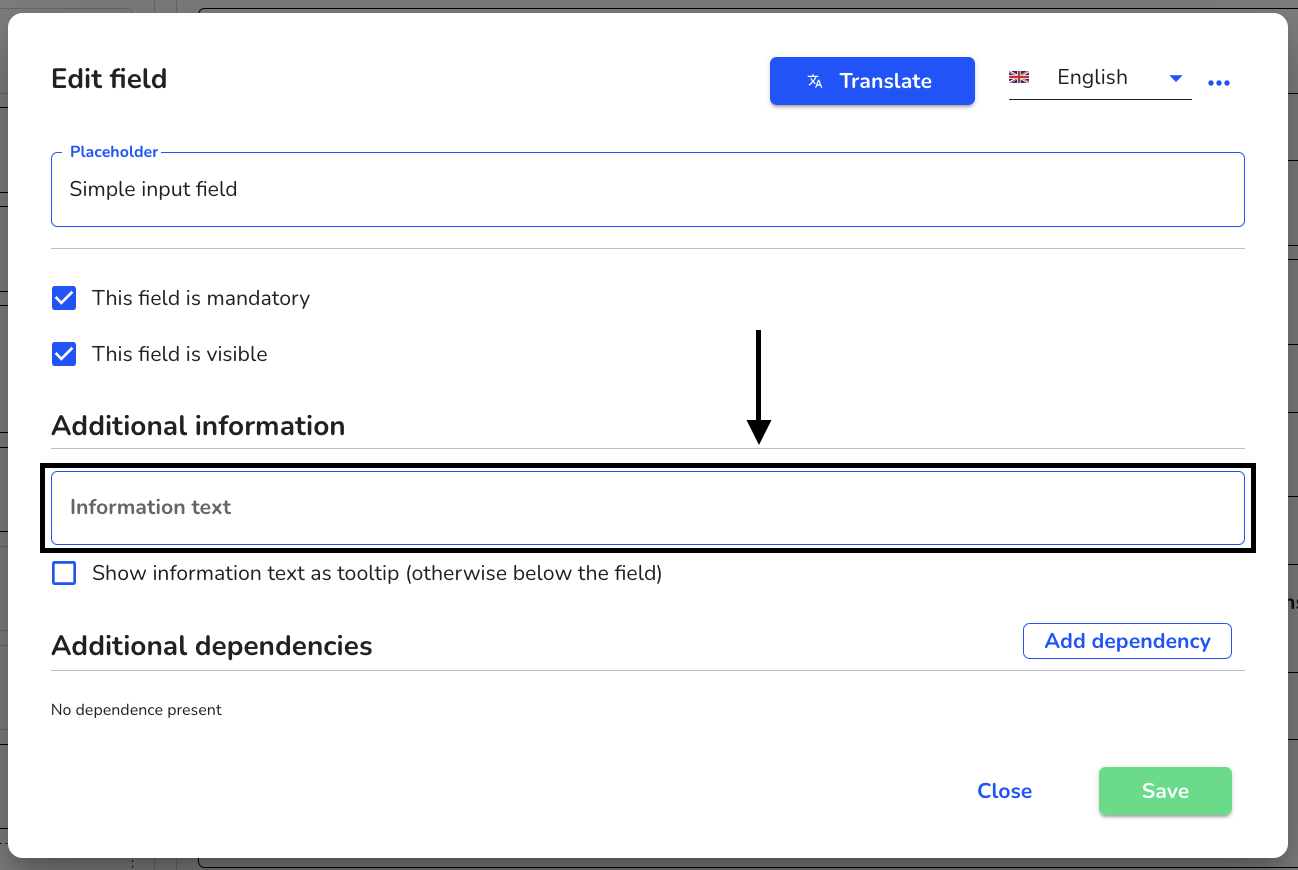
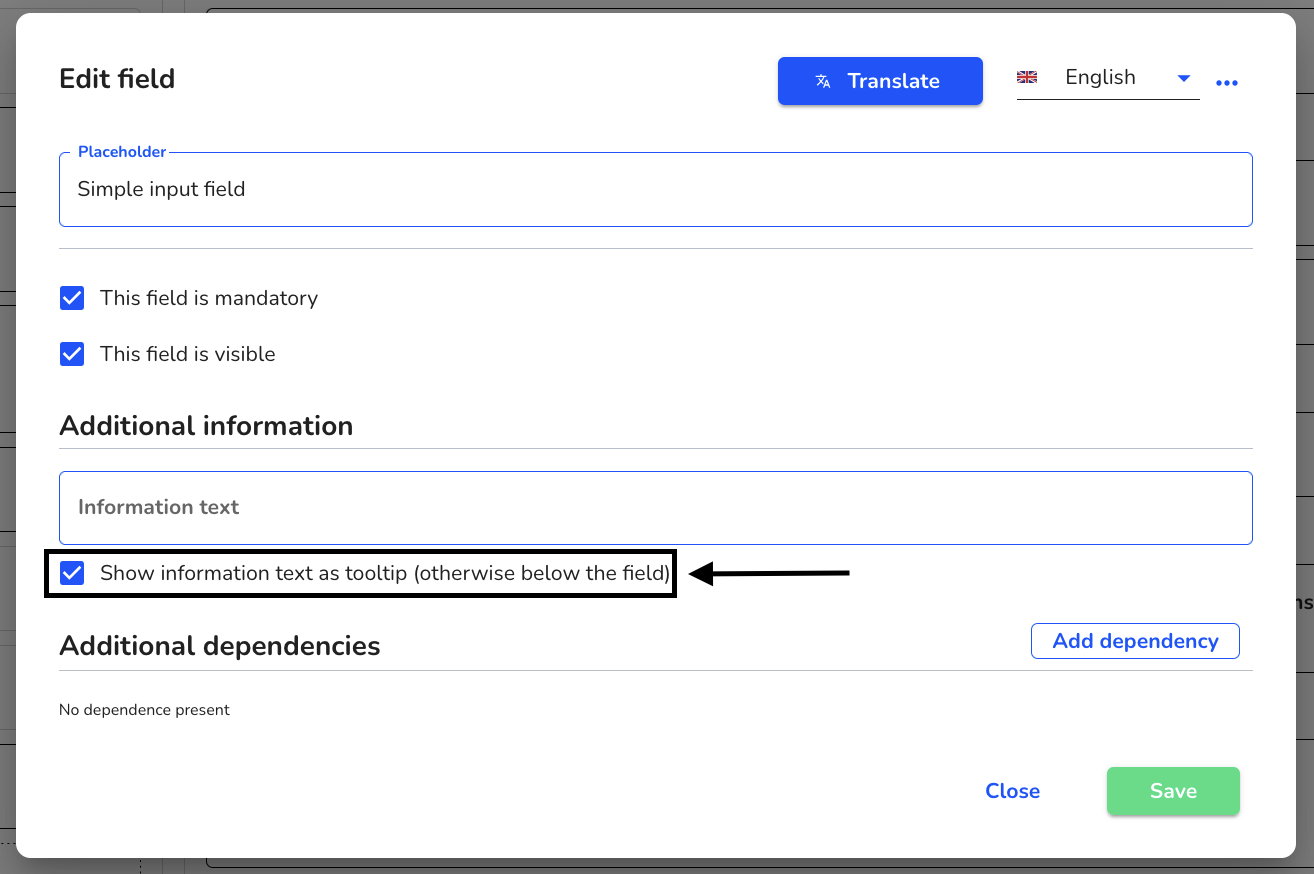
You have the option of displaying the information text as a tooltip.
To do this, click on the Show information text as tooltip checkbox (otherwise below the field) to display the information text as a tooltip.
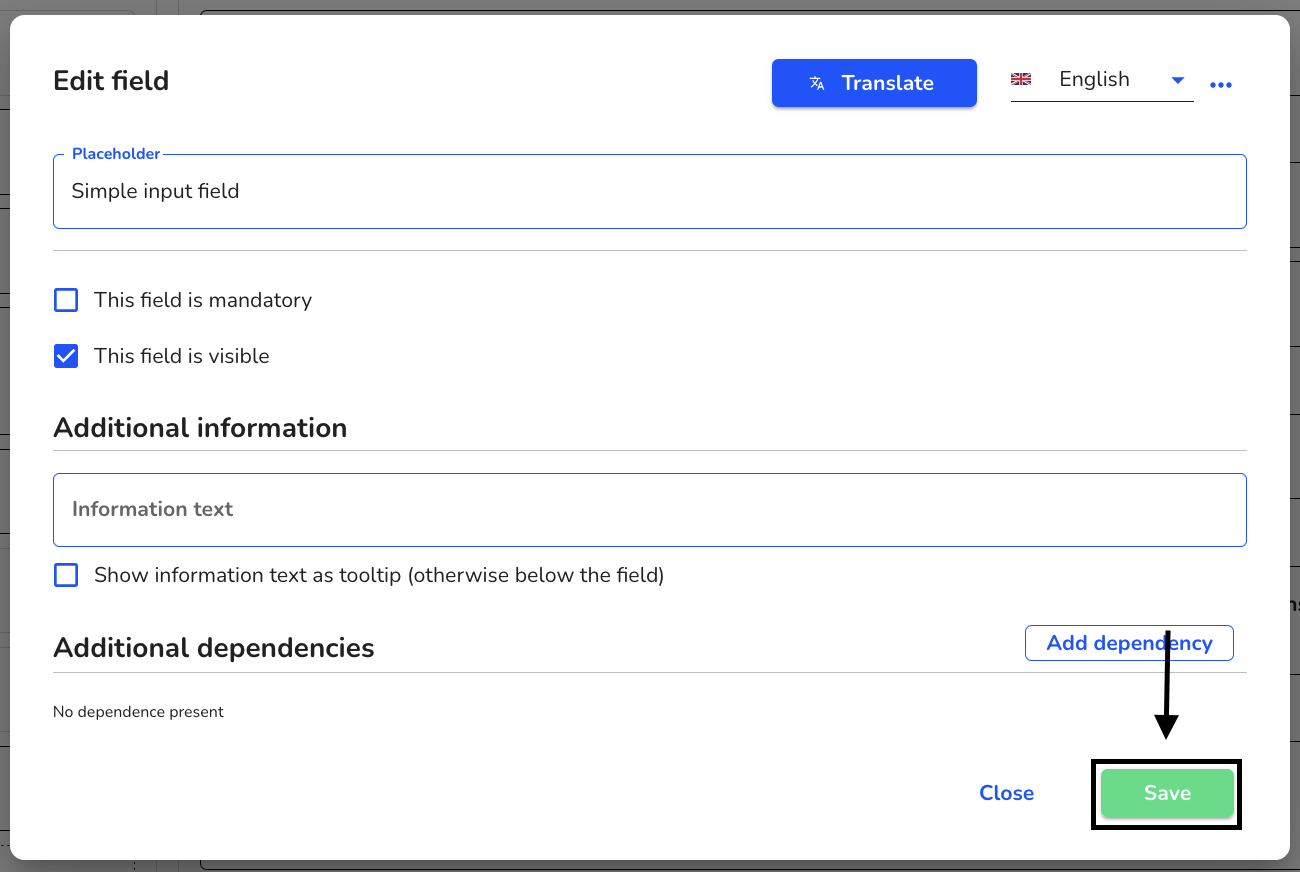
Click on Save to save the change.
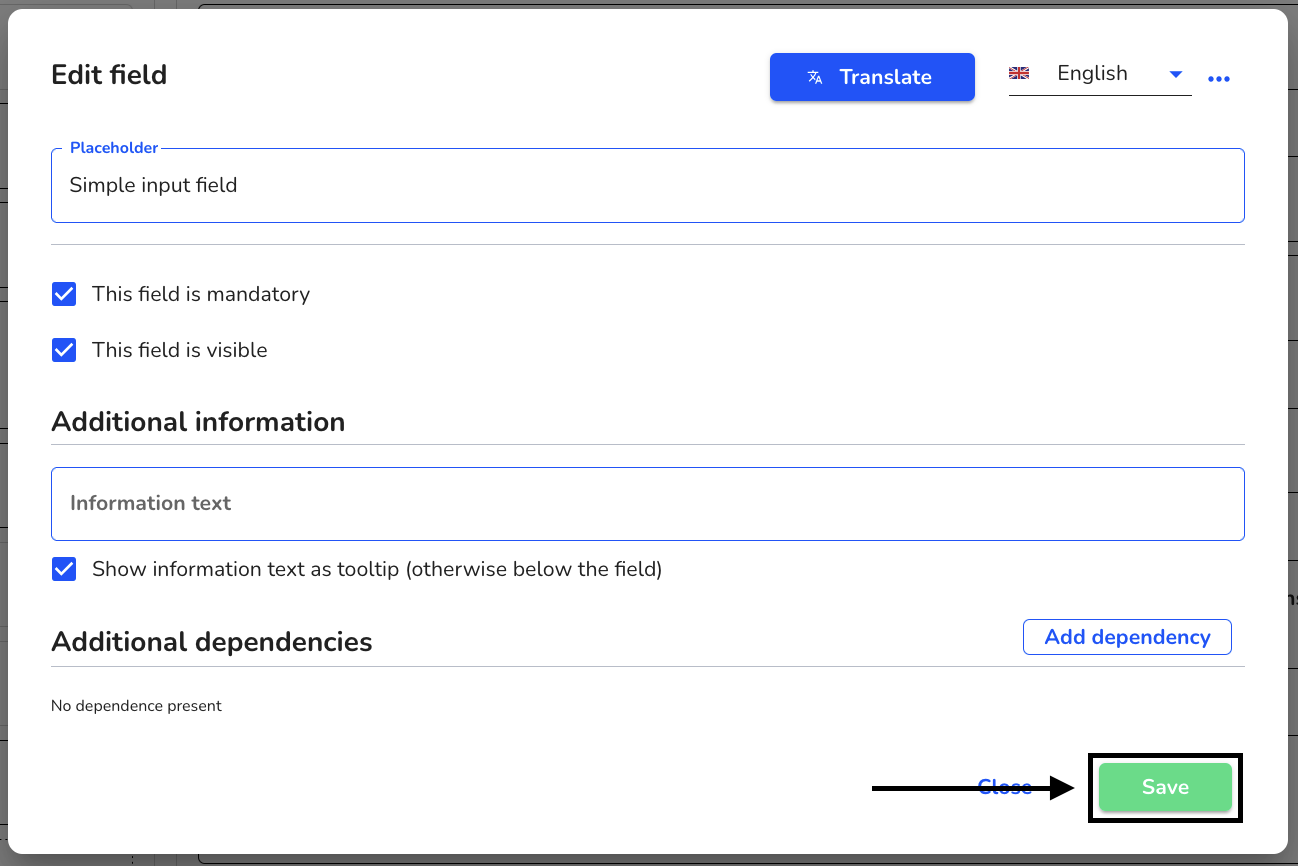
After editing the field, click on Save to apply the changes to the entire form.
Translate field
You can translate any number of fields in the Supply Chain module. Instead of manually adapting the texts in all languages, you can also use the translation function. These translations only become visible in the final form after you save the entire form after making changes.
To edit a field, click in the form administration.
Under Actions, click on the editing pencil of the form you want to edit.
Open the desired field for translation by clicking on the editing pen in the step under Actions.
Click on the blue Translate button.
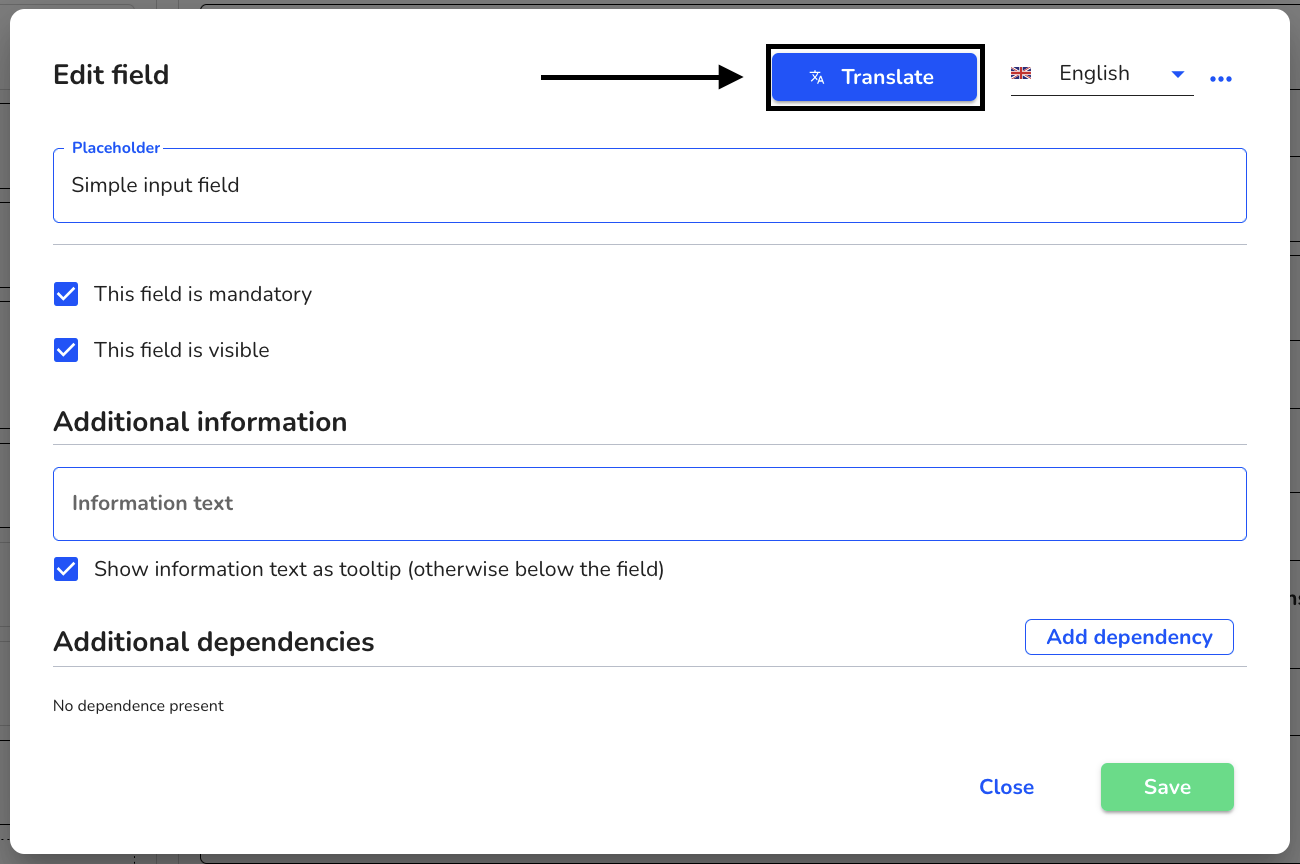
Select the languages in which the translation will be carried out by selecting the checkbox of the desired language and click on Translate now.
The translation has been carried out. Click on Save to accept the translation of the field.
After translating the field, click on Save to apply the changes to the entire form.
Delete field
You can delete any number of fields in the Supply Chain module. These adjustments only become visible in the final form after you save the entire form after making changes.
To edit a field, click in the form administration.
Under Actions, click on the editing pencil of the form you want to edit.
Delete the desired field for translation by clicking in the step under Actions from the recycle bin.
The field is then automatically removed from the form.
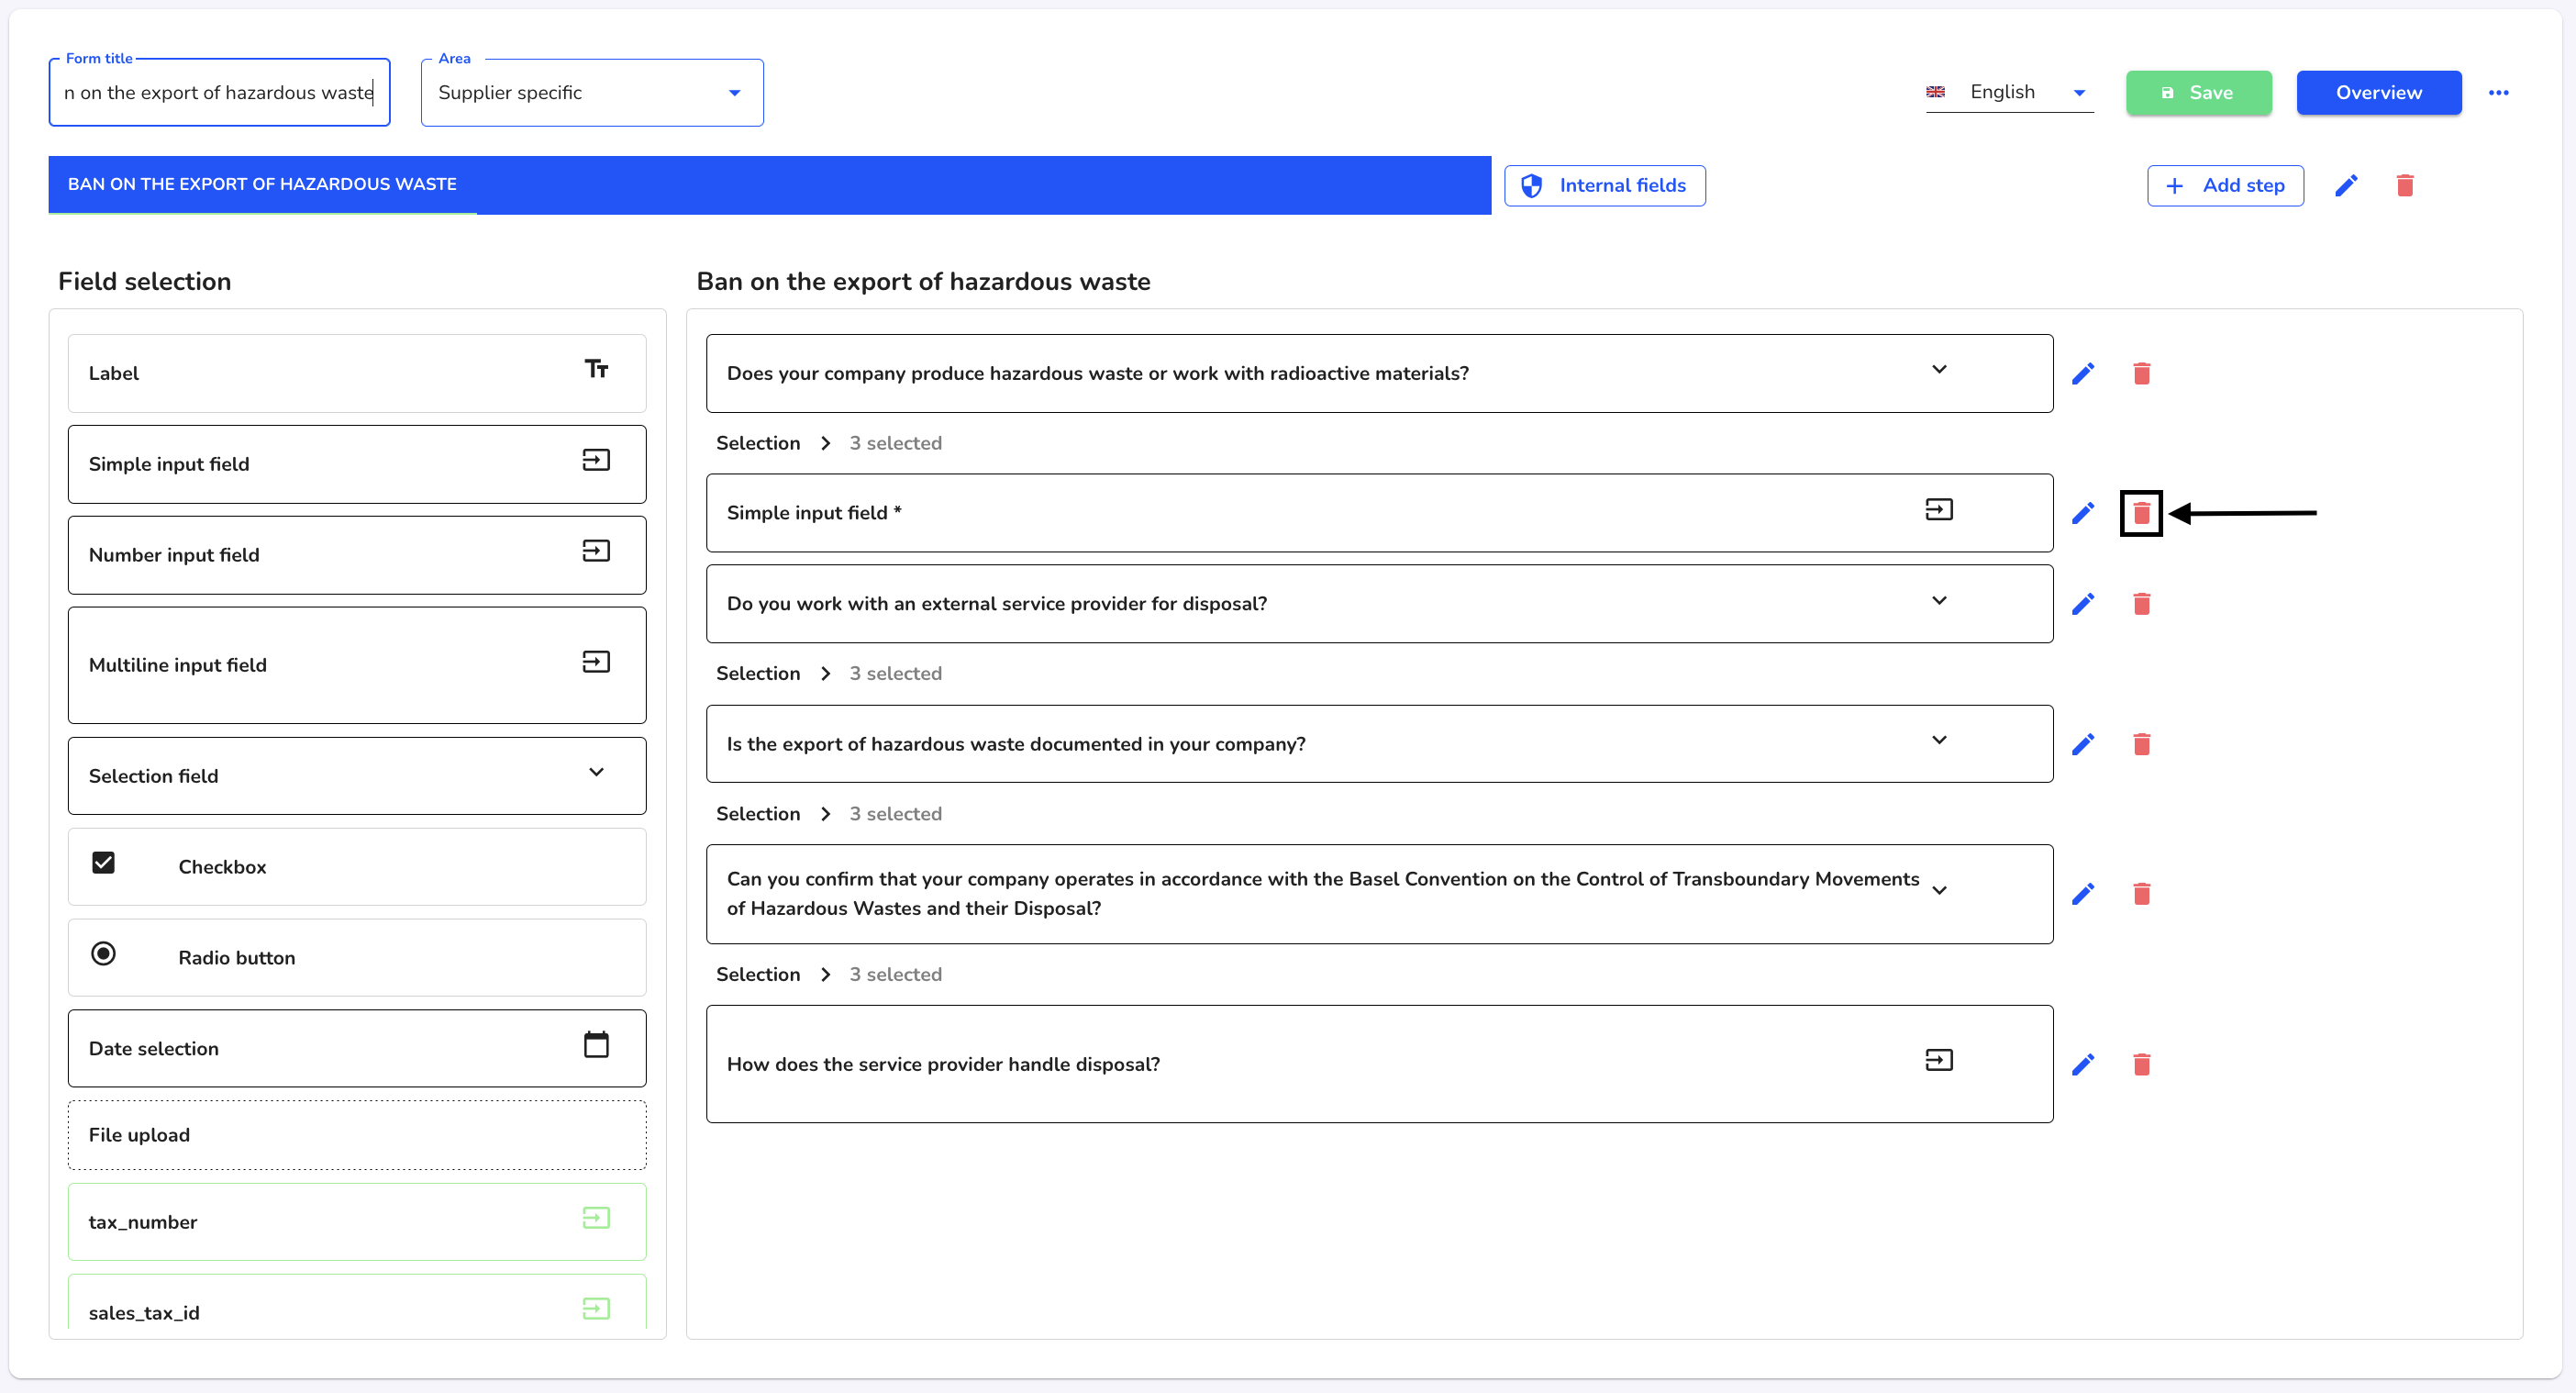
After deleting the field, click on Save to apply the changes to the entire form.
Dependencies
Dependencies are used in the Supply Chain module to link several steps in a form and create dependencies between them. These dependencies are carried out automatically when a form is used. Dependencies can be applied to steps and fields. In this chapter, we will explain how to create dependencies for steps and fields, as well as how to remove them.
Dependencies can be linked to the value of fields and activated according to the selection made by the person in question. Dependencies can be created for all other selectable fields.
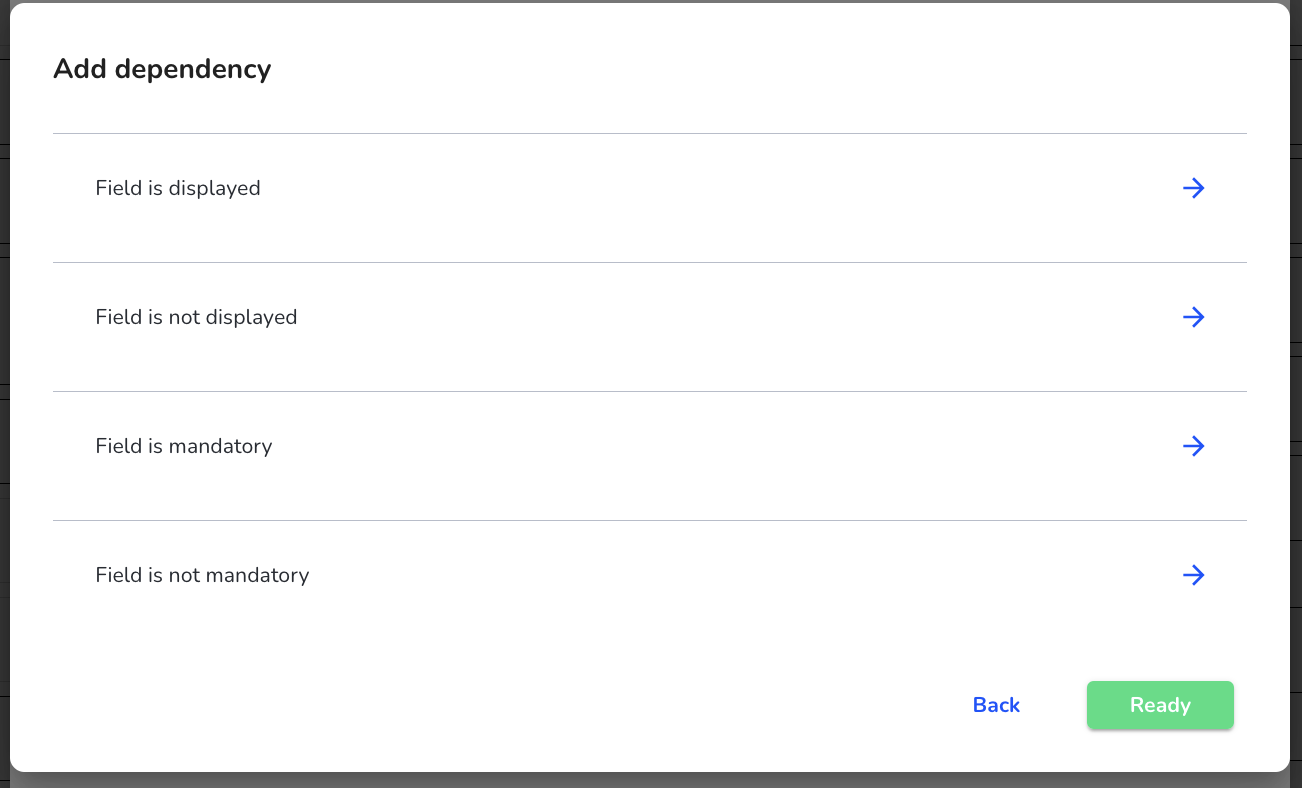
There are various ways to perform actions with dependencies. A field can be displayed or hidden in the form thanks to a dependency or not displayed and the field made mandatory.
Create dependencies - steps
Dependencies in steps allows you to add a dependency to another field for each desired stepin your form.
To add a dependency for a step in your form, click on the form administration.
Under Actions, click on the editing pencil of the form you want to edit.
Select the step to which you want to add a dependency.
Click on the editing step of the step to open it.
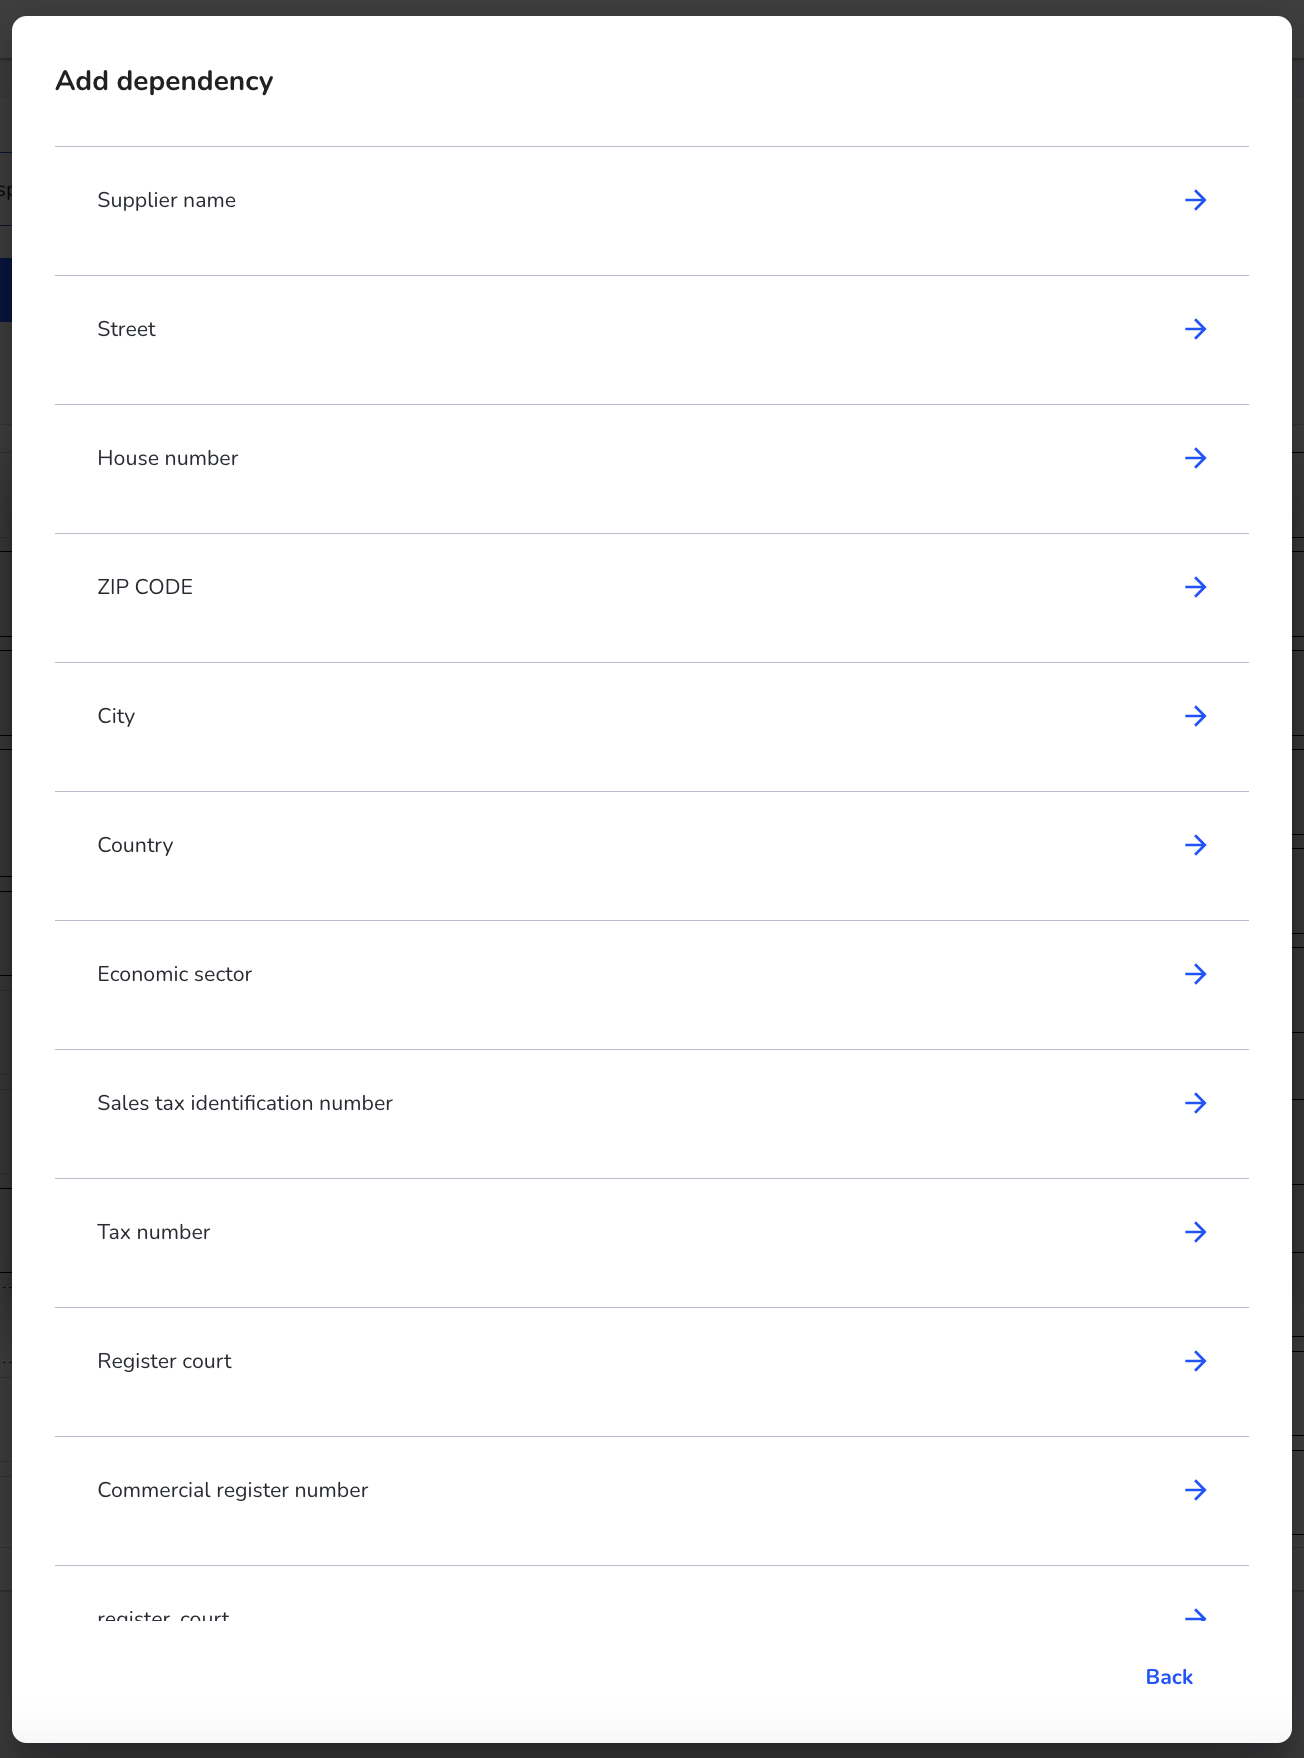
Click on Add dependency.
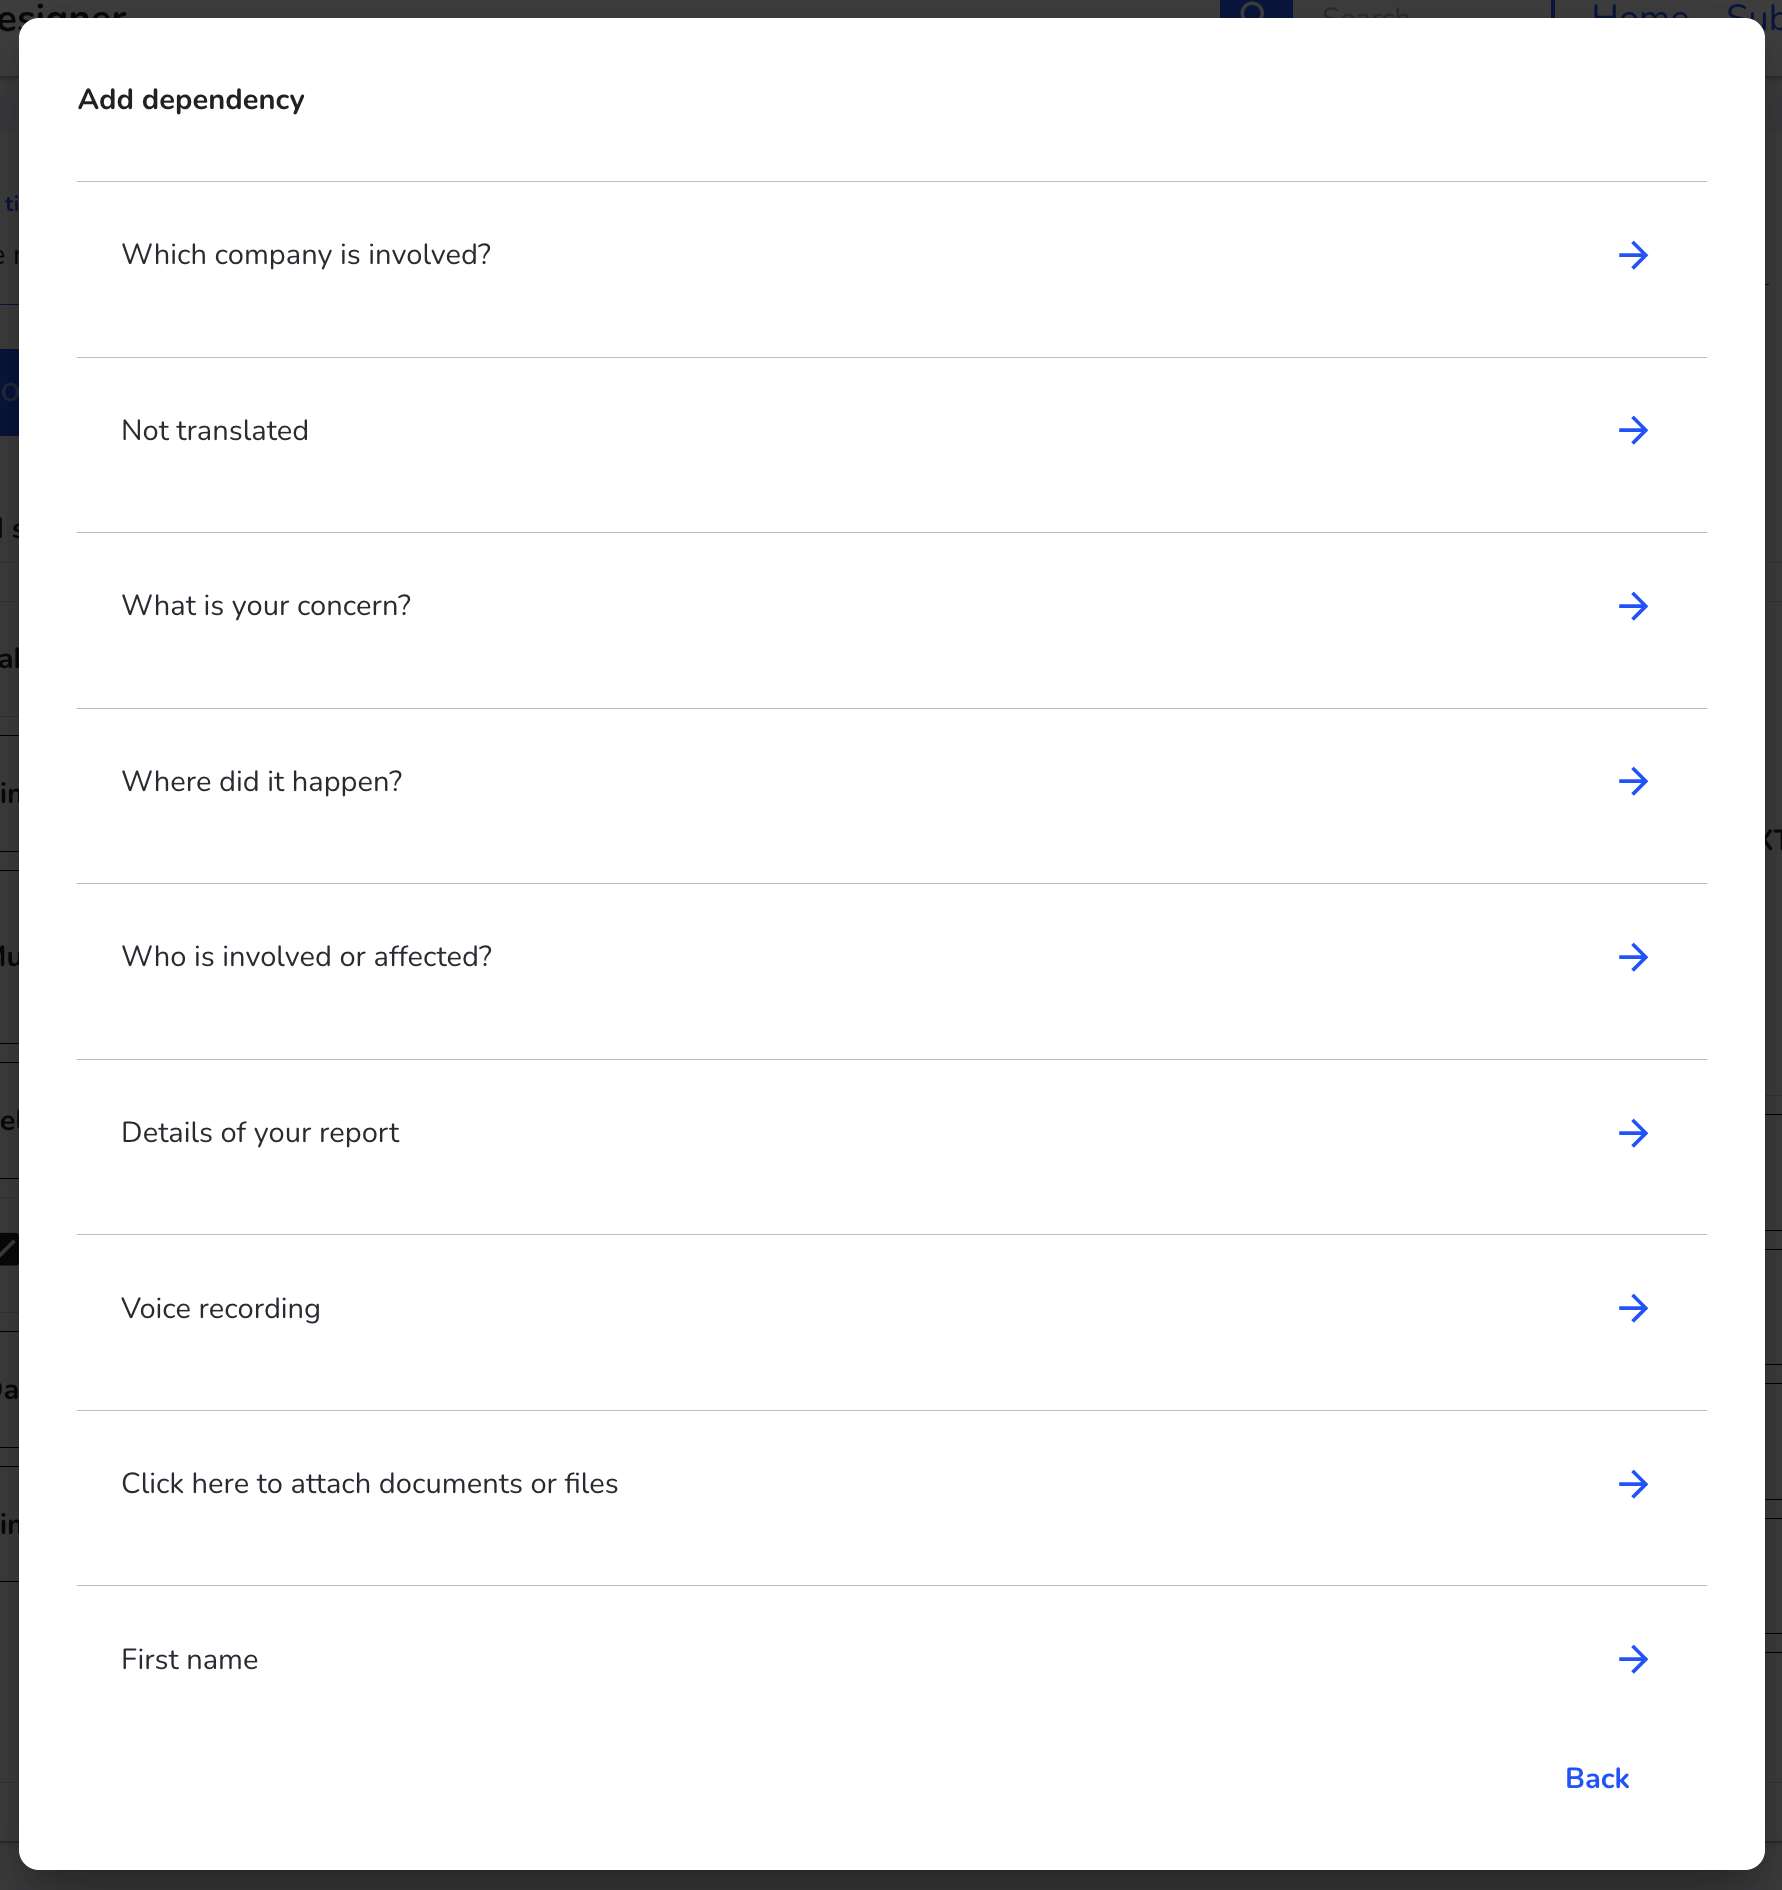
Select the field to which a dependency is to be added.
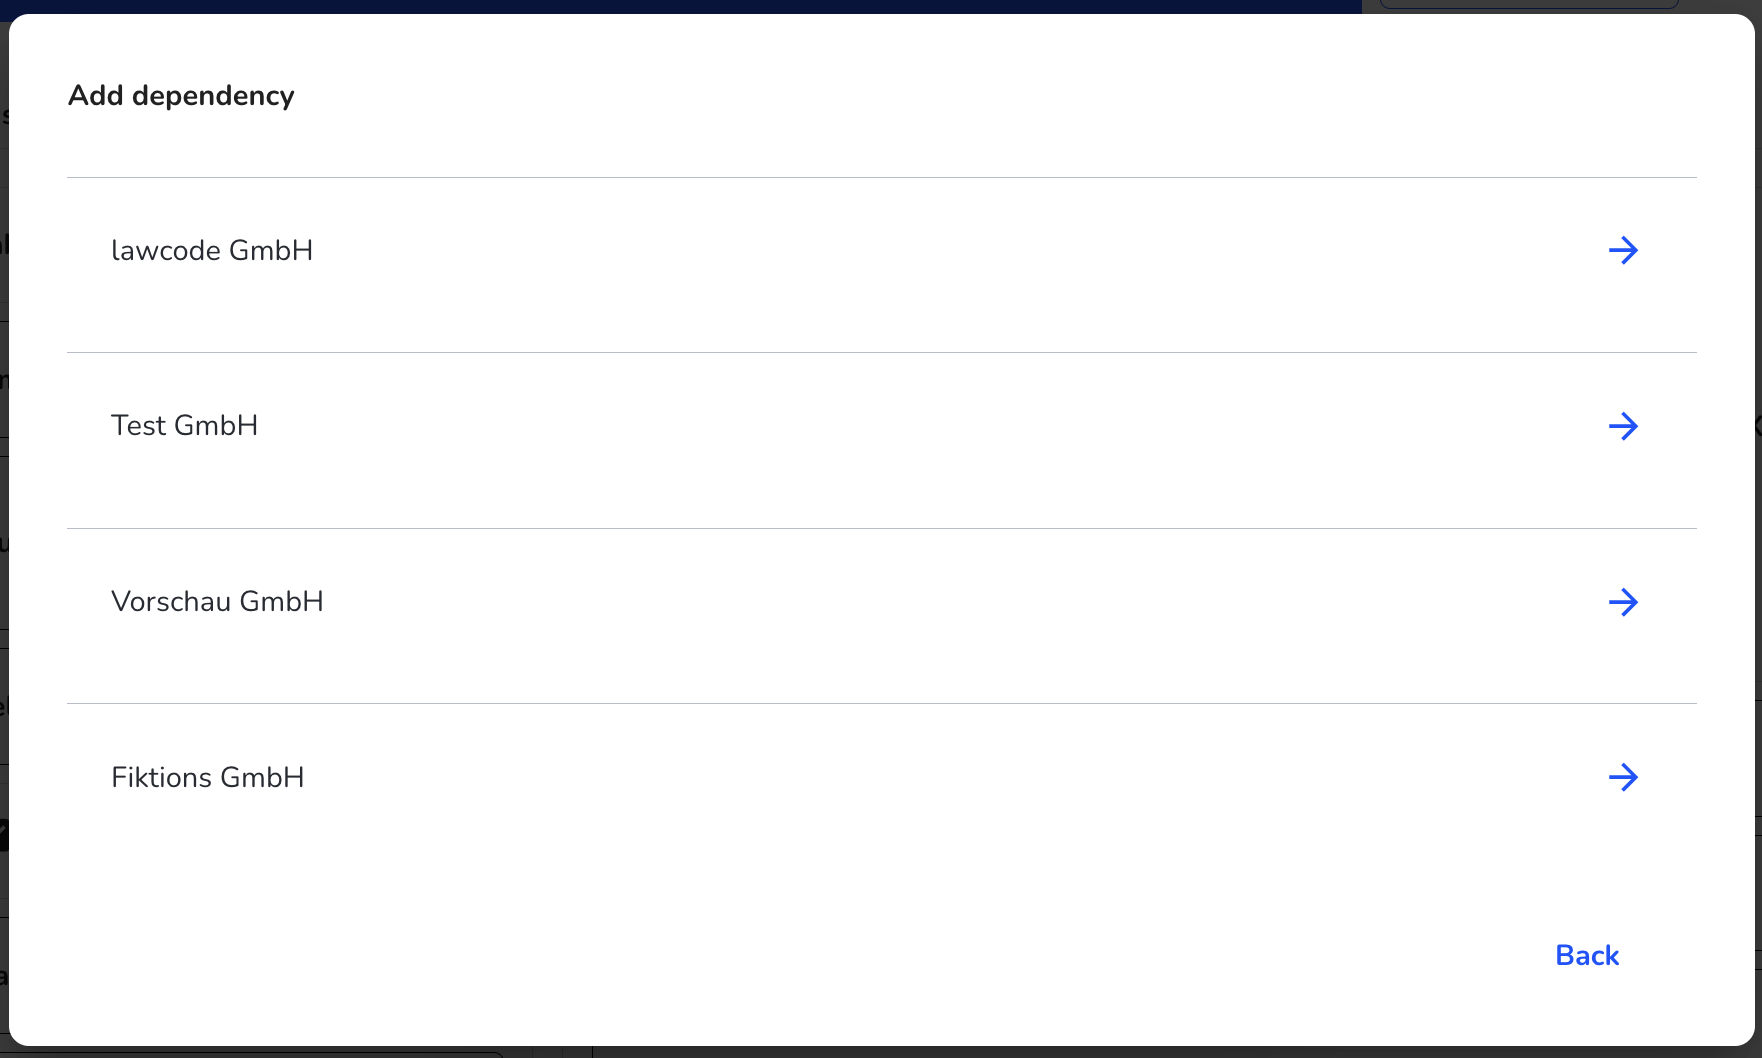
Select the value that the dependency should have.
Select the action to be performed by the dependency if this field is selected.
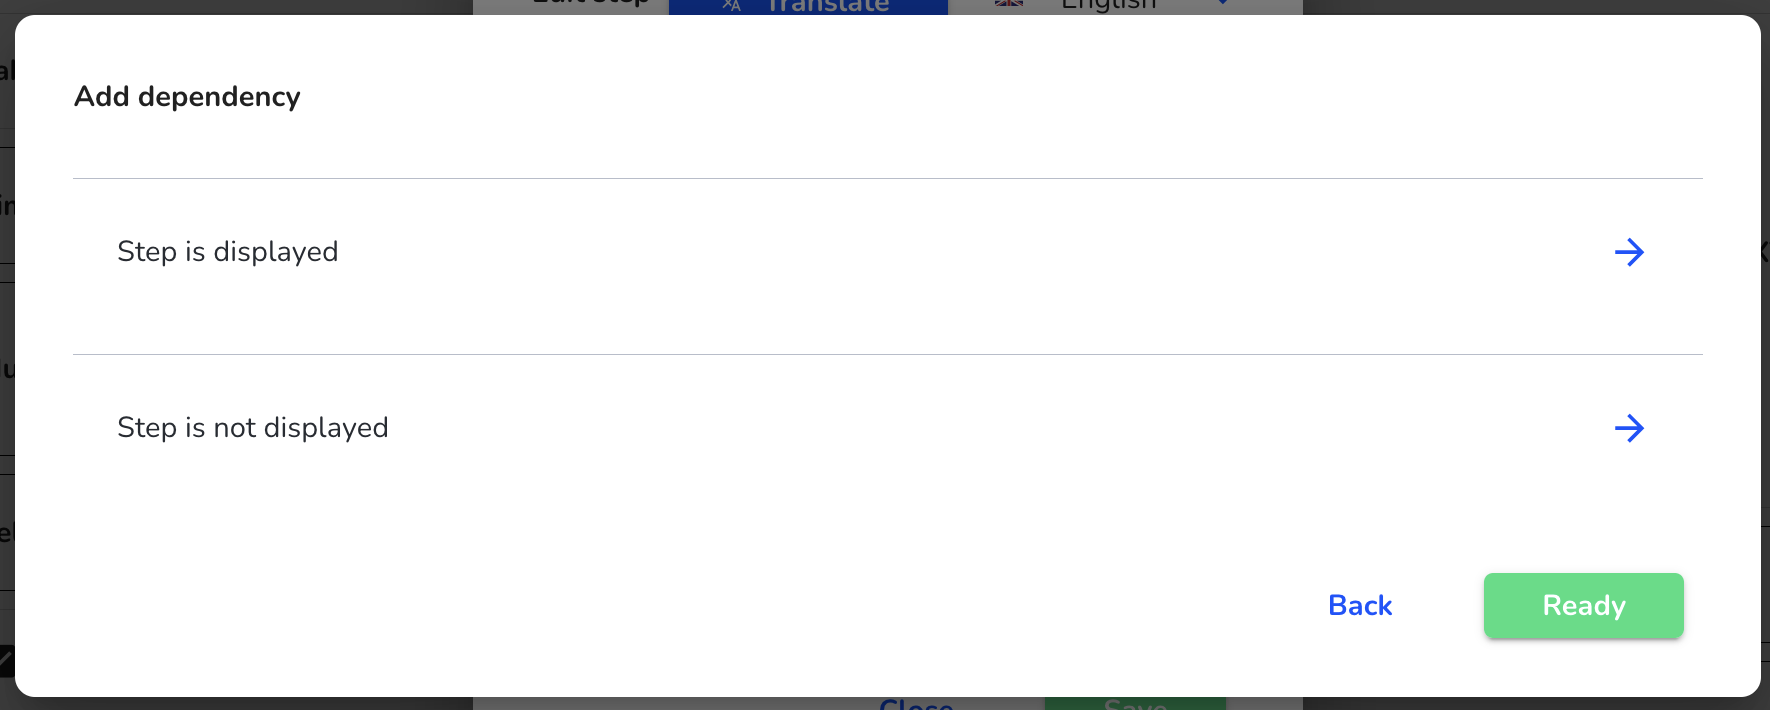
The dependency has now been added. The step is now only displayed if the dependency is fulfilled. Infinite dependencies can be added in one step.
Click on Save to save the change in the step.
A new symbol now appears next to the step. This indicates that there is a dependency.
Click on Save to apply the changes to the entire form.

Delete dependencies - steps
Dependencies in steps allows you to add a dependency to another field for each desired step in your form.
To remove a dependency in one step in your form, click on the form administration.
Under Actions, click on the editing pencil of the form you want to edit.
Select the step for which you want to remove a dependency. Steps with a dependency are marked with a symbol.
Click on the editing pencil to open the step.
Click on the trash can to remove the dependency.
The dependency has now been removed. Click Save to save the change in the step.
Click on Save to apply the changes to the entire form.
Create dependencies - Fields
Dependencies in fields allows you to add a dependency to another field to any desired field in your form.
To add a dependency for a field in your form, click on the form administration.
Under Actions, click on the editing pencil of the form you want to edit.
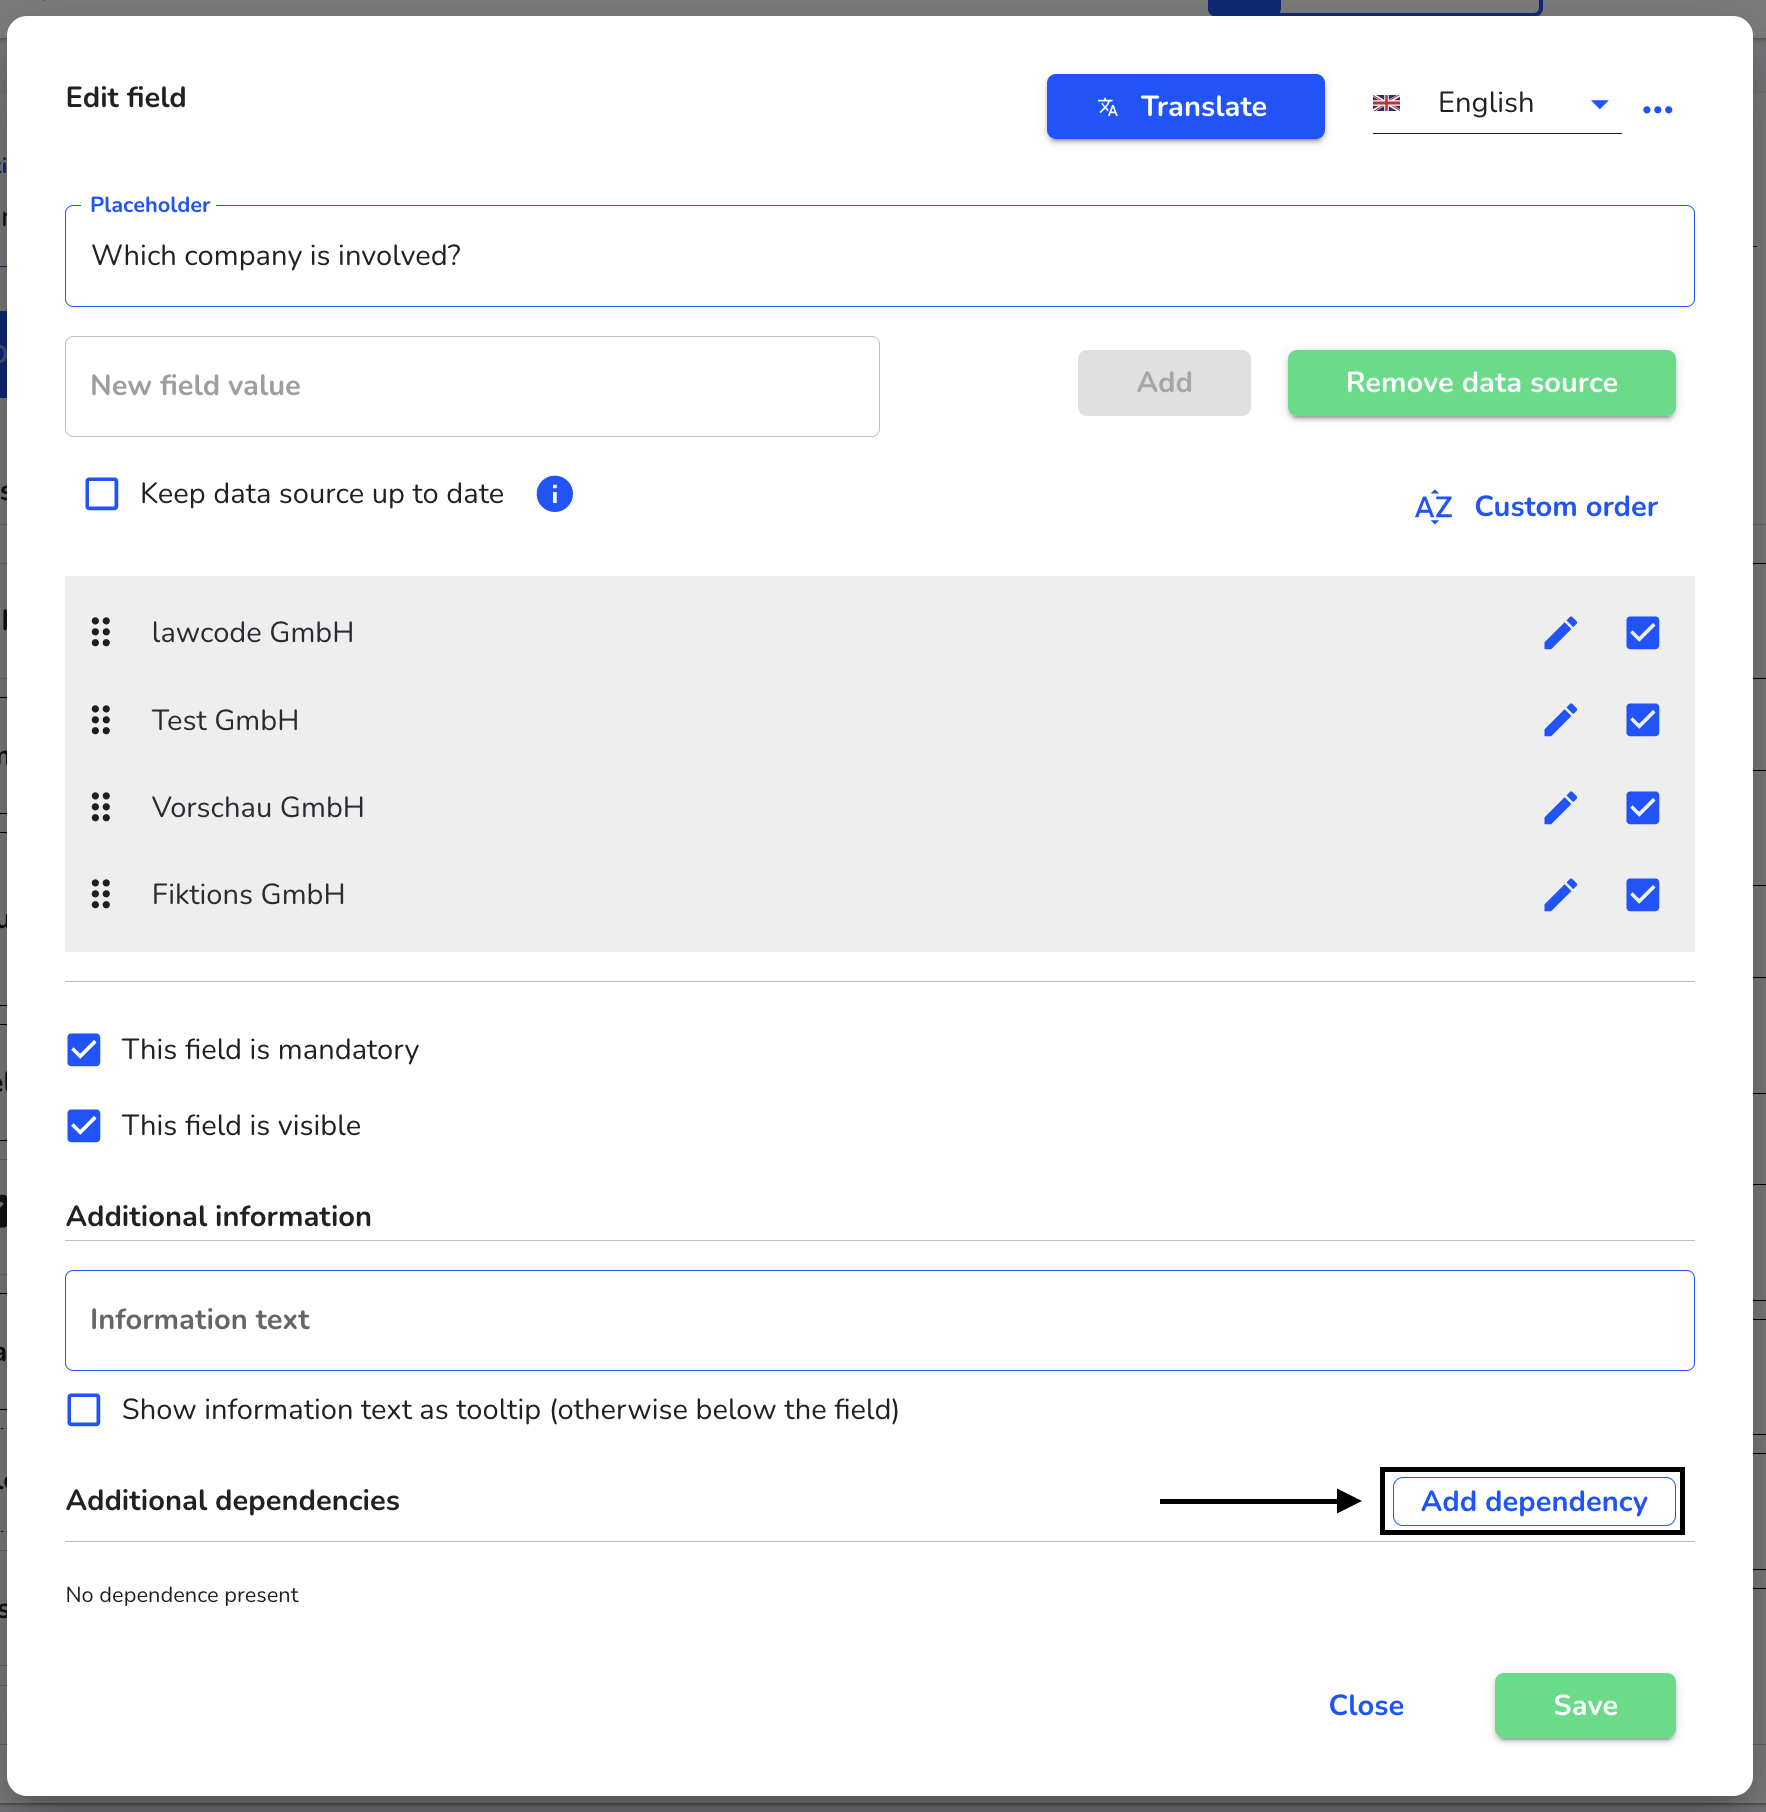
Select the field to which you want to add a dependency. To do this, click on the editing pencil for the field.
Click on Add dependency.
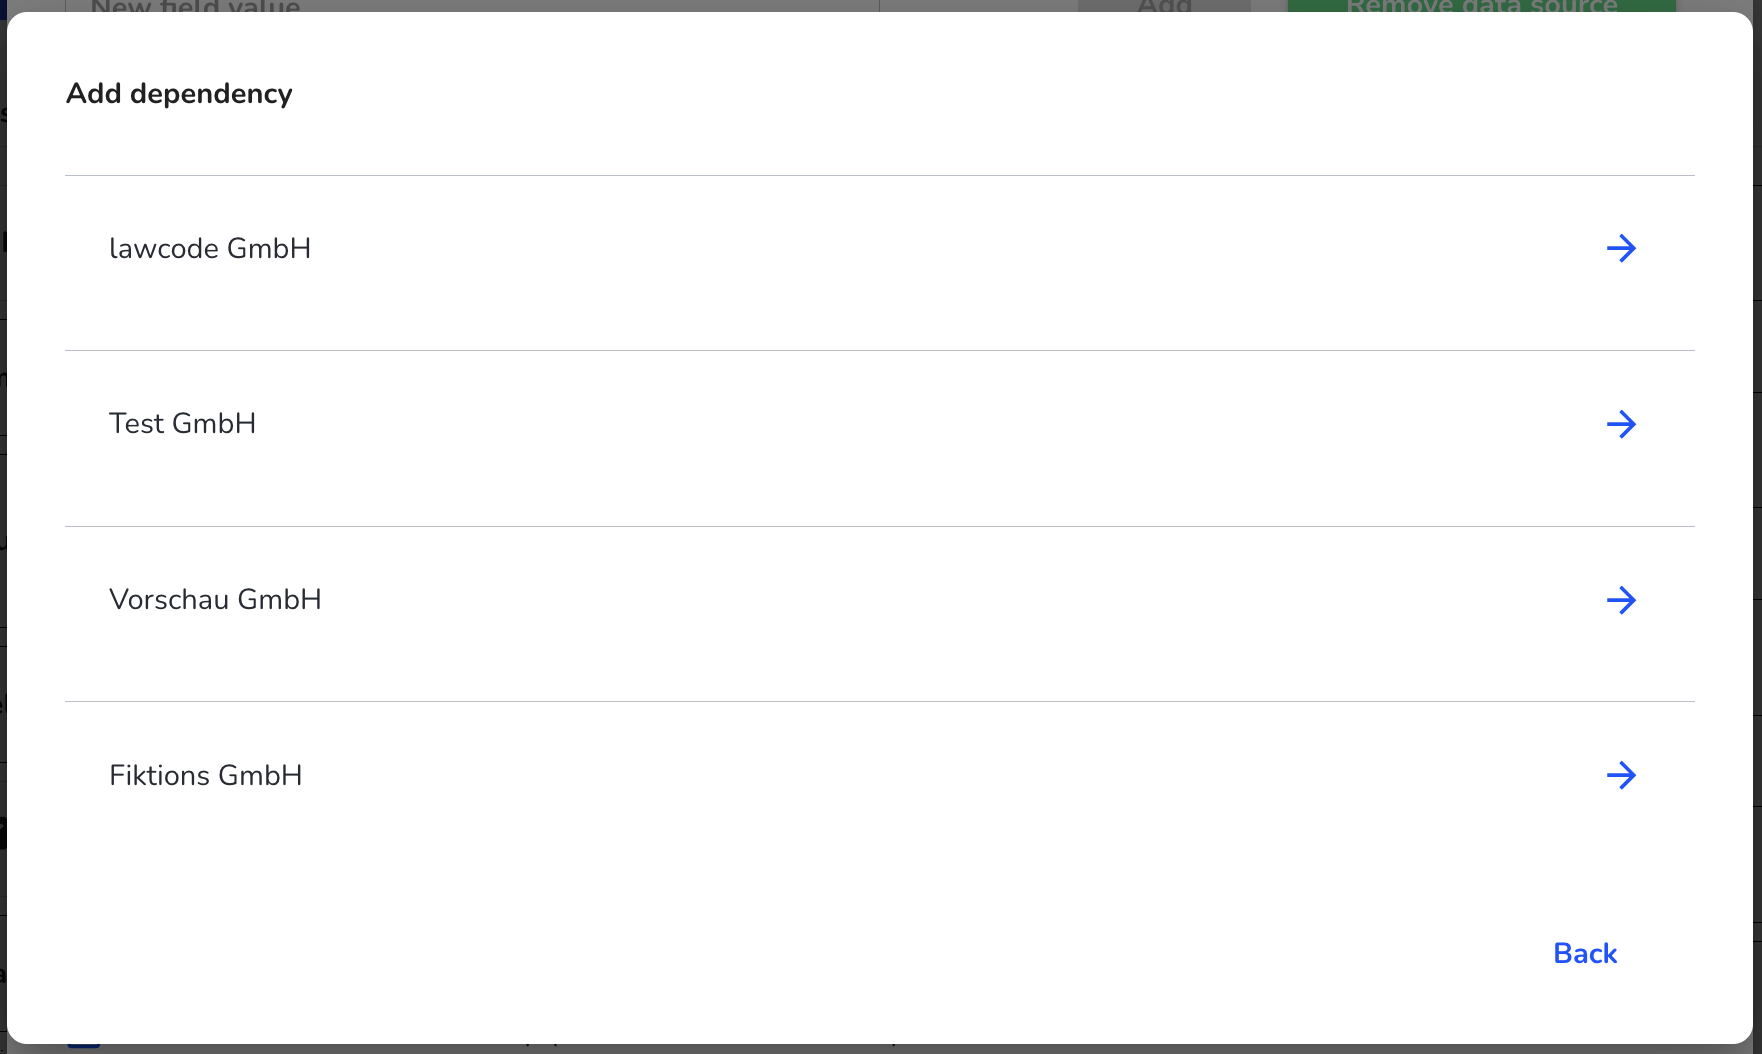
Select the field to which a dependency is to be added.
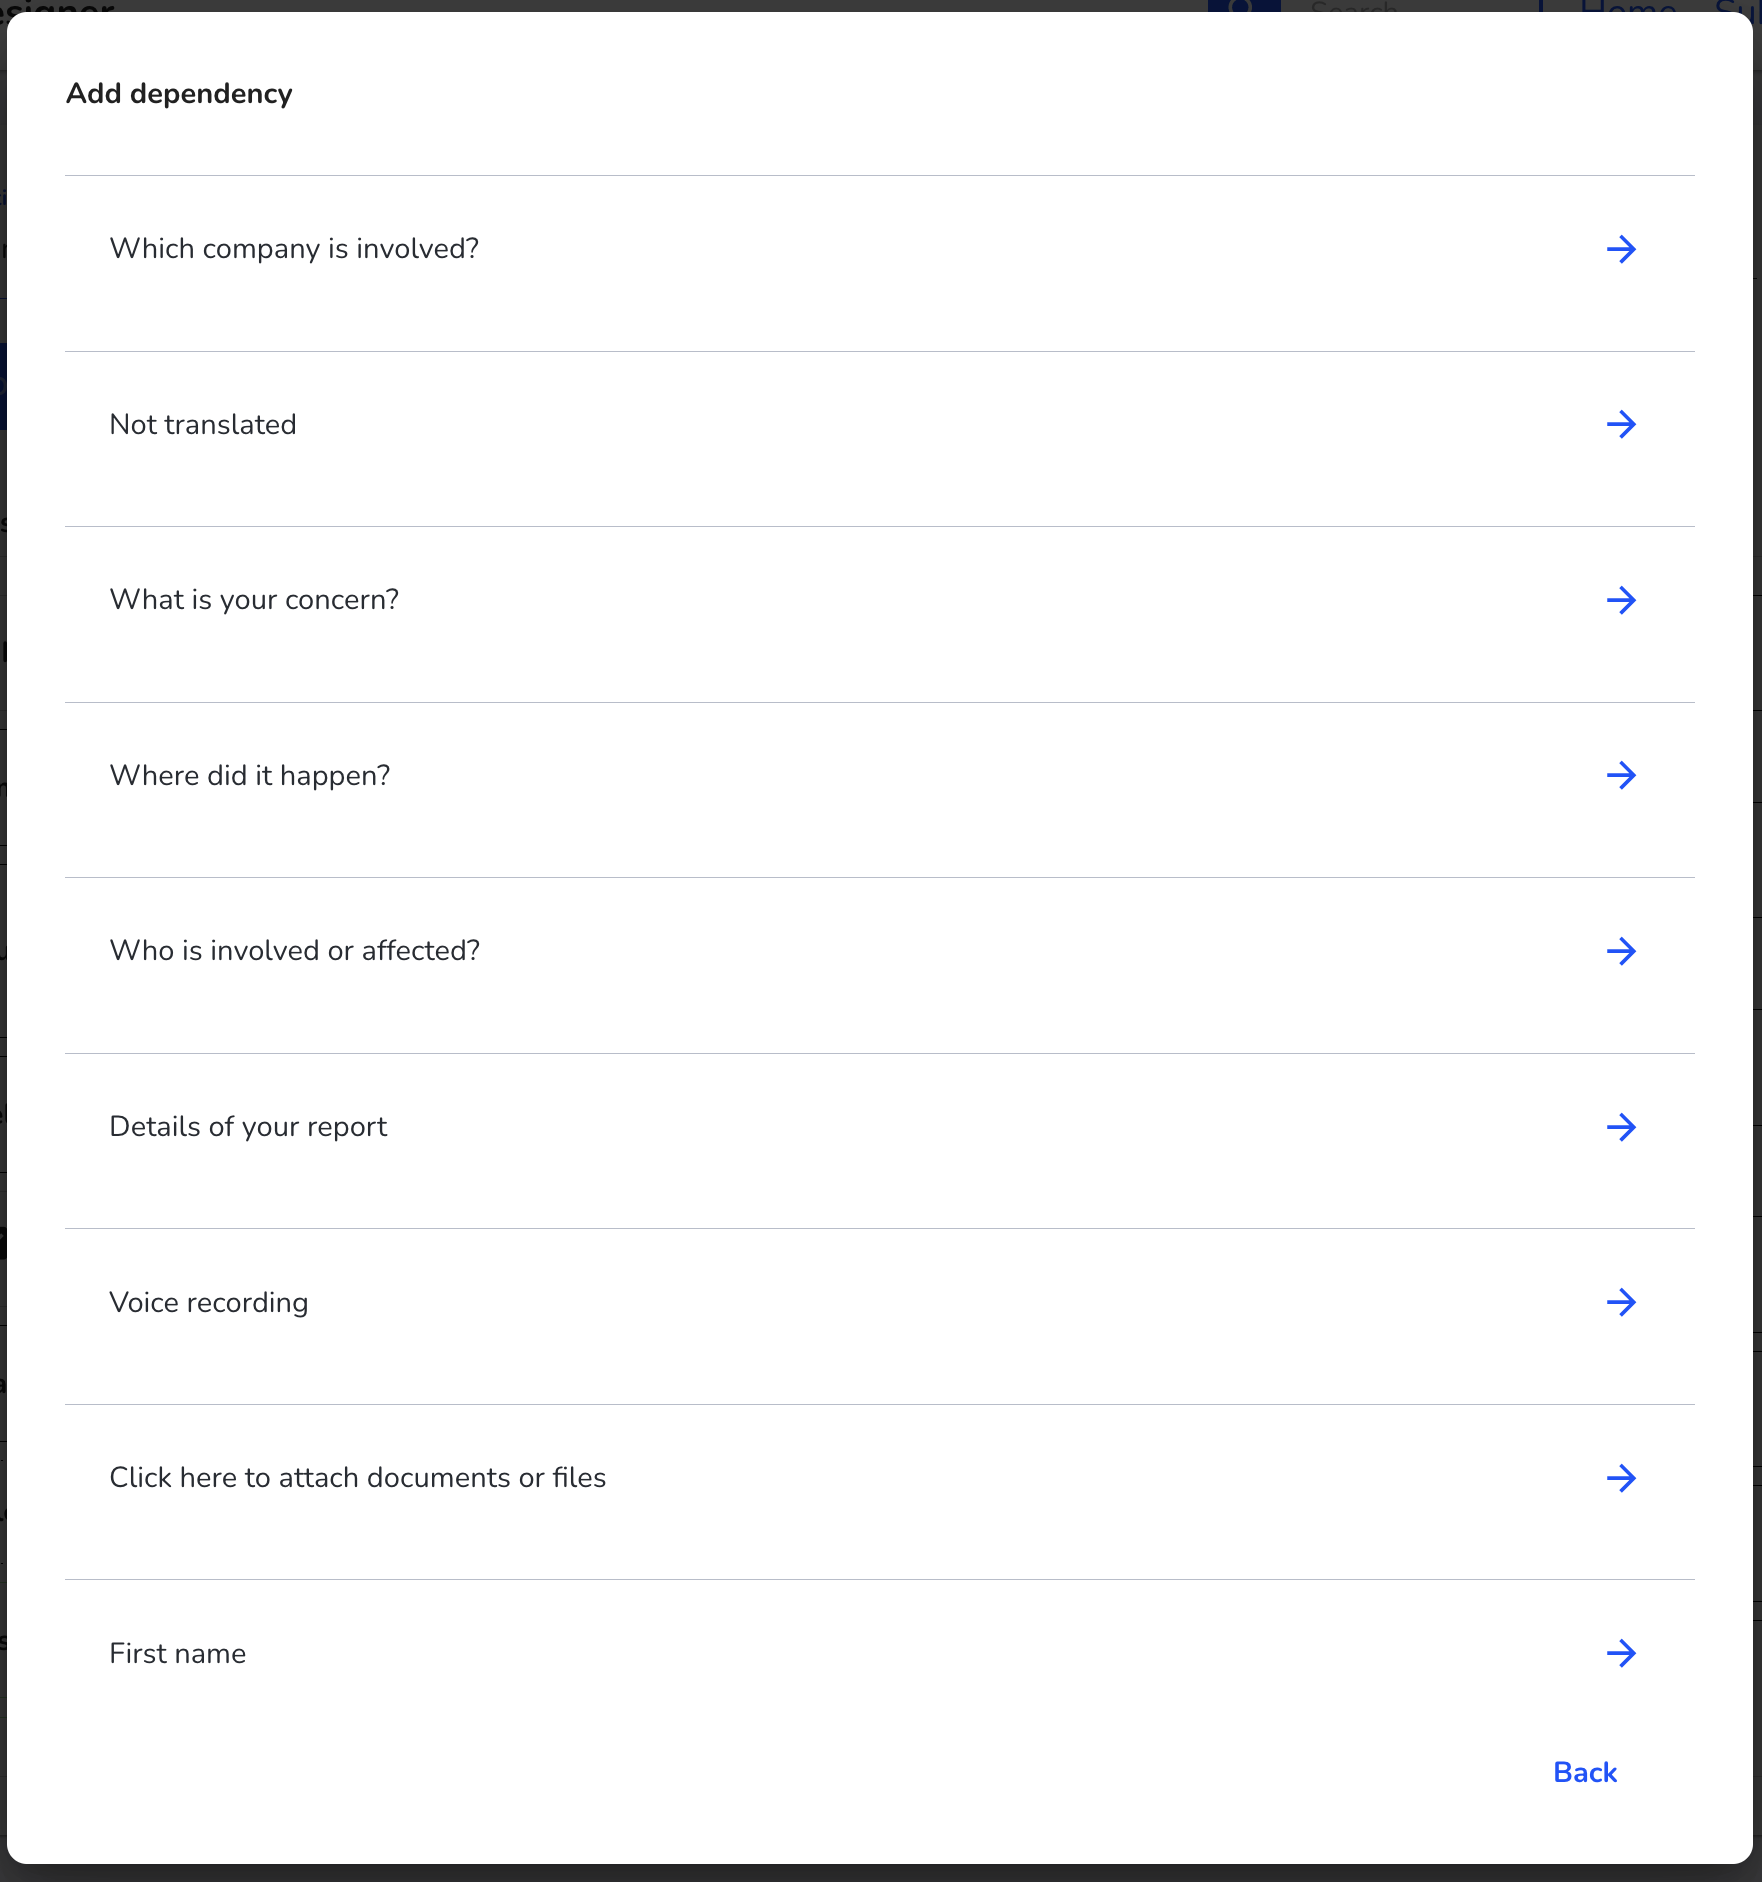
Select the value that the dependency should have.
Select the action to be performed by the dependency if this field is selected.
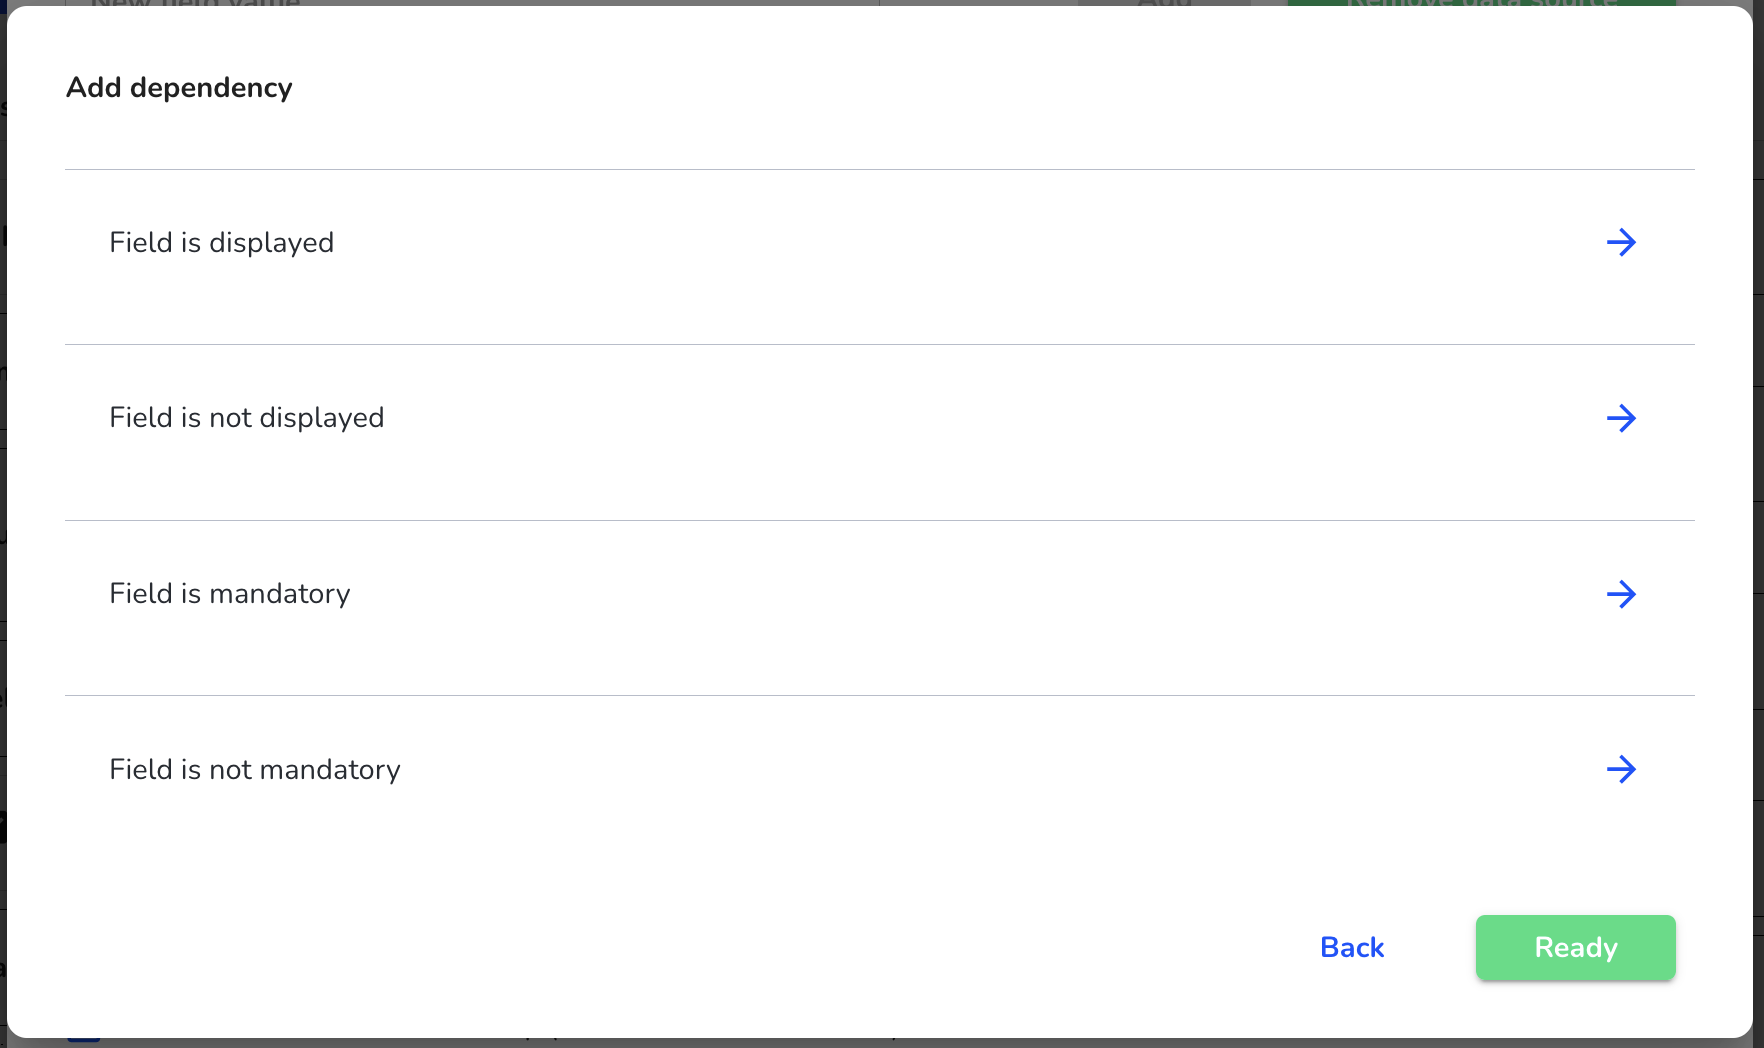
The dependency has now been added. The field is now only displayed if the dependency is fulfilled. Infinite dependencies can be added to a field.
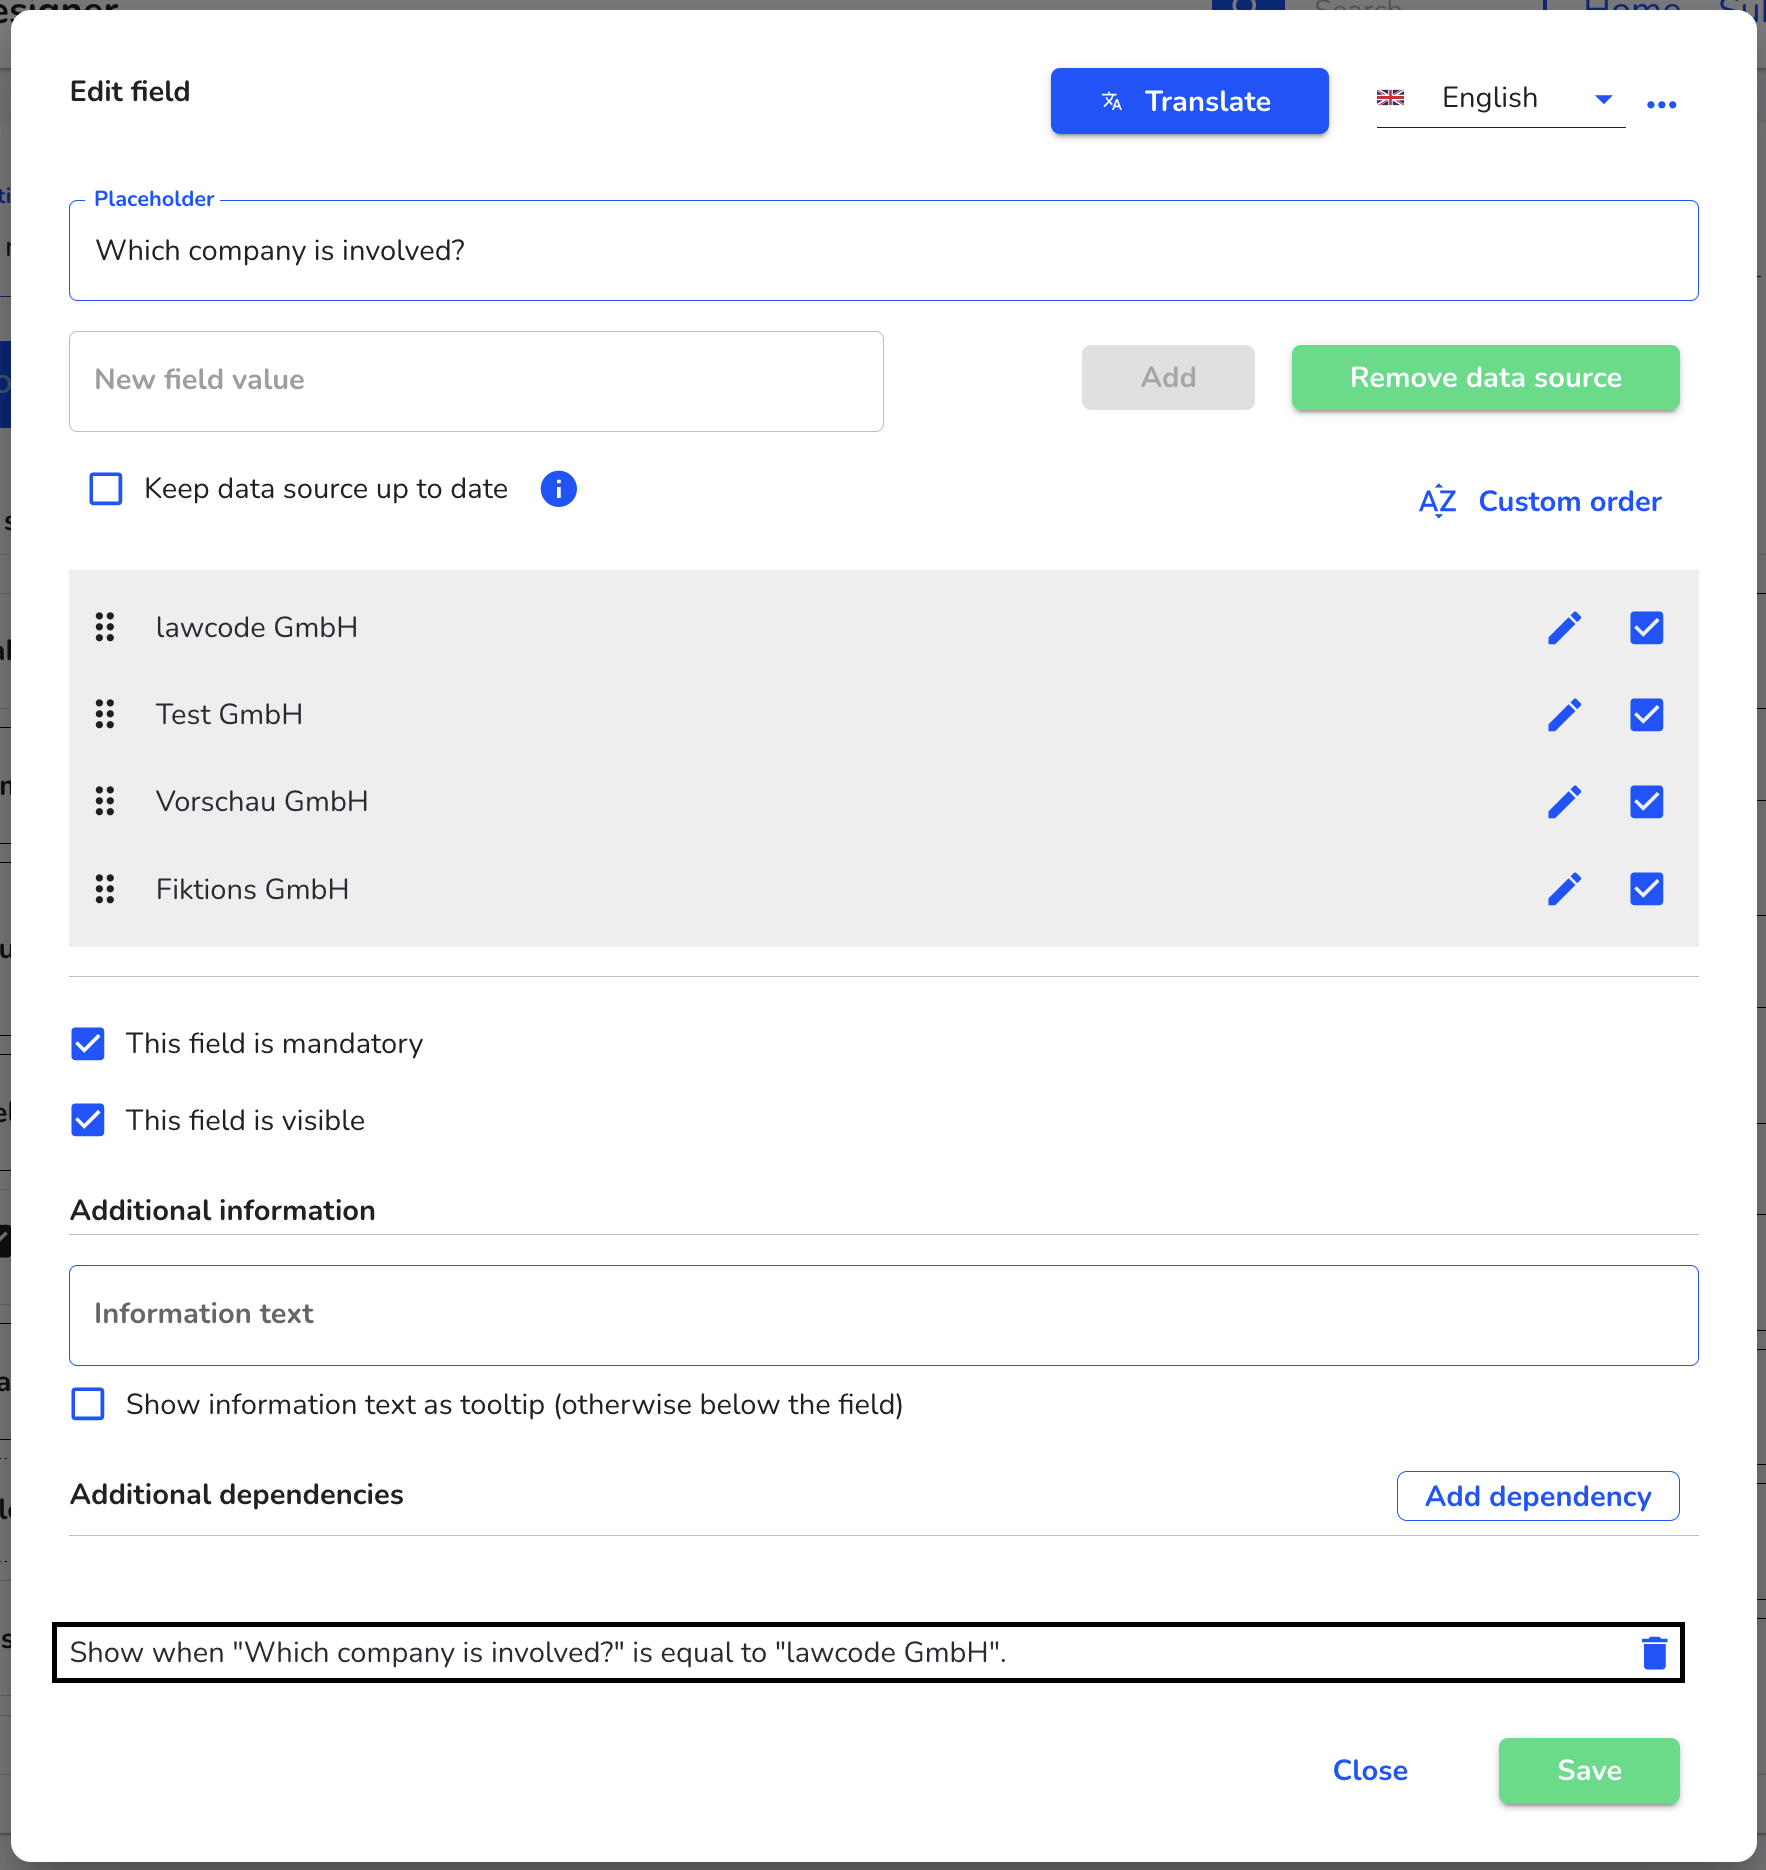
Click on Save to save the change in the field.
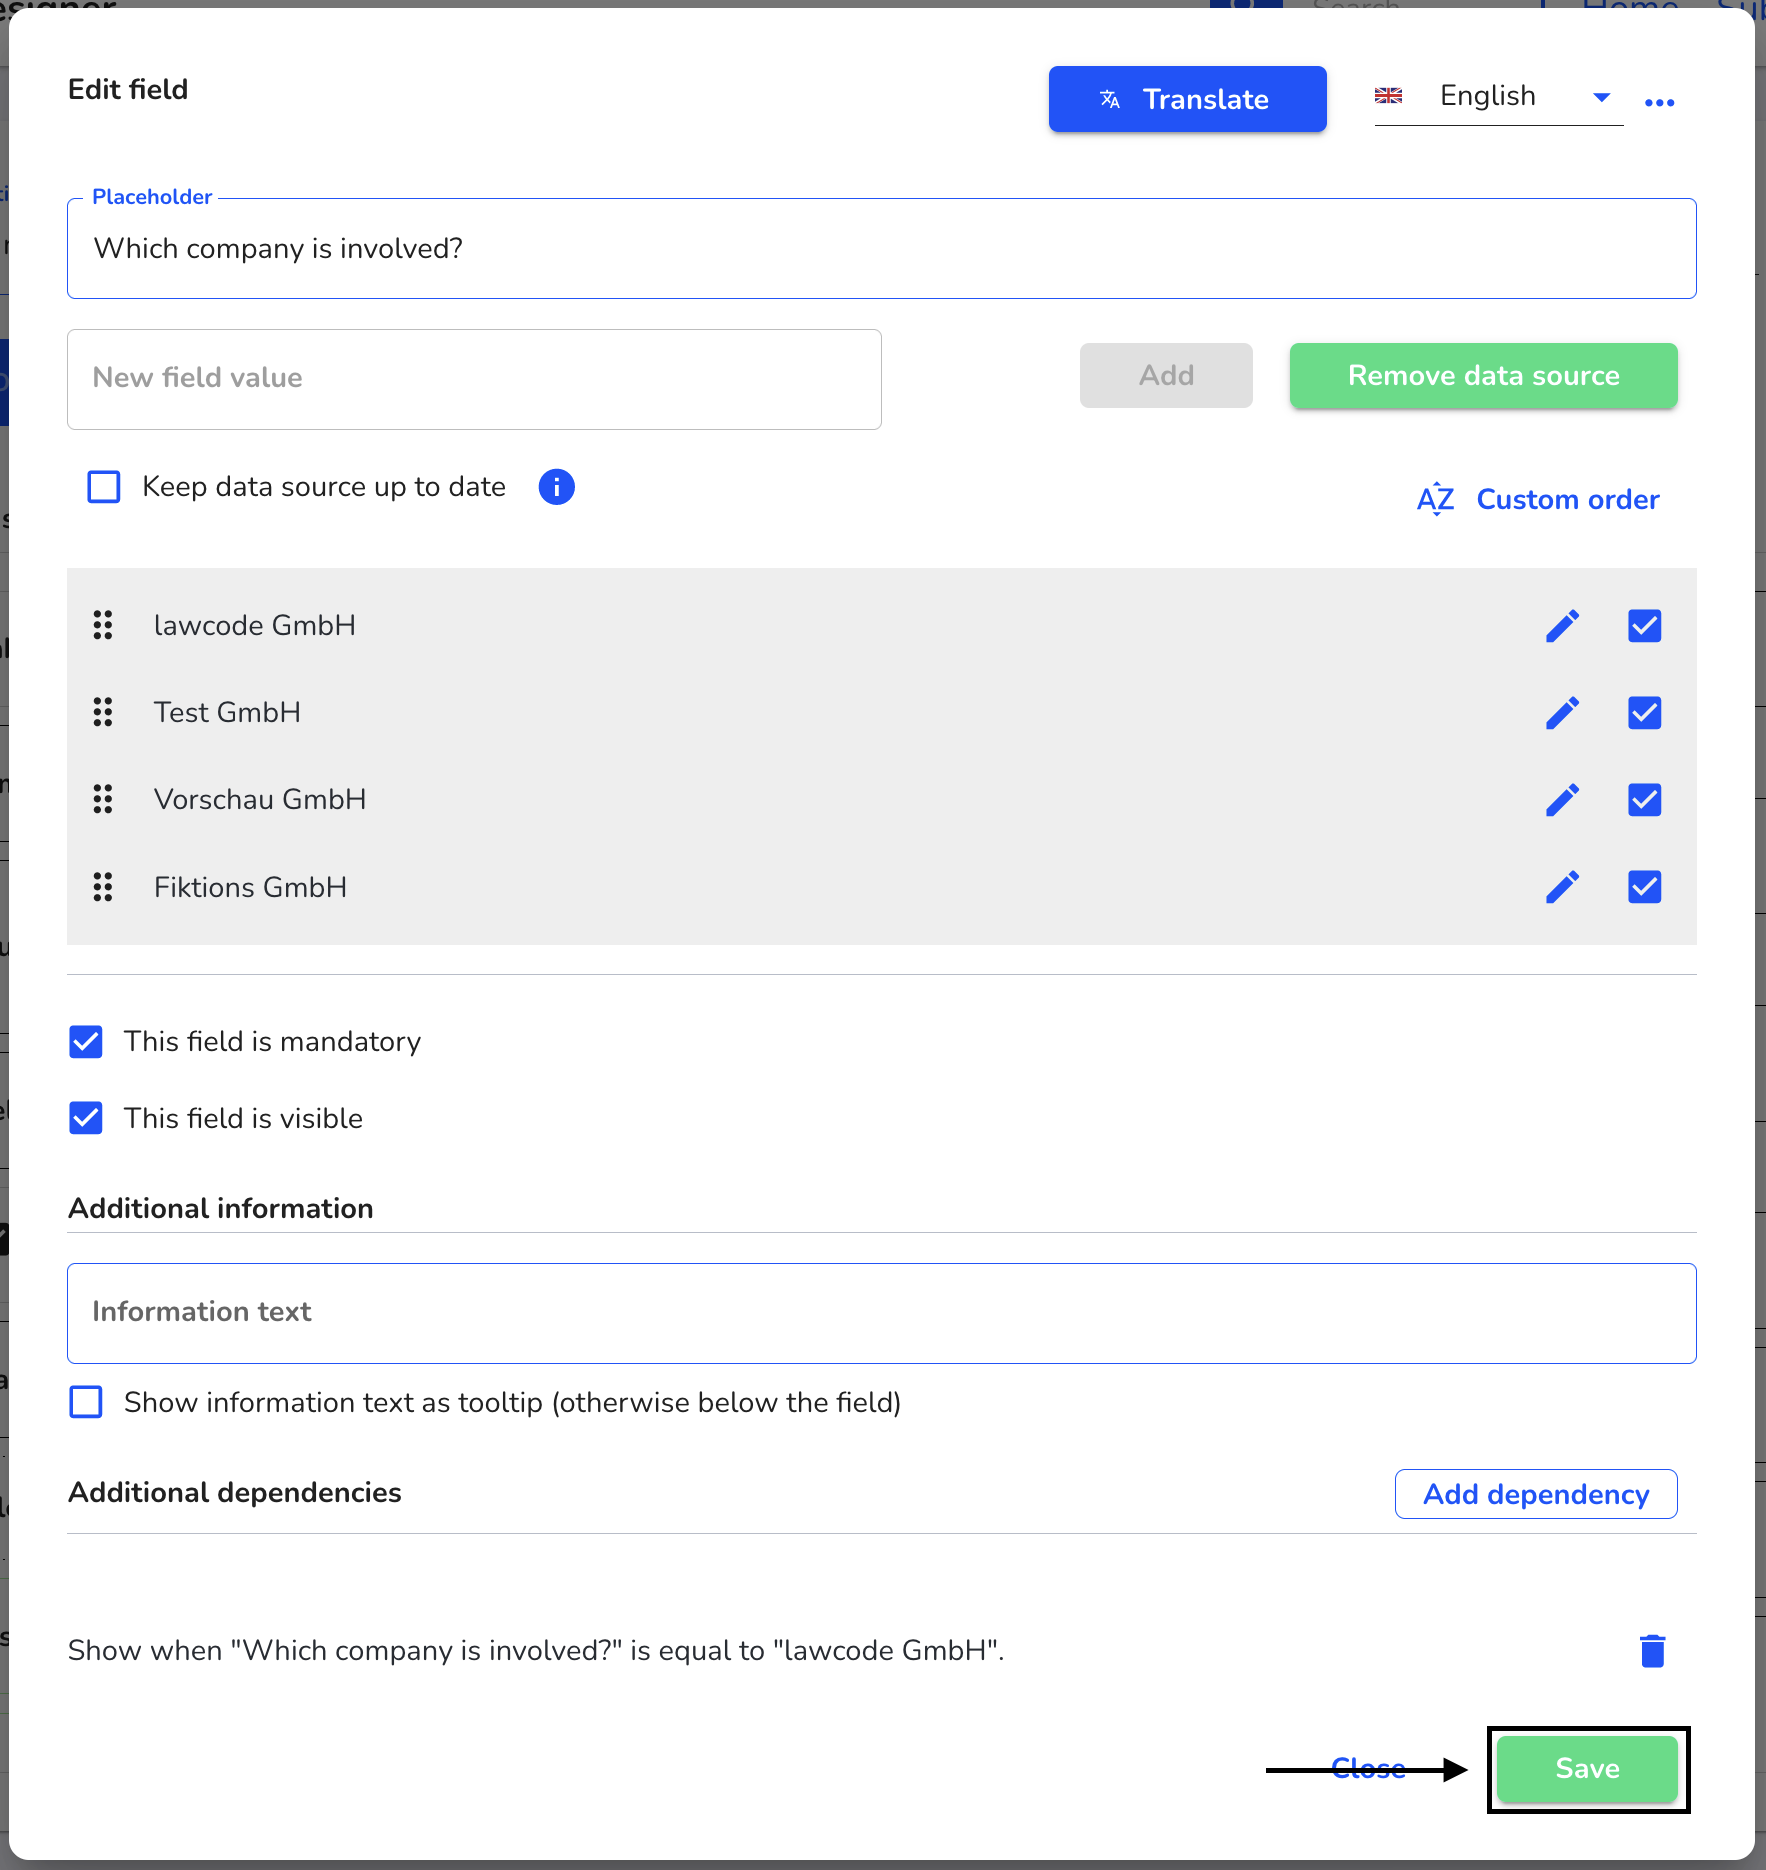
Click on Save to apply the changes to the entire form.
Remove dependencies - Fields
Dependencies in fields allows you to add a dependency to another field to any desired field in your form.
To remove a dependency for a field in your form, click on the form administration.
Under Actions, click on the editing pencil of the form you want to edit.
Select the field for which you want to remove a dependency. To do this, click on the editing pencil of the field.
Click on the paper basket to remove the dependency.
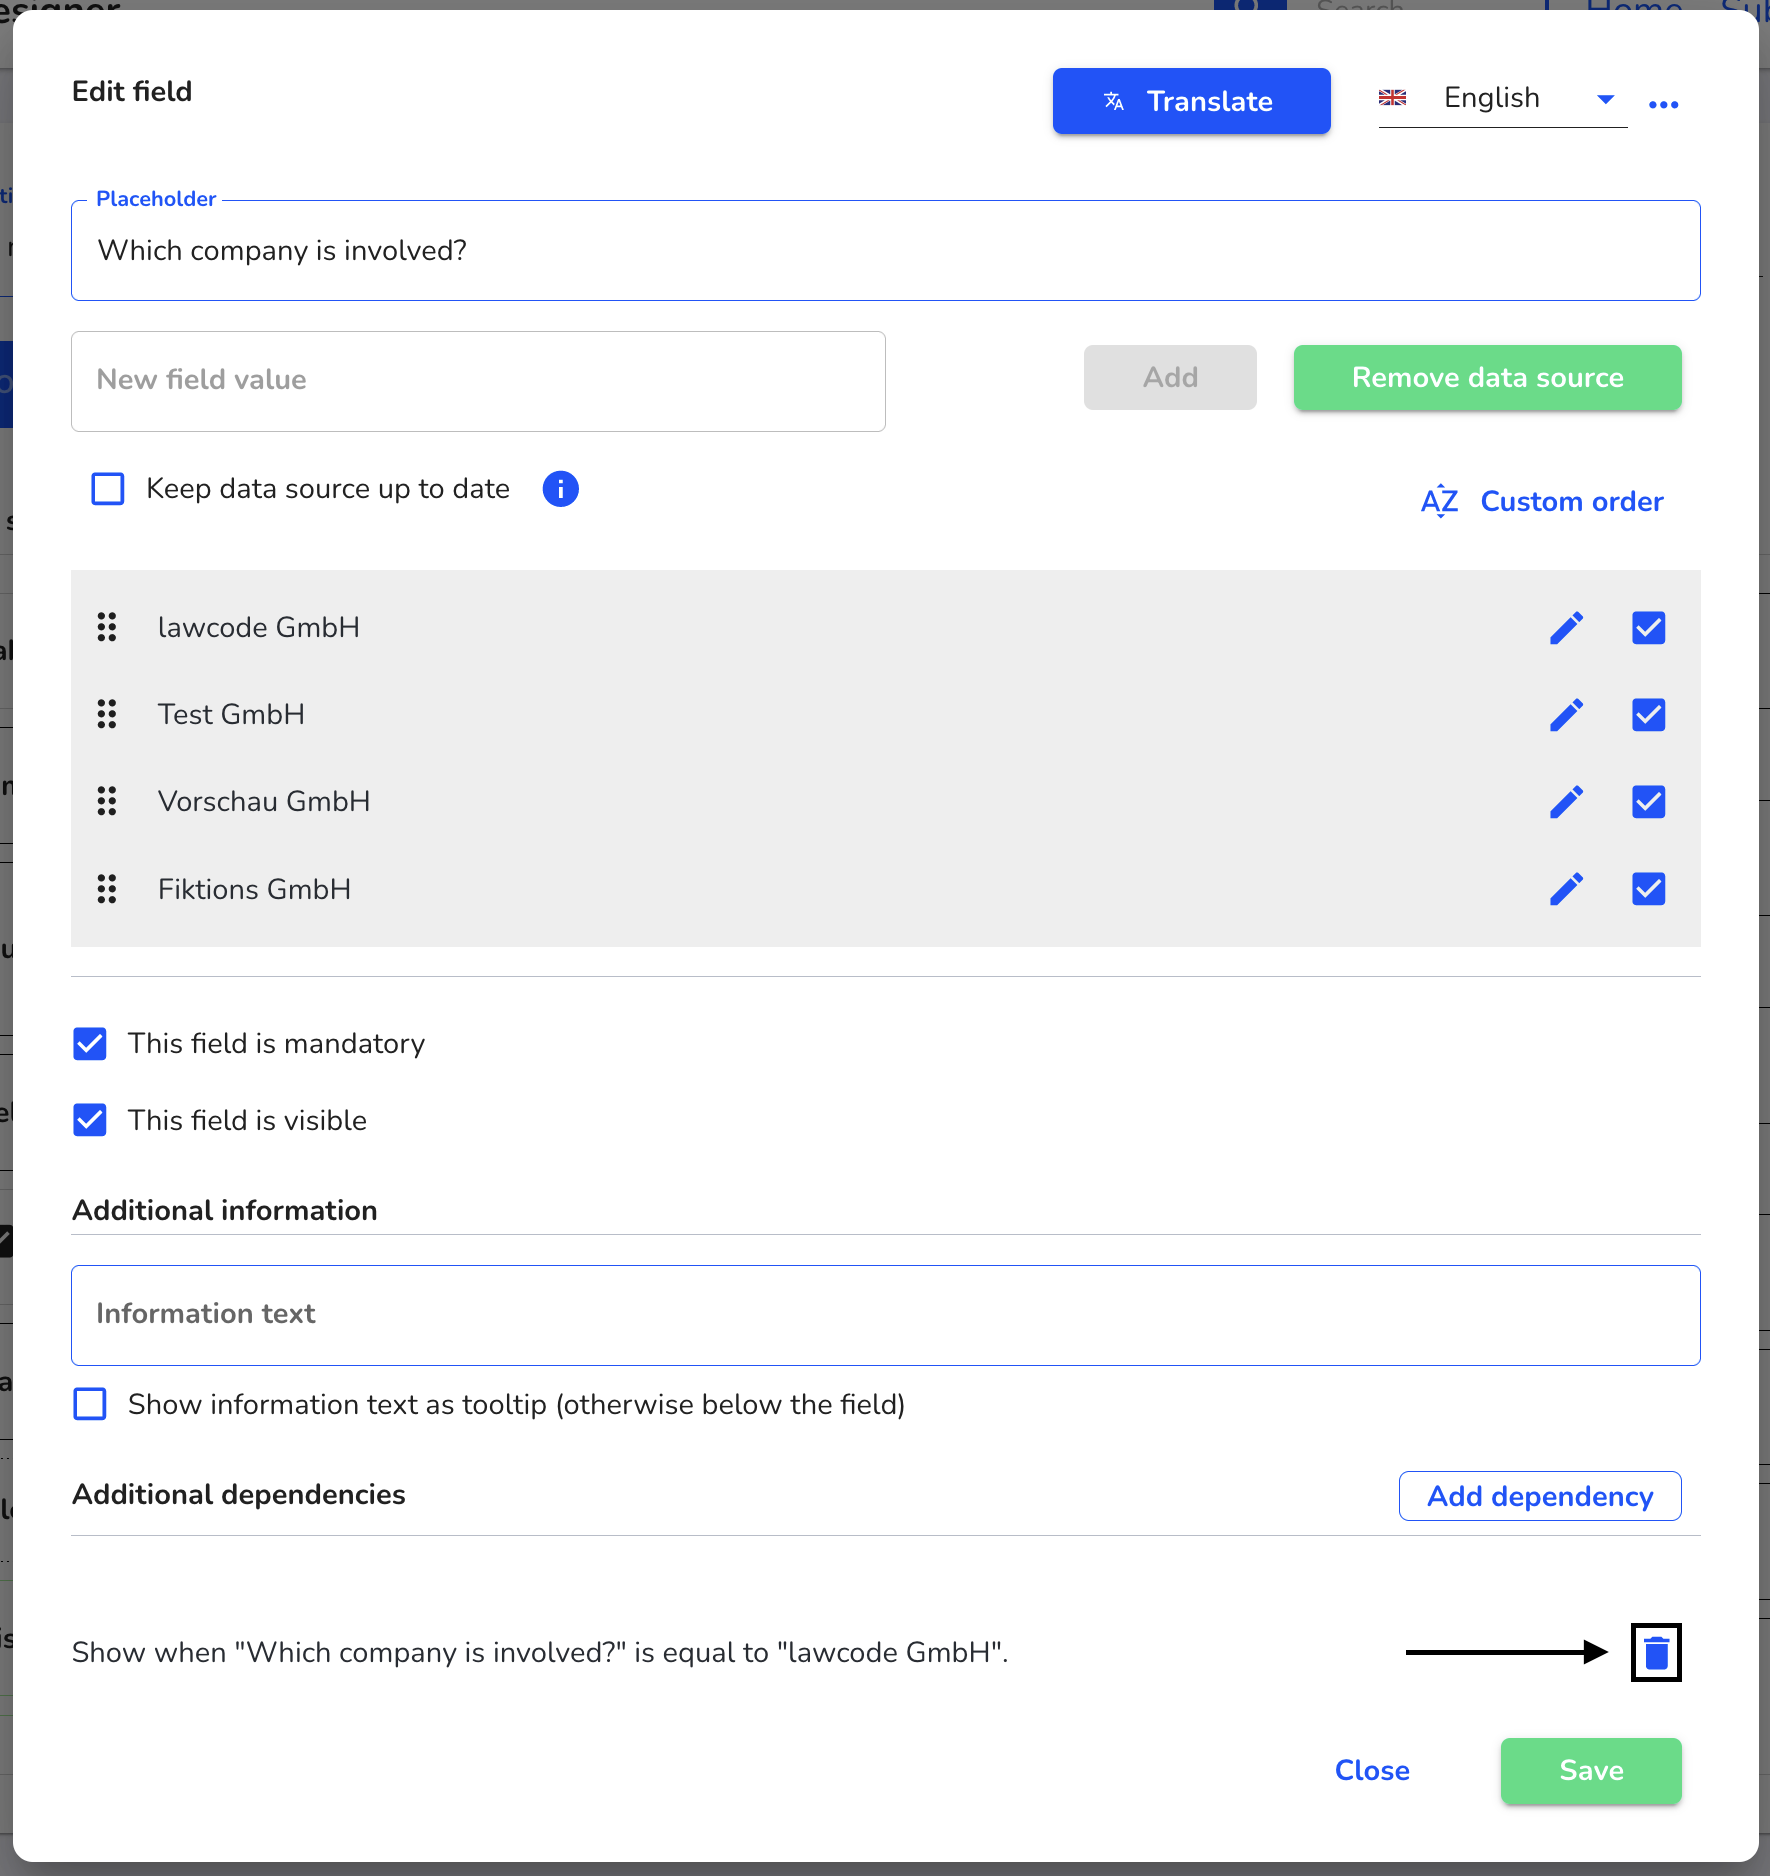
The dependency has now been removed. Click Save to save the change in the step.
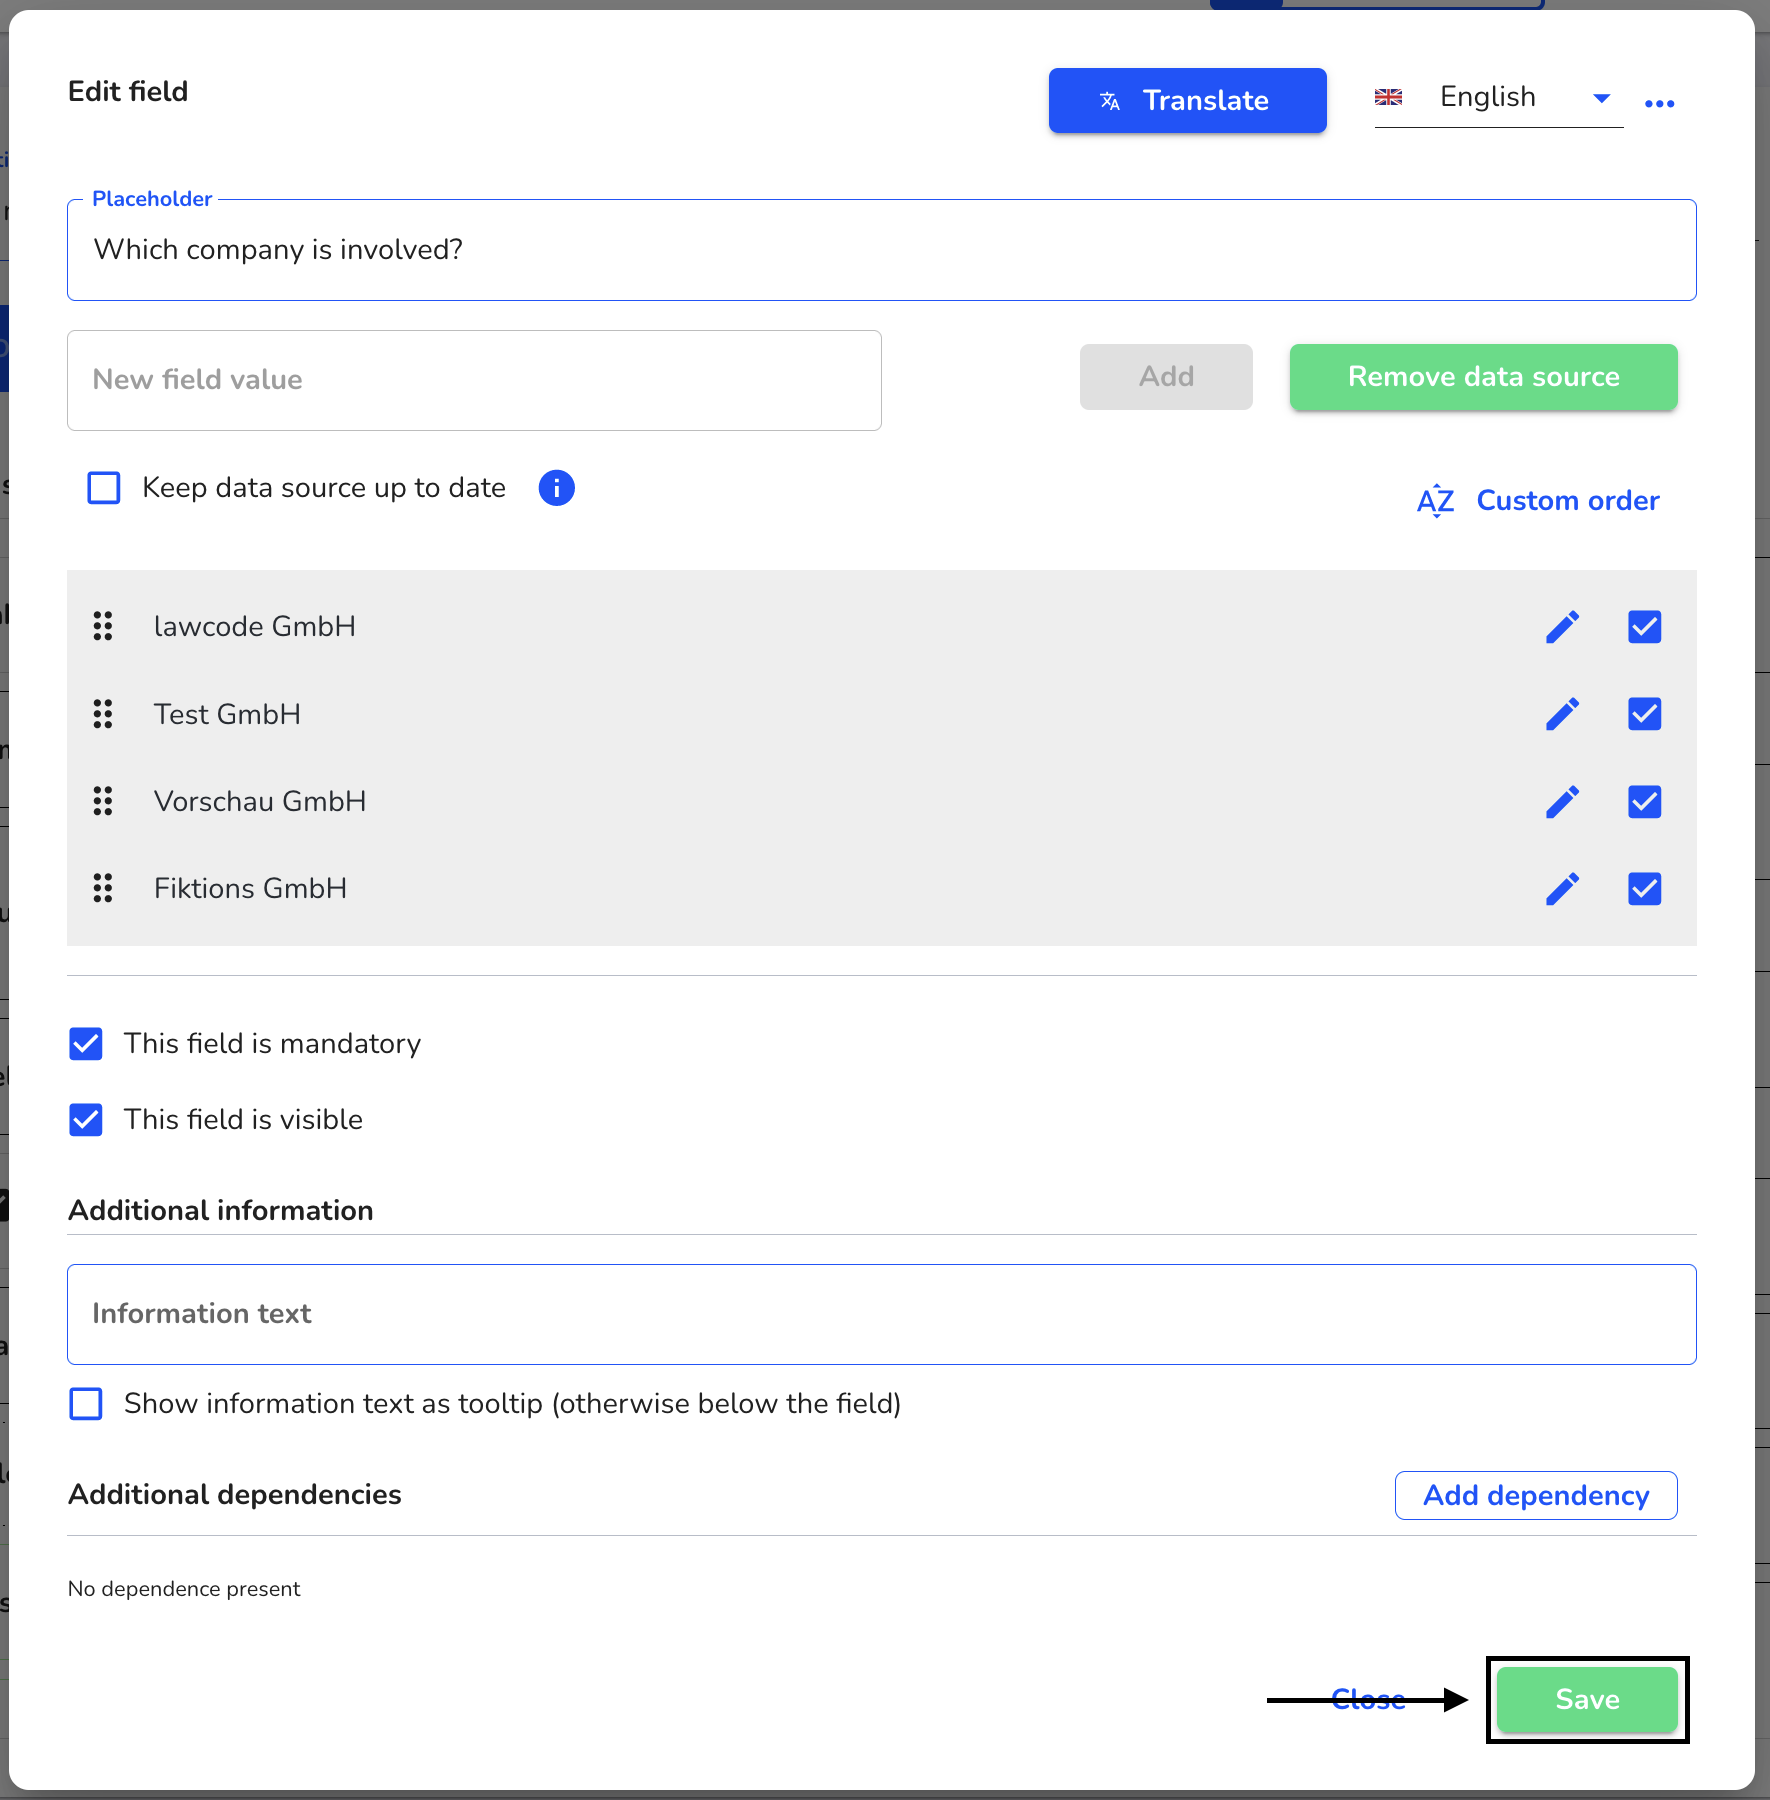
Click on Save to apply the changes to the entire form.