OpenID Connect Support for Single Sign On
Please contact your IT department first, as only they know the necessary details to carry out the following configurations together with you.
To test the single sign-on configuration, it is recommended to leave the current login active during the test. A login can be attempted with another user in a separate browser (e.g. Incognito window or another browser). If errors occur, the settings can be adjusted via the current login.
Single sign-on is only possible for internal users of the Hintbox, referring persons always receive automated access and cannot be managed via the identity provider (IdP).
Before you start, you must activate "OpenID Connect" in the system settings under Single Sign-On
Basic technical requirements
- OpenID Connect protocol
- The IdP (the OpenID Connect Client) must be configured in such a way that it is possible to request a refresh token (an additional scope may be necessary - e.g. "offline_access" for the IdP AzureAD)
- Necessary scopes that are requested by Hintbox
- Openid E-Mail profile
- Groups and/or roles must be included in the user information
SSO configuration
Before you start, you must activate "OpenID Connect" in the system settings under Single Sign-On

Step 1 - Enter Discovery Document, Client ID and Client Secret
OpenID Connect Discovery Document
This is the "well-known endpoint" provided by your IdP. This URL usually ends like this: ".../.../.../.well-known/openid-configuration".
You can check the URL for validity at any time using the button on the right.
Client ID & Client Secret
The Client ID is the ID of your Hintbox application; you will receive the ID as soon as you store the Hintbox as an application in your IdP. You will then also receive your Client Secret there.

Step 2 - Redirect URL
Copy redirect URL and store it with OpenID Connect IdP
To ensure that your IdP knows where to navigate back to as soon as a successful authentication has taken place, you must store this in your IdP.

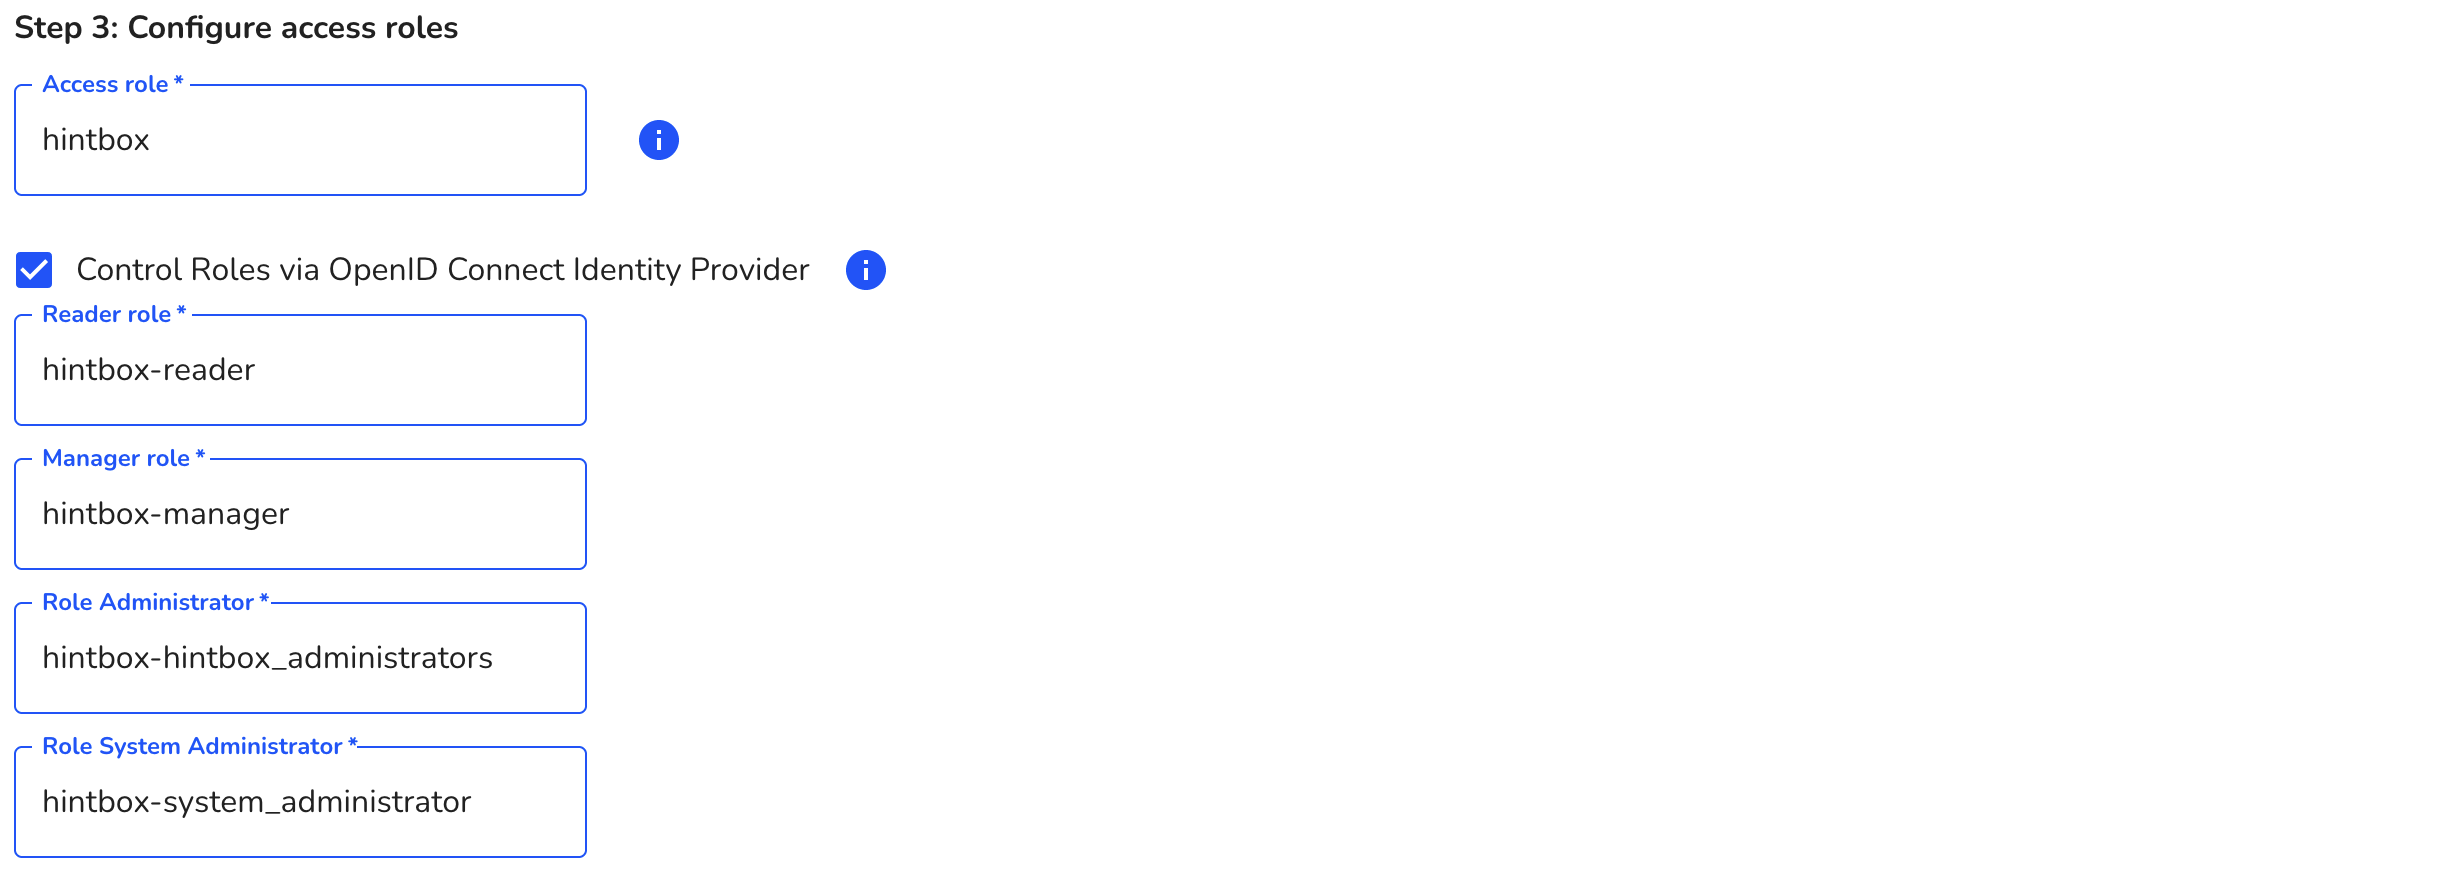
Step 3 - Configure access roles
The "hintbox" access role (or the one you have entered, which may vary) must always be assigned to your users in order for them to have access to the hintbox! All new users are initially assigned the reader role.
You have the option of changing the name of the role.

Optional for step 3 - Configure access roles
In the Hintbox, there are currently the roles "Admin", "Manager" and "Reader" (and persons providing information). You can also maintain and manage these three roles in your IdP. If you want to do this, you can activate the "Control roles via OpenID Connect Identity Provider" checkbox. The input field contains the names of these access roles, which must match your roles in the IdP.
You have the option of changing the name of the role.

Optional step 4 - Configure additional scopes
This field can be used to specify additional scopes that are requested during authentication. Configuring additional scopes is optional. If several scopes are to be used, they can be separated by ';'.

Save the configuration and test it in another browser or in the incognito mode of the same browser.
If the configuration is not correct, you can deactivate it in the original window.
If you have made a mistake during configuration and have logged out of your original session, you will no longer have access and must contact Hintbox technical support for security reasons. They can deactivate the SSO again.
The configuration of Single Sign-On has been successfully completed!
To log in via Single Sign-On, you must click on the "Manager Login" in the footer and then use the "Log in with Single Sign-On" button.
