Editing the hints
Introduction
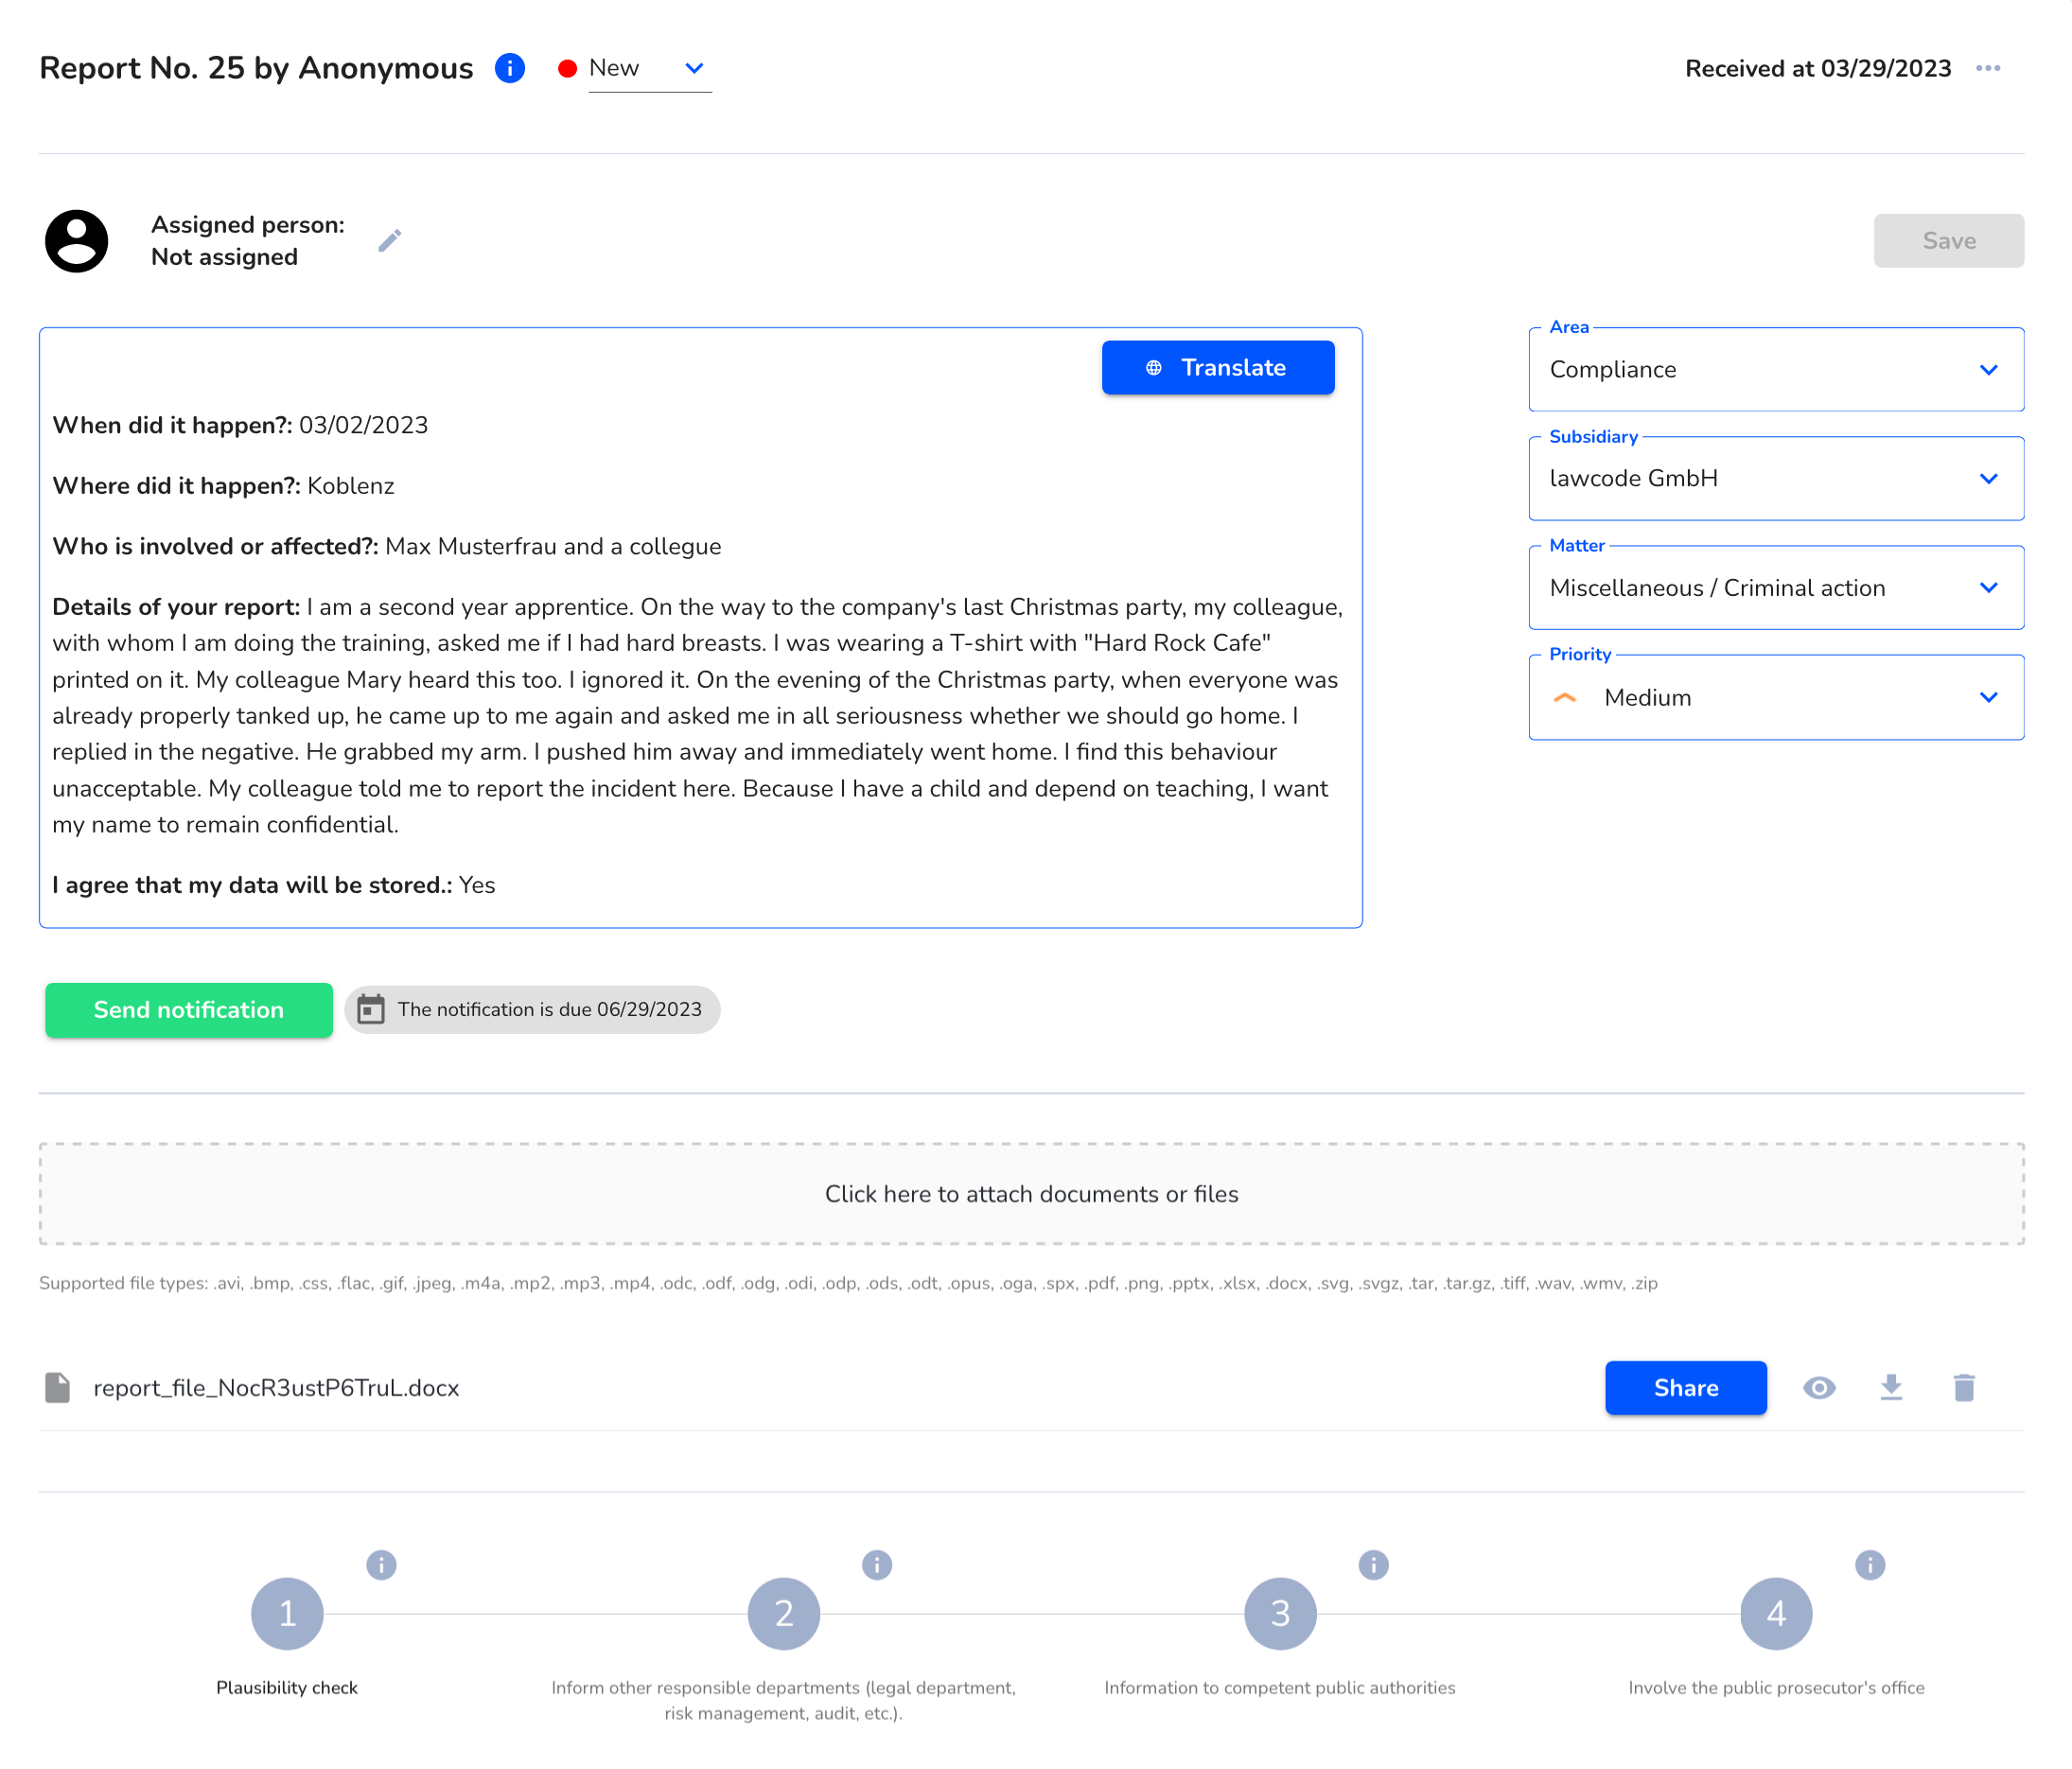
Here you can see the editing view of a note, from this view you can start editing a note. All possible editing functions are explained to you below.
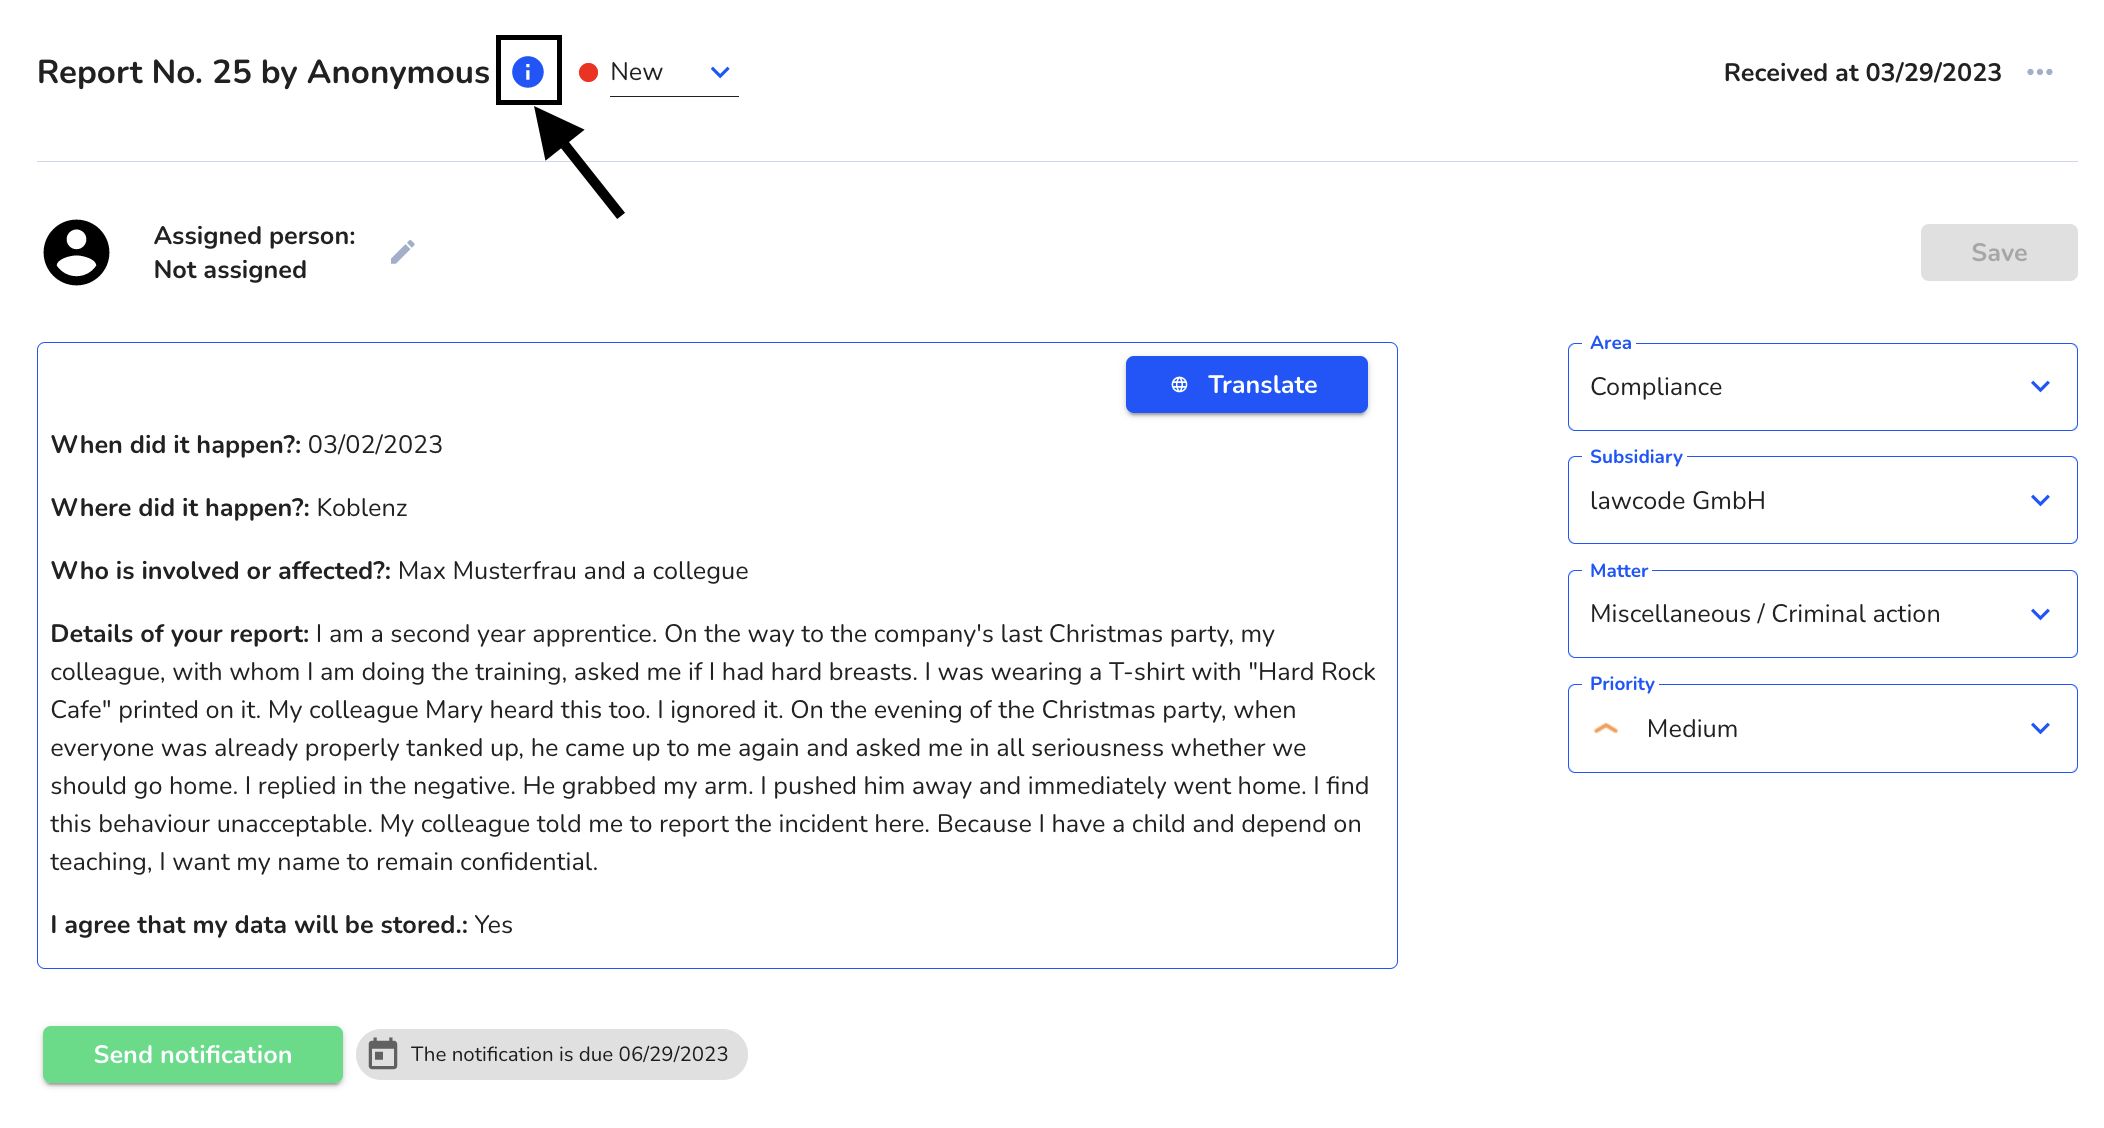
Get contact information of the whistleblower
Click on the blue "i" to view the whistleblower's contact information:
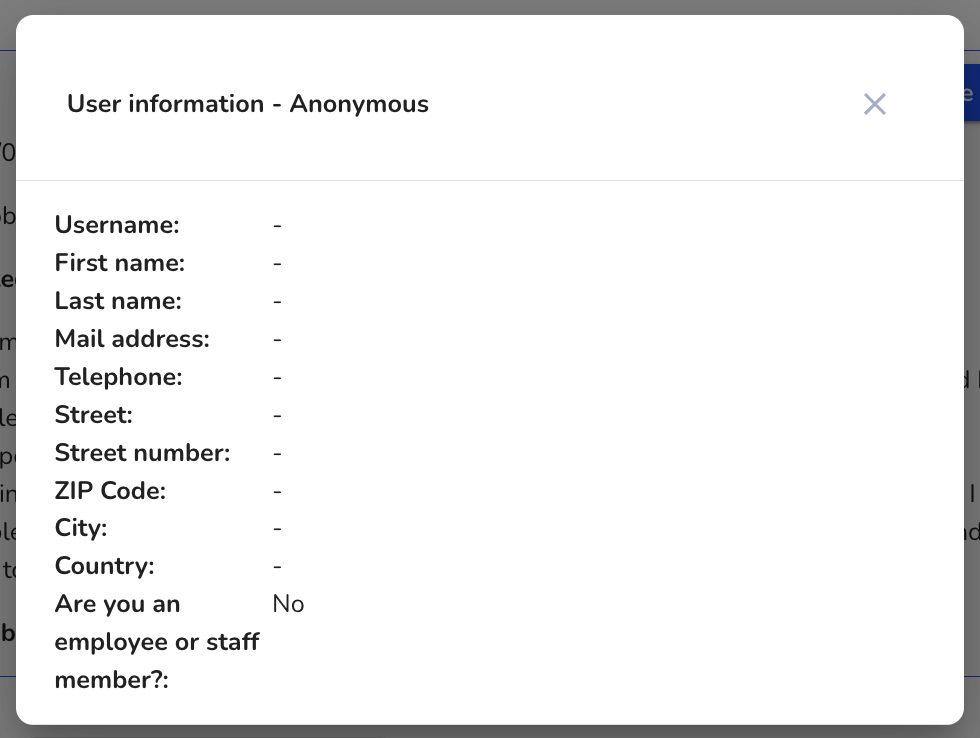
This dialog then opens, with the whistleblower's detailed contact information:
Change the status of the report
With a click on the black bordered selection field you can change the status.
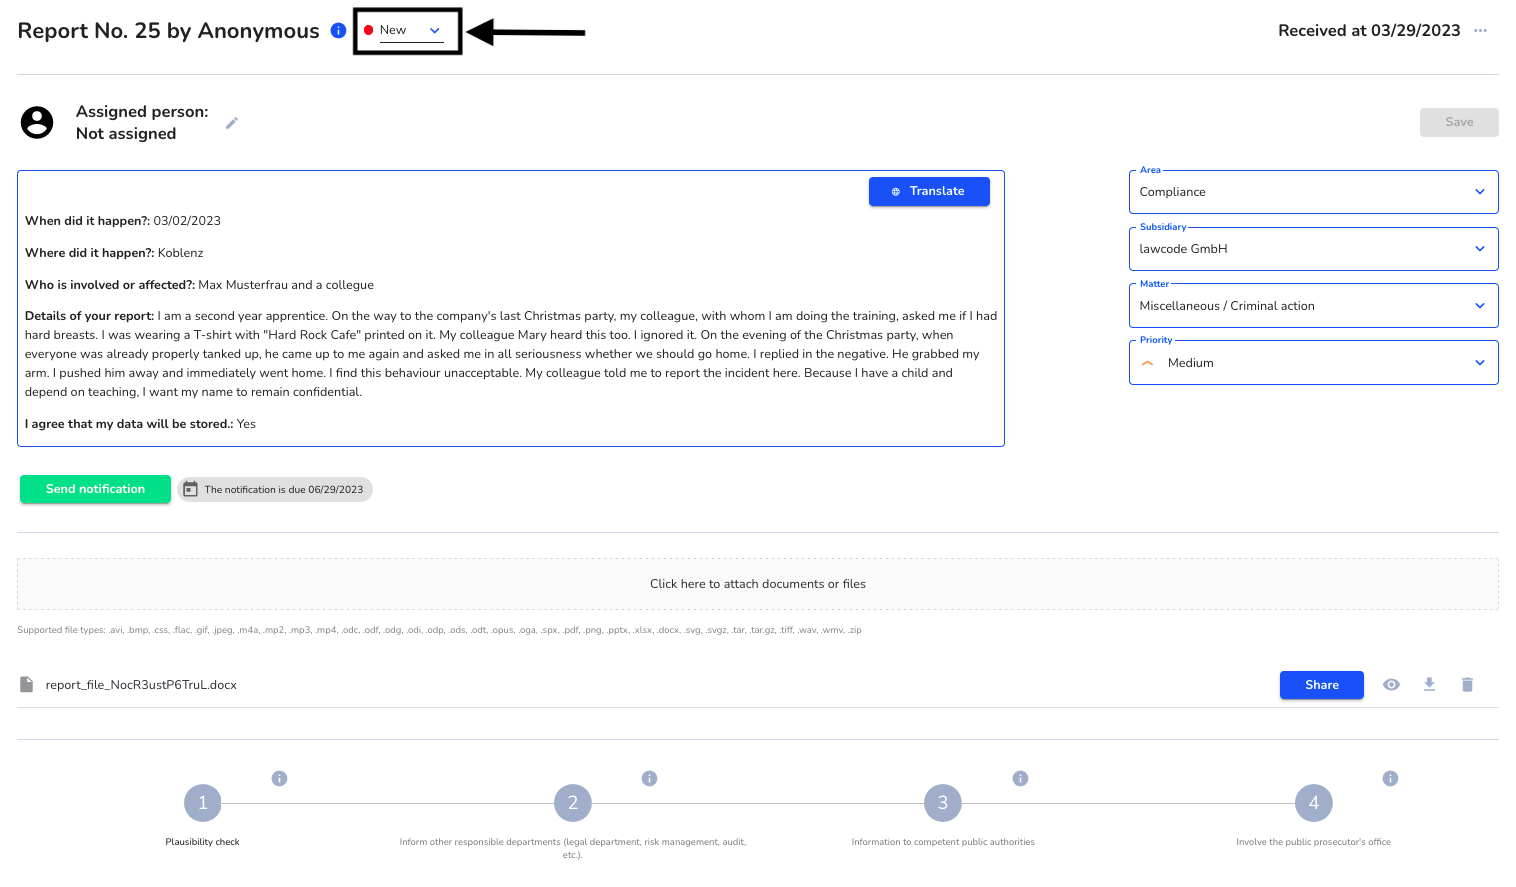
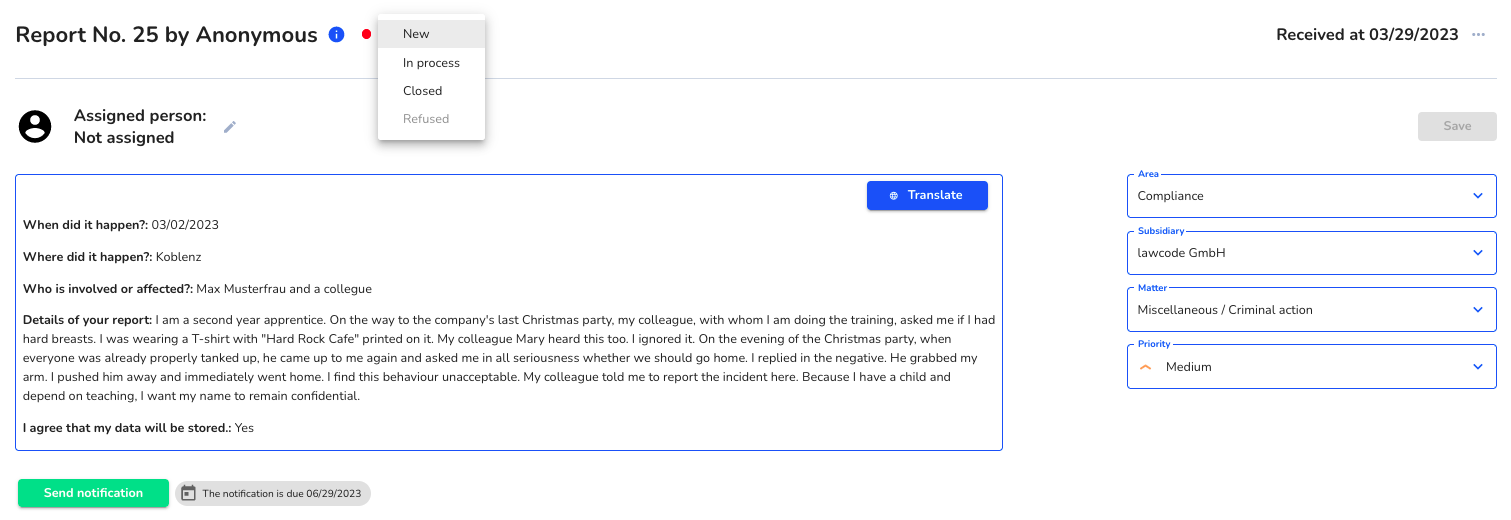
Then you can choose between the statuses "New", "In progress", "Closed".
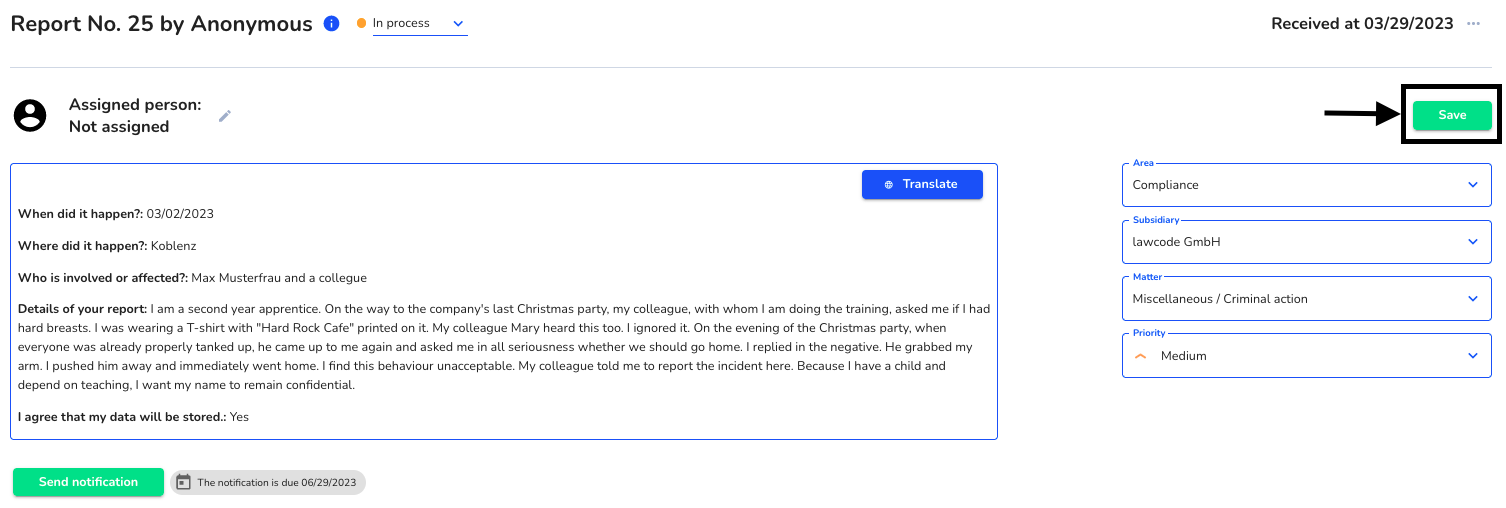
After you have selected the desired status, you can save the change by clicking on "Save".
Assign report to a responsible processor
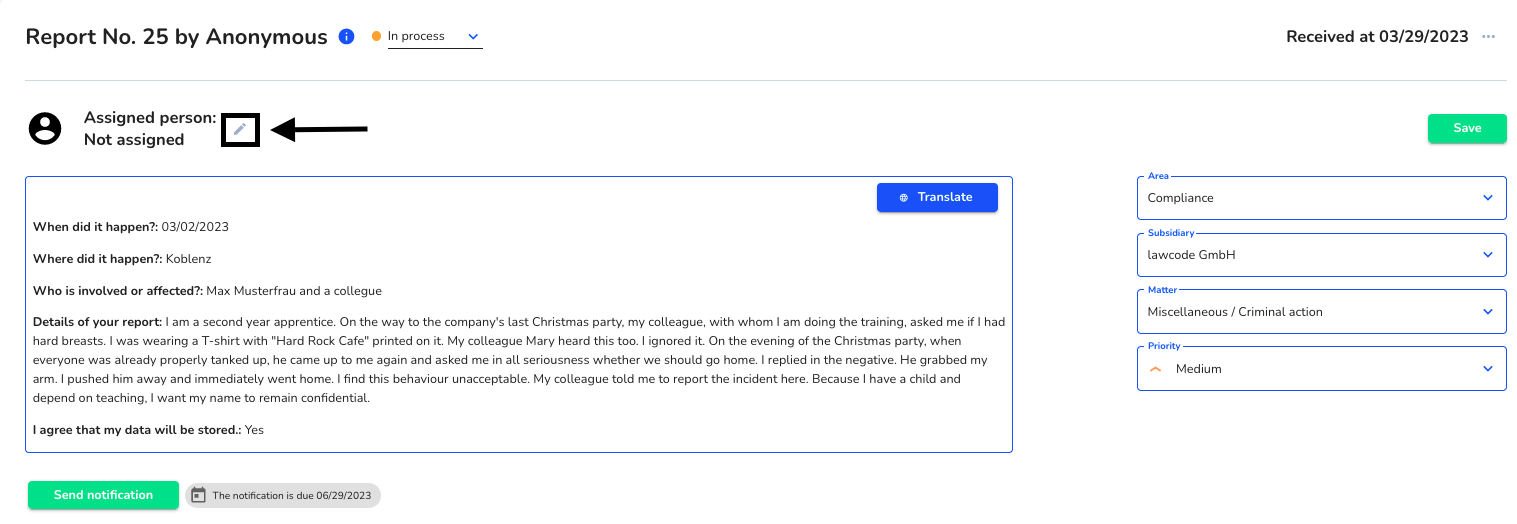
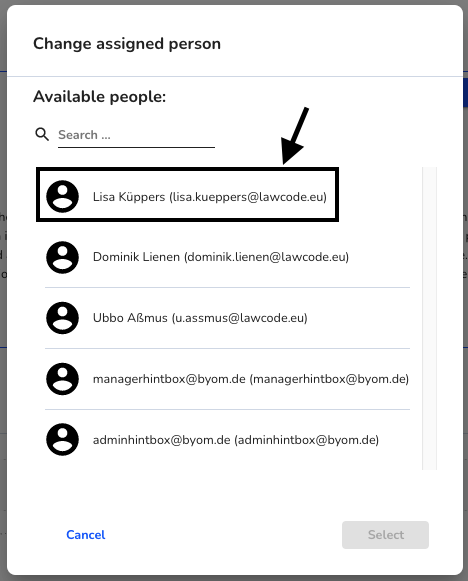
By clicking on the black bordered edit pen you can adjust the responsible editor of the note
Then the dialog for selecting a responsible editor opens, you can select them with one click.
Then the dialog for selecting a responsible editor opens, you can select them with one click.
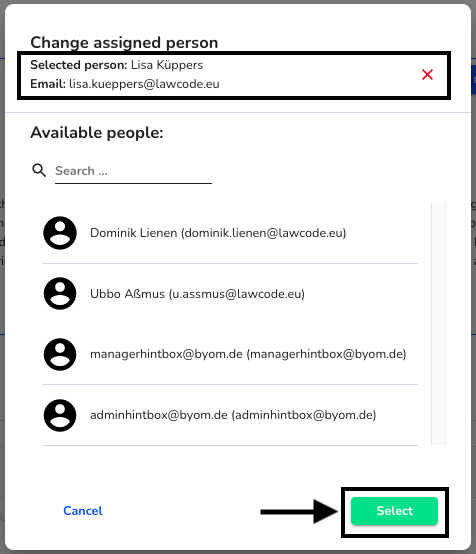
Afterwards, the selected editor will be displayed with a black border as shown in the screenshot. You must then confirm this selection by clicking on "Select".
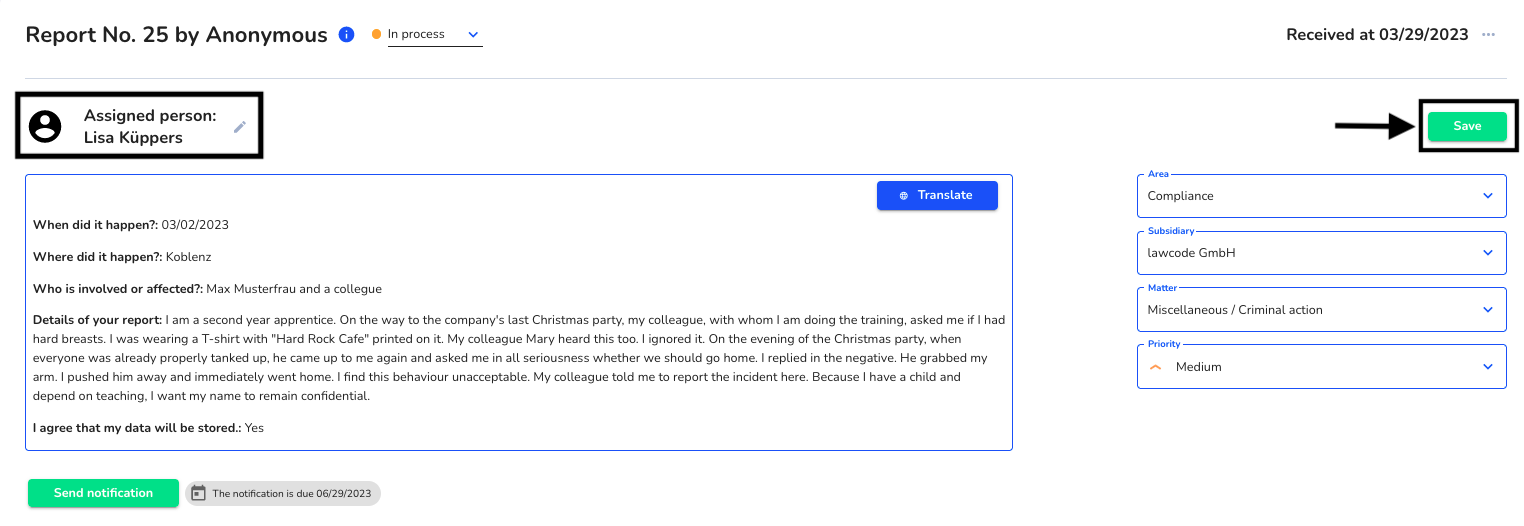
Afterwards, you should be able to see the selected agent in the note's detail view. You must now save this change in the Note Final by clicking on the "Save" button.
Partially anonymize report
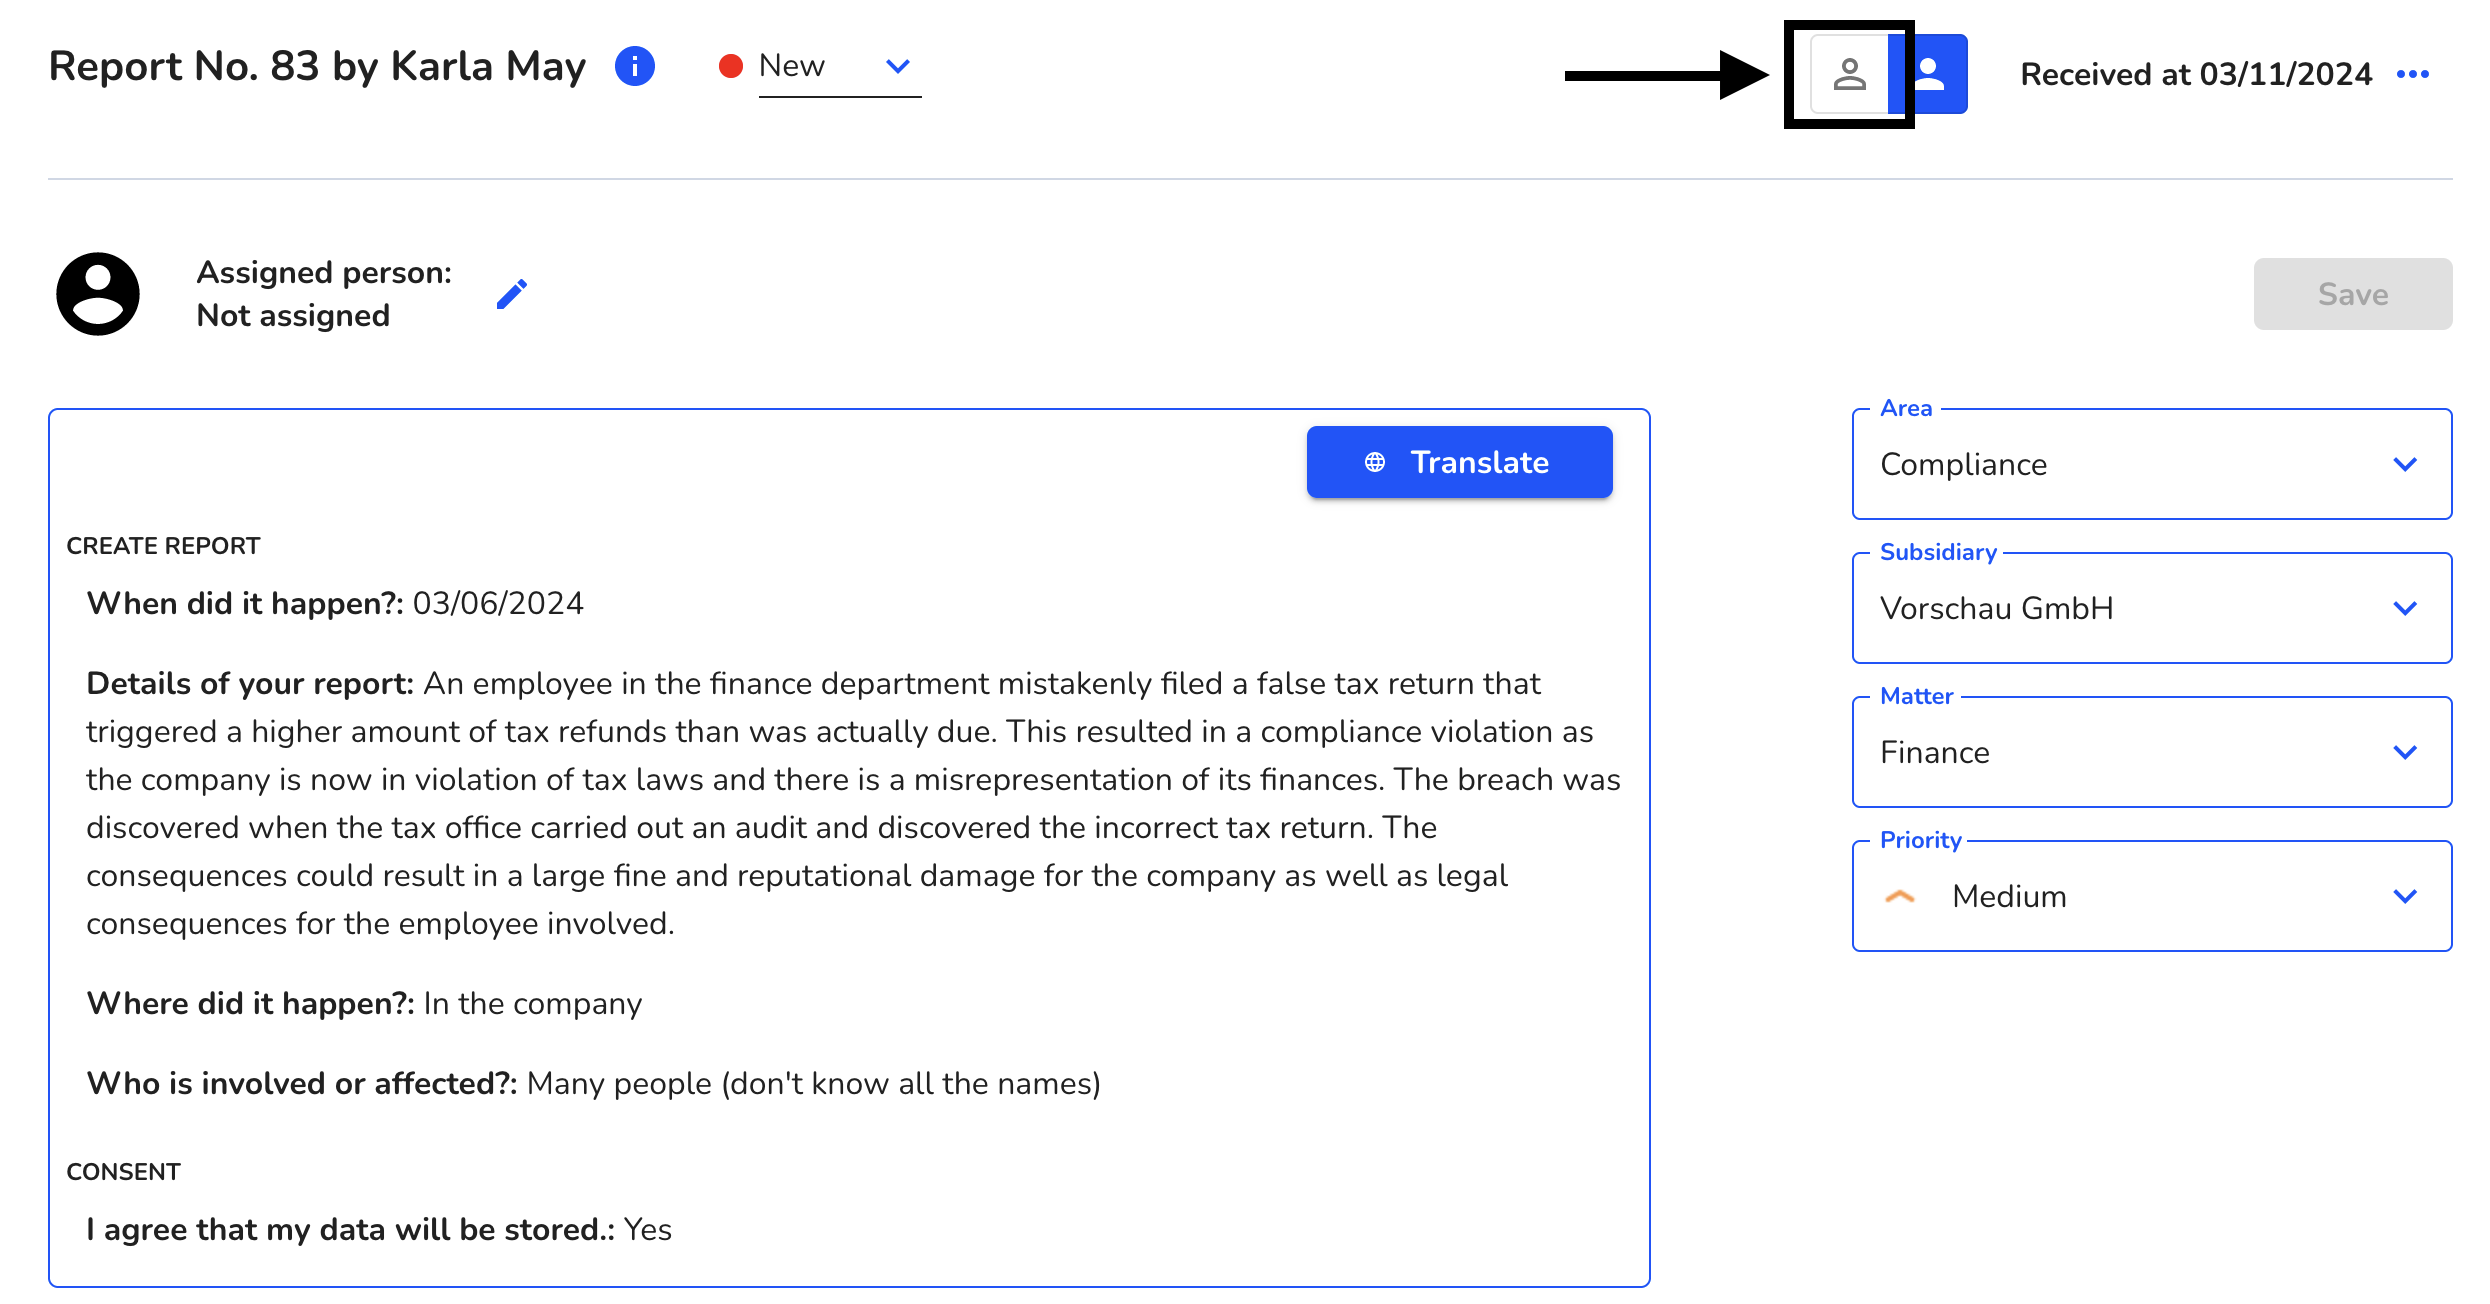
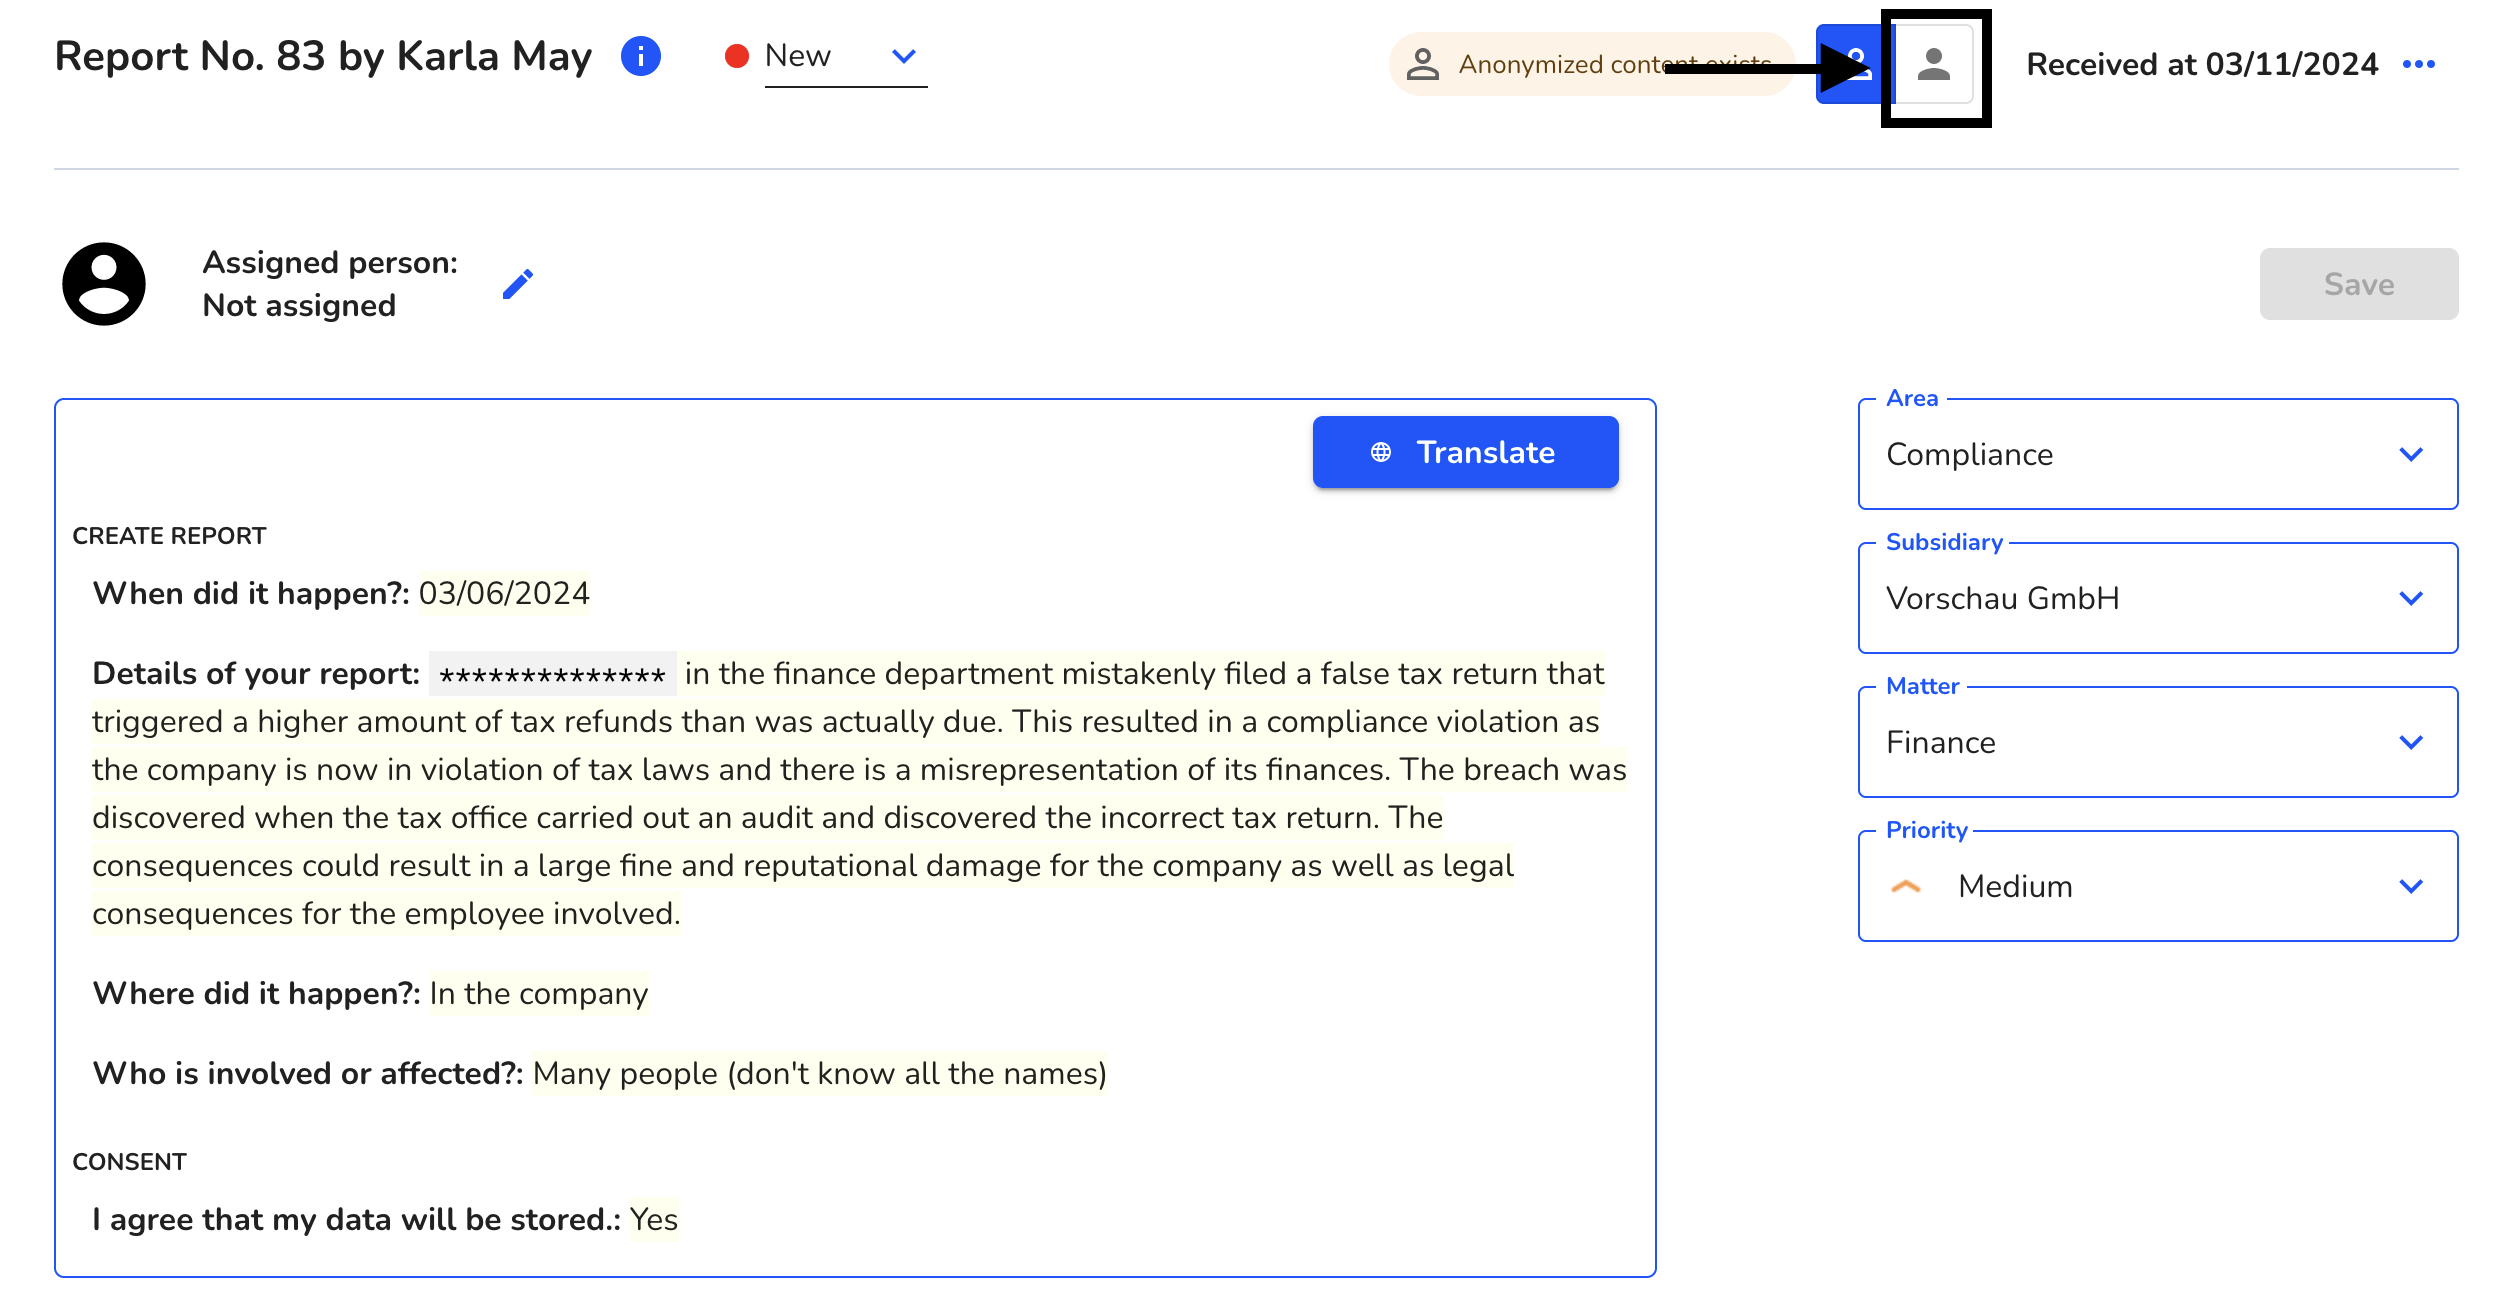
By clicking on the highlighted symbol, you can switch to the anonymized view and anonymize the contents of the report.
The following texts can be anonymized.
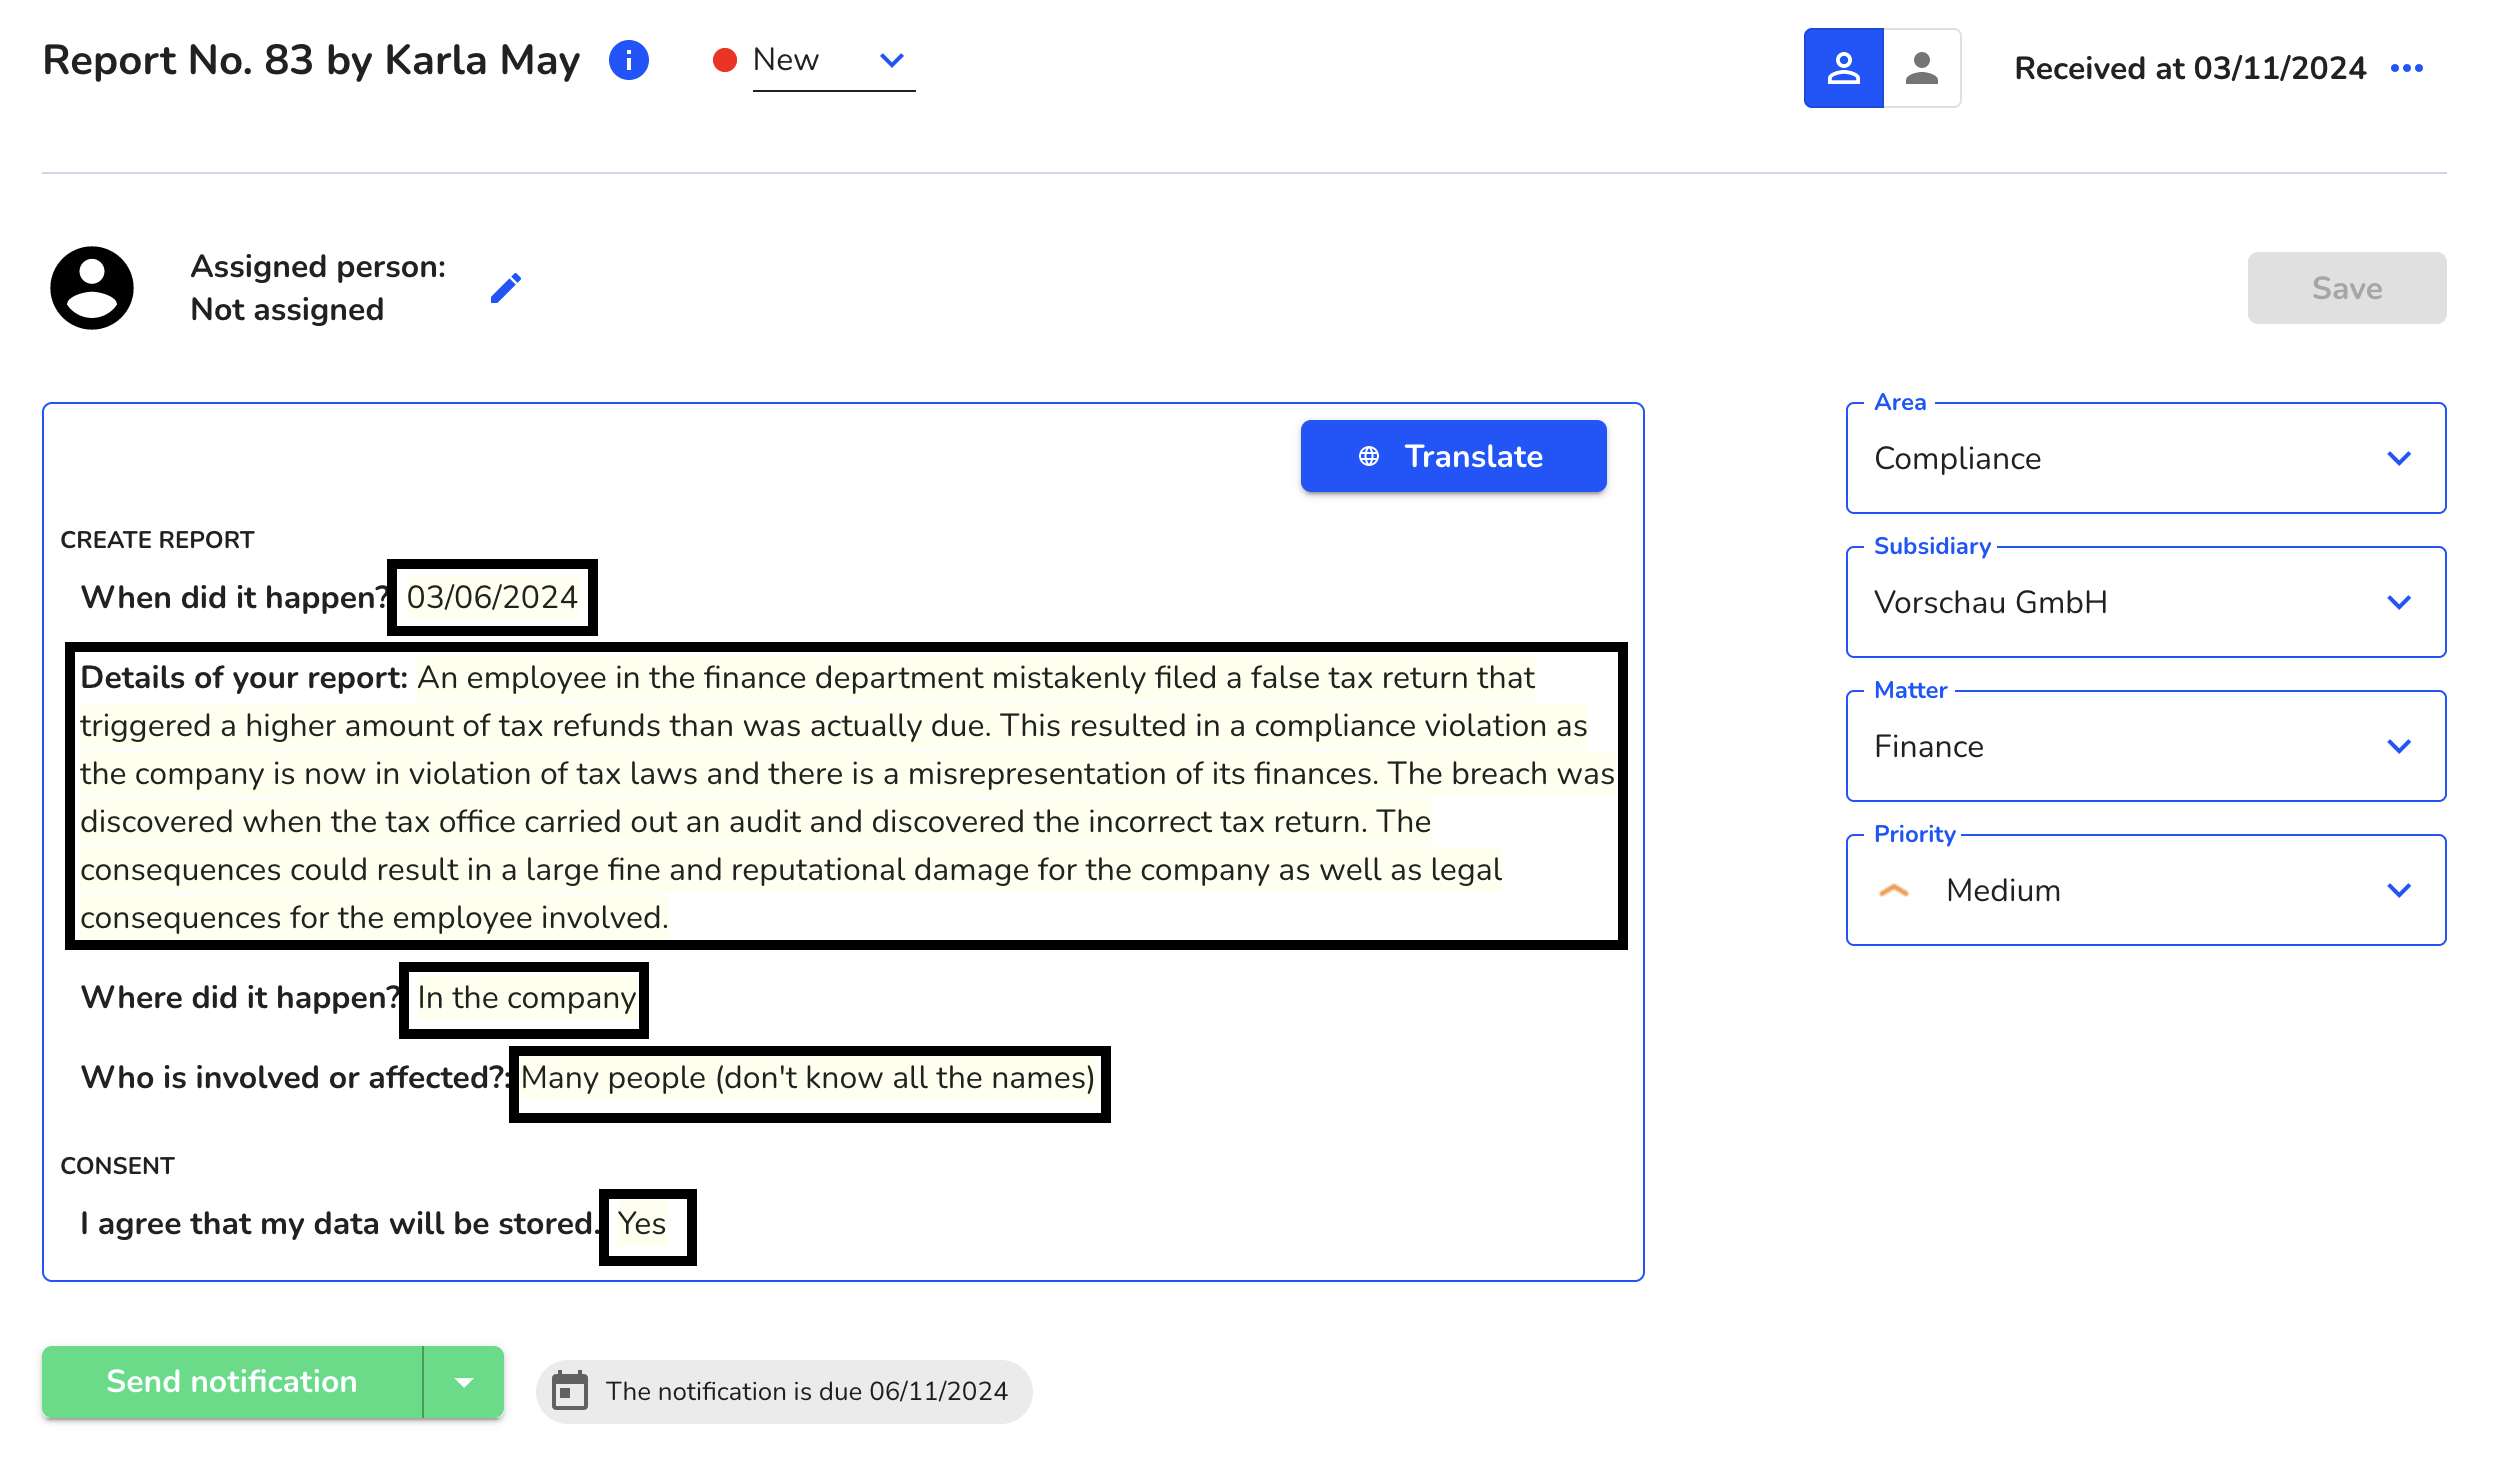
To do this, select the content to be anonymized and mark it.
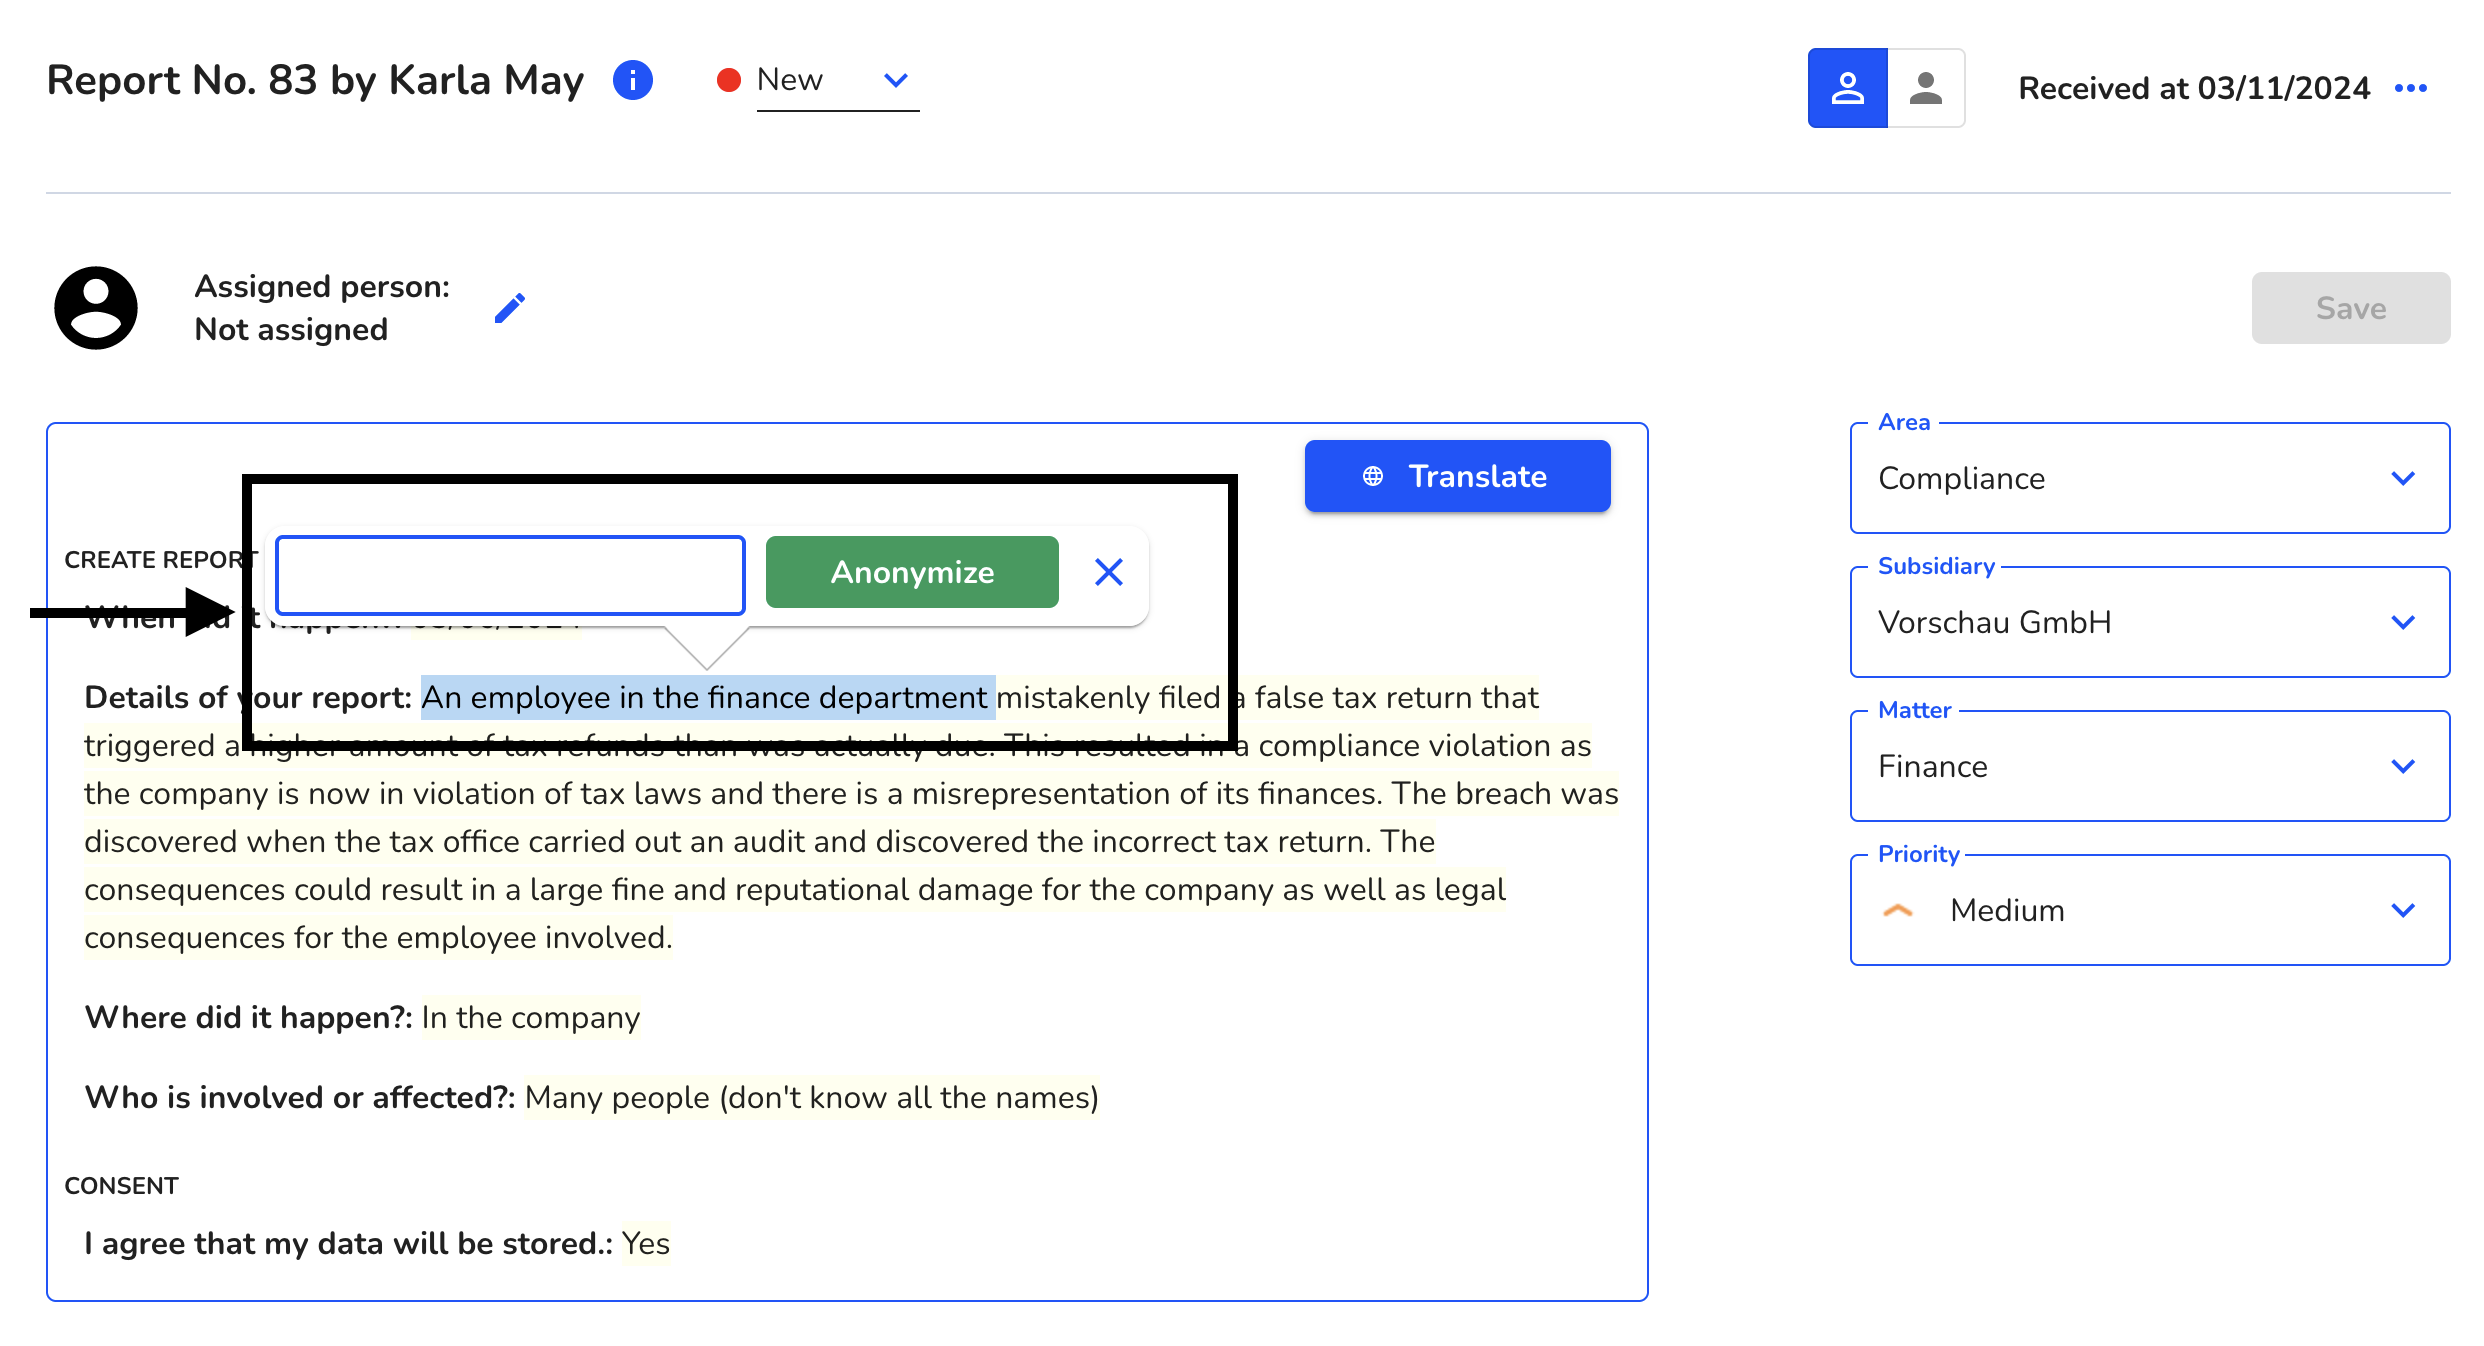
Enter the text that should appear at the position instead and click on anonymize.

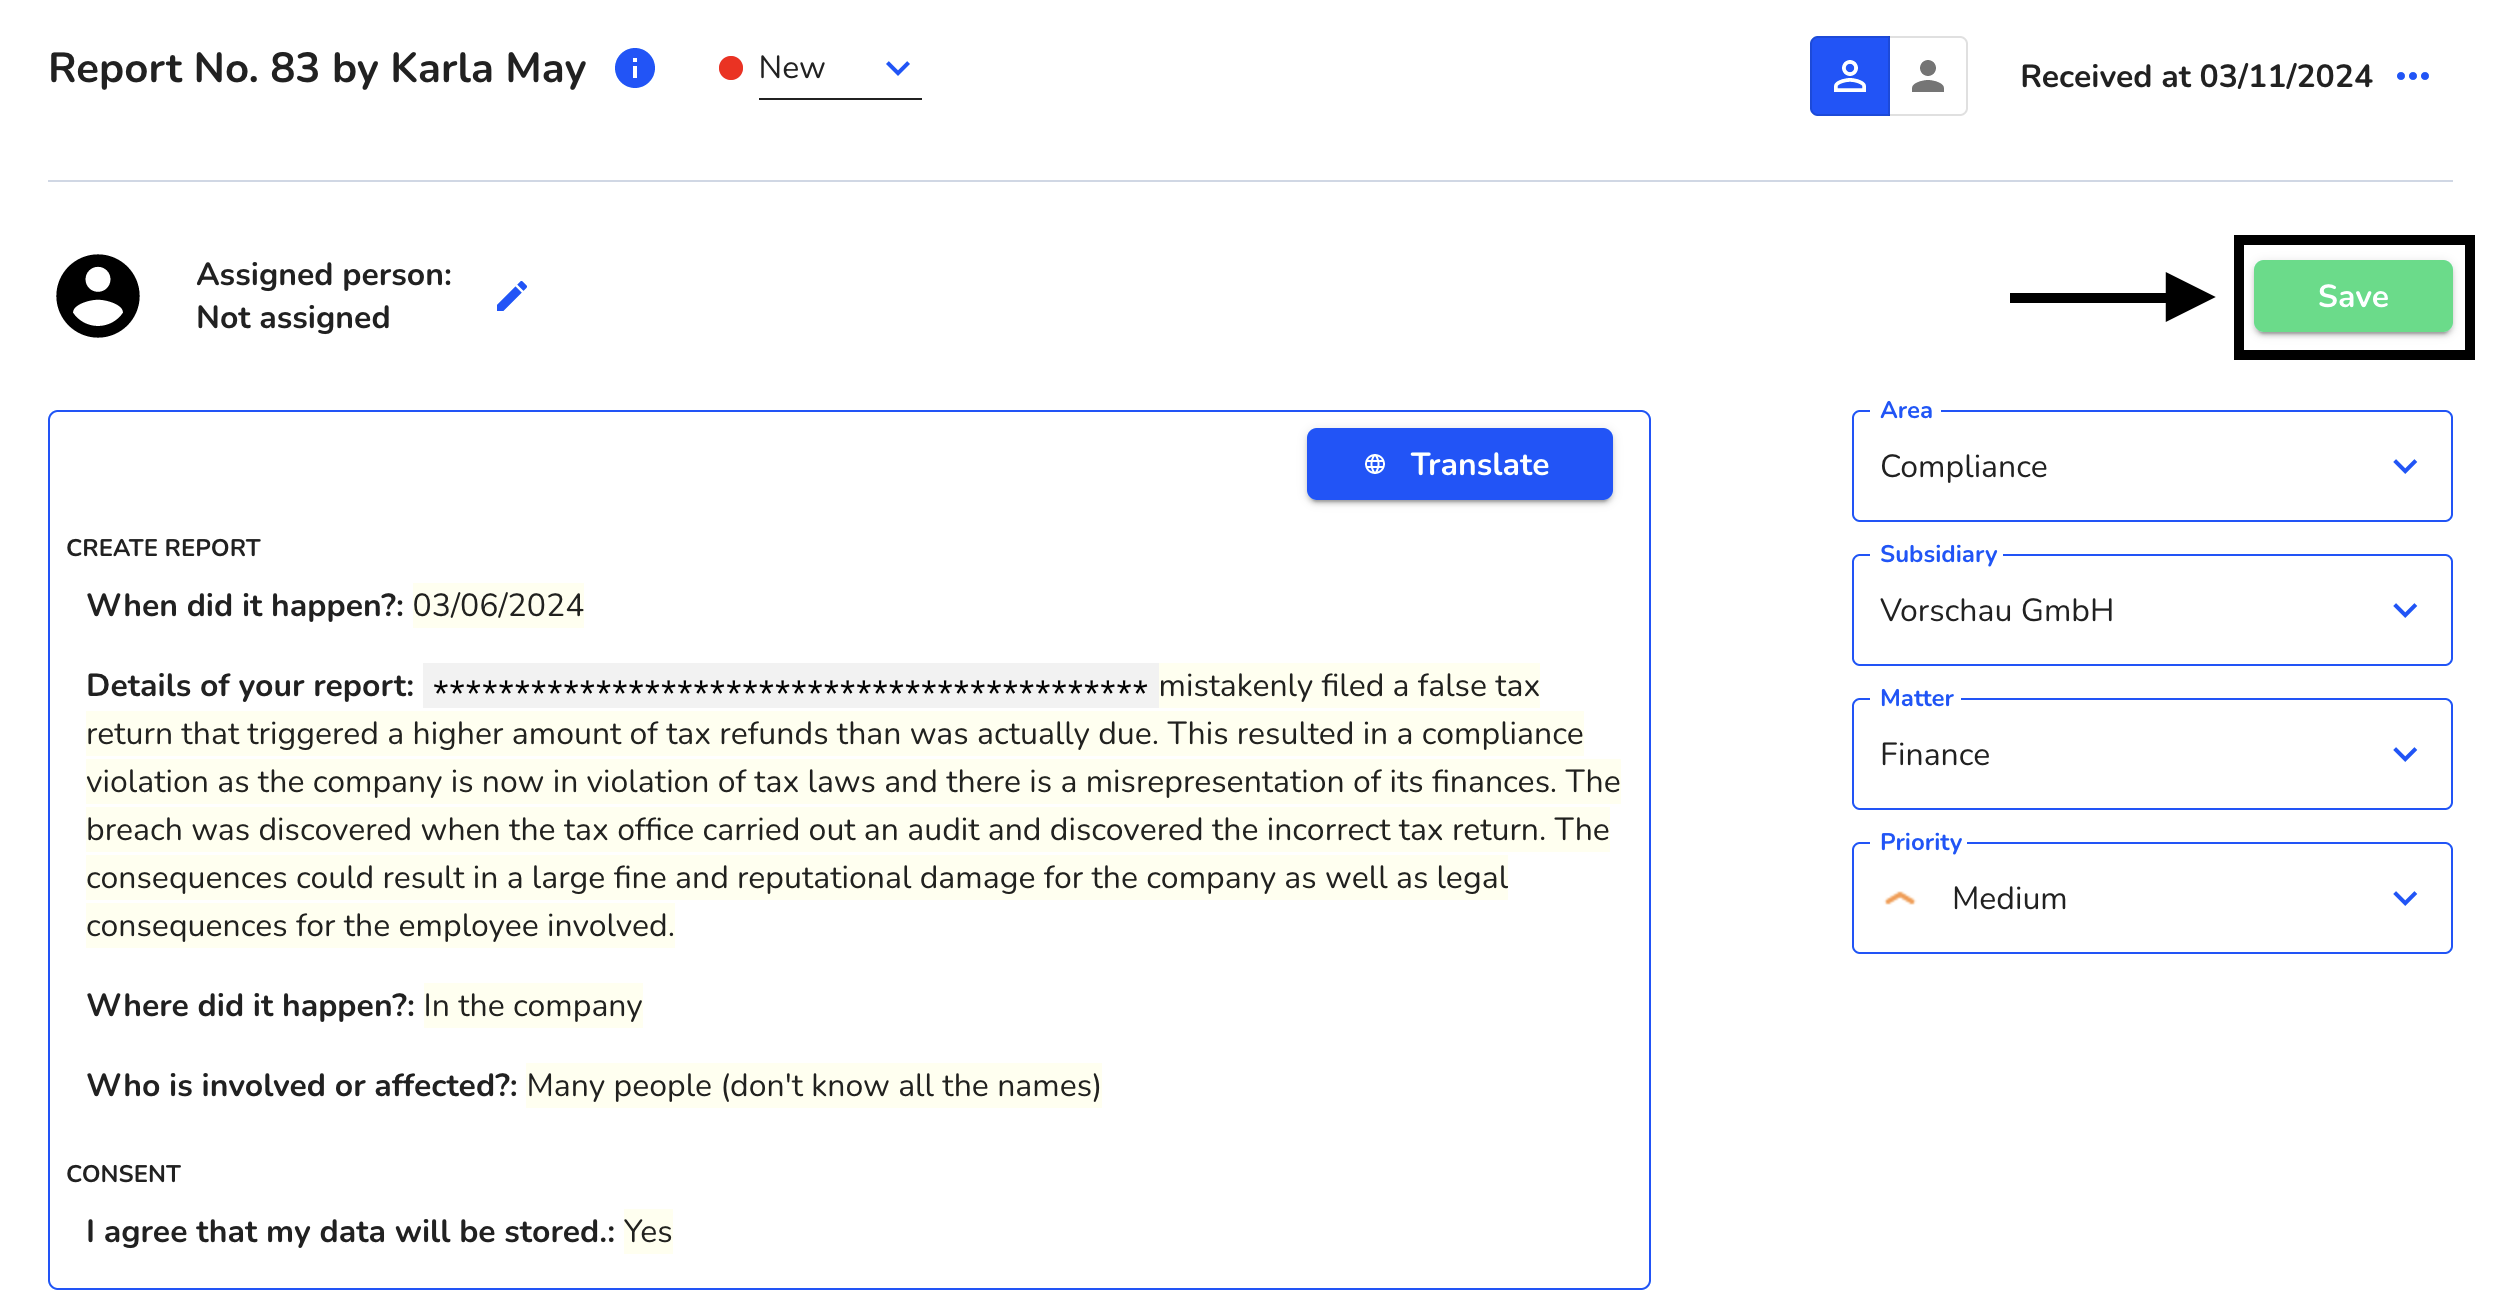
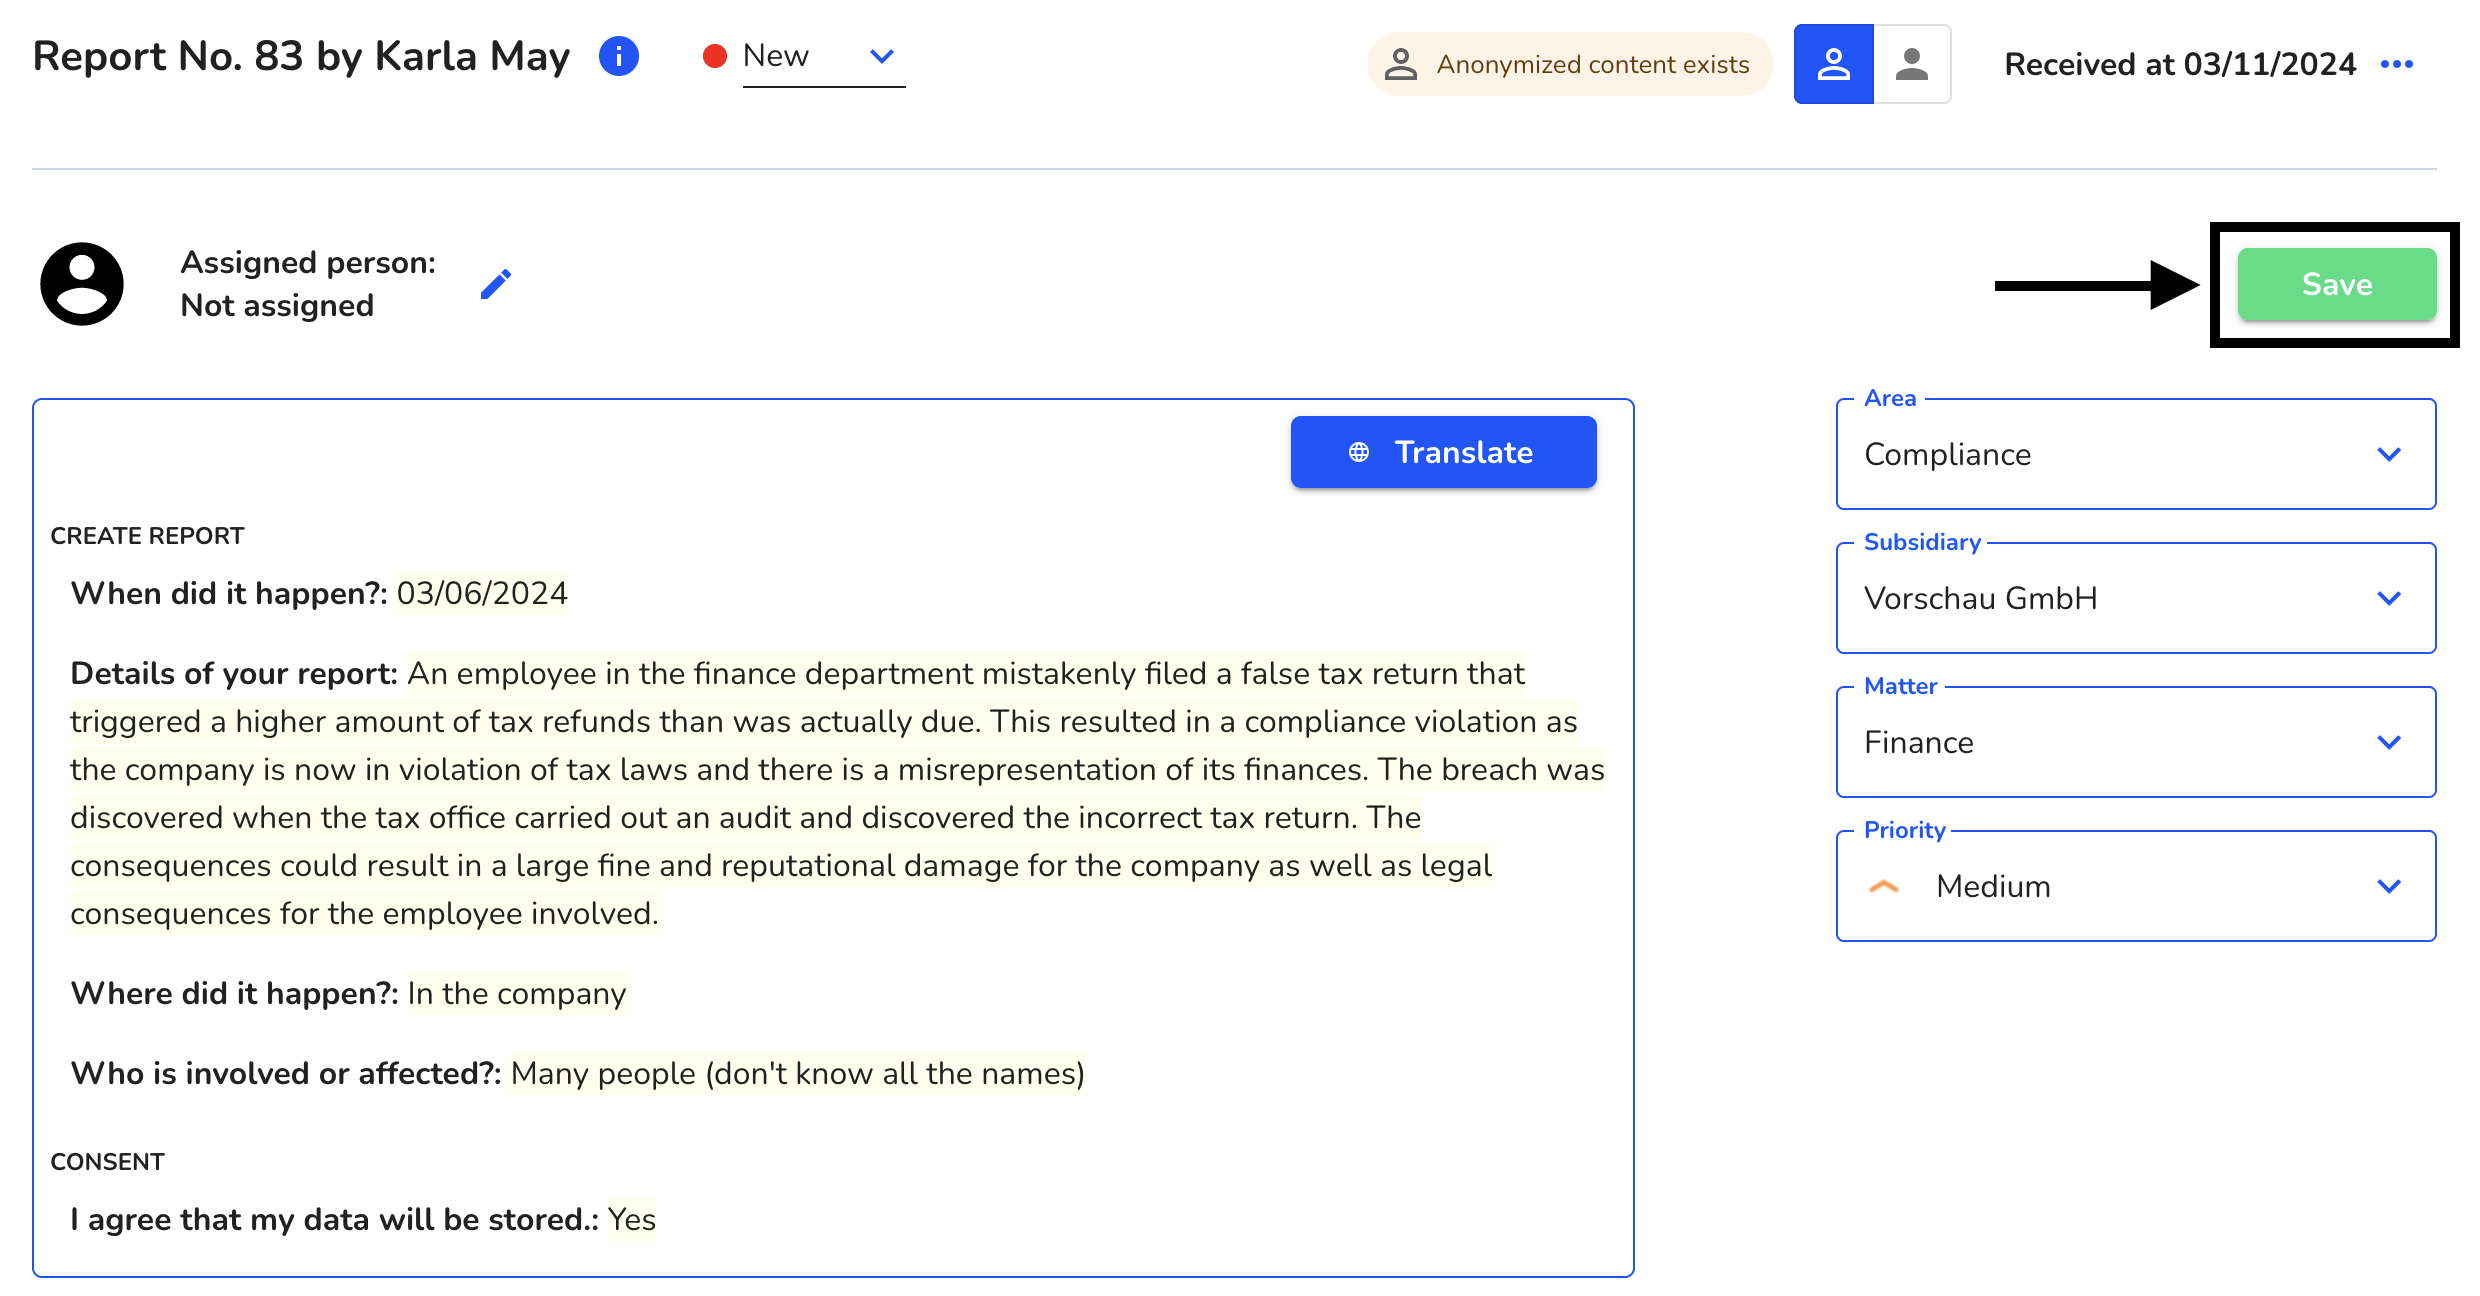
Click on Save.
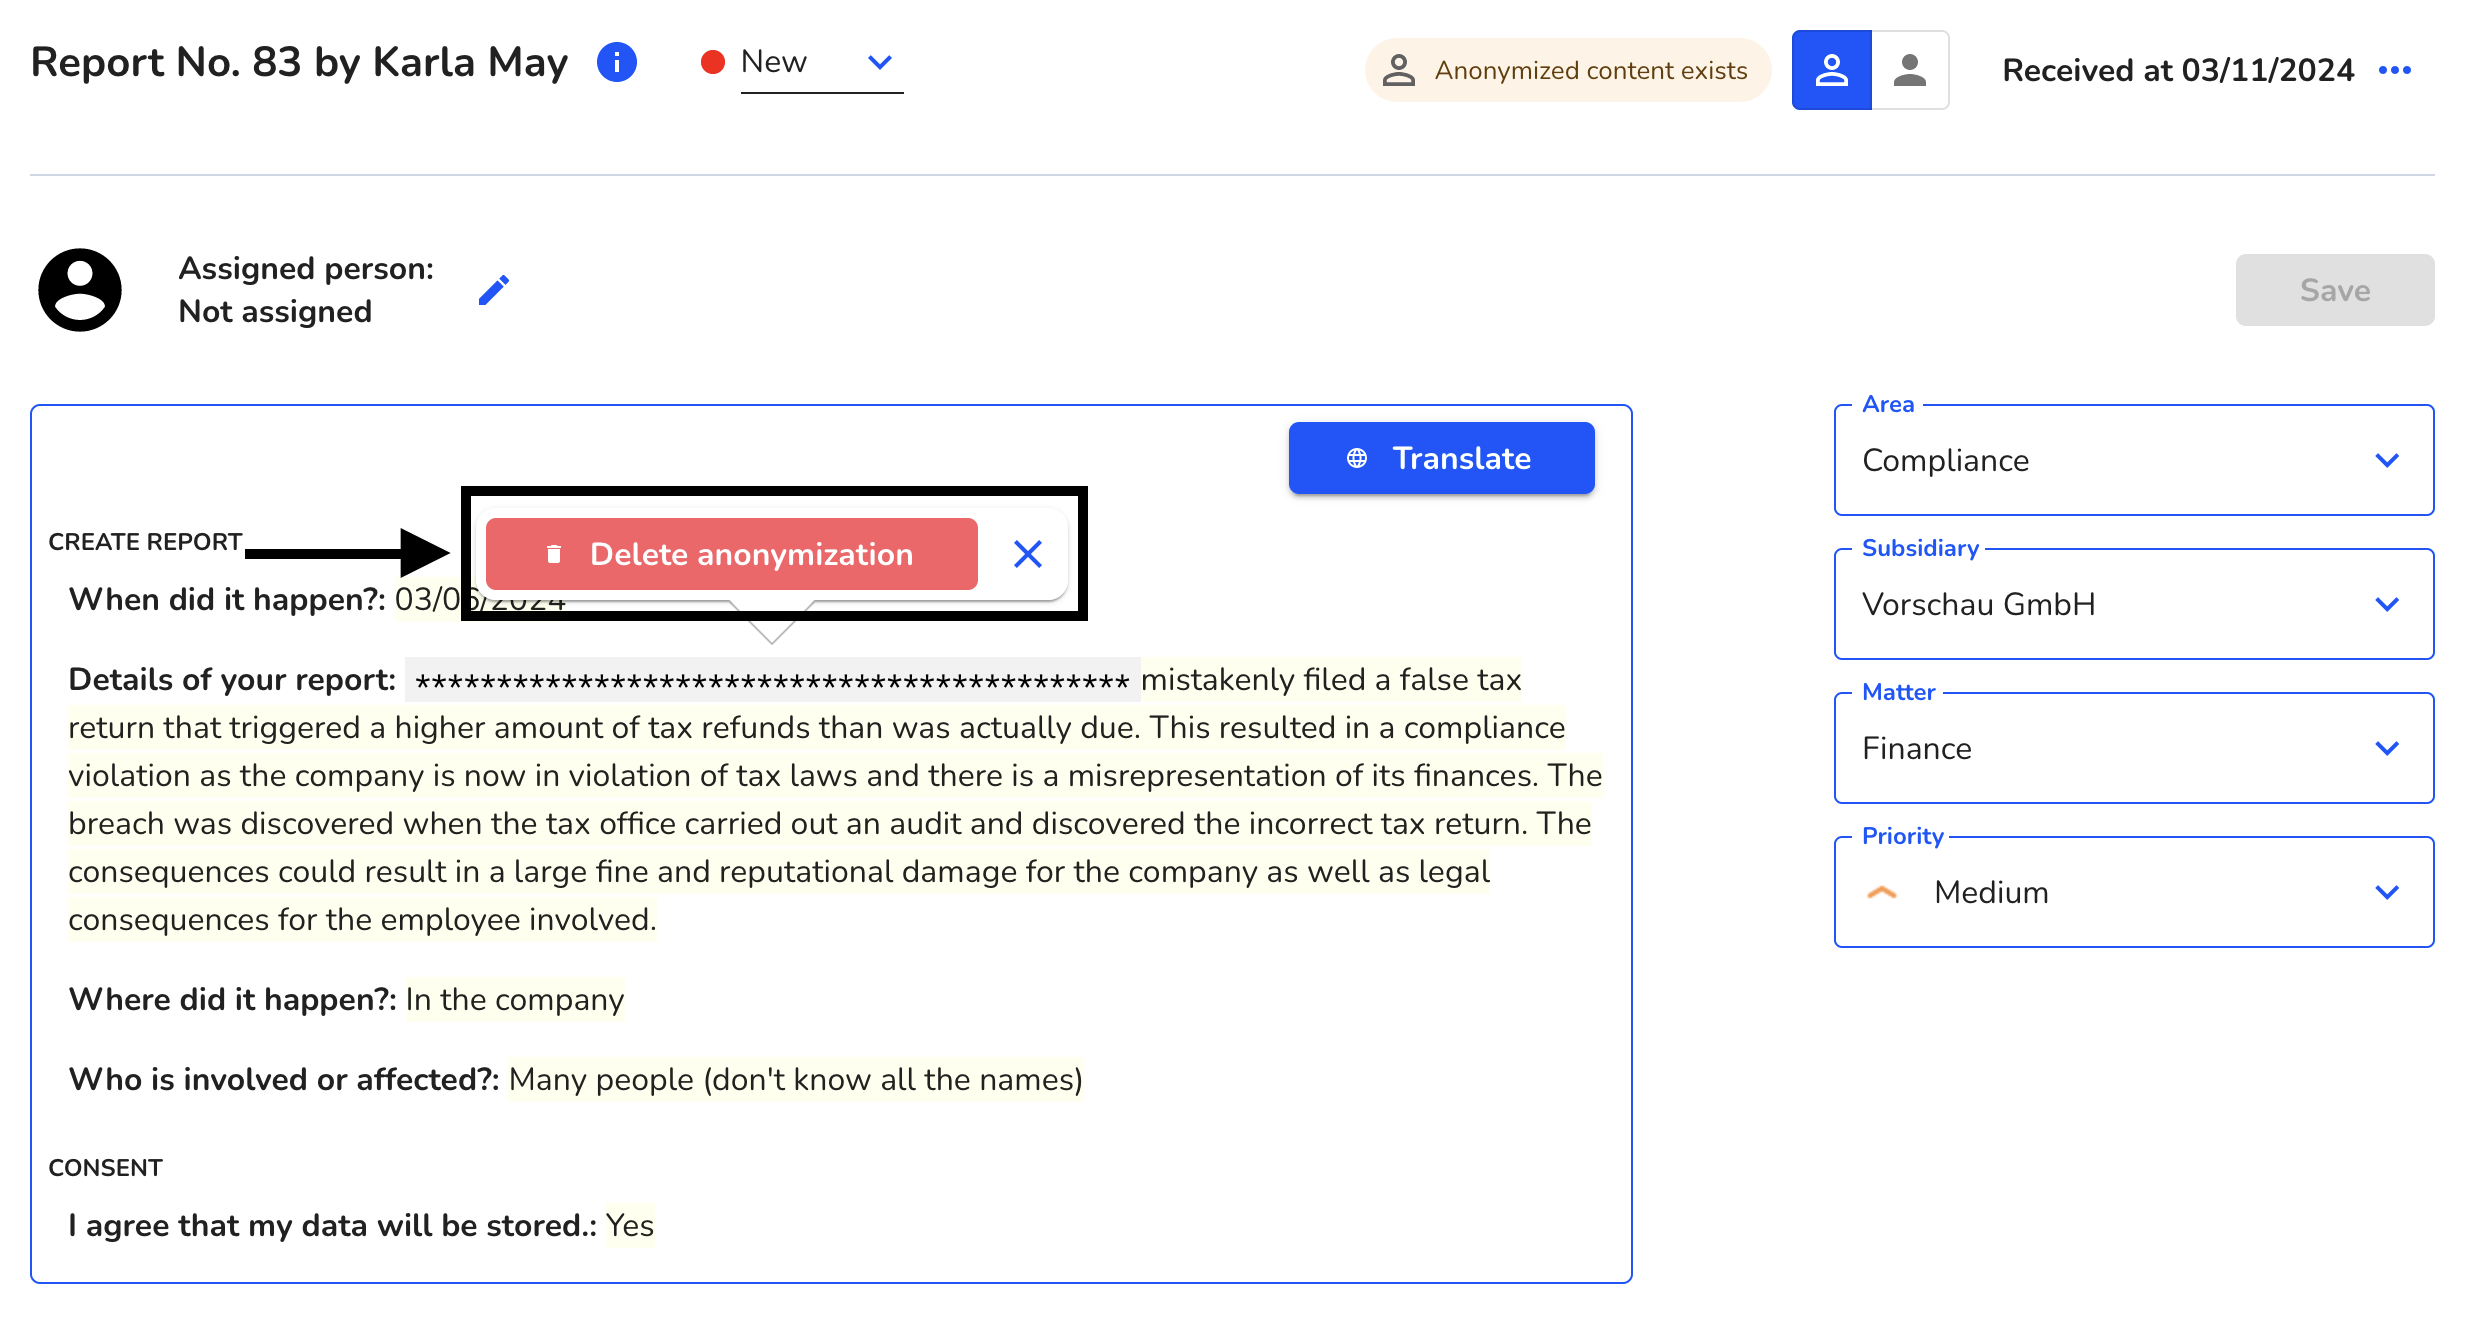
An anonymization can be deleted at any time by clicking on the corresponding anonymized content. Then click on Delete anonymization.
This change must also be saved.
You can switch to the non-anonymized version at any time if you are in the Manager or Administrator role.
Complete anonymization
You can also completely anonymize content. It is then no longer possible to switch between the anonymous and the original view of a notice. The anonymized content is irrevocably blacked out. The anonymization must be confirmed by another administrator in accordance with the dual control principle.
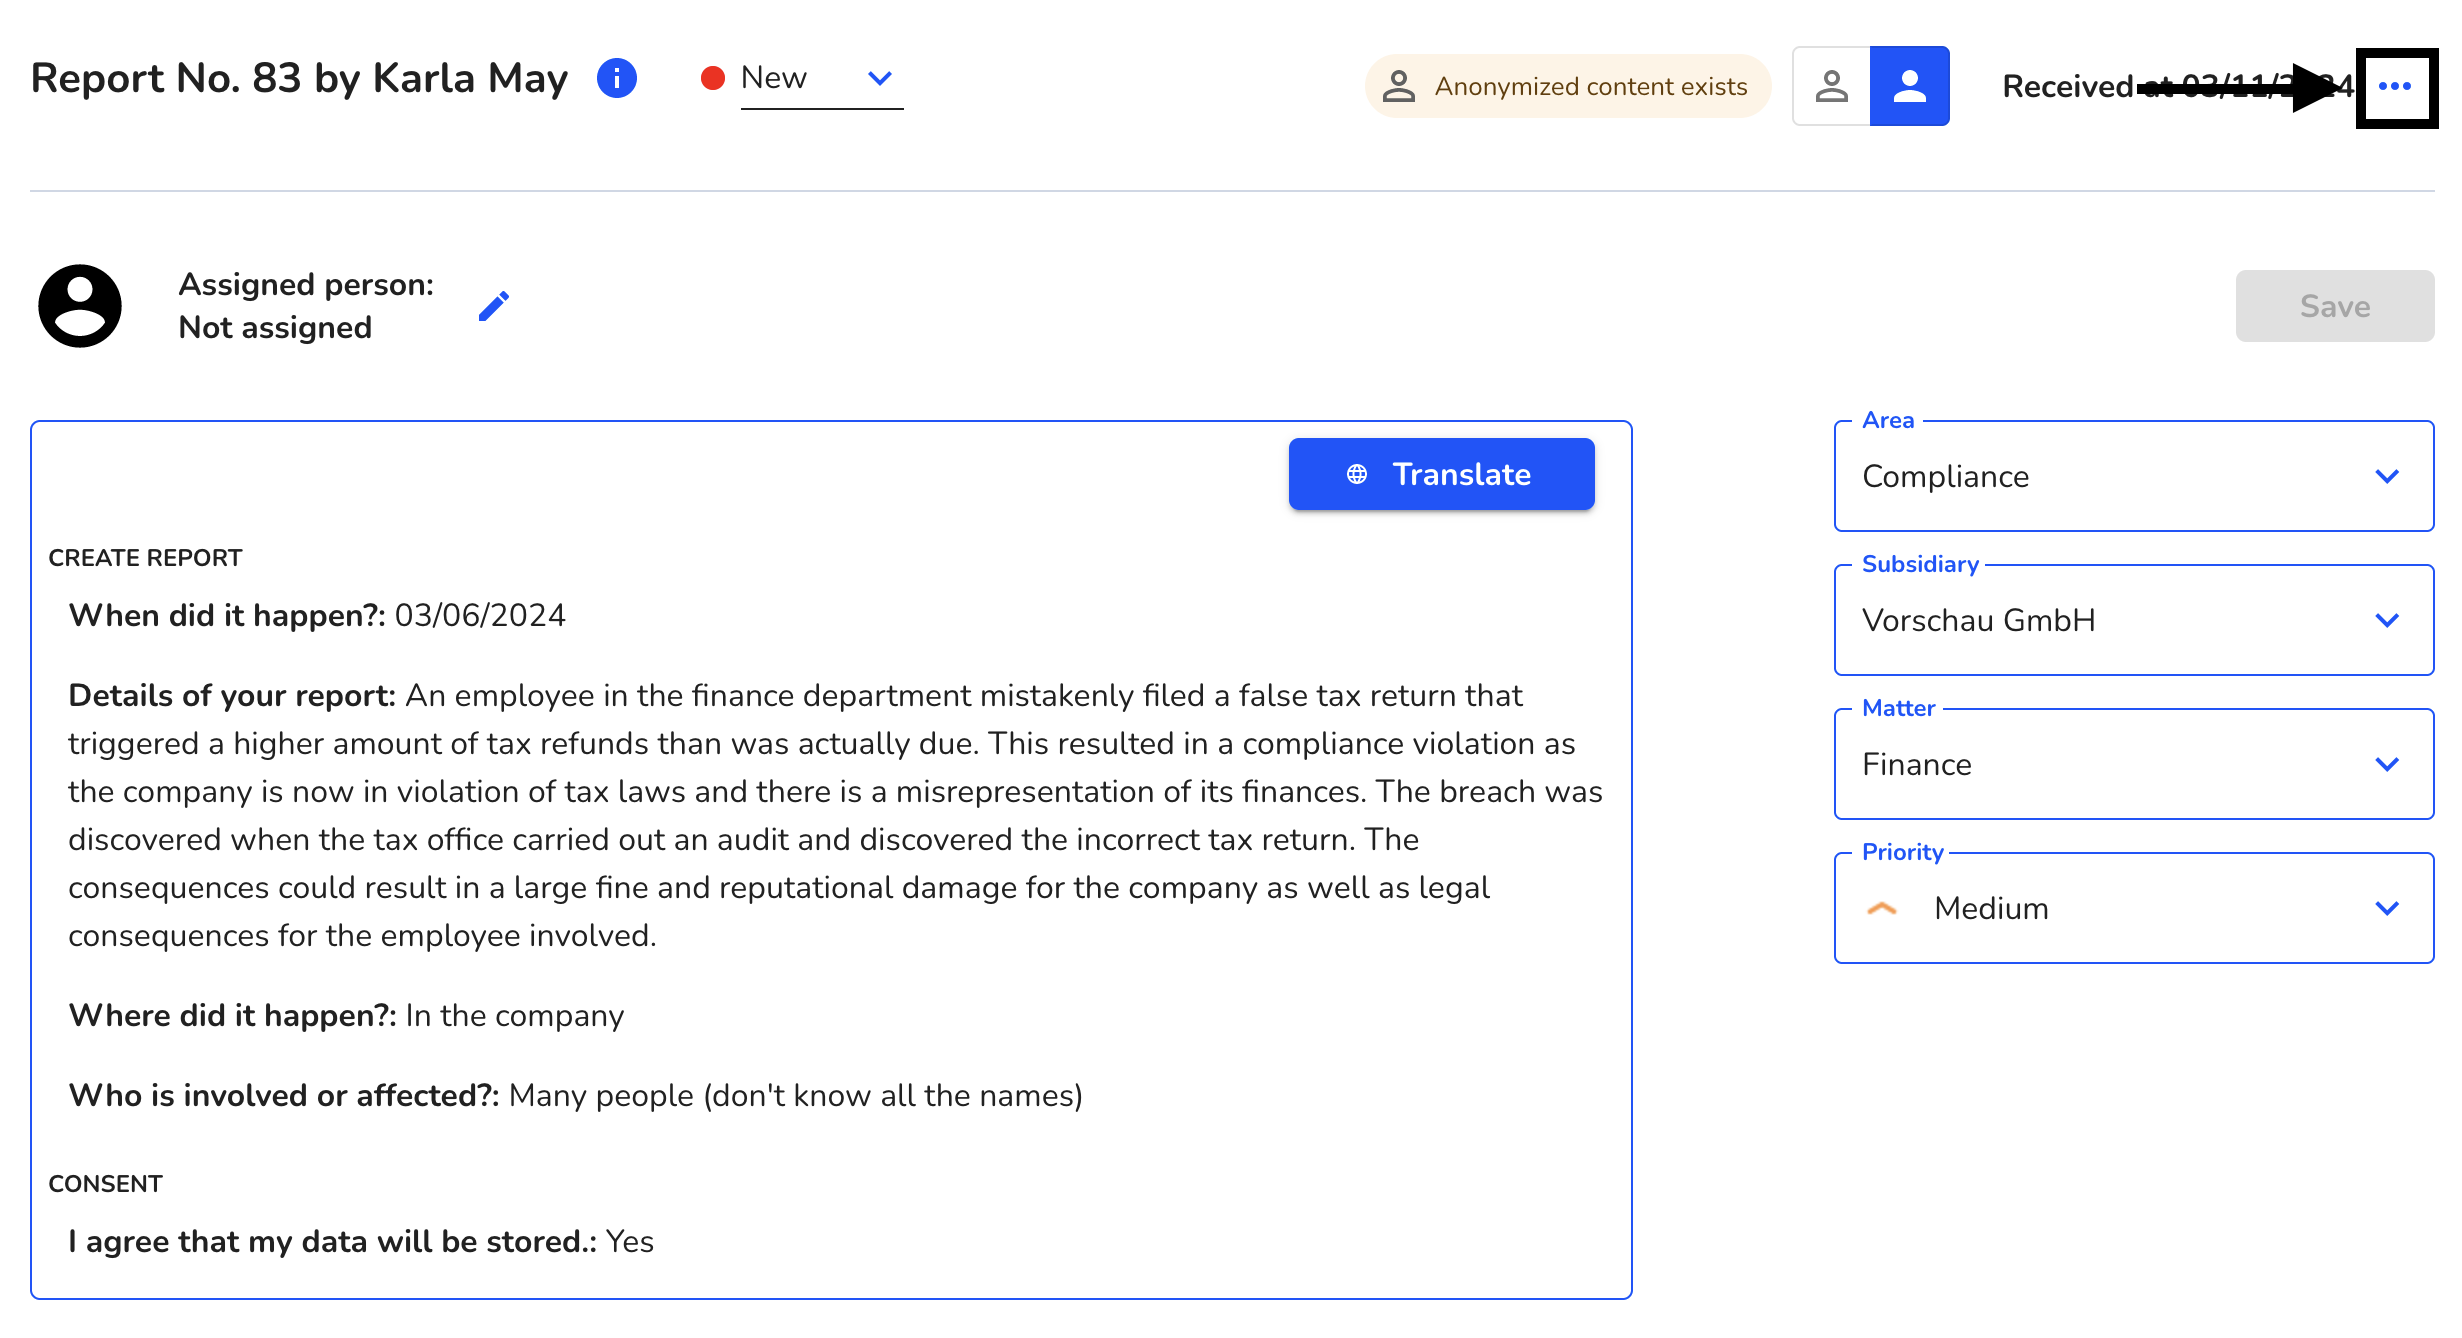
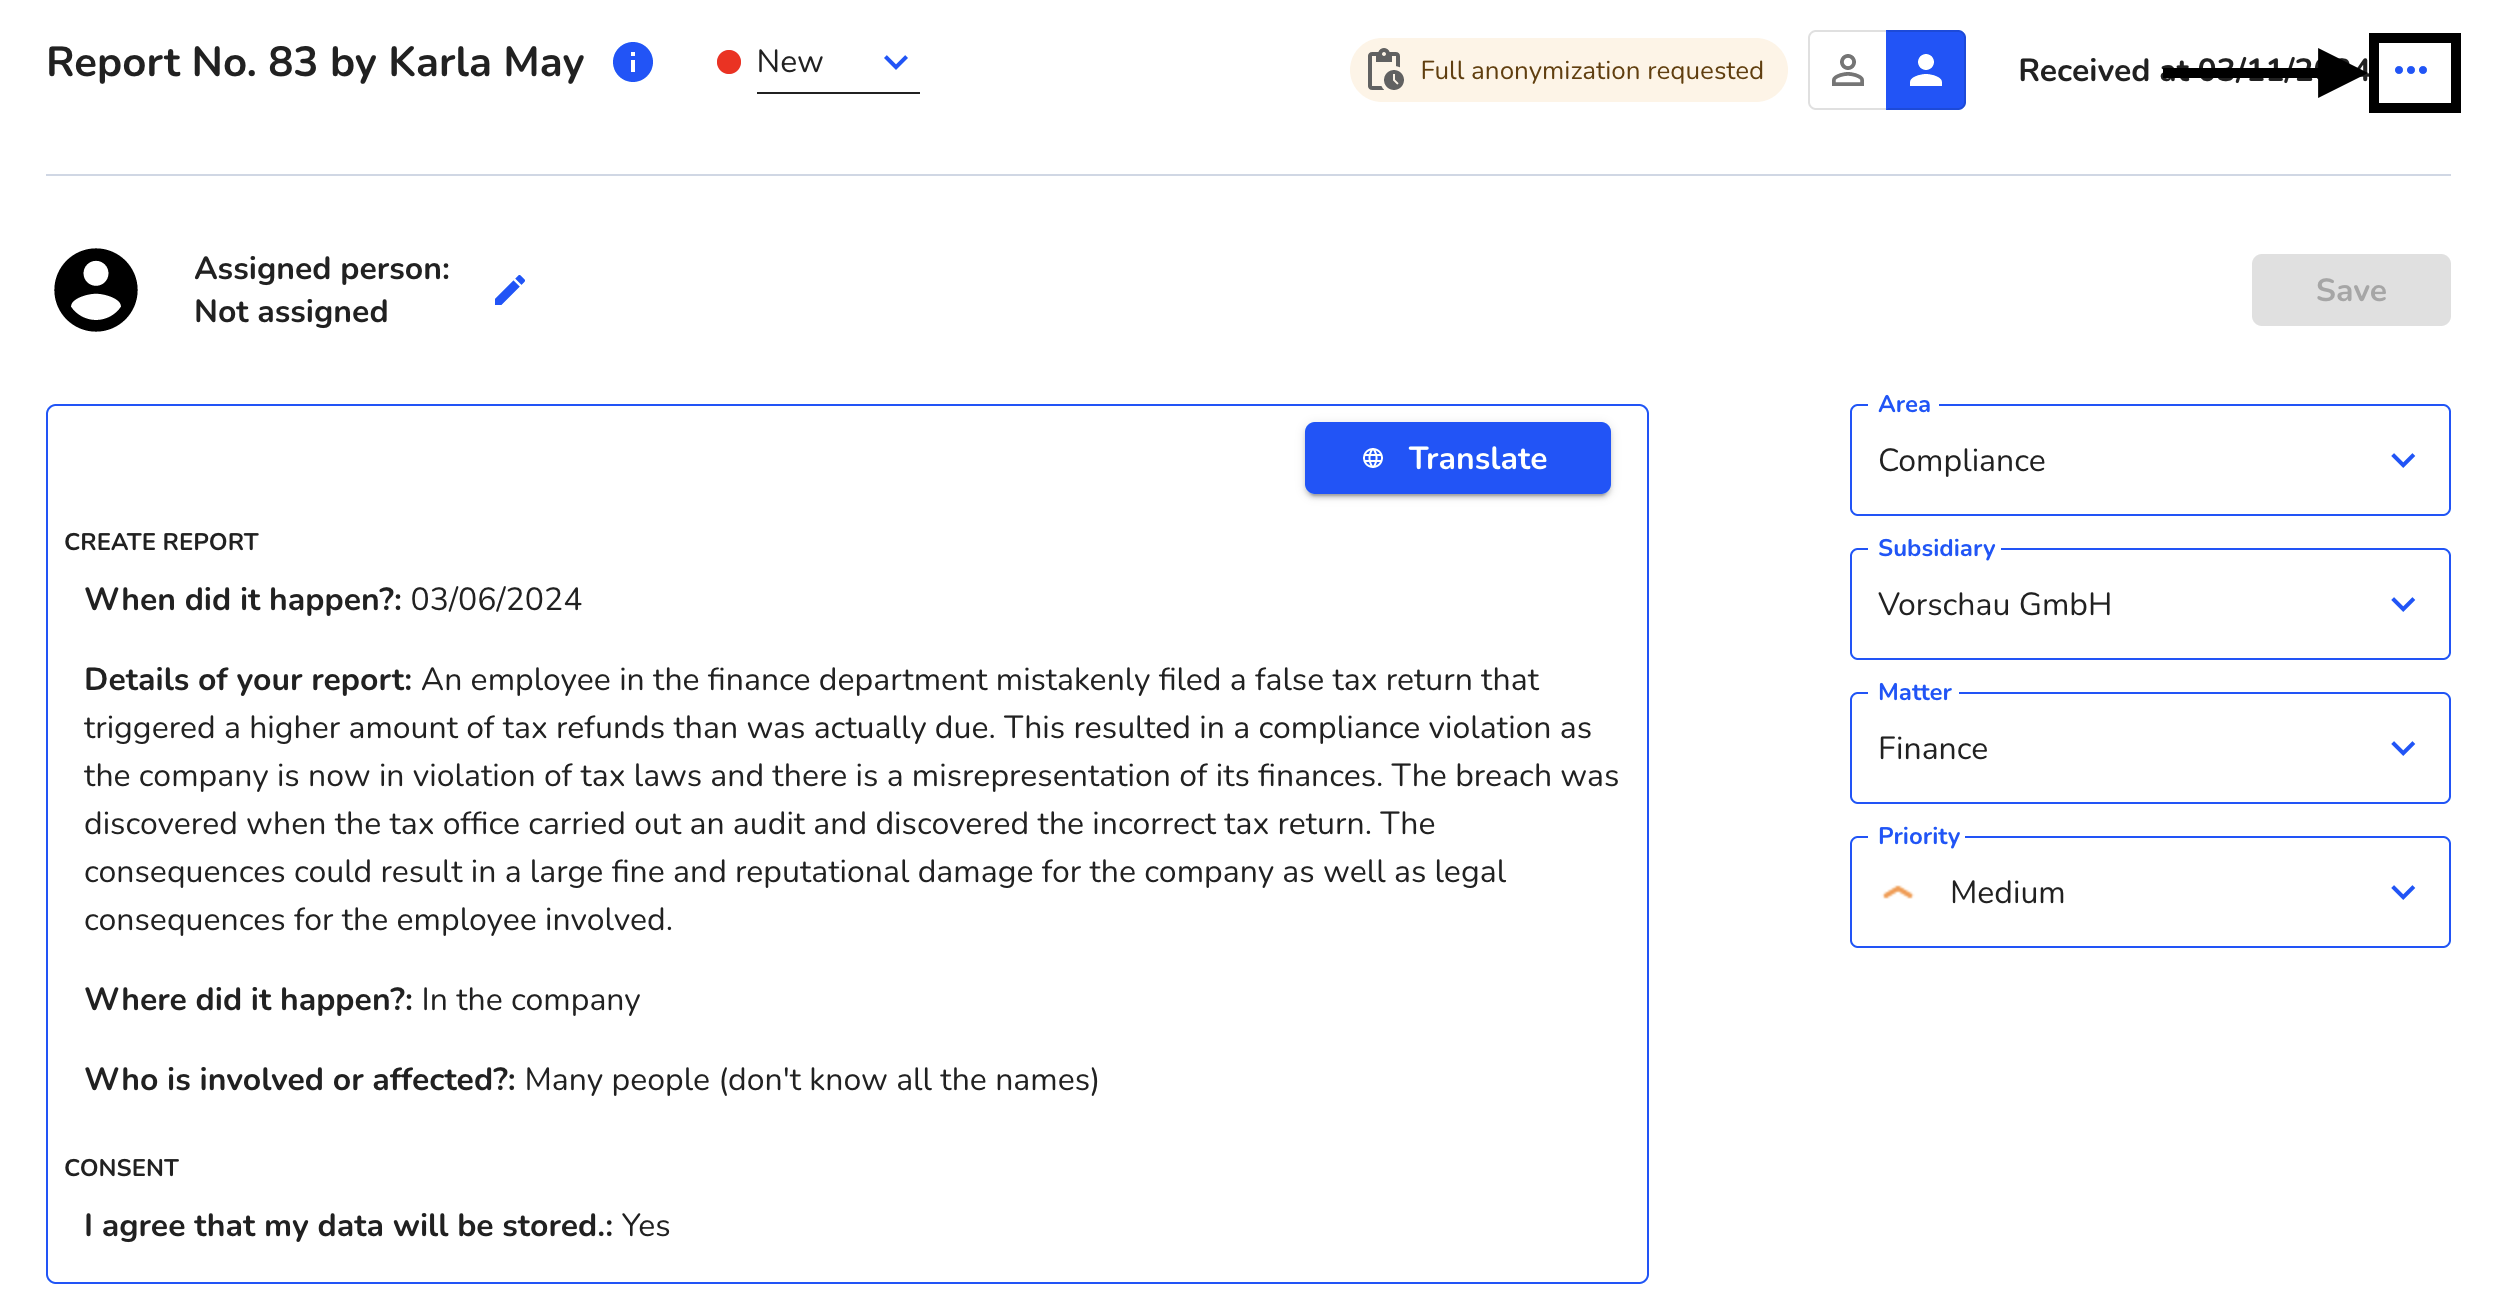
Click on the three dots.
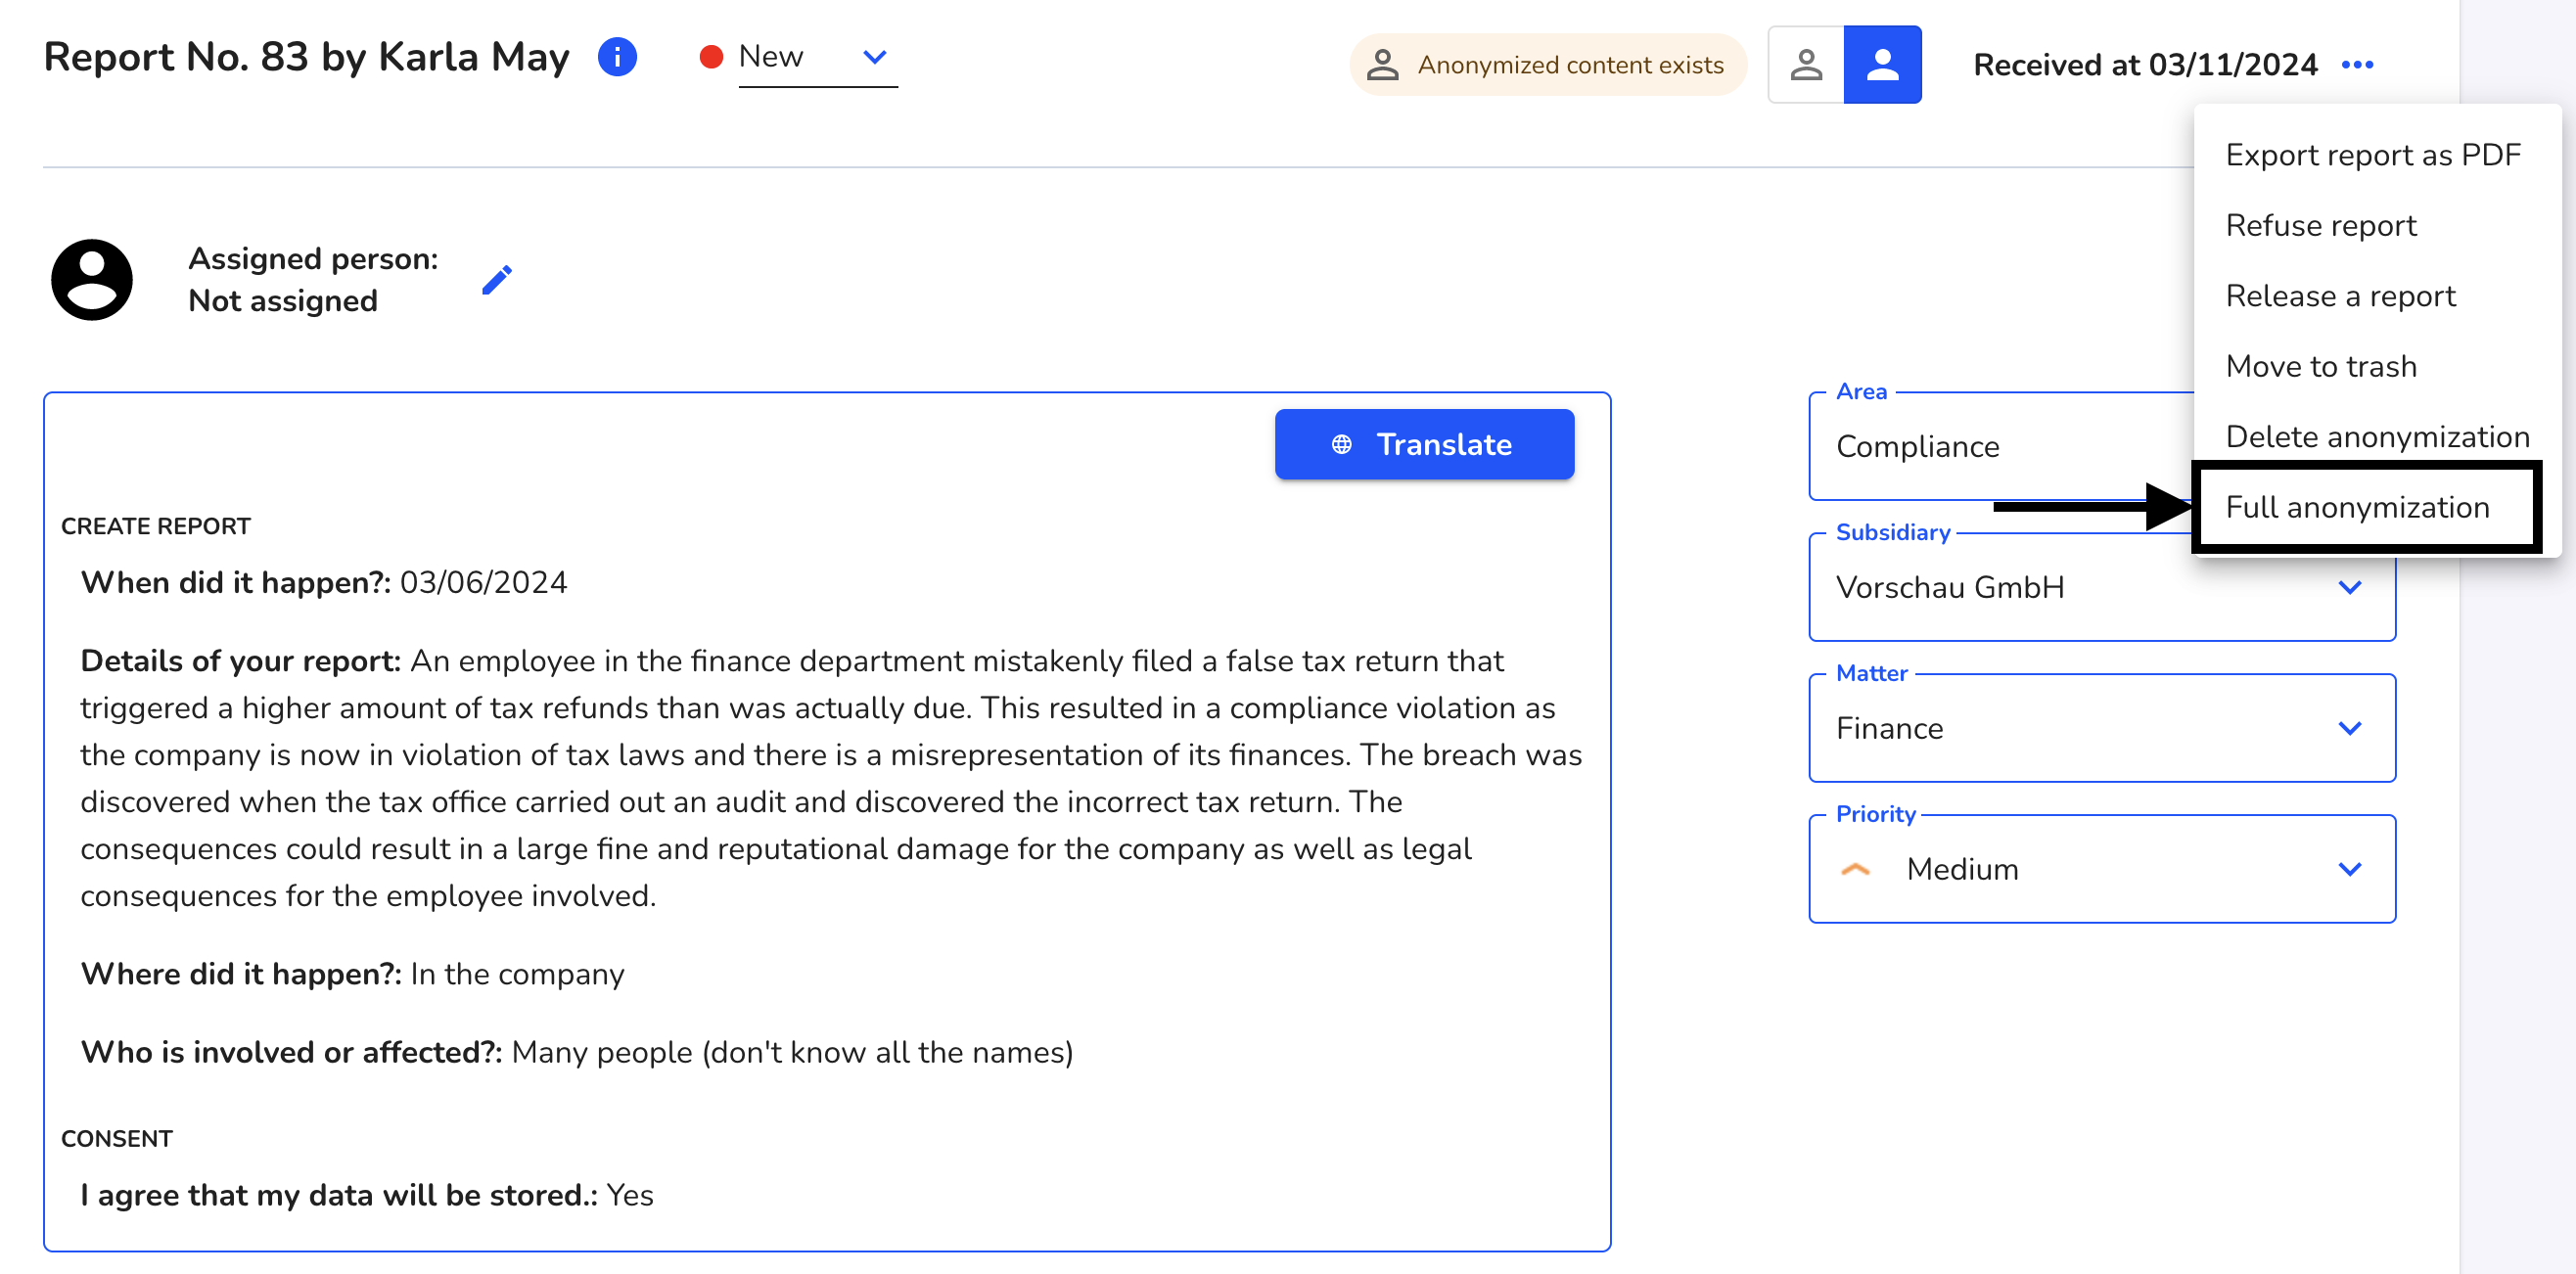
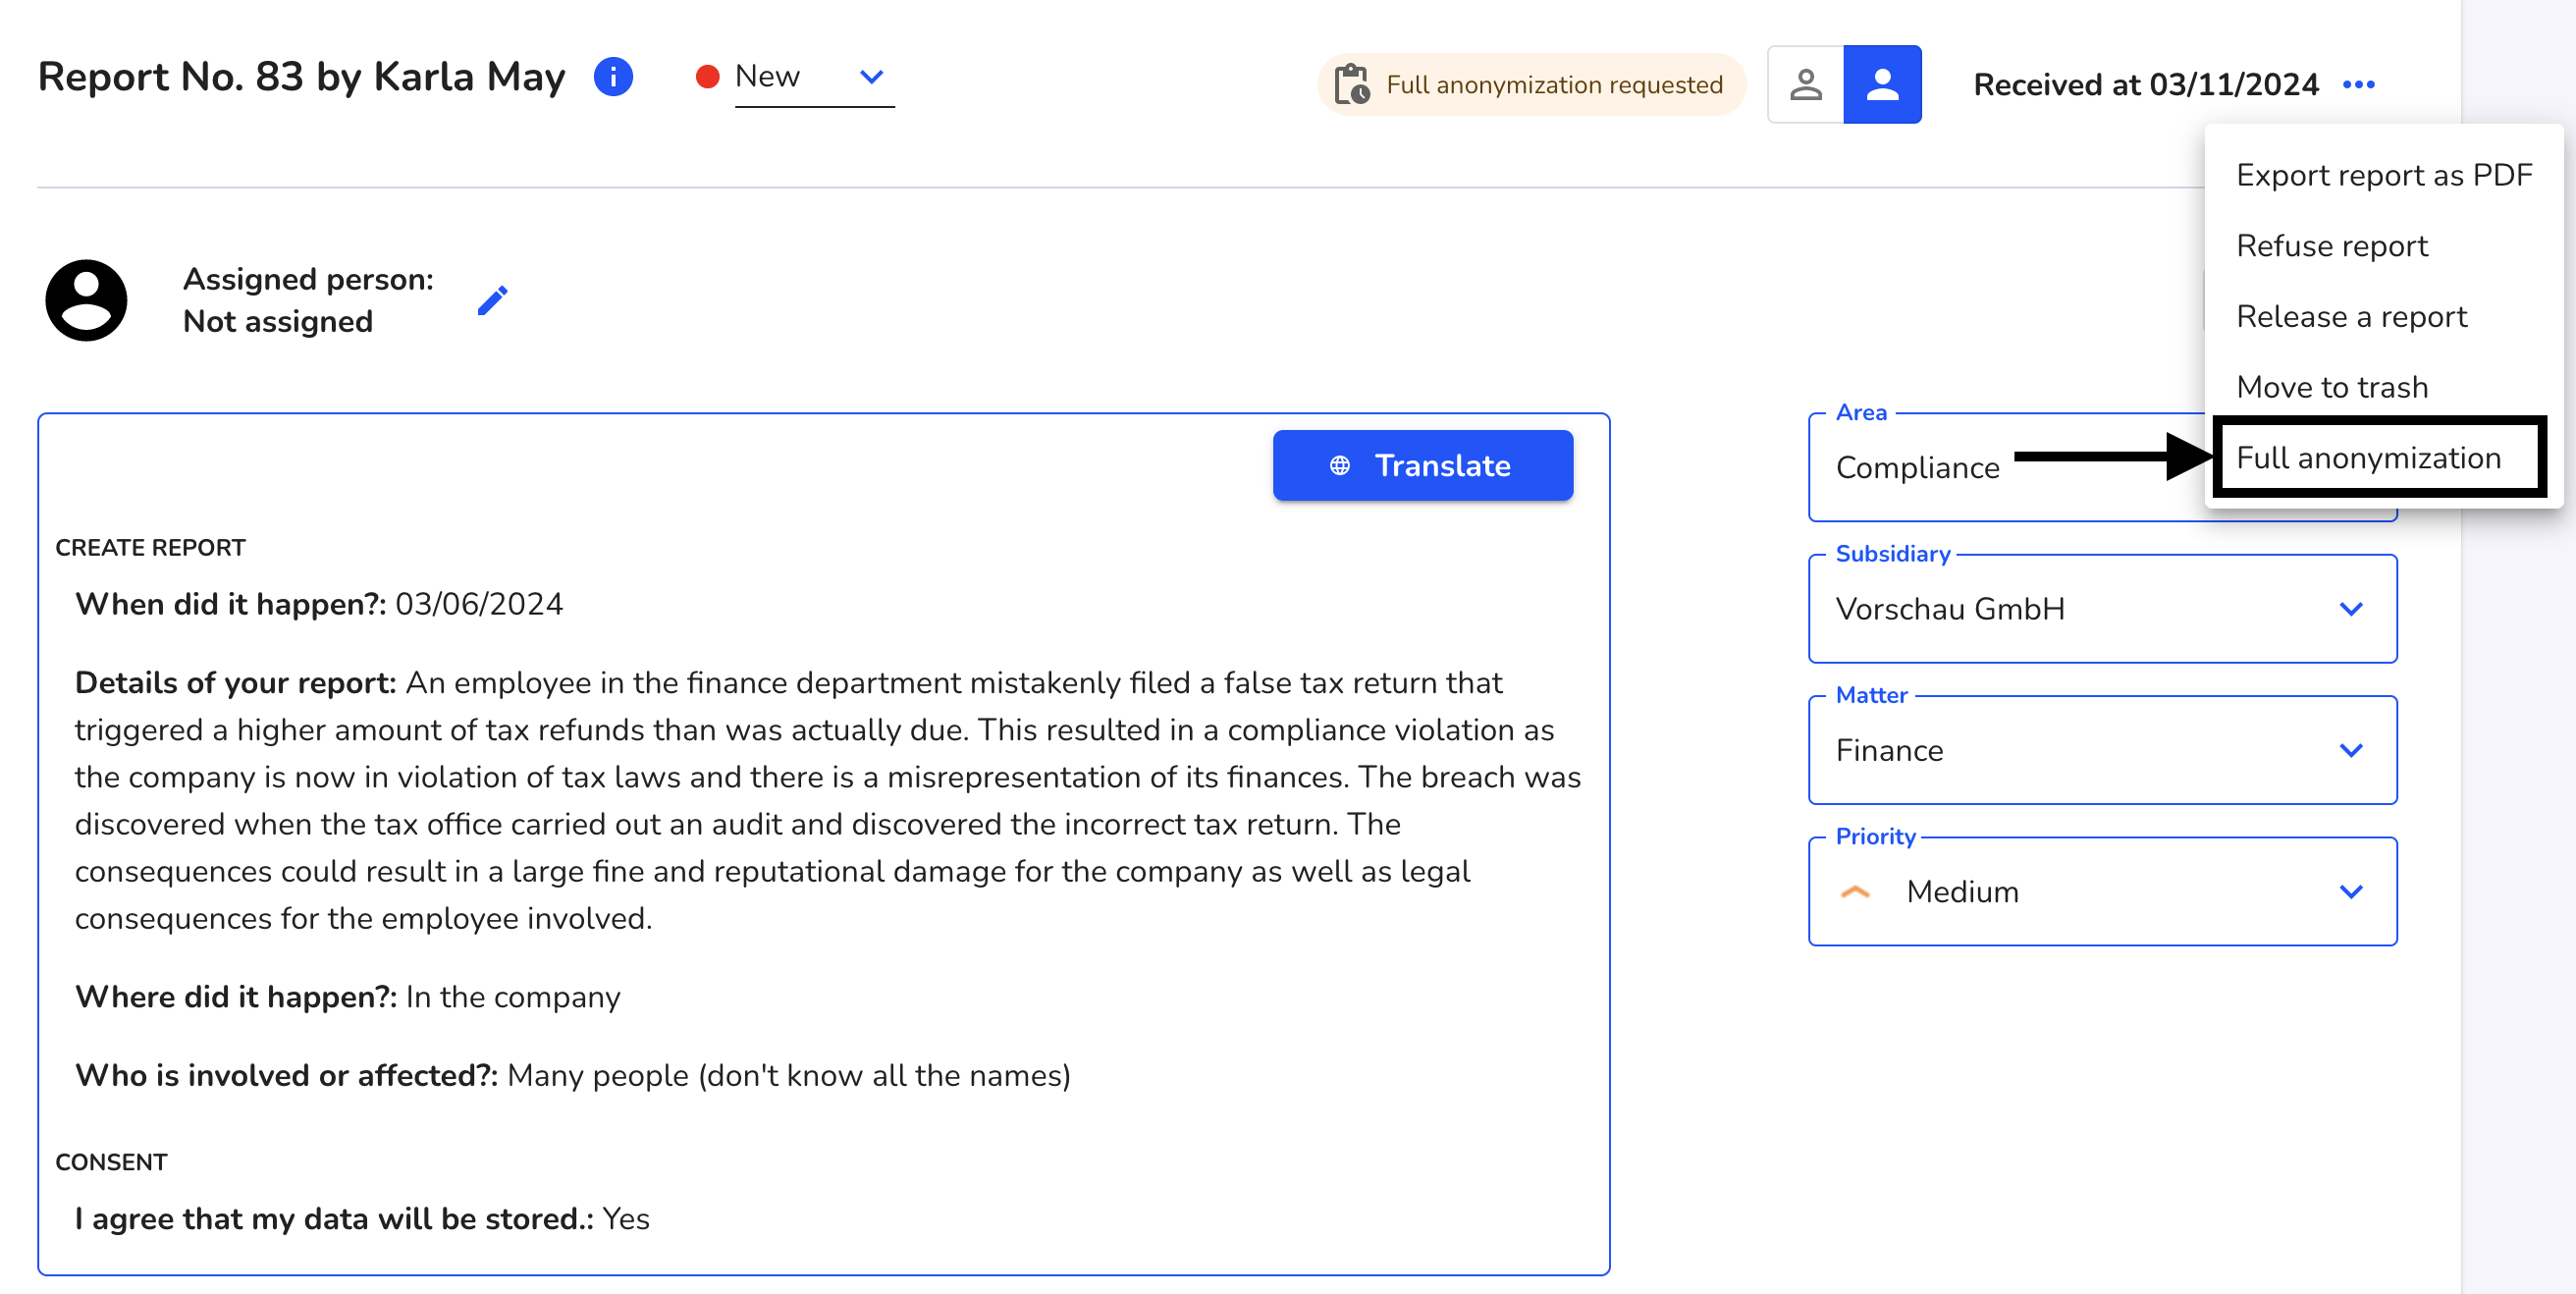
Then click on complete anonymization.
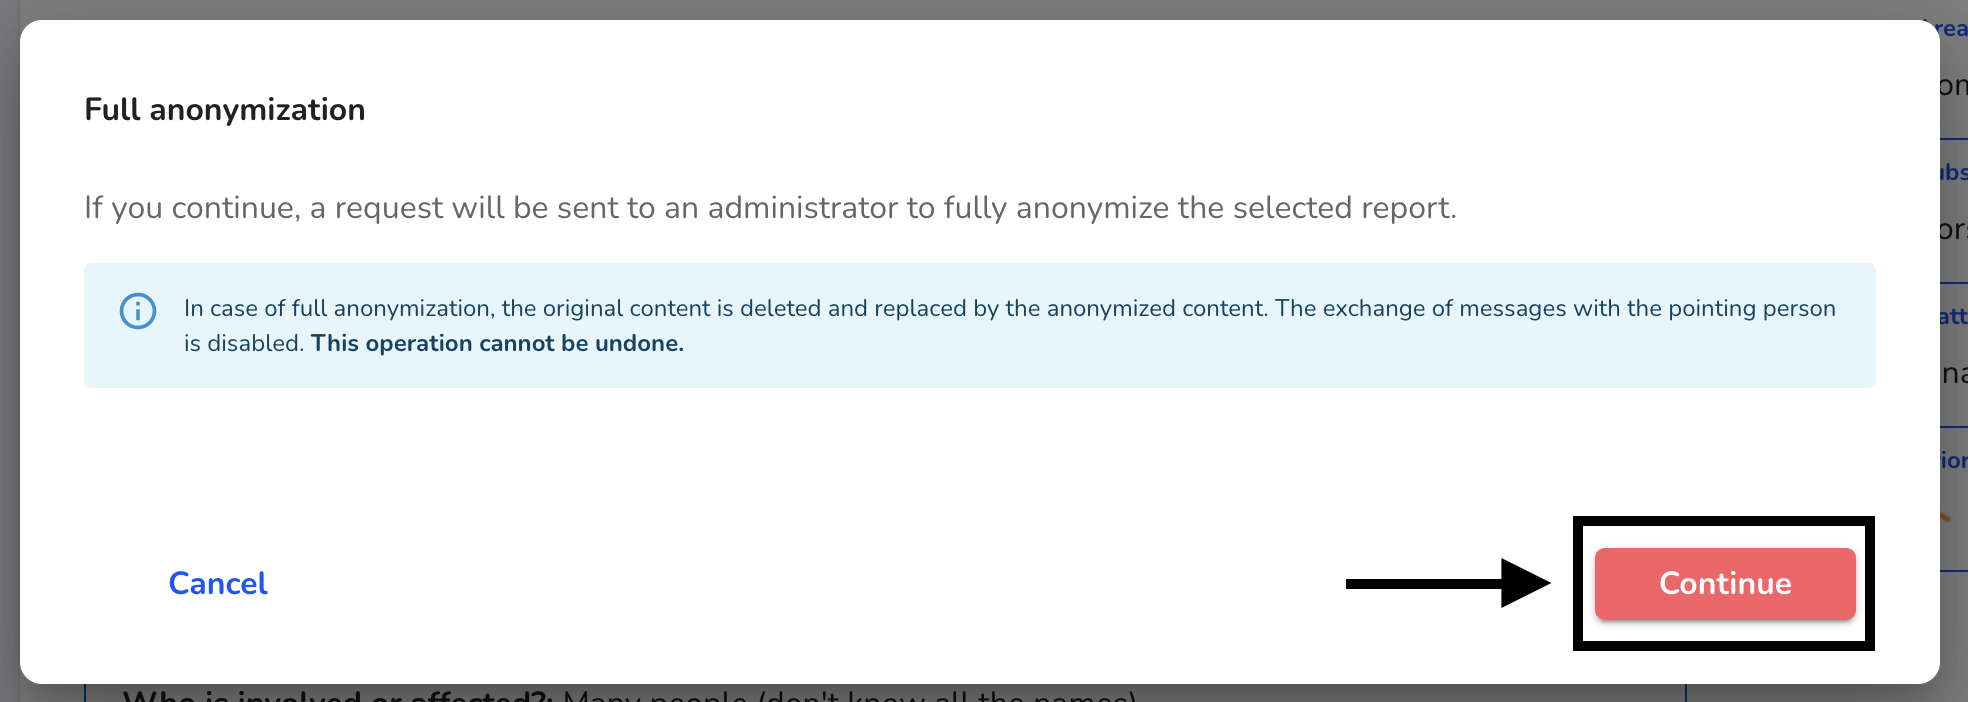
A dialog opens. Click on continue.
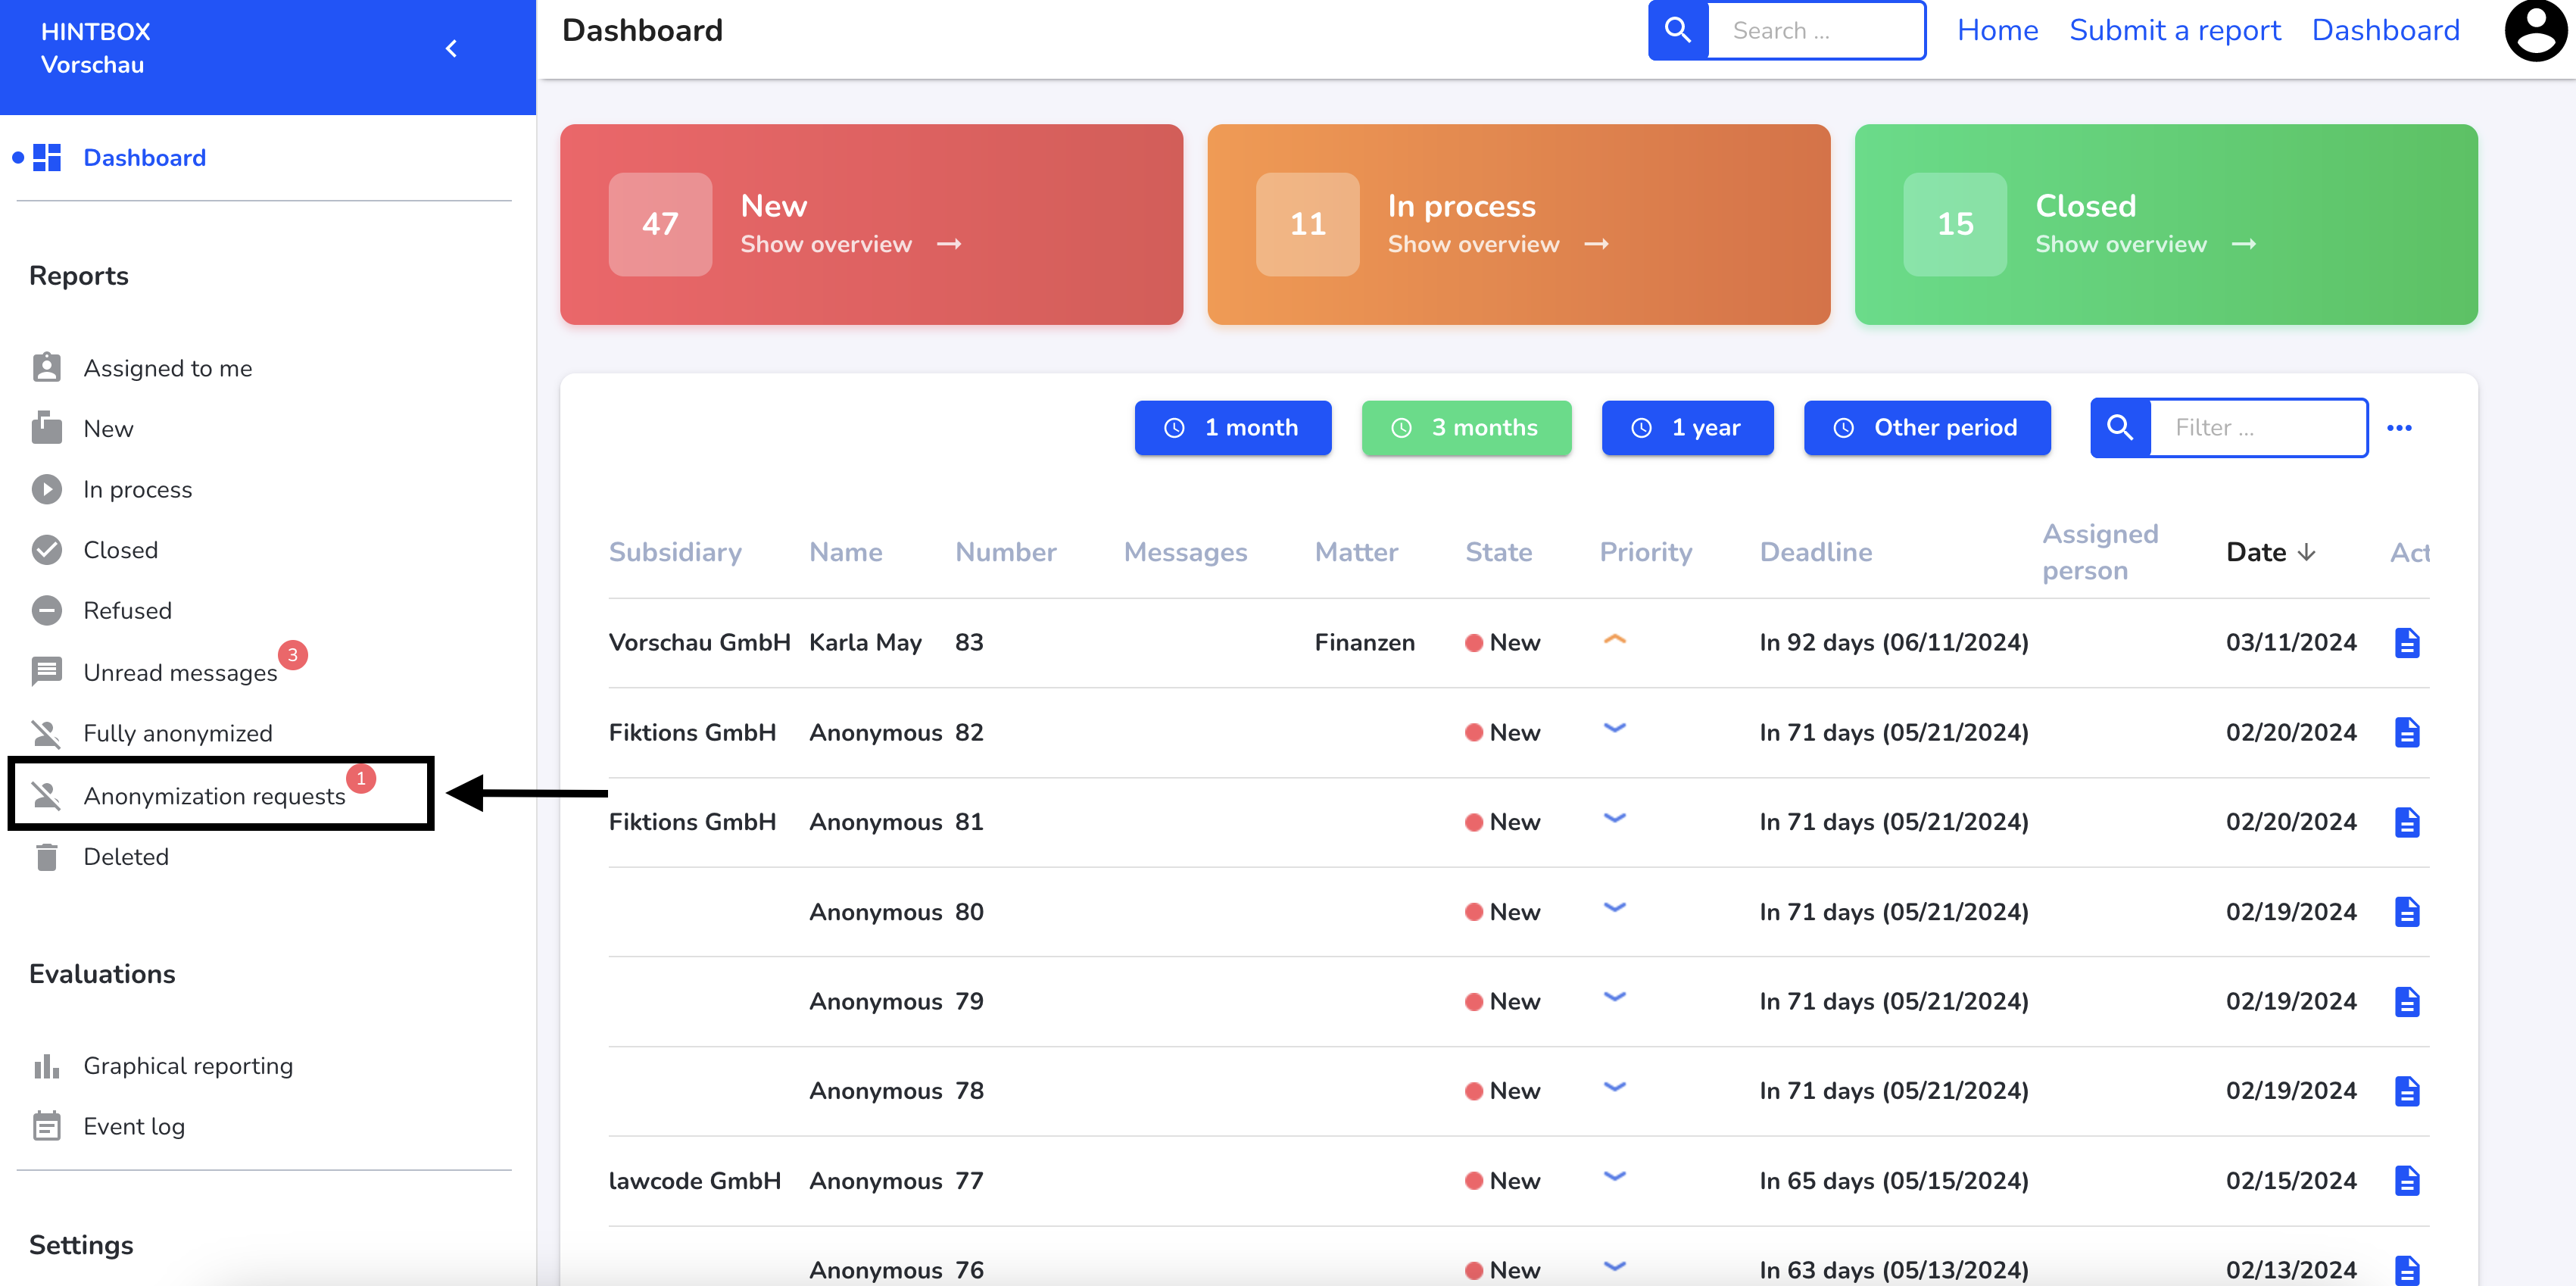
Another admin must approve the request. (Another administrator is now logged in here). Click on Request anonymization in the dashboard.
An overview of all applications will open. Click on the relevant application.

Click on the three dots.
Click on complete anonymization.
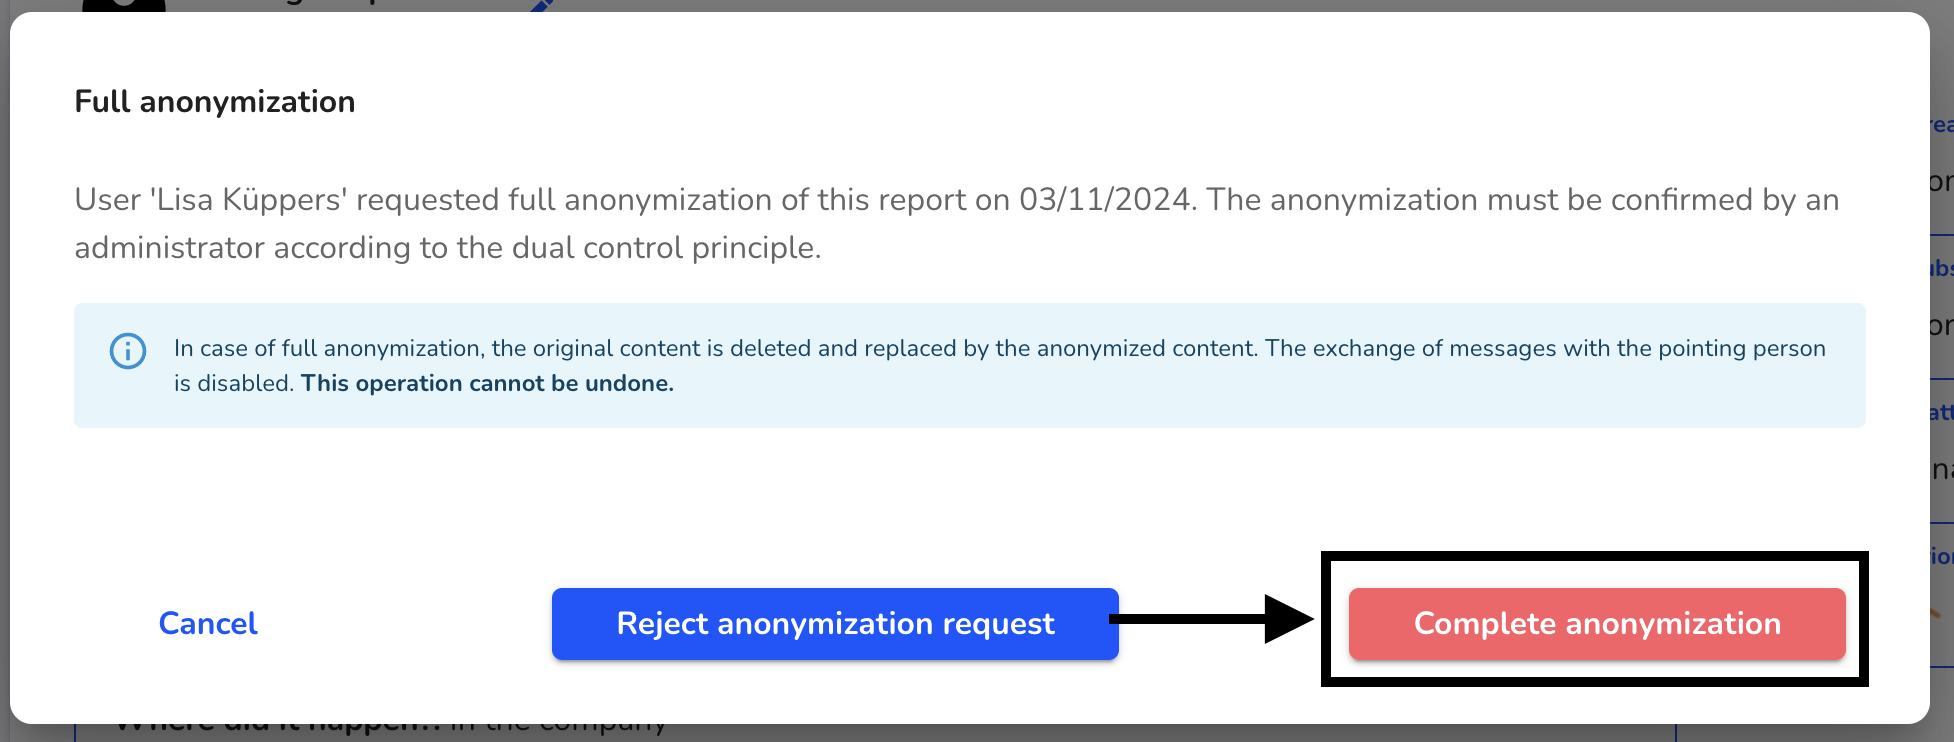
You can reject or approve the request for anonymization. In this case, click on Accept anonymization.
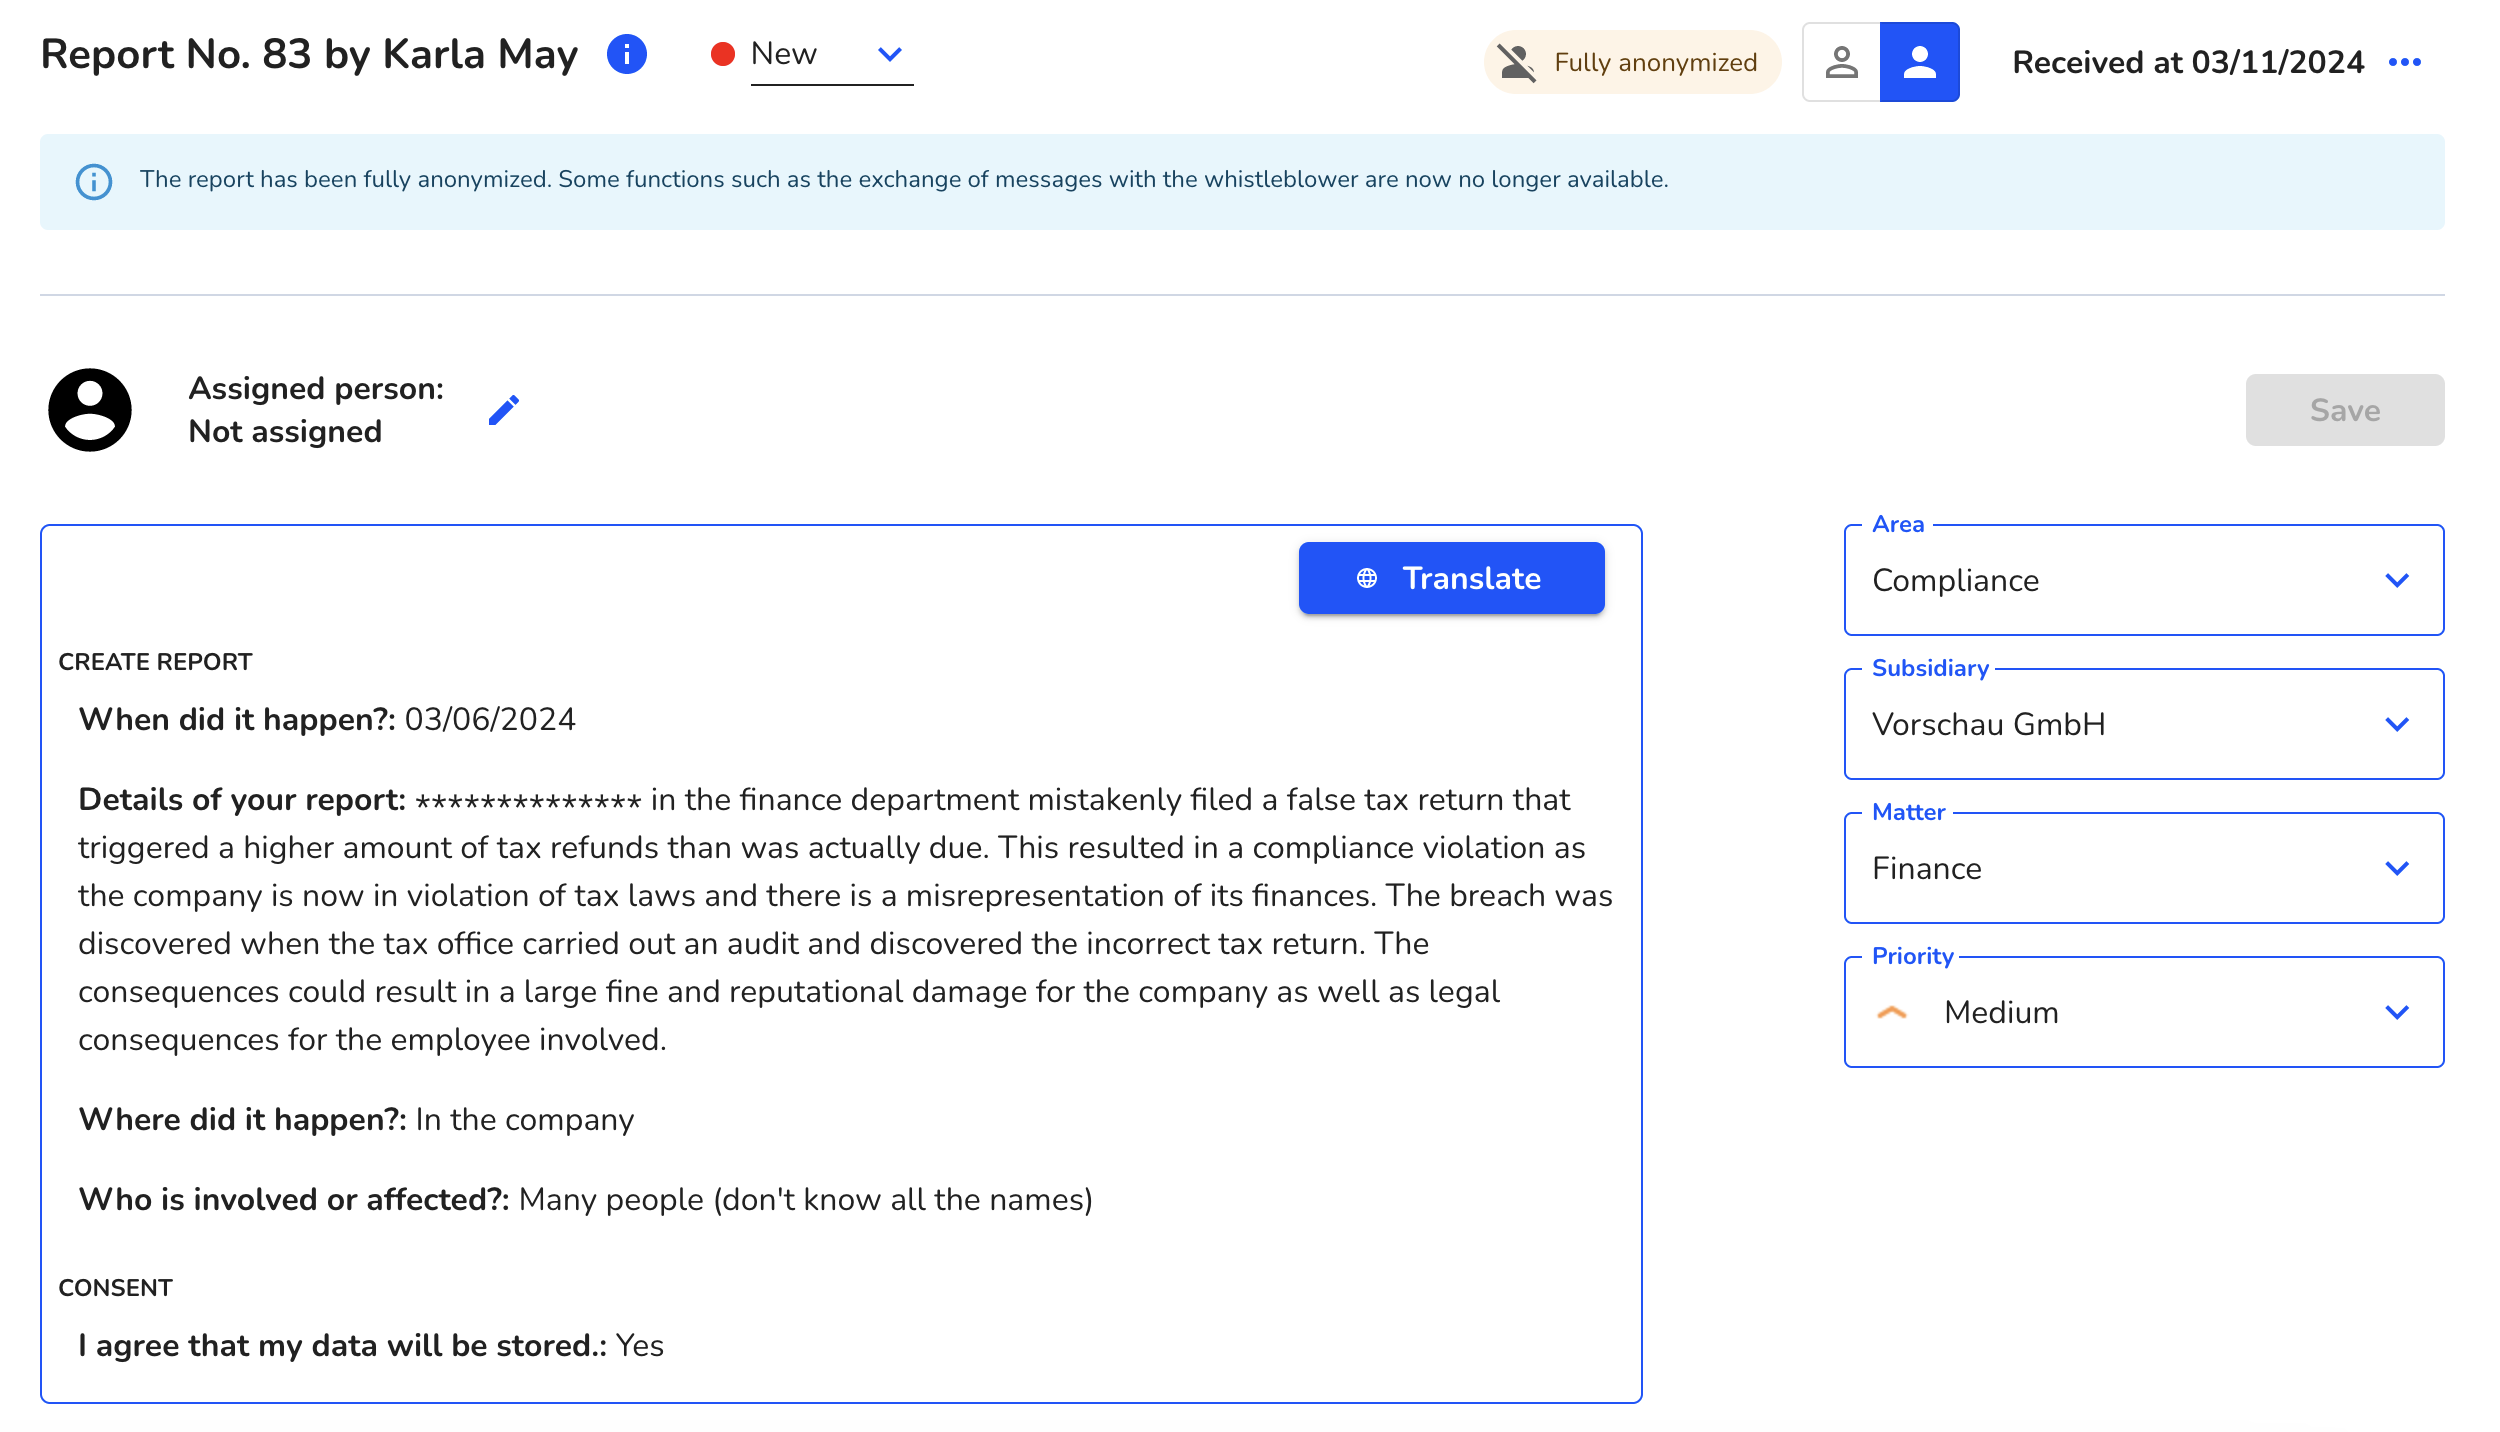
The case is completely anonymized.
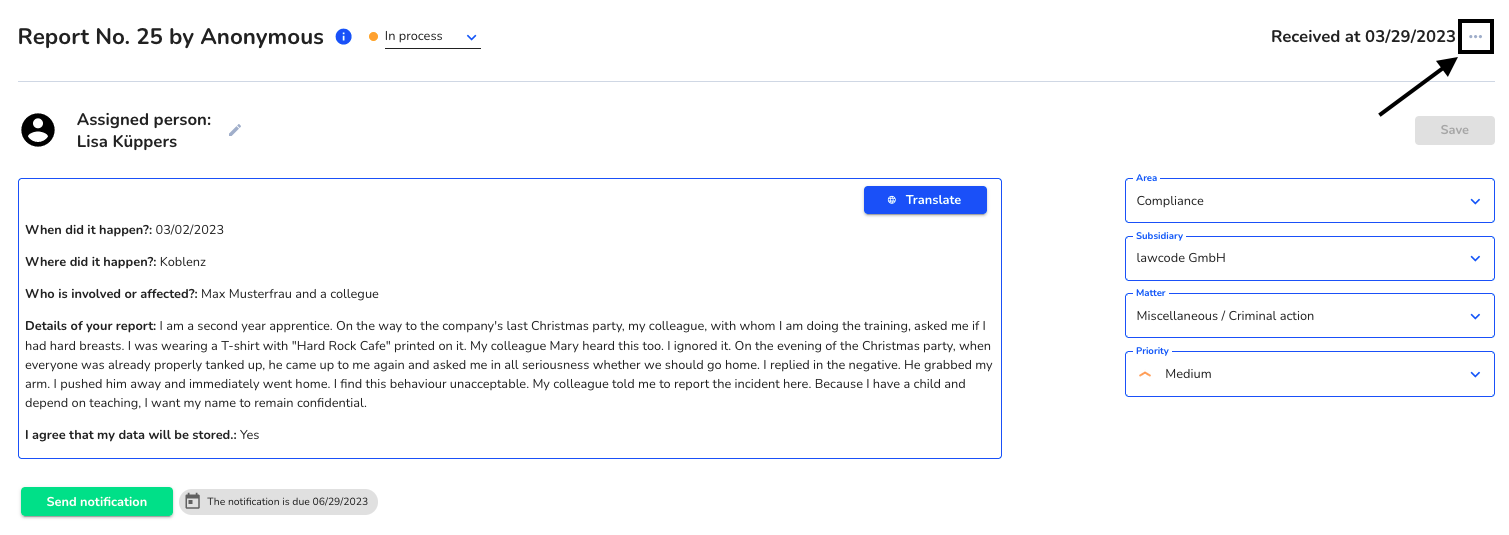
Move report to trash
Clicking on "..." opens the selection of actions.
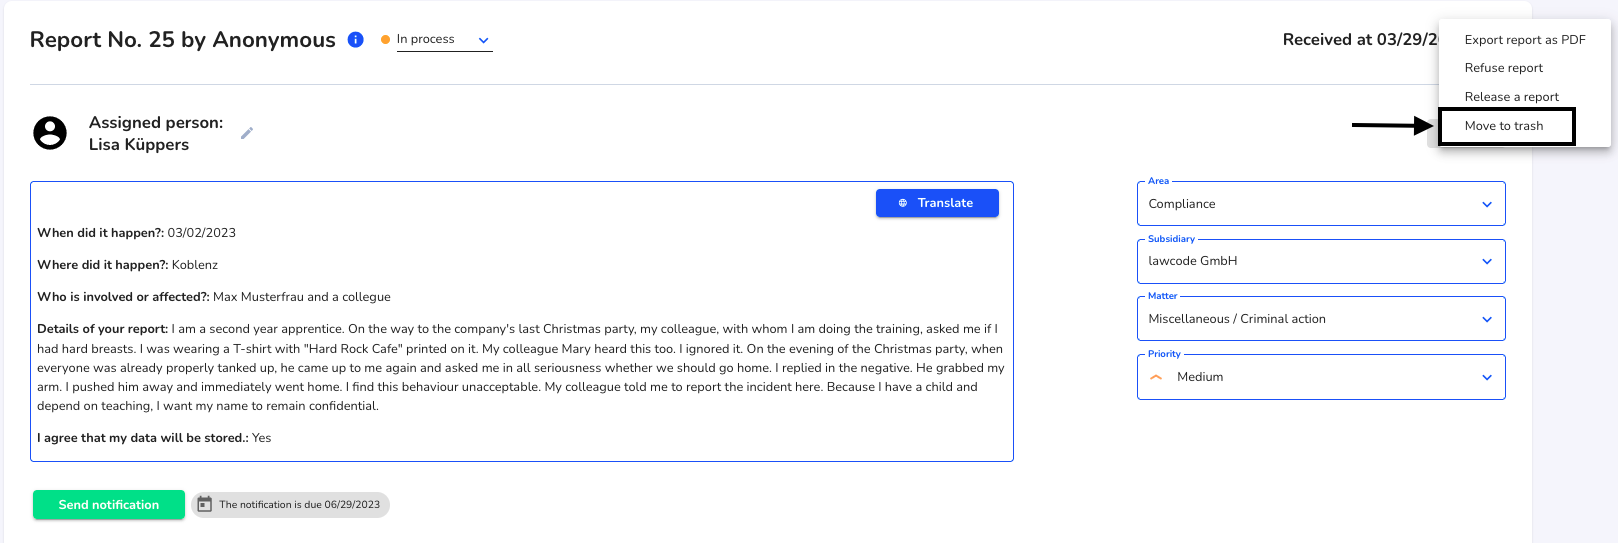
In the selection field you can now click on the action "Move to trash".
Now a dialog opens in which you can decide whether information should be sent to the detector.
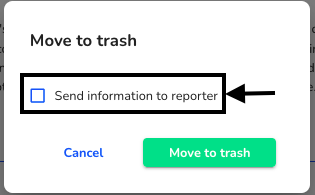
If you place a check mark there, the text editor opens accordingly for optional customization of the message.
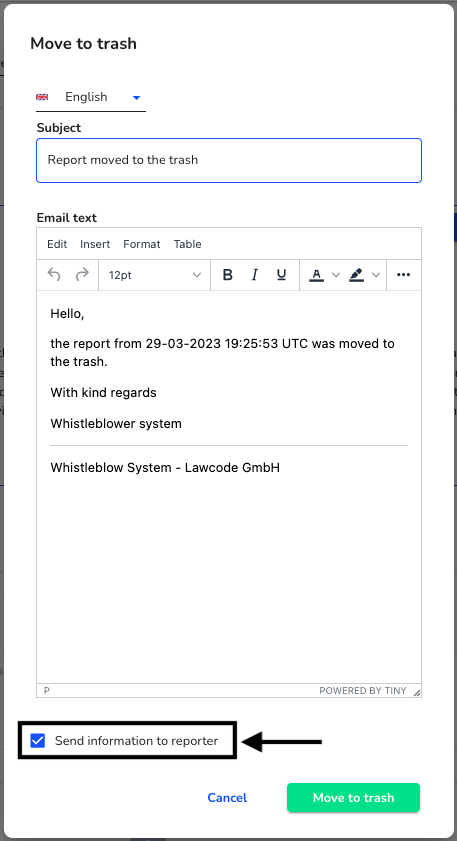
If you uncheck "Send information to notifier", the text editor will be hidden again so that you can move the notice to the trash without notifying the notifier.
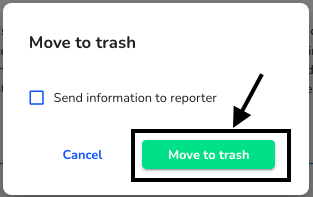
Afterwards you have to click on "Move to Trash" to finally move the note to the Trash.
Reject report
Clicking on "..." opens the selection of actions.

In the selection field you can now click on the action "Refuse report".
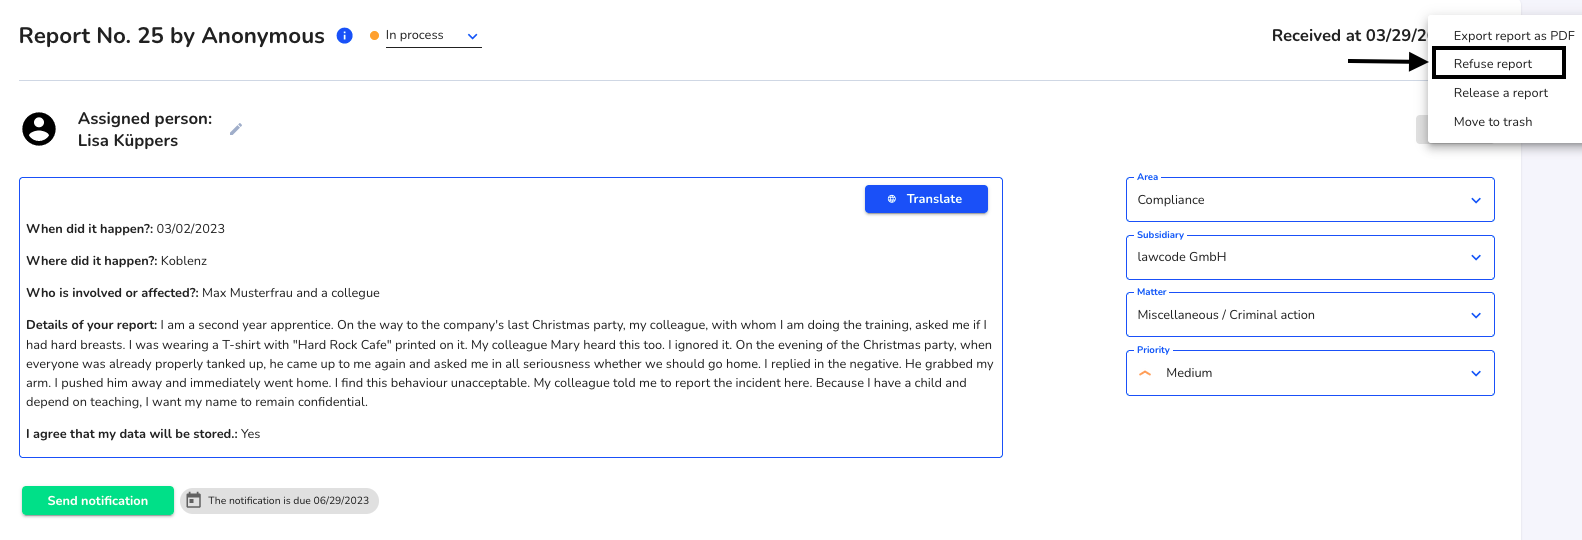
Now a dialog opens in which you can decide whether information should be sent to the detector.
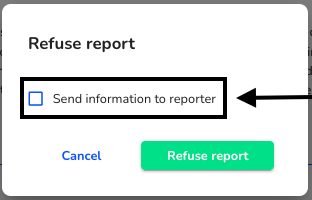
If you place a check mark there, the text editor opens accordingly for optional customization of the message.
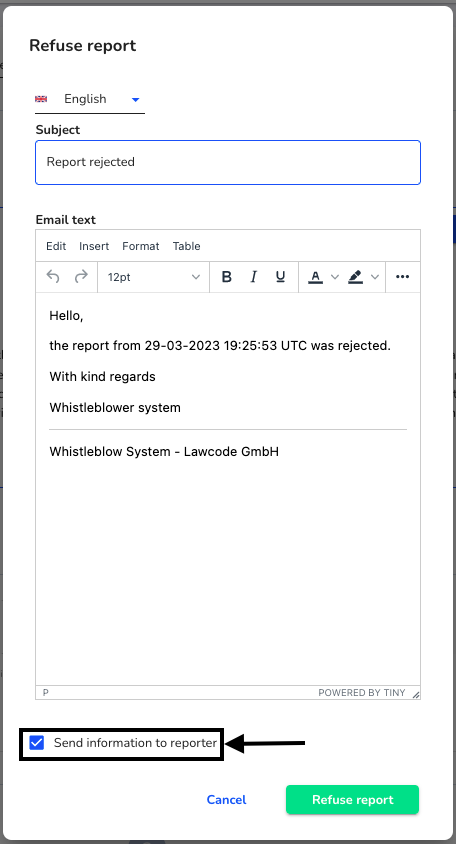
If you uncheck "Send information to notifier", then the text editor will be hidden again so that you can reject the notice without notifying the notifier.
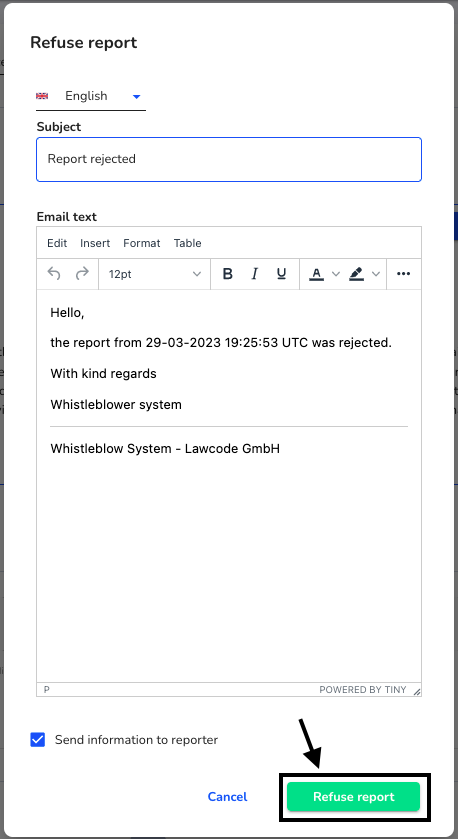
Afterwards you have to click on "Reject report" to finally reject the note.
Share report
Clicking on "..." opens the selection of actions.

You want to share a single report with a user with the reader role. Then simply click on "Share report".
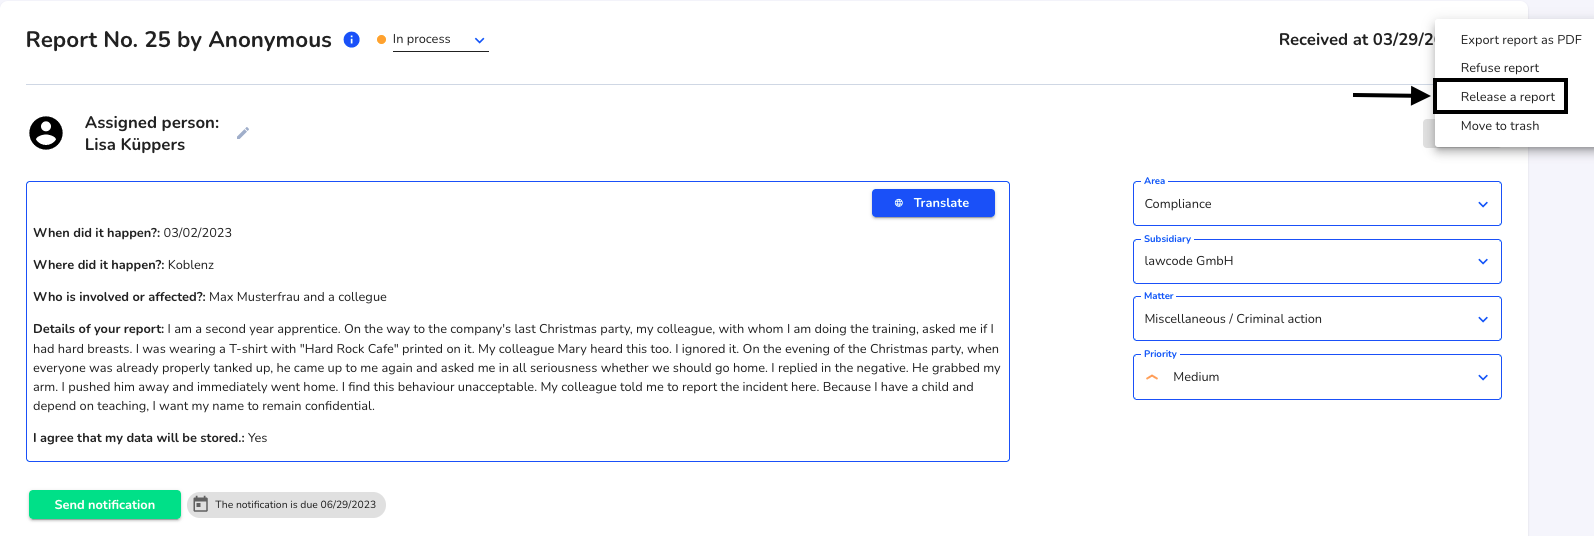
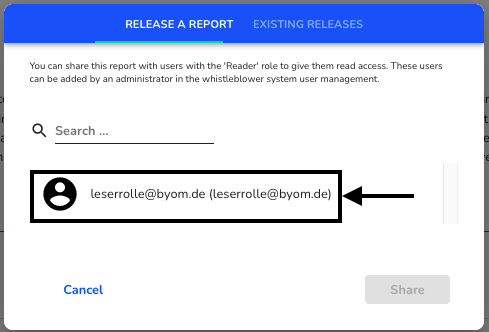
Then the dialog opens where you can select the different users with the reader role for a single report. In order to be able to select the desired users, you must make sure that the user has access to the respective area, client and matter. You can select the users with one click.
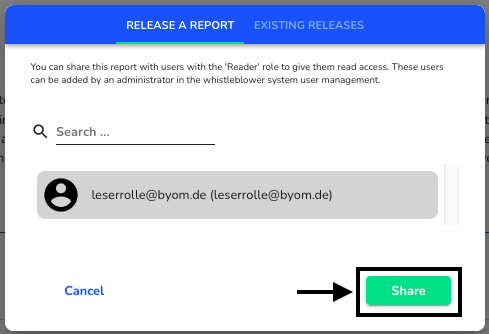
The selected user will be grayed out, with a click on Share you can now specifically share the individual report to the selected report.
Customize existing report release
Clicking on "..." opens the selection of actions.

You want to customize the sharing of a user in the individual report. Then simply click on "Share report".

Then the dialog to the shares opens, in which you can adjust existing shares. Click on "Existing shares" to change the view of the dialog.
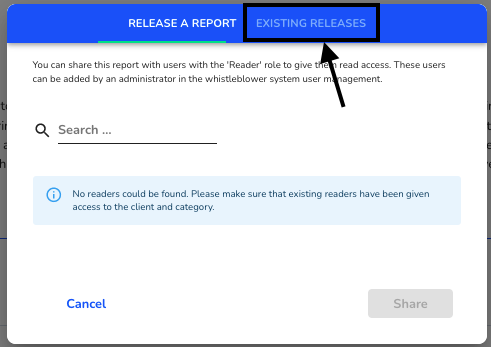
In the new view, you can now see existing shares and adjust them by clicking on "Assign rights".

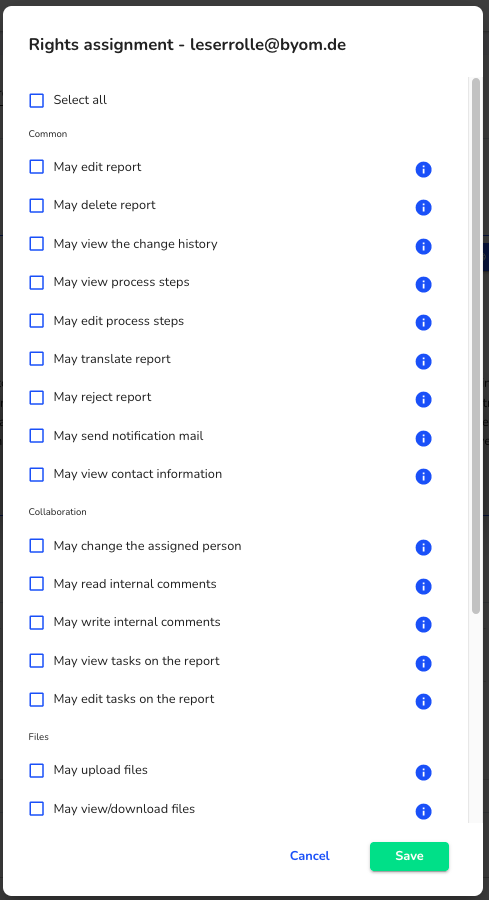
Then a new dialog opens where all actions that an agent can perform are displayed. You can now decide granularly which actions may be performed within the release for the individual note.
Remove existing share
Clicking on "..." opens the selection of actions.

You want to withdraw a user's approval for individual report, then just click "Release report".

The dialog for the shares then opens. Click on "Existing shares" to change the view of the dialog.

Now we see our existing share and via the red "x" we can retract and remove the existing share. After that, the user will no longer have access to the shared report.

Export report as PDF
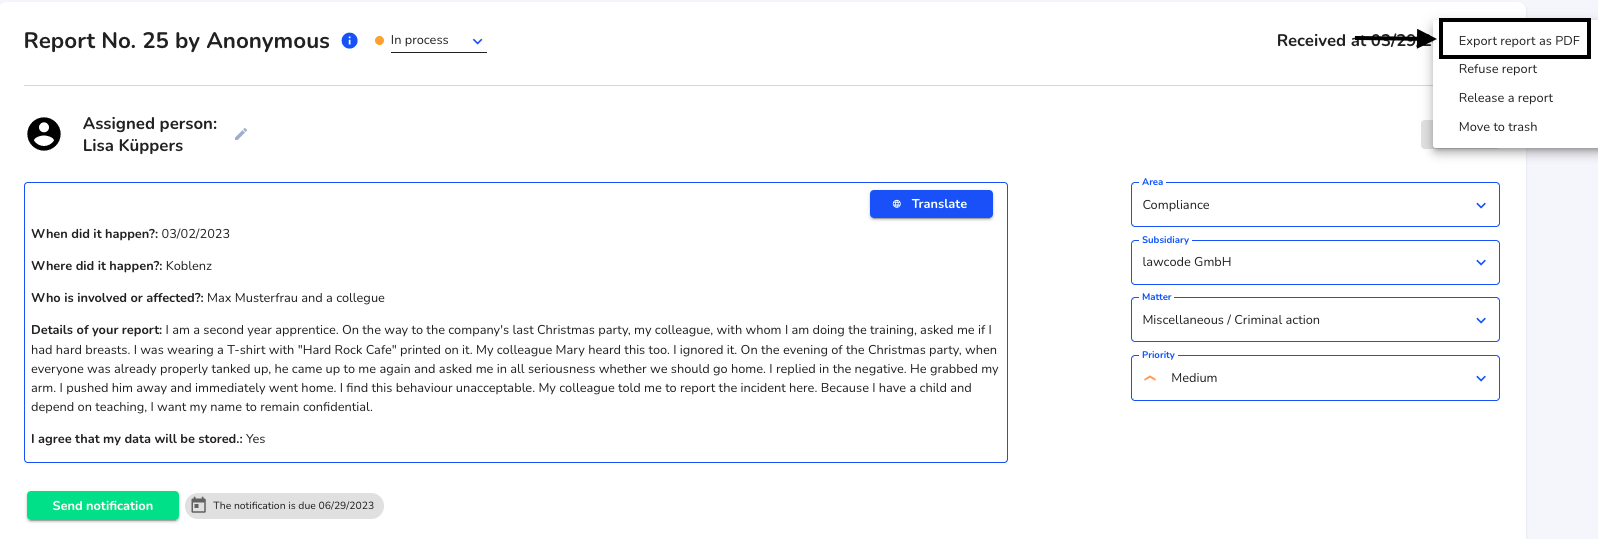
Clicking on "..." opens the selection of actions.

After that, click on "Export report as PDF" and then your browser should download the report as a PDF.
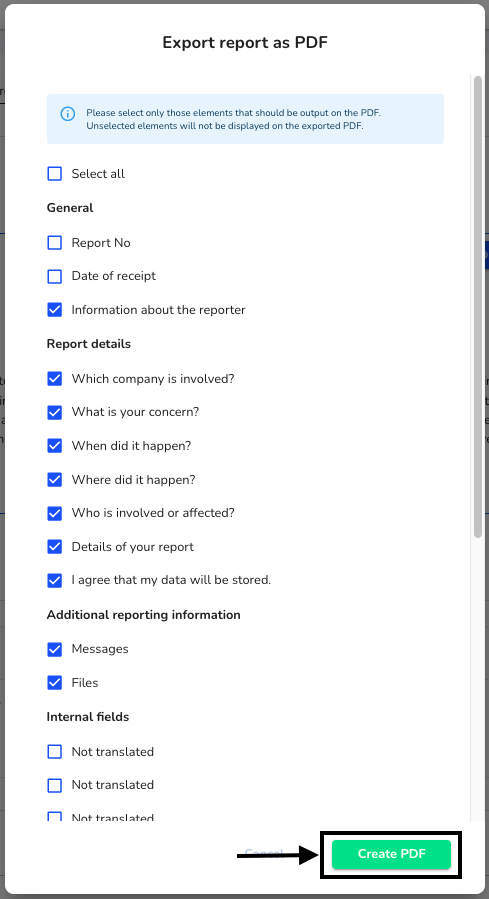
Select all the items you want to appear in the PDF document and then click Create PDF.
Translate report information
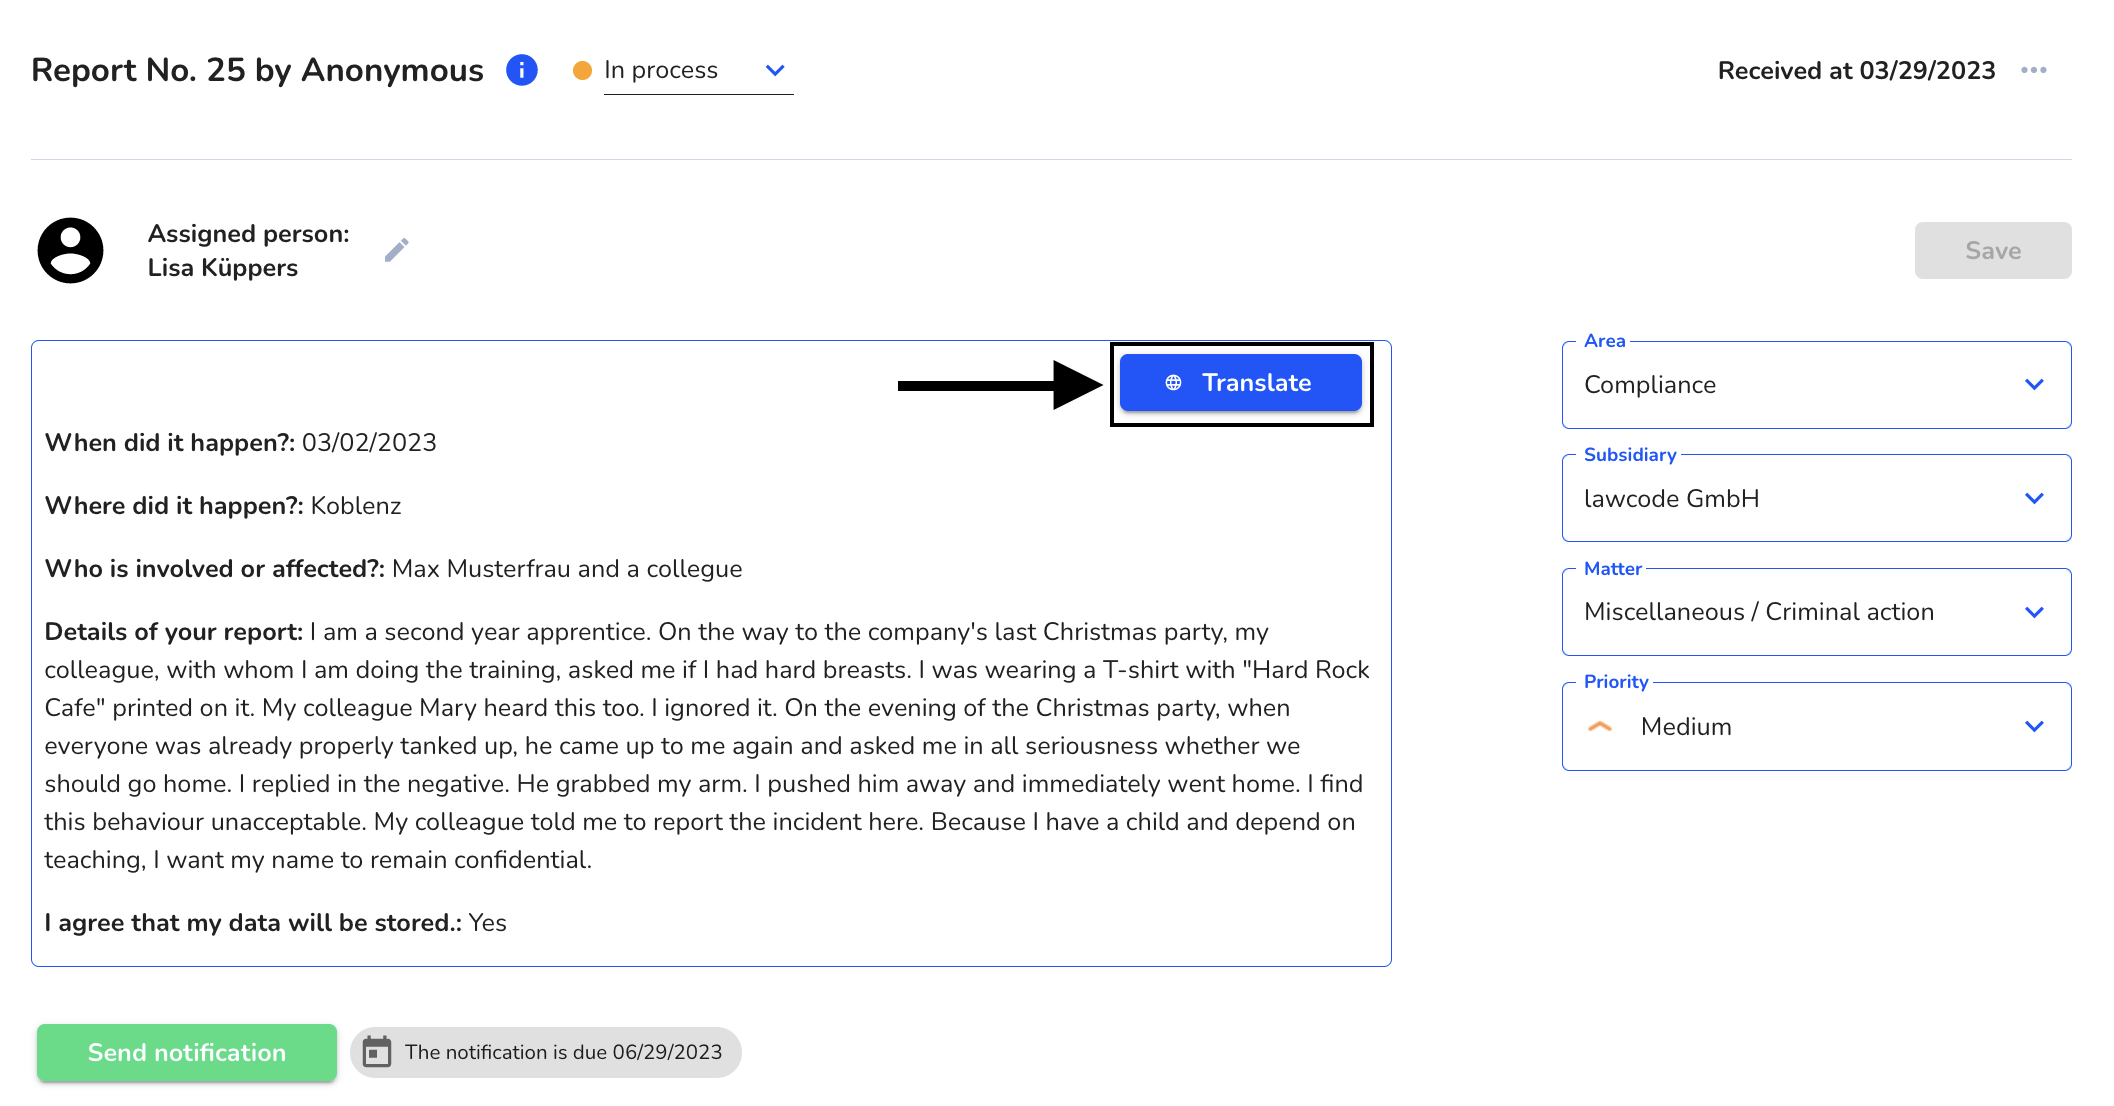
You can easily translate the report information "Details about your report", "Who is involved?" and "Where did it happen?" by clicking the "Translate" button.
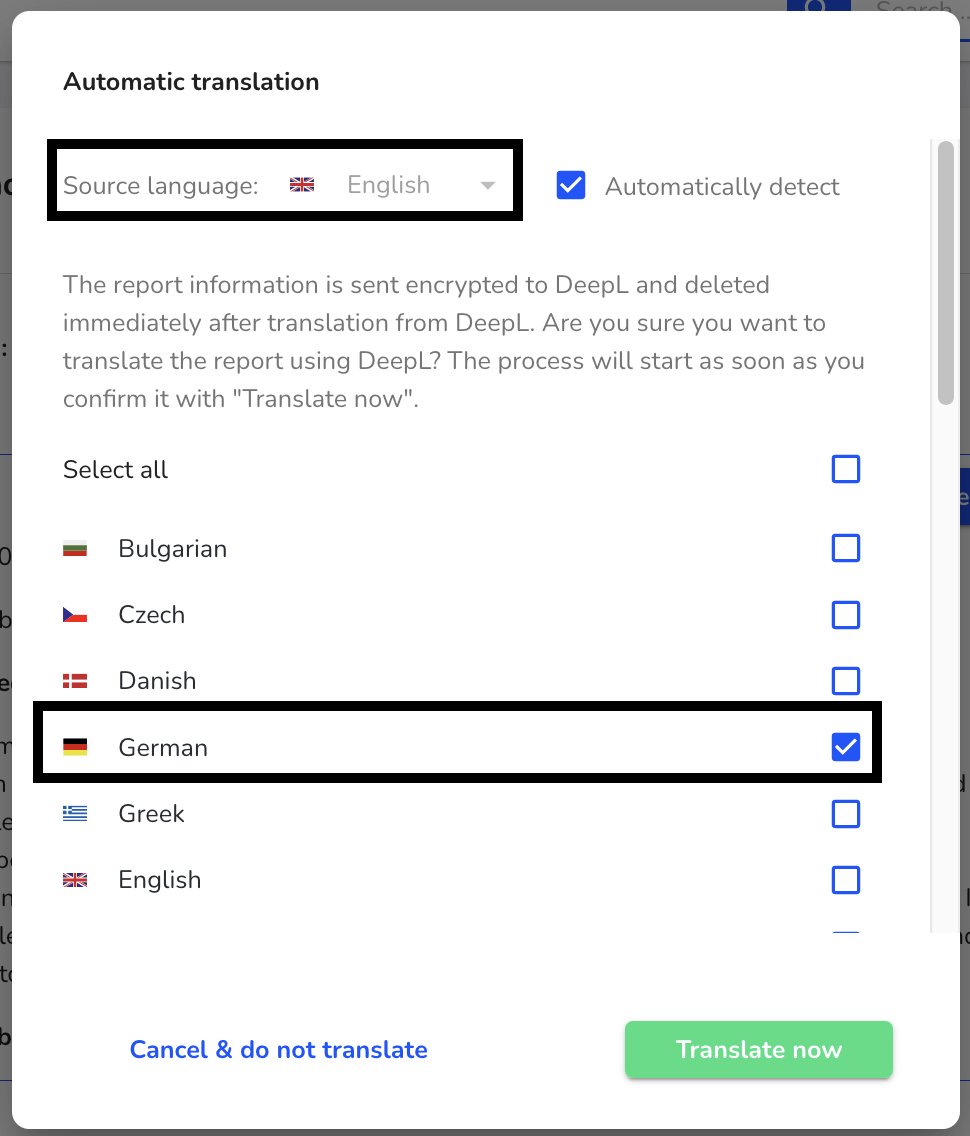
Then the dialog opens to use the automatic translation. Here you can select different languages for translation.
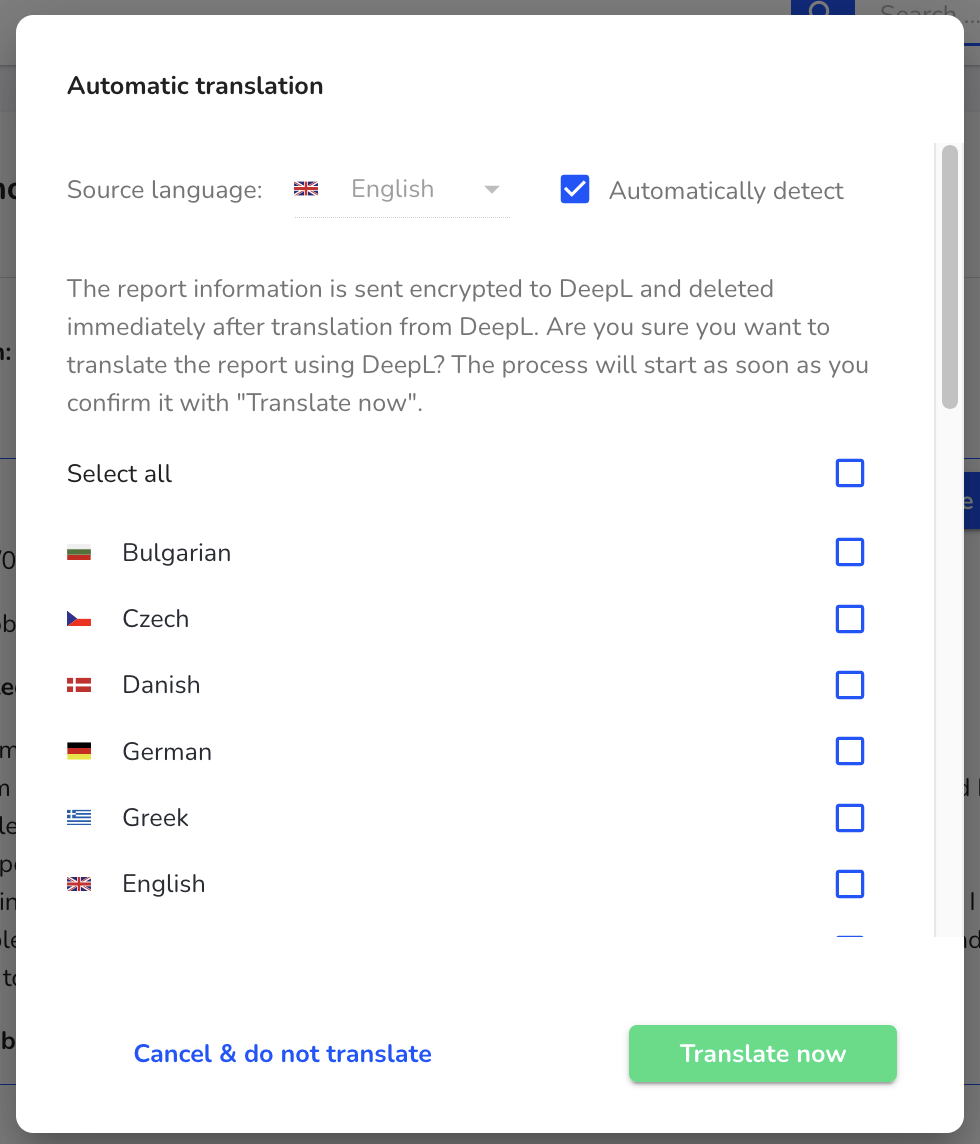
In this example, we translate from the source language English to German. To translate, select the desired language in the dialog. Once you have selected the desired languages for translation, confirm the selection by clicking "Translate now".
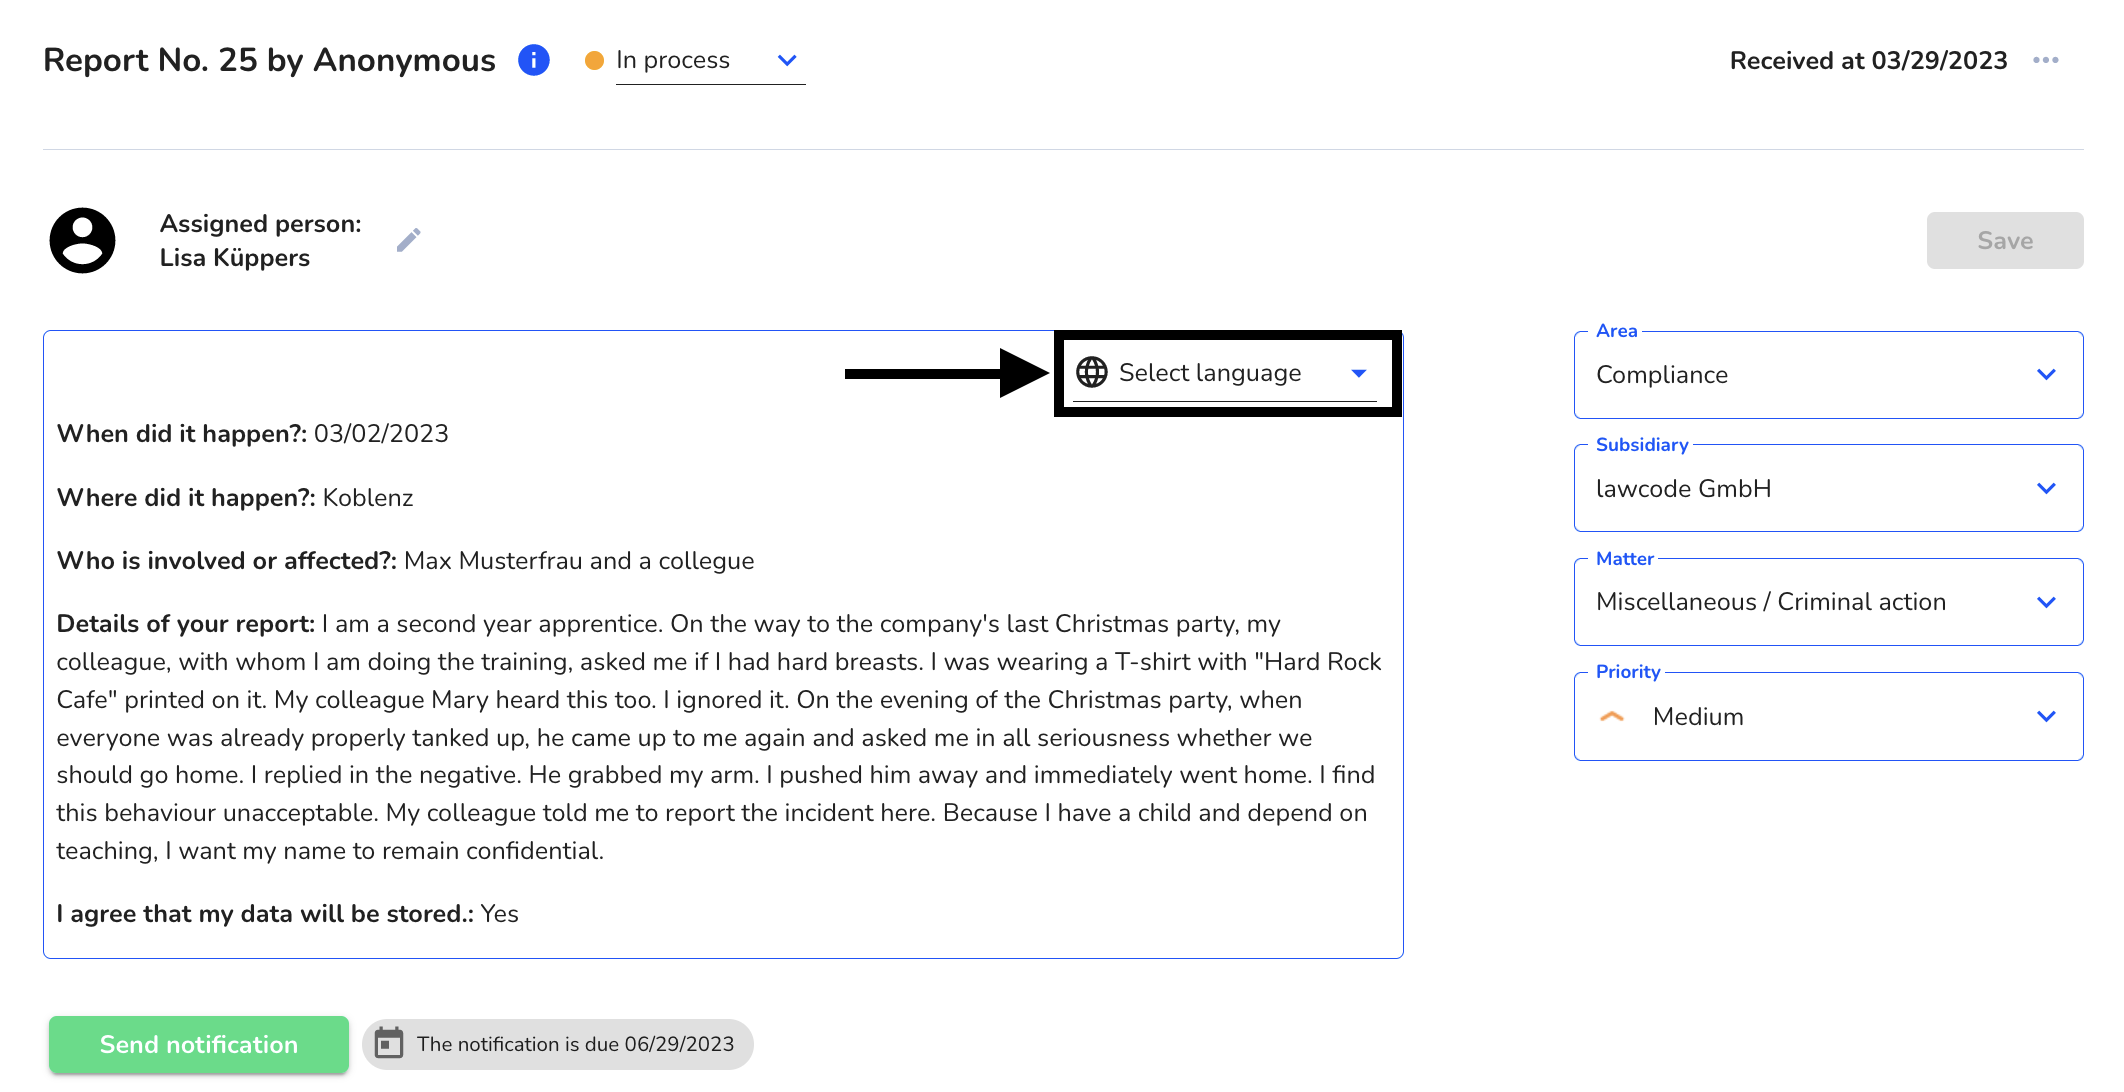
After clicking on "Translate now" the dialog closes and you can select the translated language via the selection field displayed in the image outlined in black or select a language that has not been translated in order to translate again into the desired language.
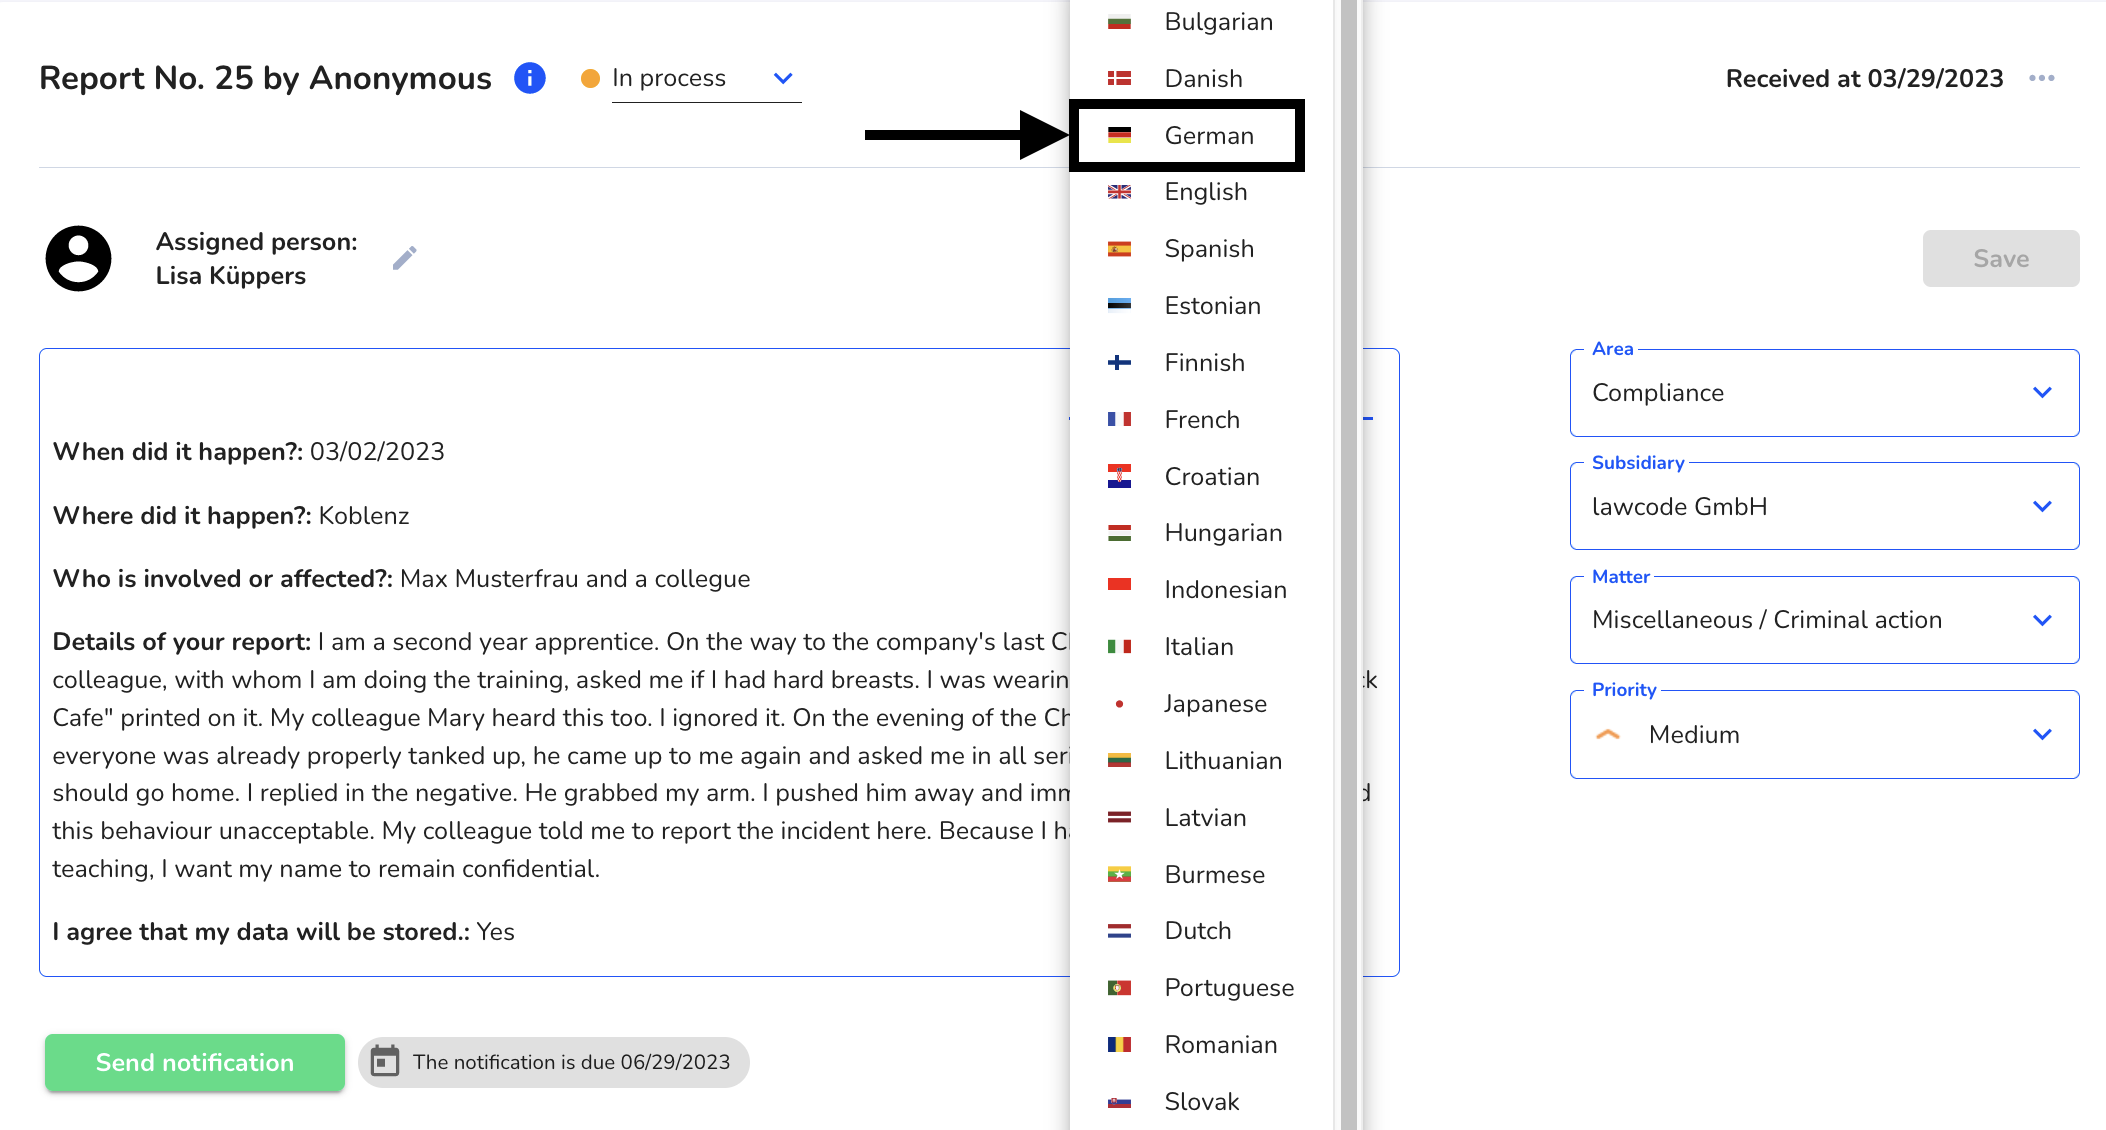
Now we select the translated language in our example it was the language "German".
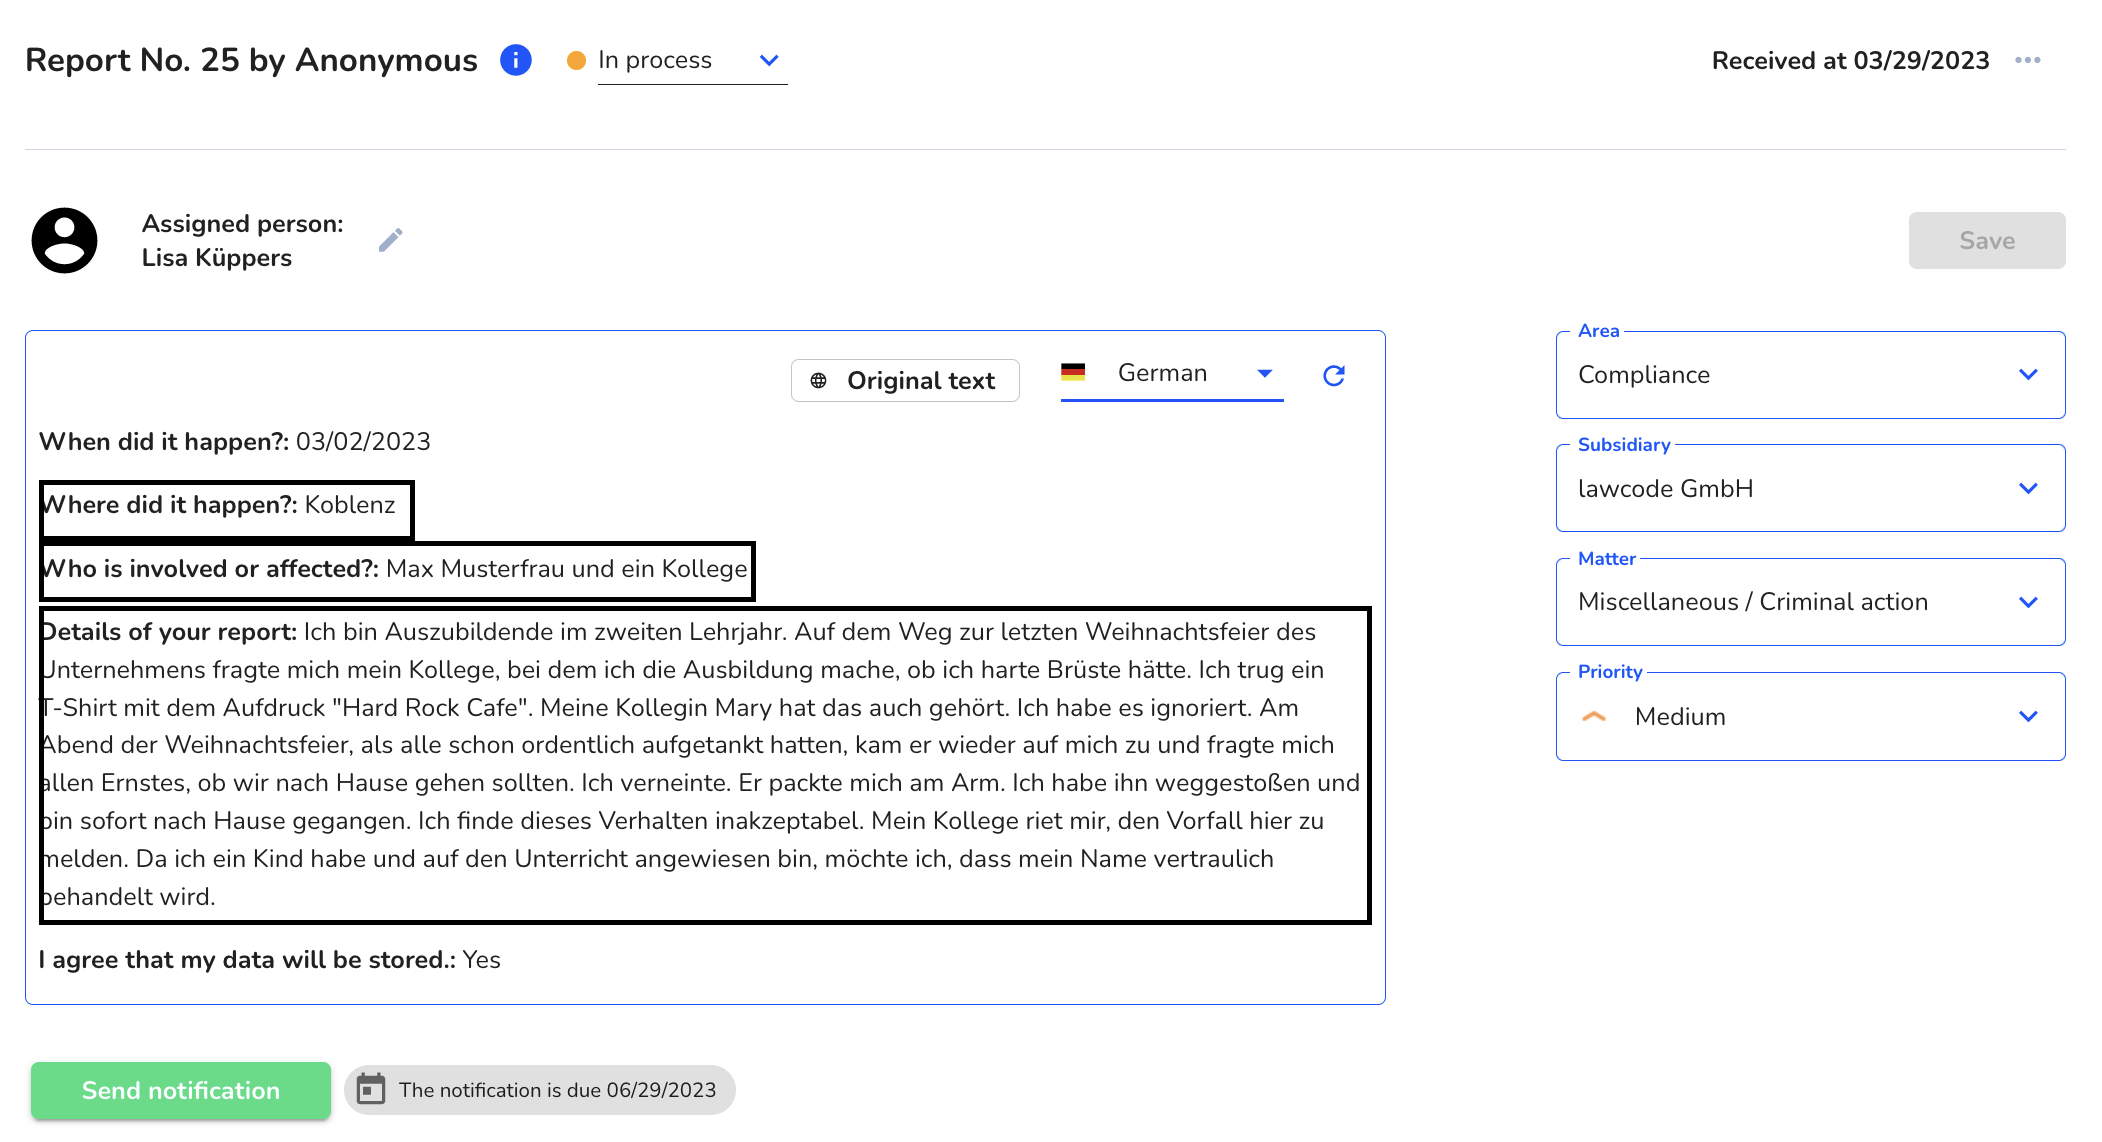
As soon as the translated language is clicked from the selection box, the translated hint information (outlined in black) is displayed.
Send notification of 3-month period (action taken) to whistleblower
You would like to inform the whistleblower what measures have been taken for the tip. Then simply click on the green button "Send notification".
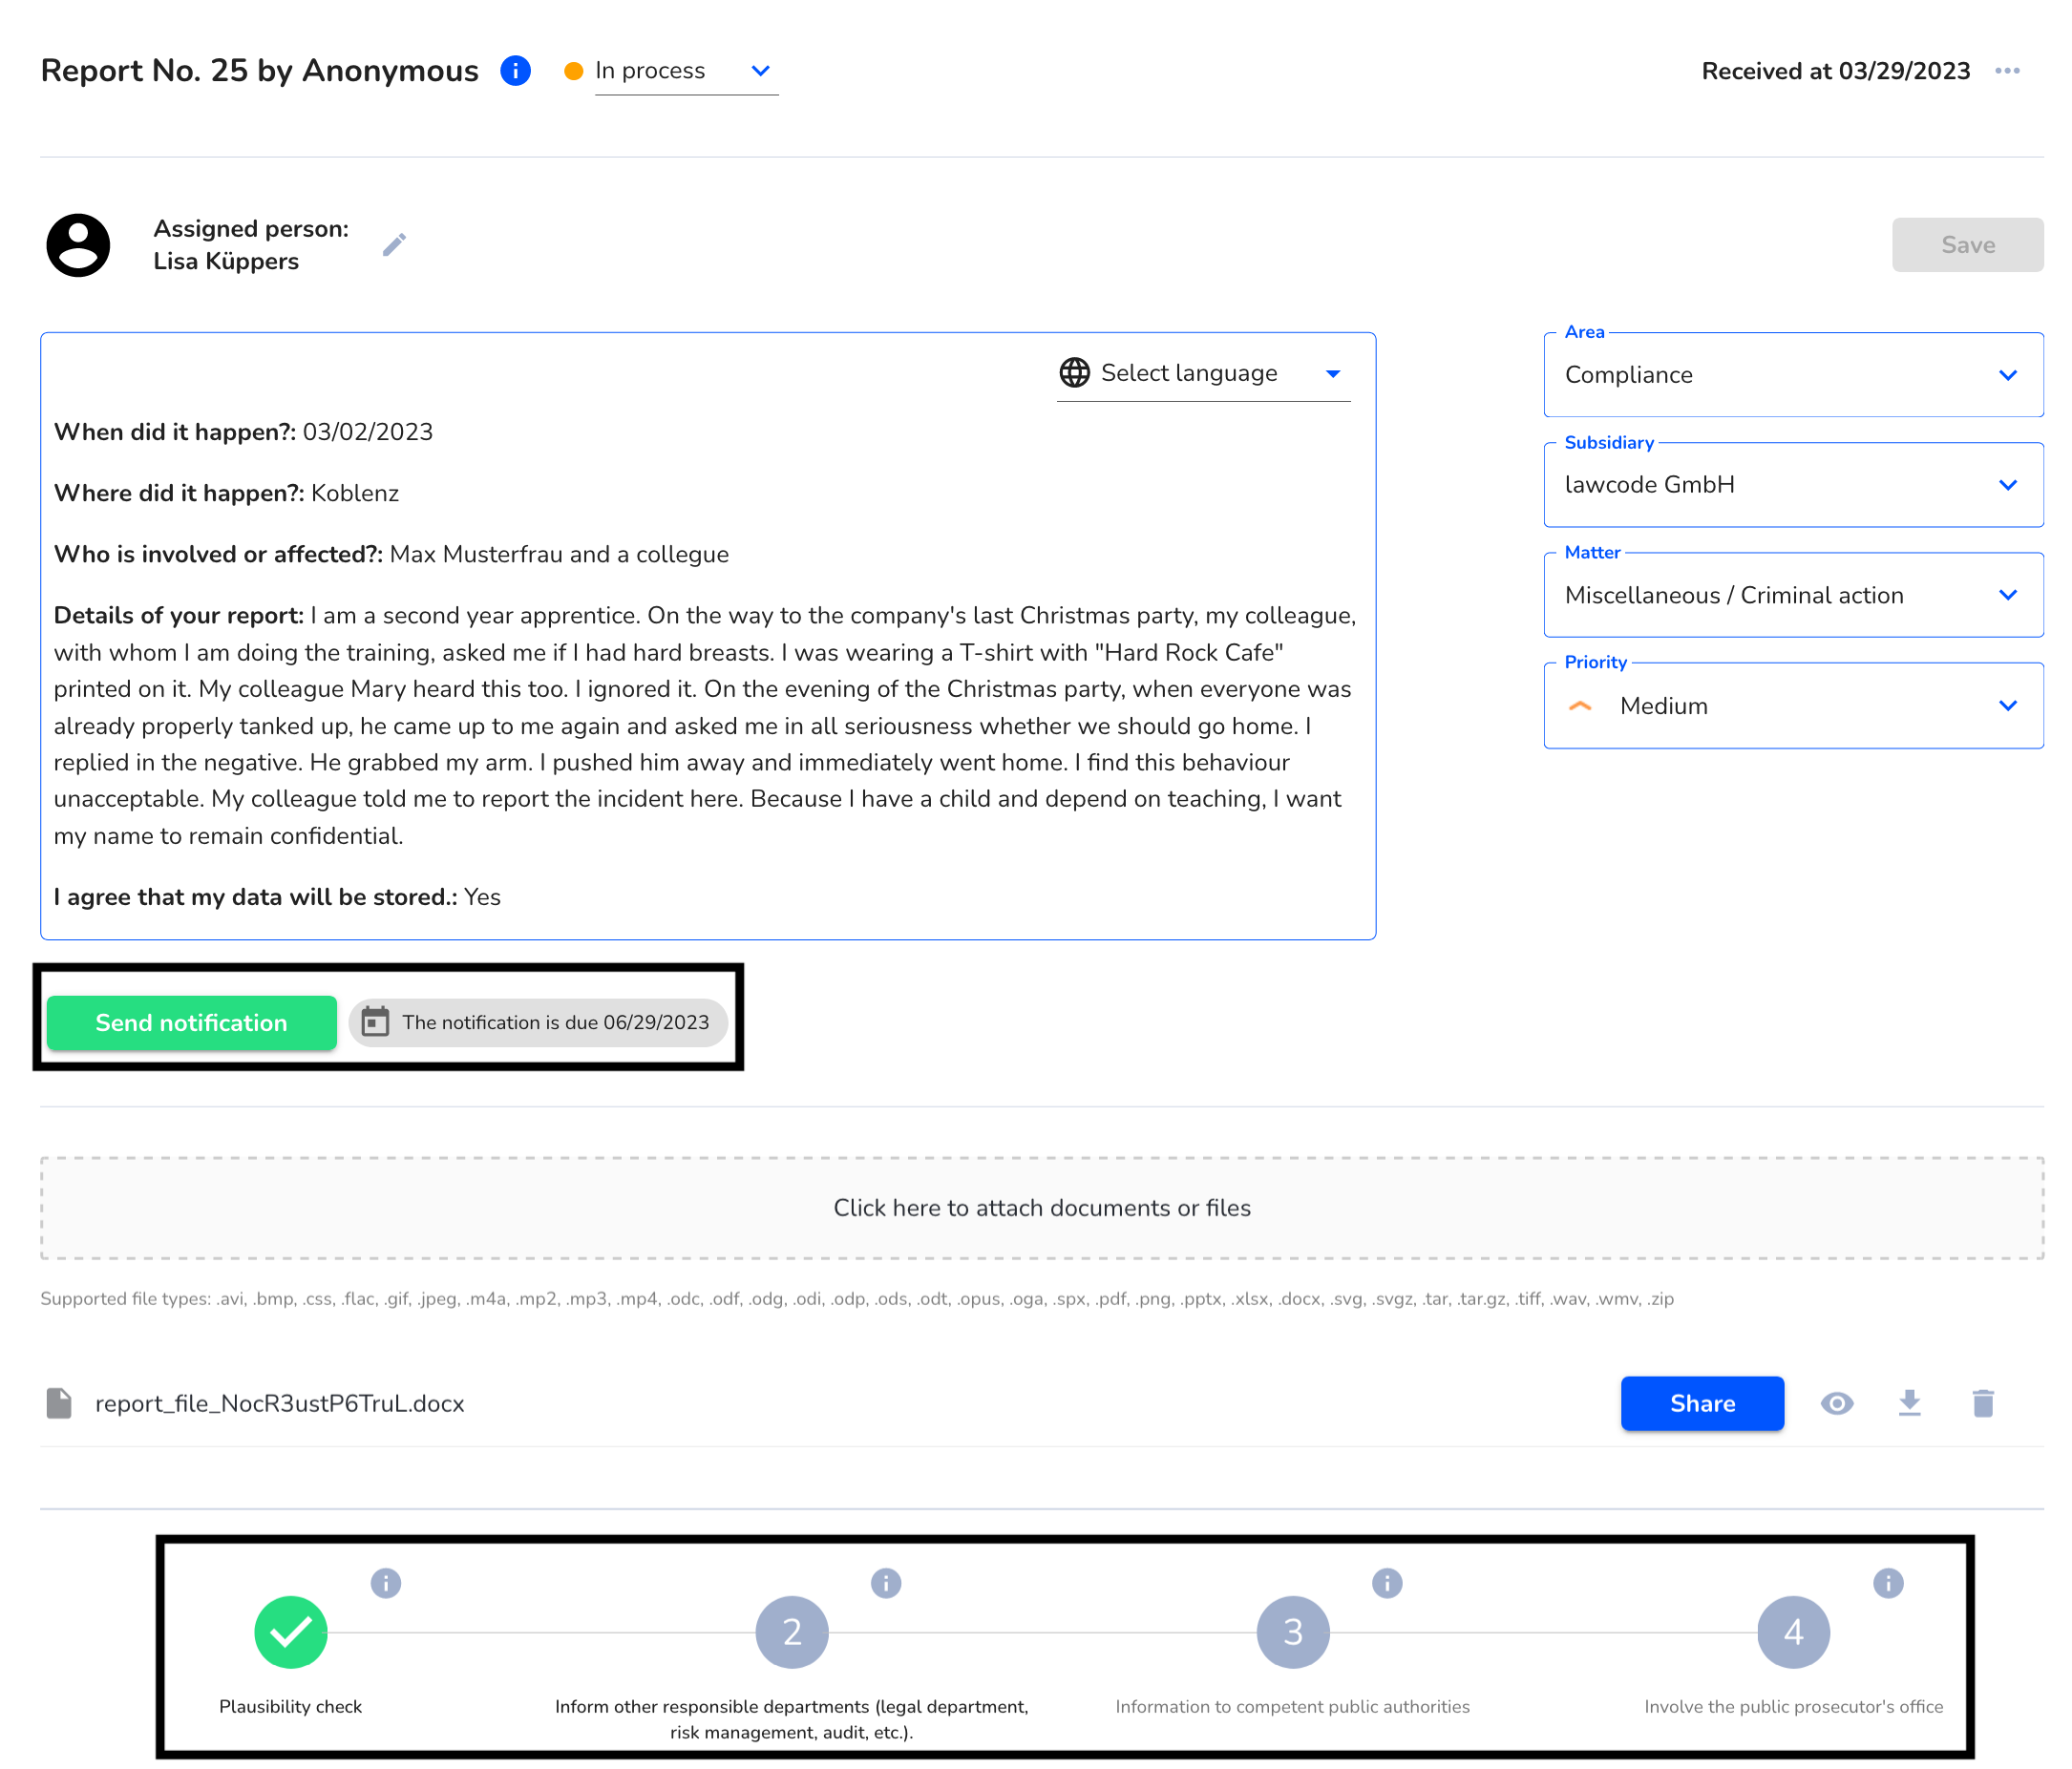
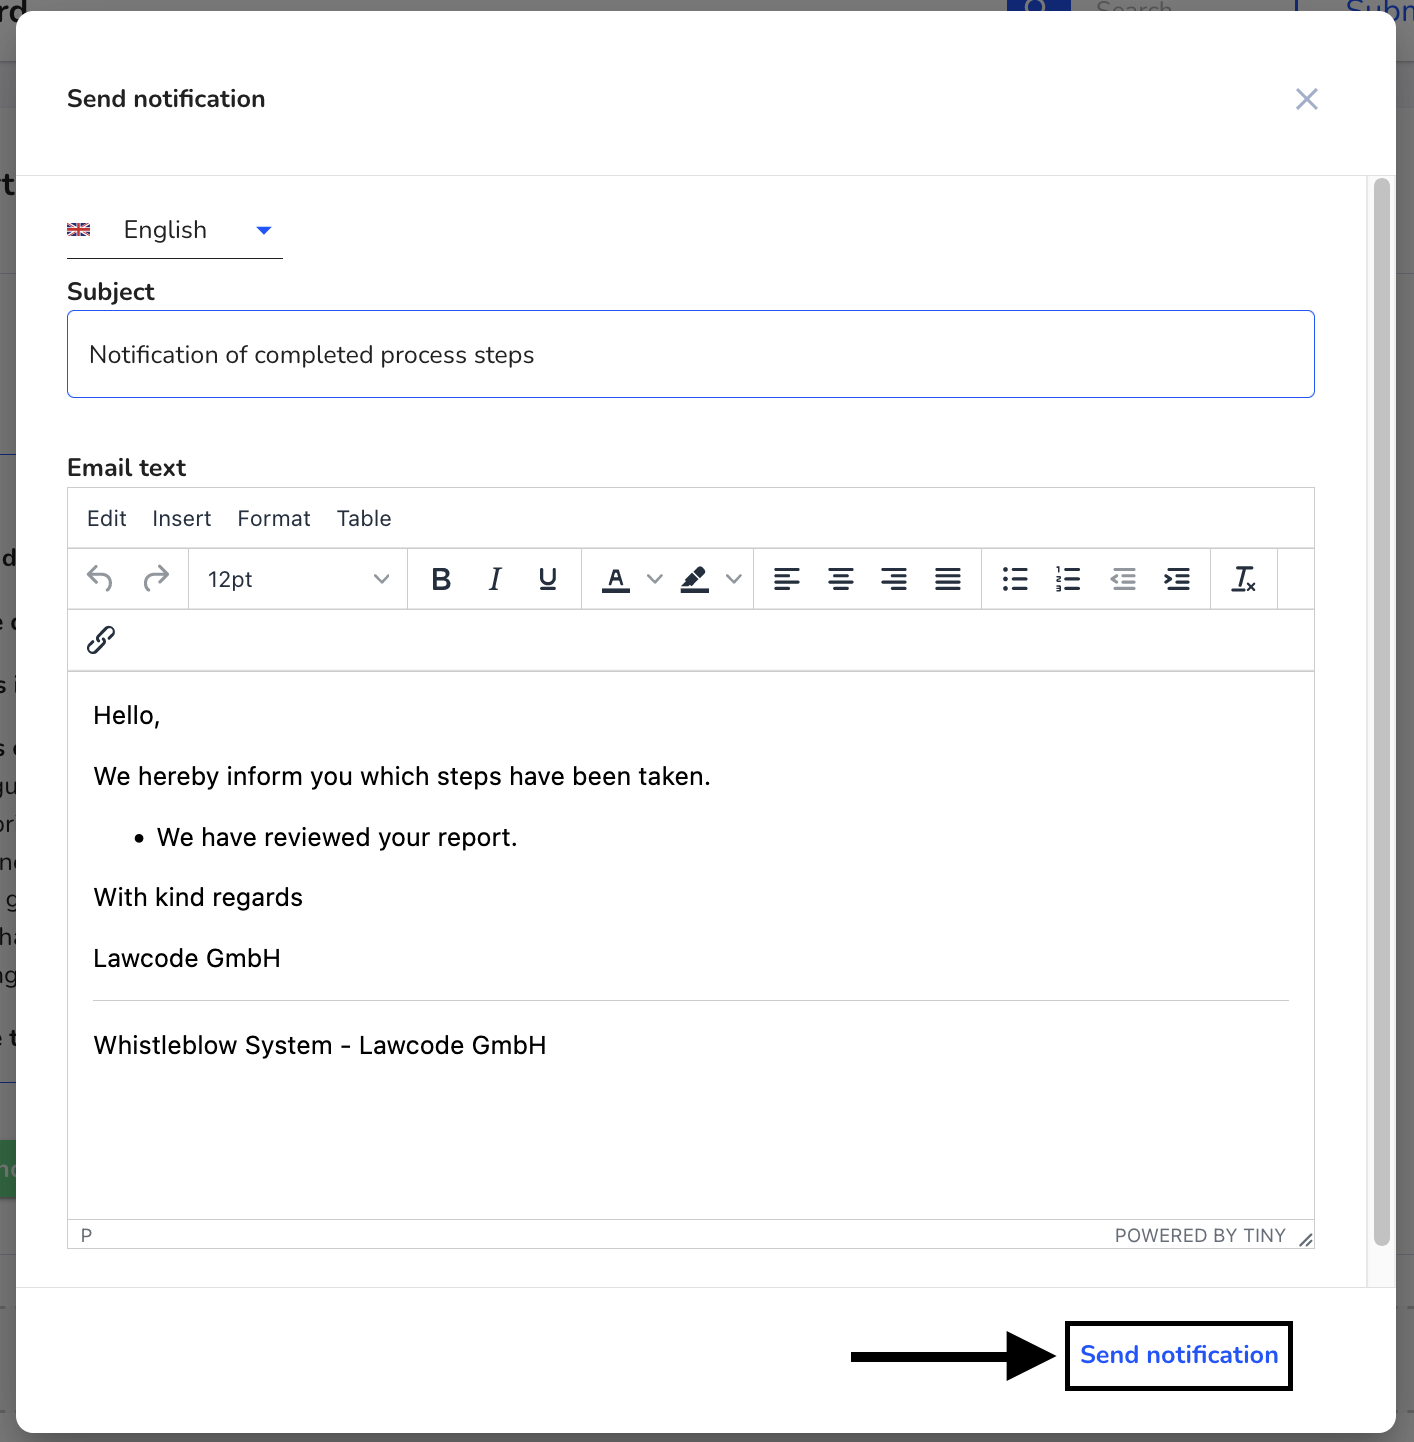
Afterwards, a dialog opens that already shows you a template for the notification. In the example, you can already see an automatically generated action listed as a list item in the text. The dialog automatically pulls the e-mail text of the checked process steps. With a click on "Send notification", the notification is sent as an e-mail from the whistleblower, if available, and is also listed in the message history.
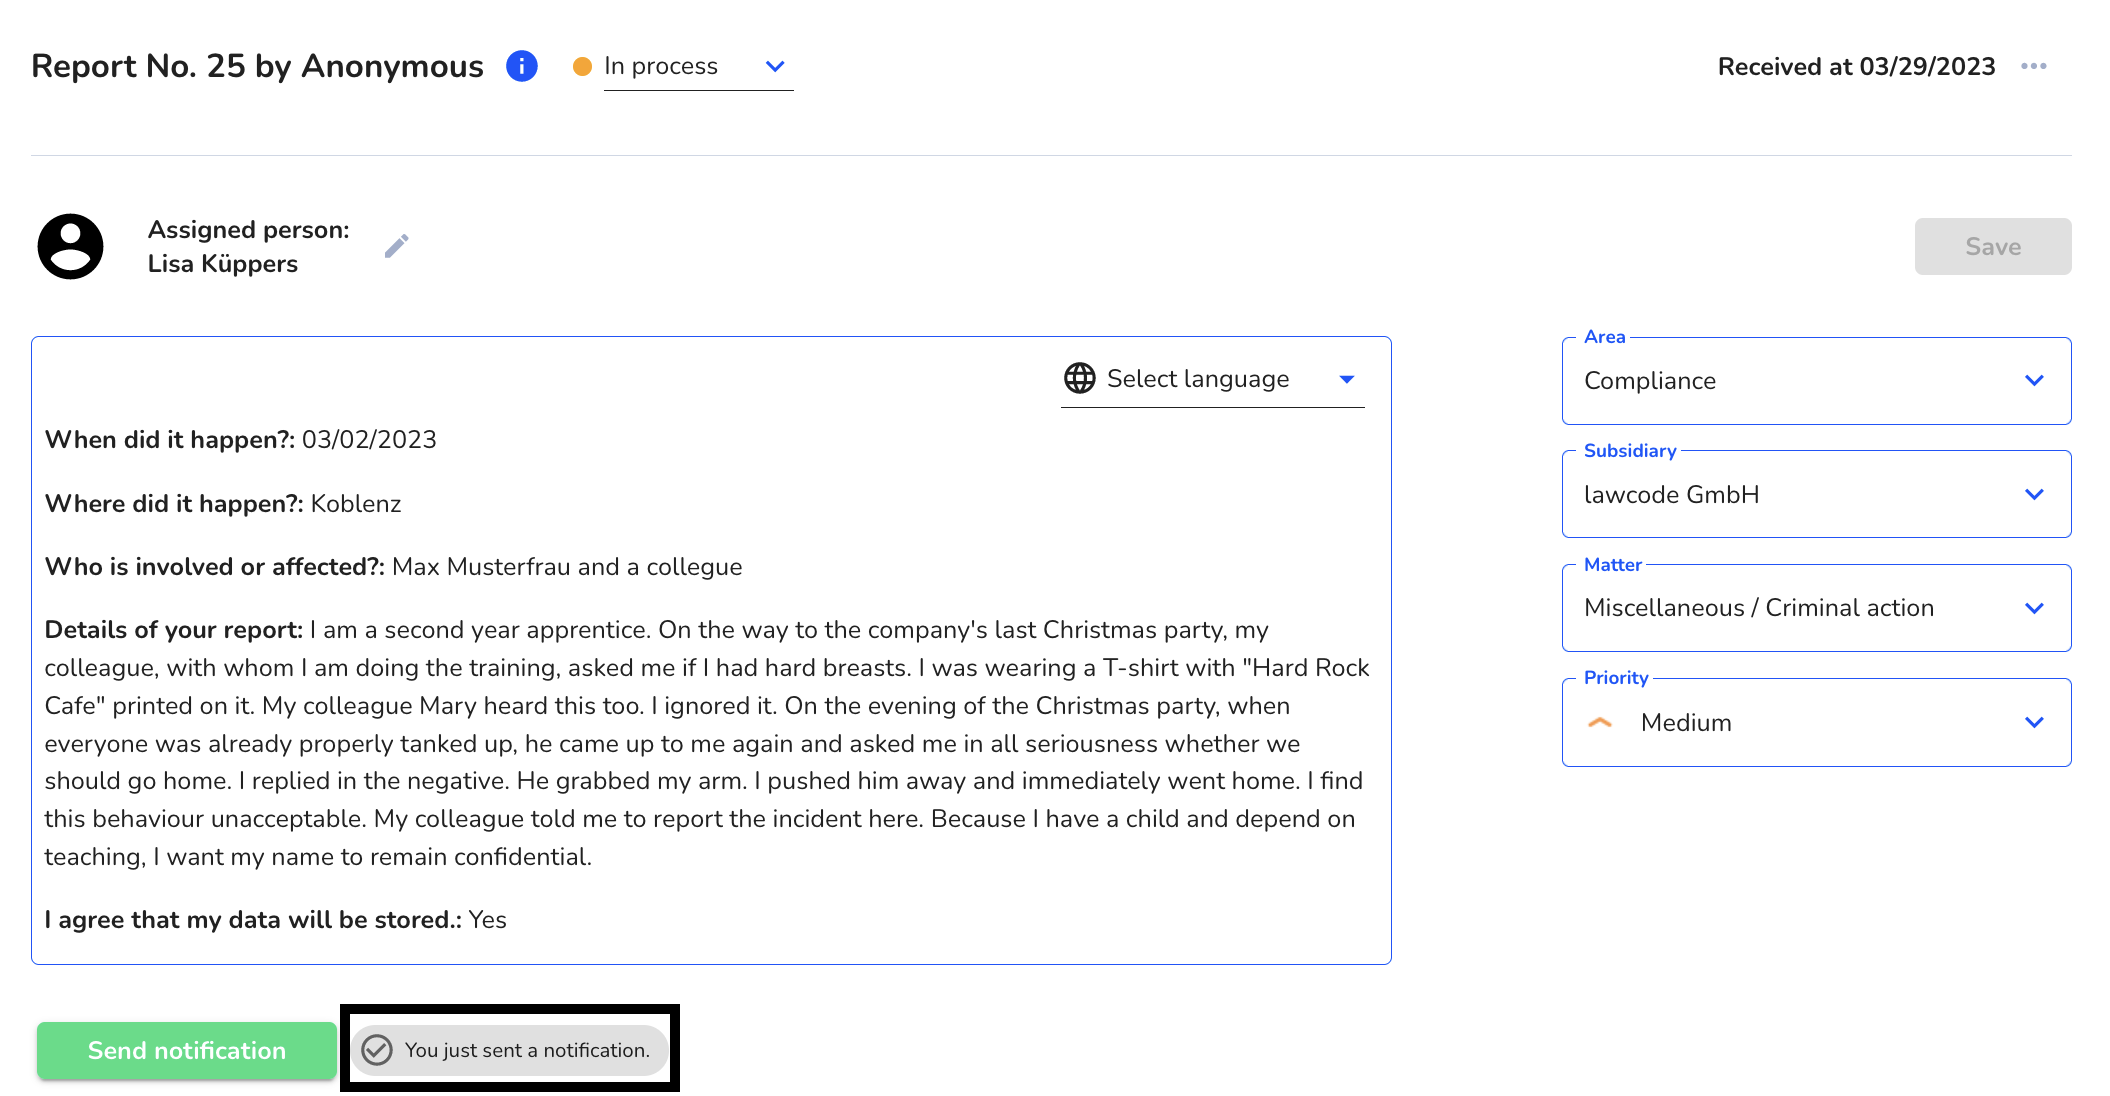
Now you will see the badge with gray background indicating that you have sent the notification to the whistleblower.
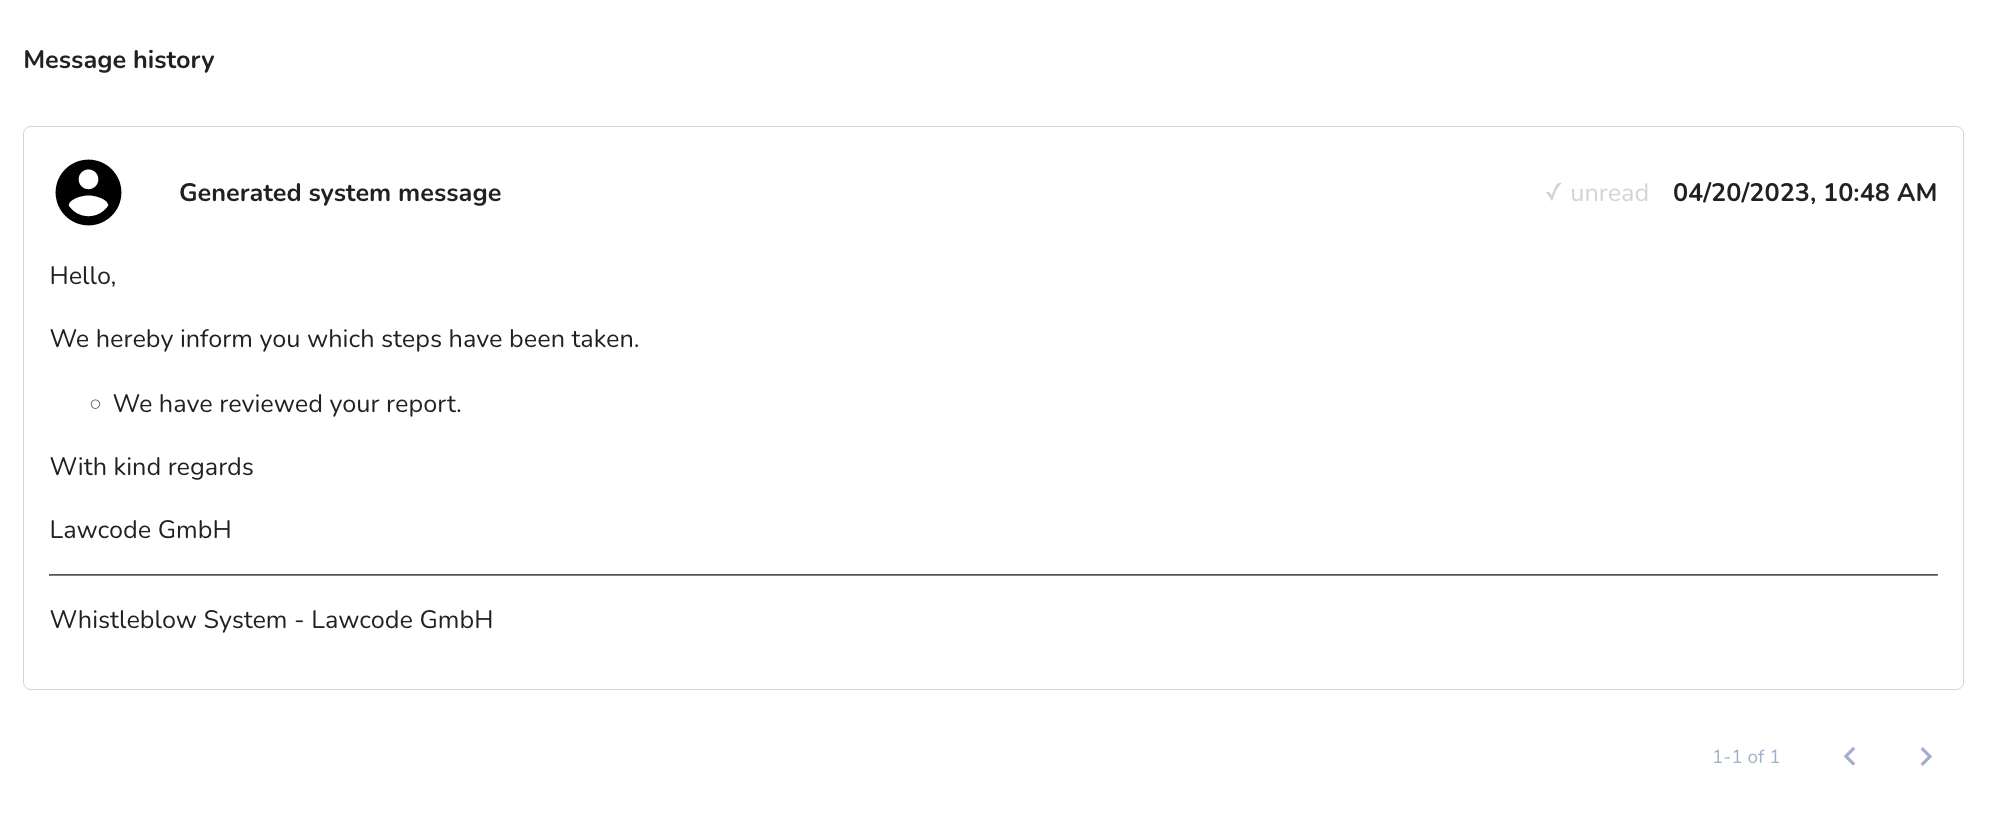
The sending of the notification can be checked in the message history, the message should be found there.
Confirm deadline manually
In addition to the predefined e-mail, you can also confirm the deadline manually. This manual confirmation is useful if you have informed the whistleblower about the processing progress by other means.
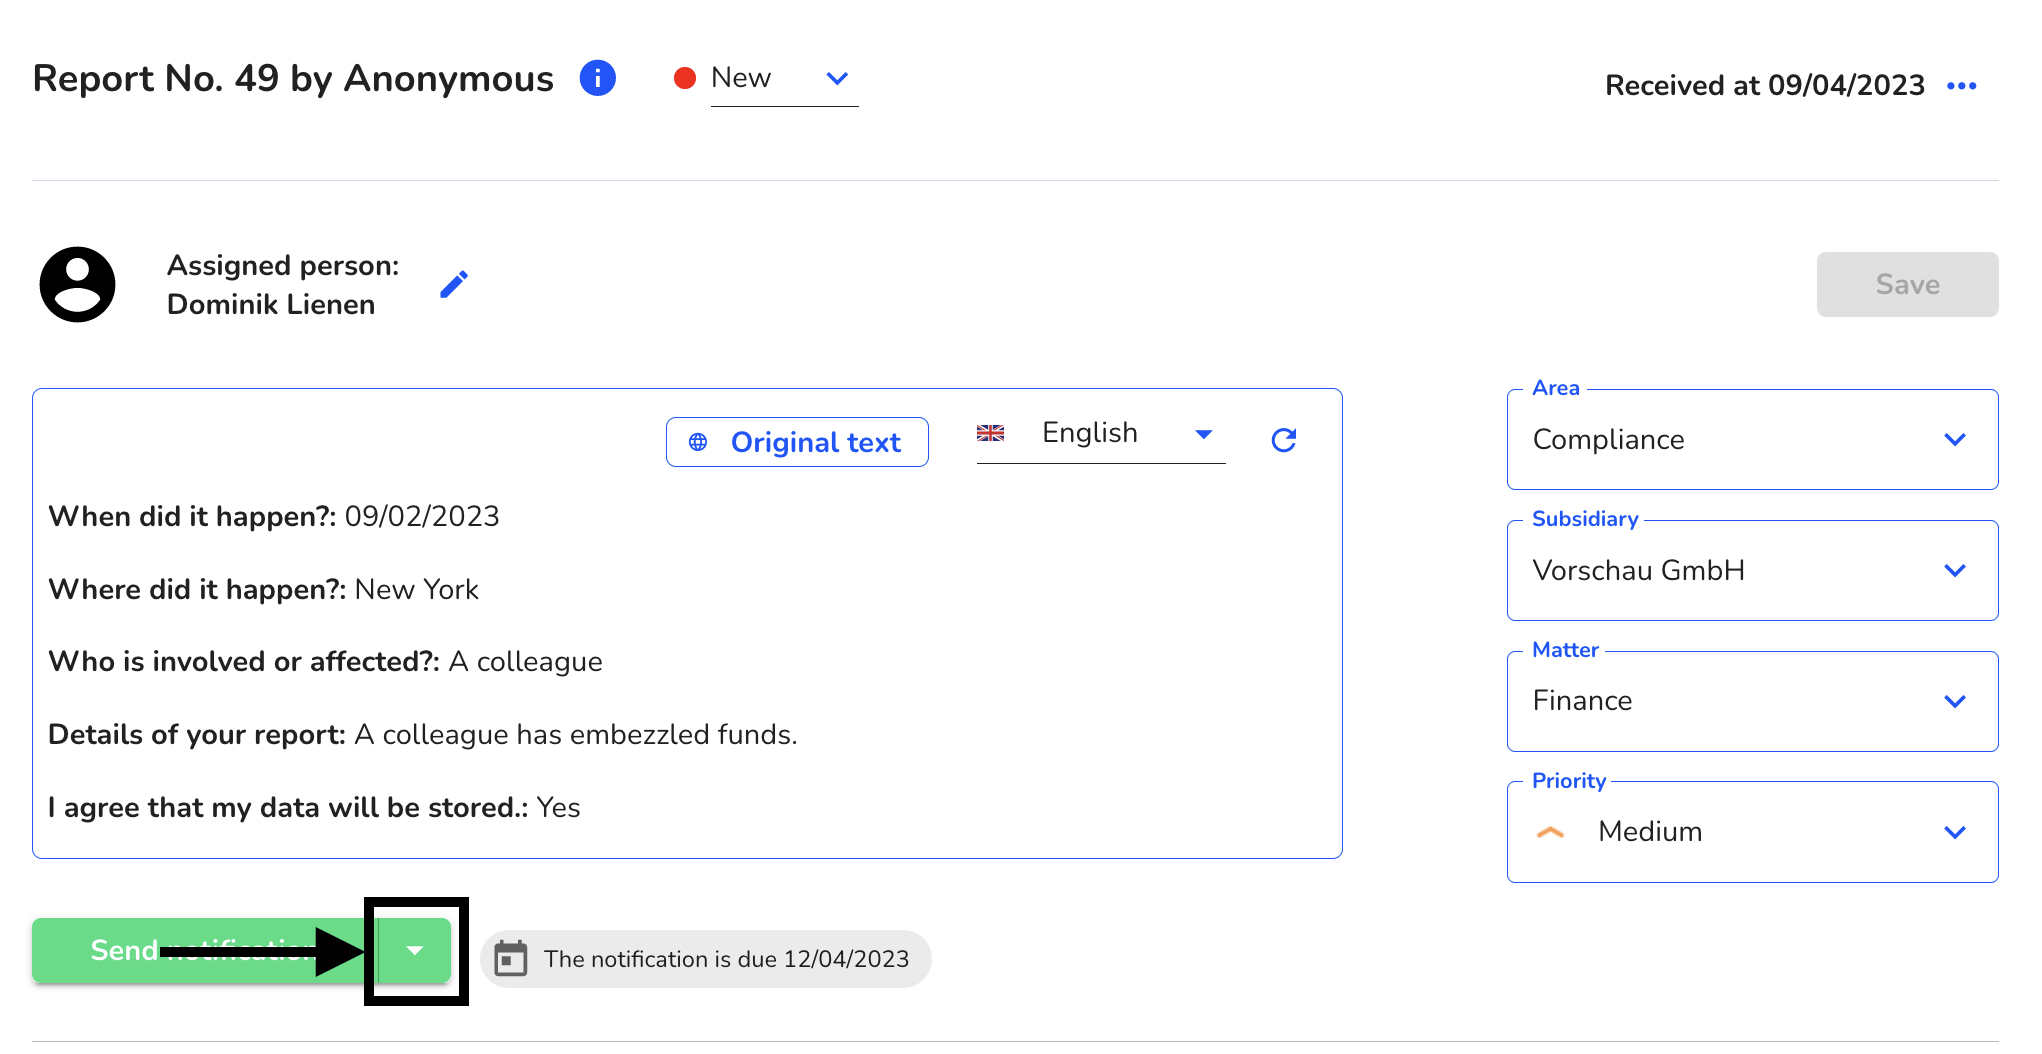
To do that, click the down arrow next to the Send notification text box.
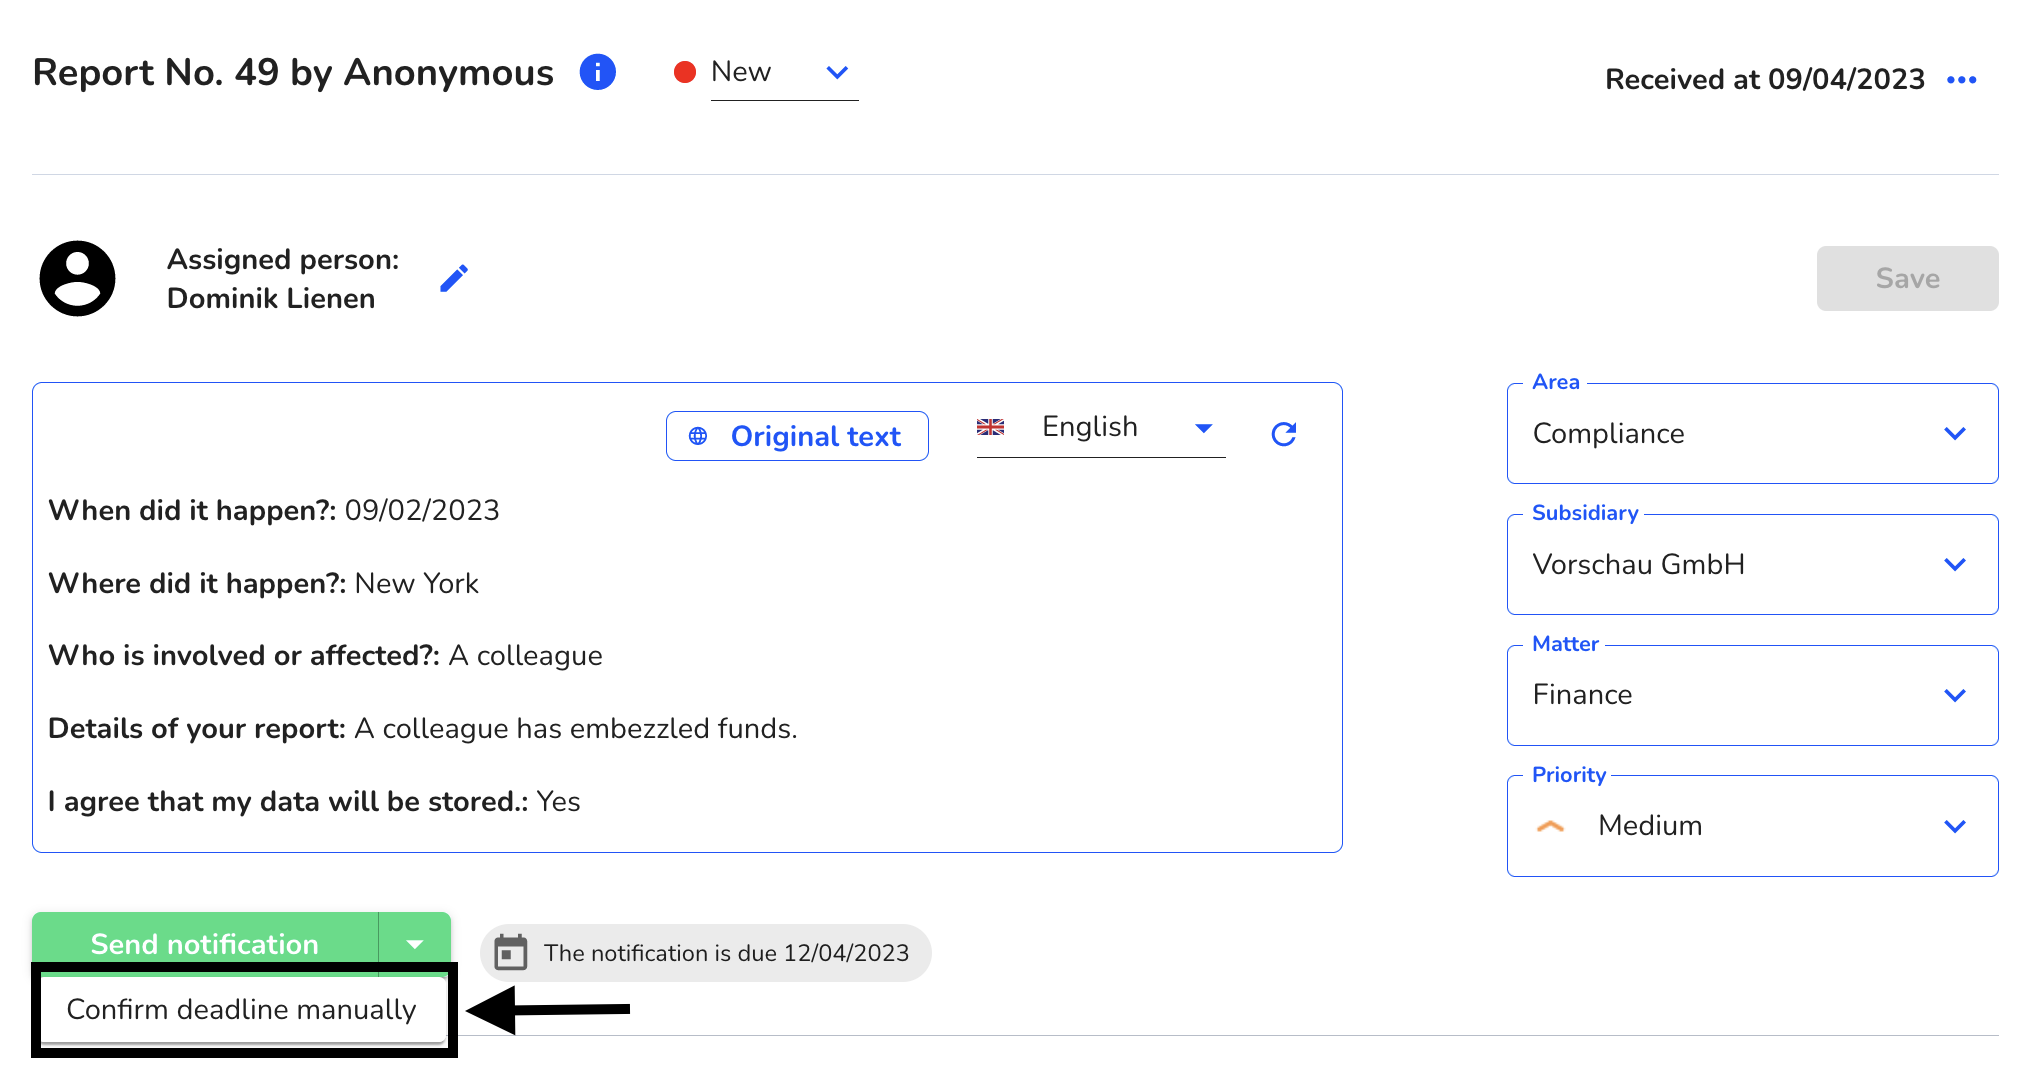
Then click Confirm deadline manually.
A dialog will then open. Click Next in this dialog.

The 3-month period has now been manually confirmed.
Upload files and documents for reference
By clicking on "Click here to attach documents or files" or using drag and drop, you can upload files or documents to the note.
After you have uploaded the file, you have the option to keep or adjust the file name assigned before the upload.
In this way, the file can be released to the whistleblower in the following step without the name of the file being used to draw conclusions about its origin.
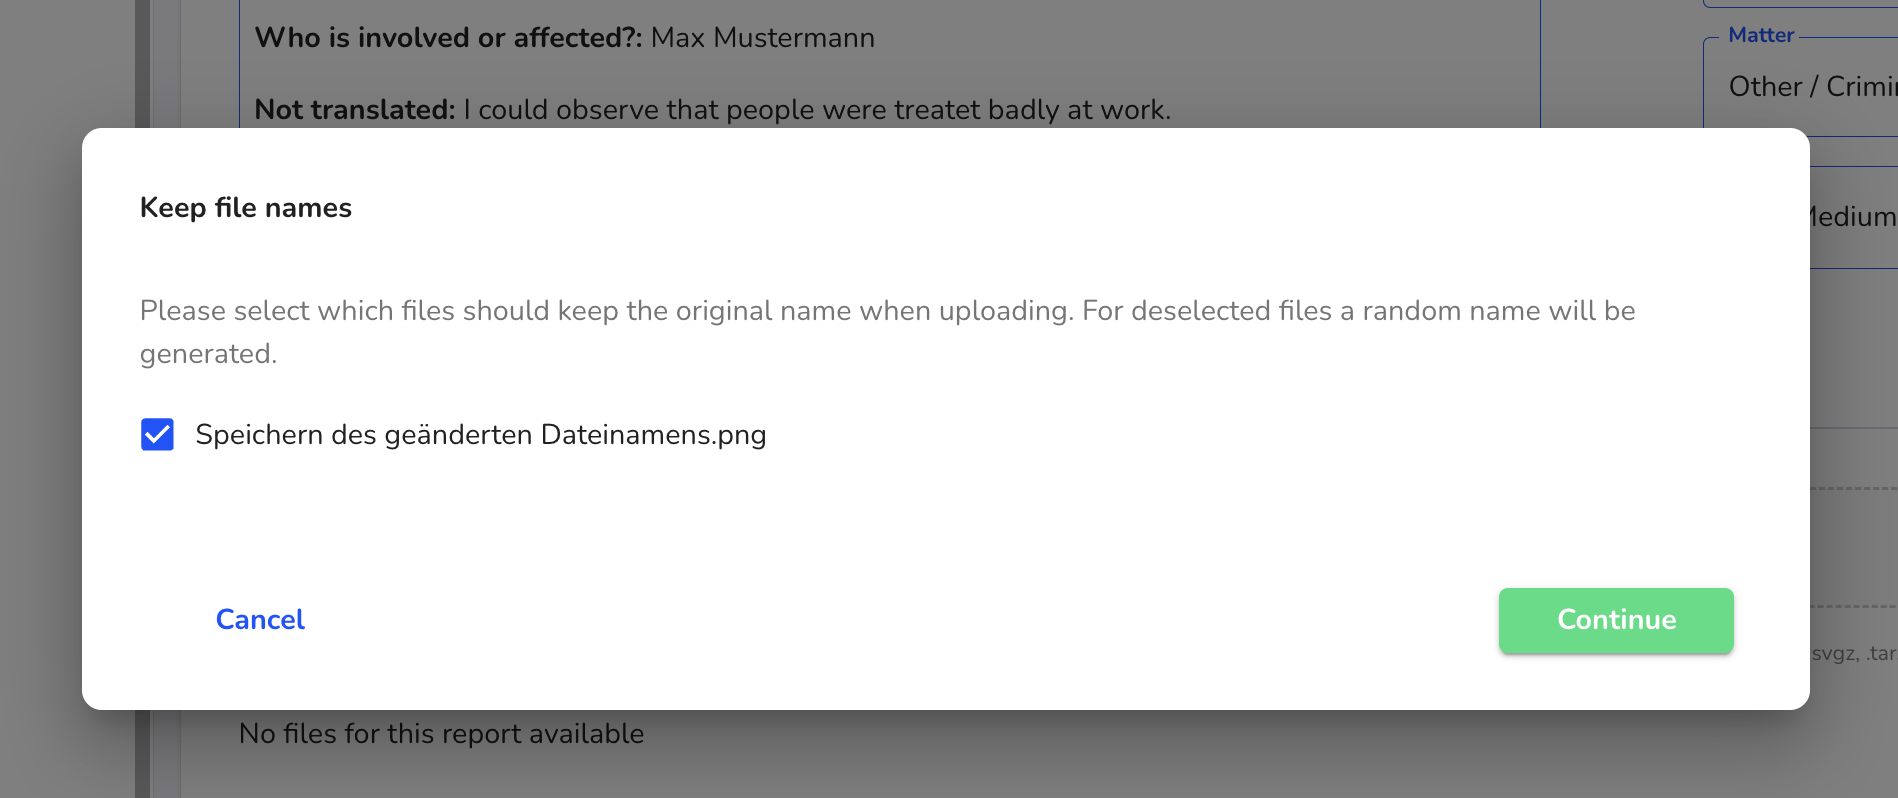
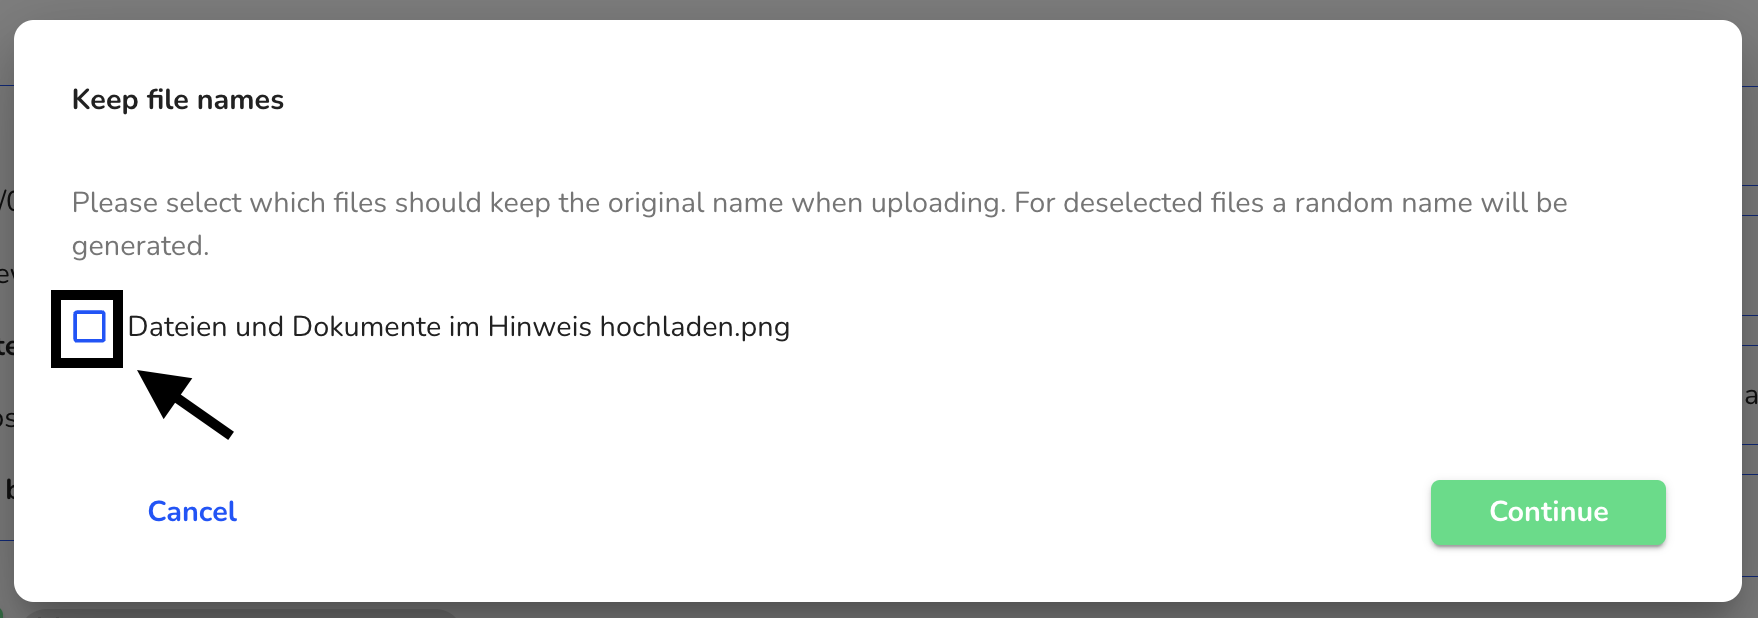
You can now choose whether to assign a random name or to keep the current one.
In our example, we uploaded an image file by dragging and dropping it onto the gray area. After that, the document can be viewed by any administrator or manager with access to the note
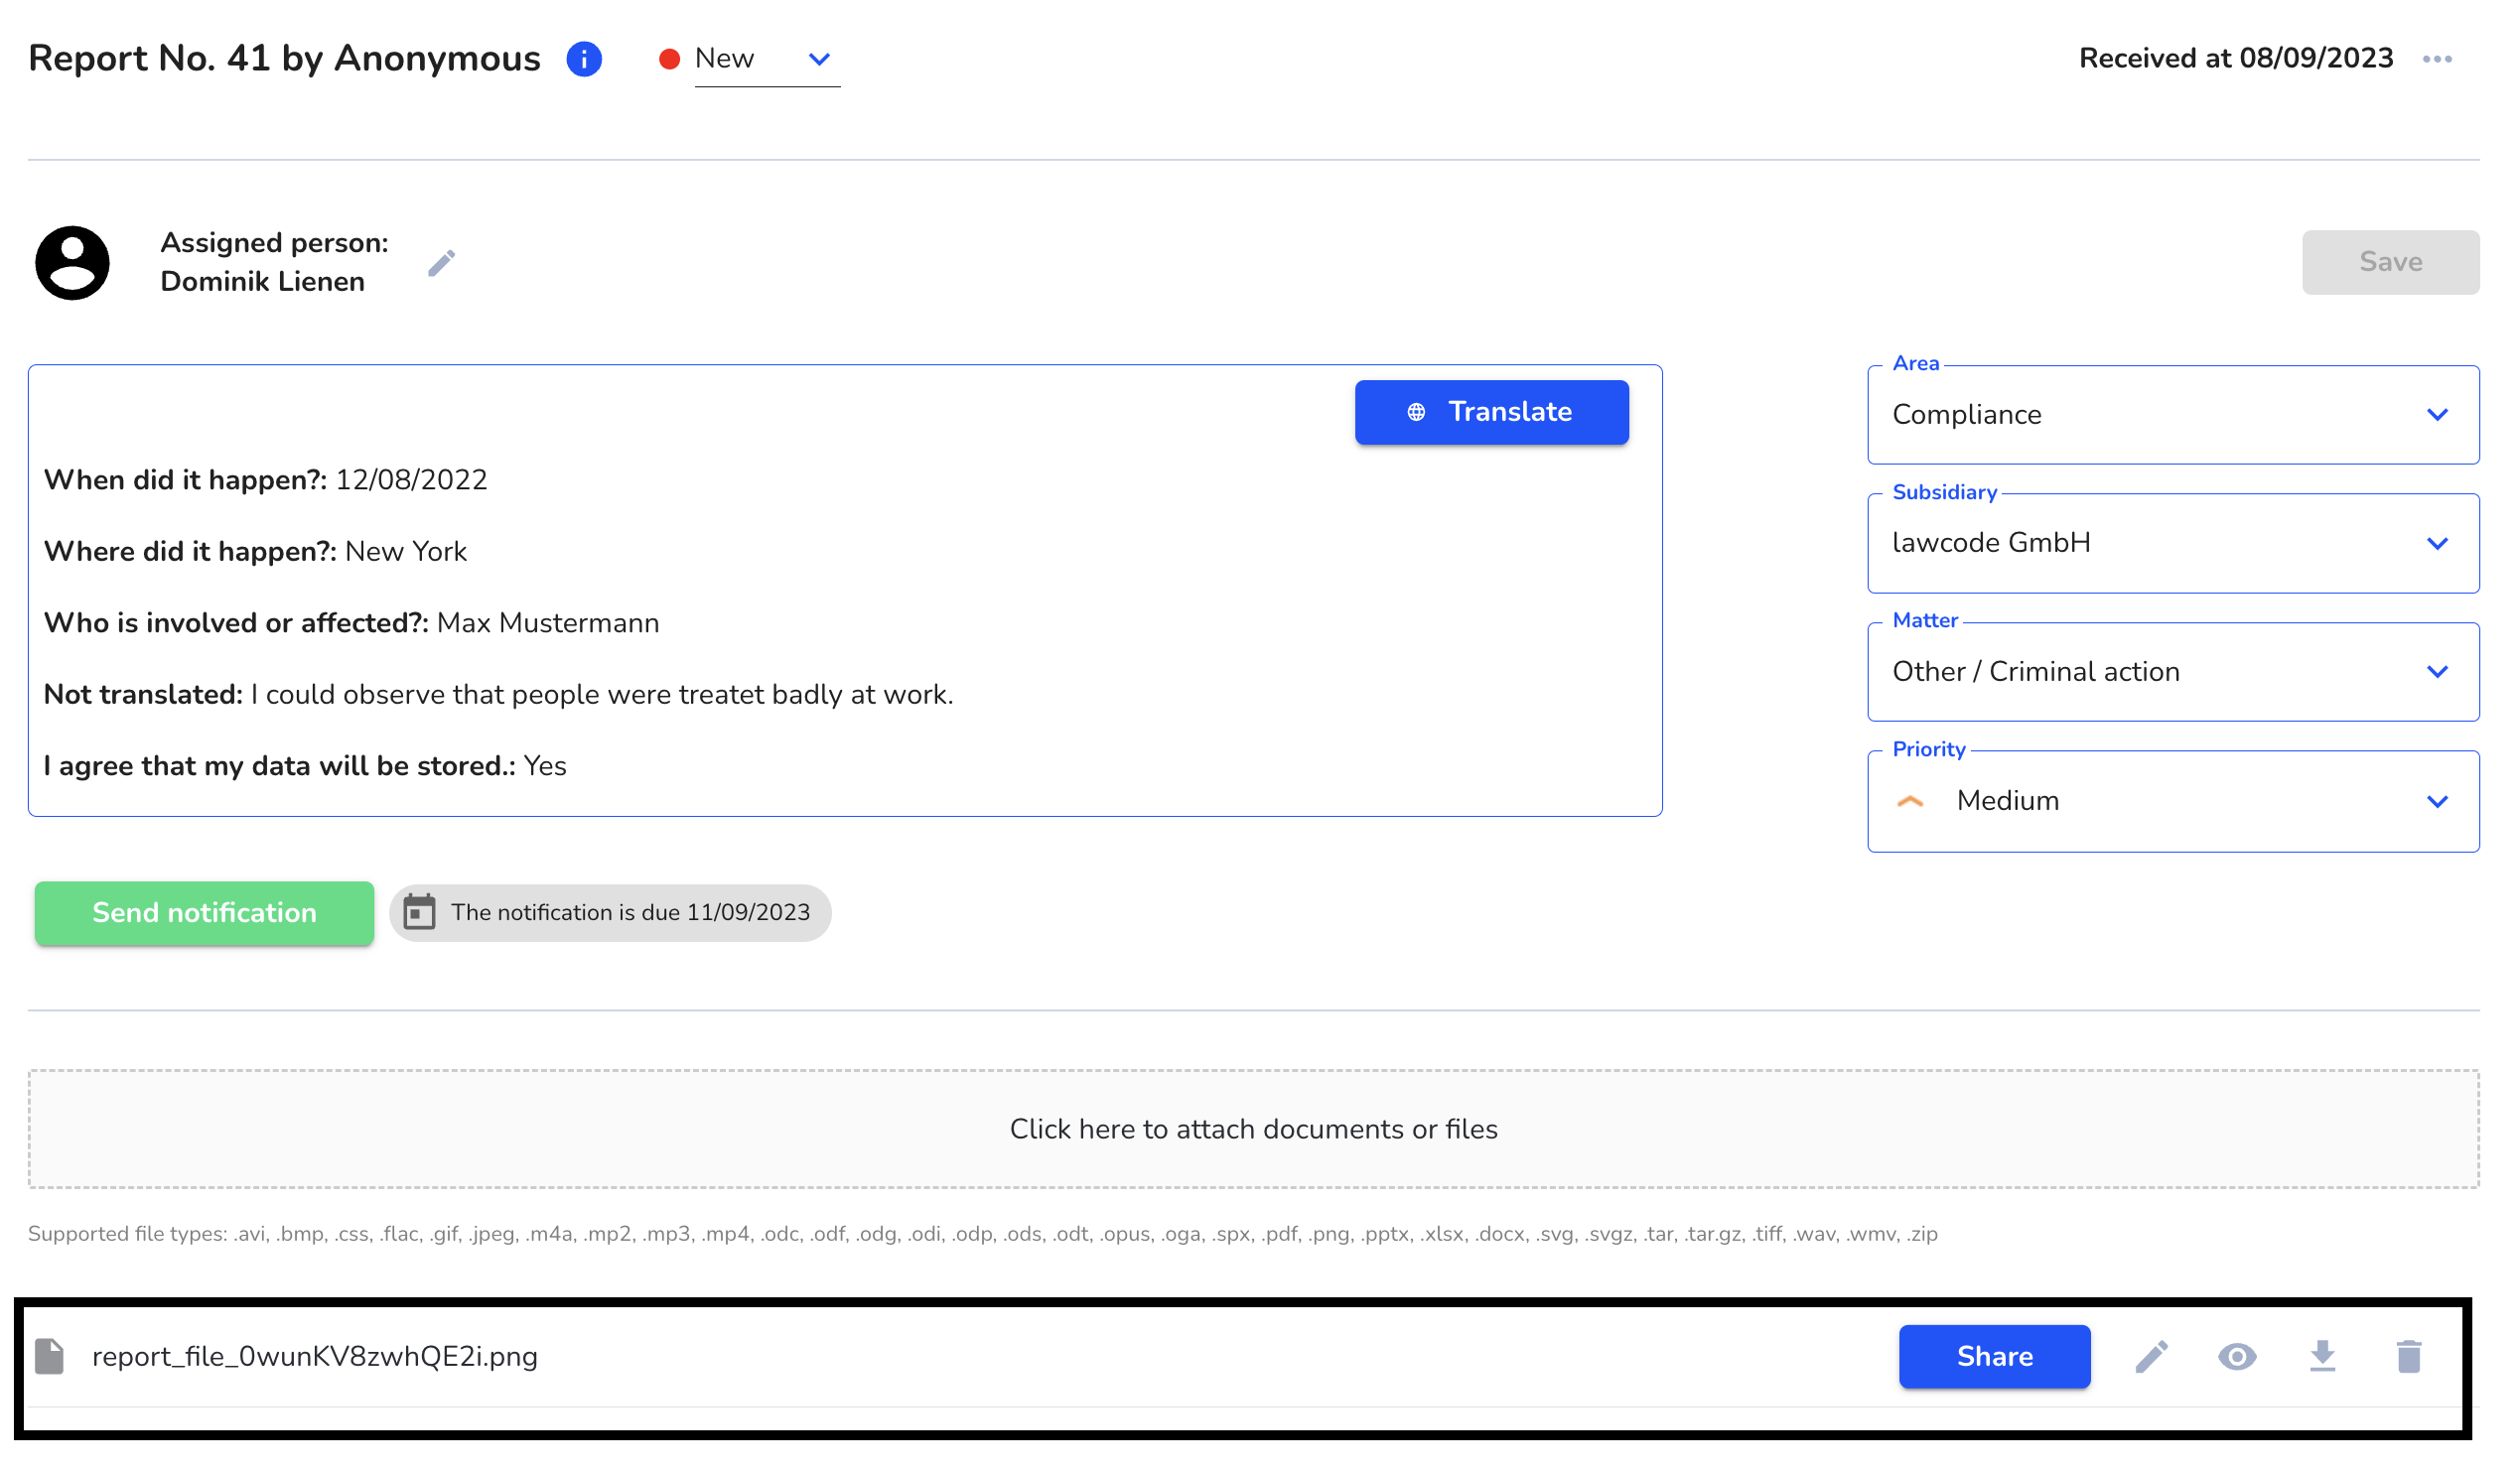
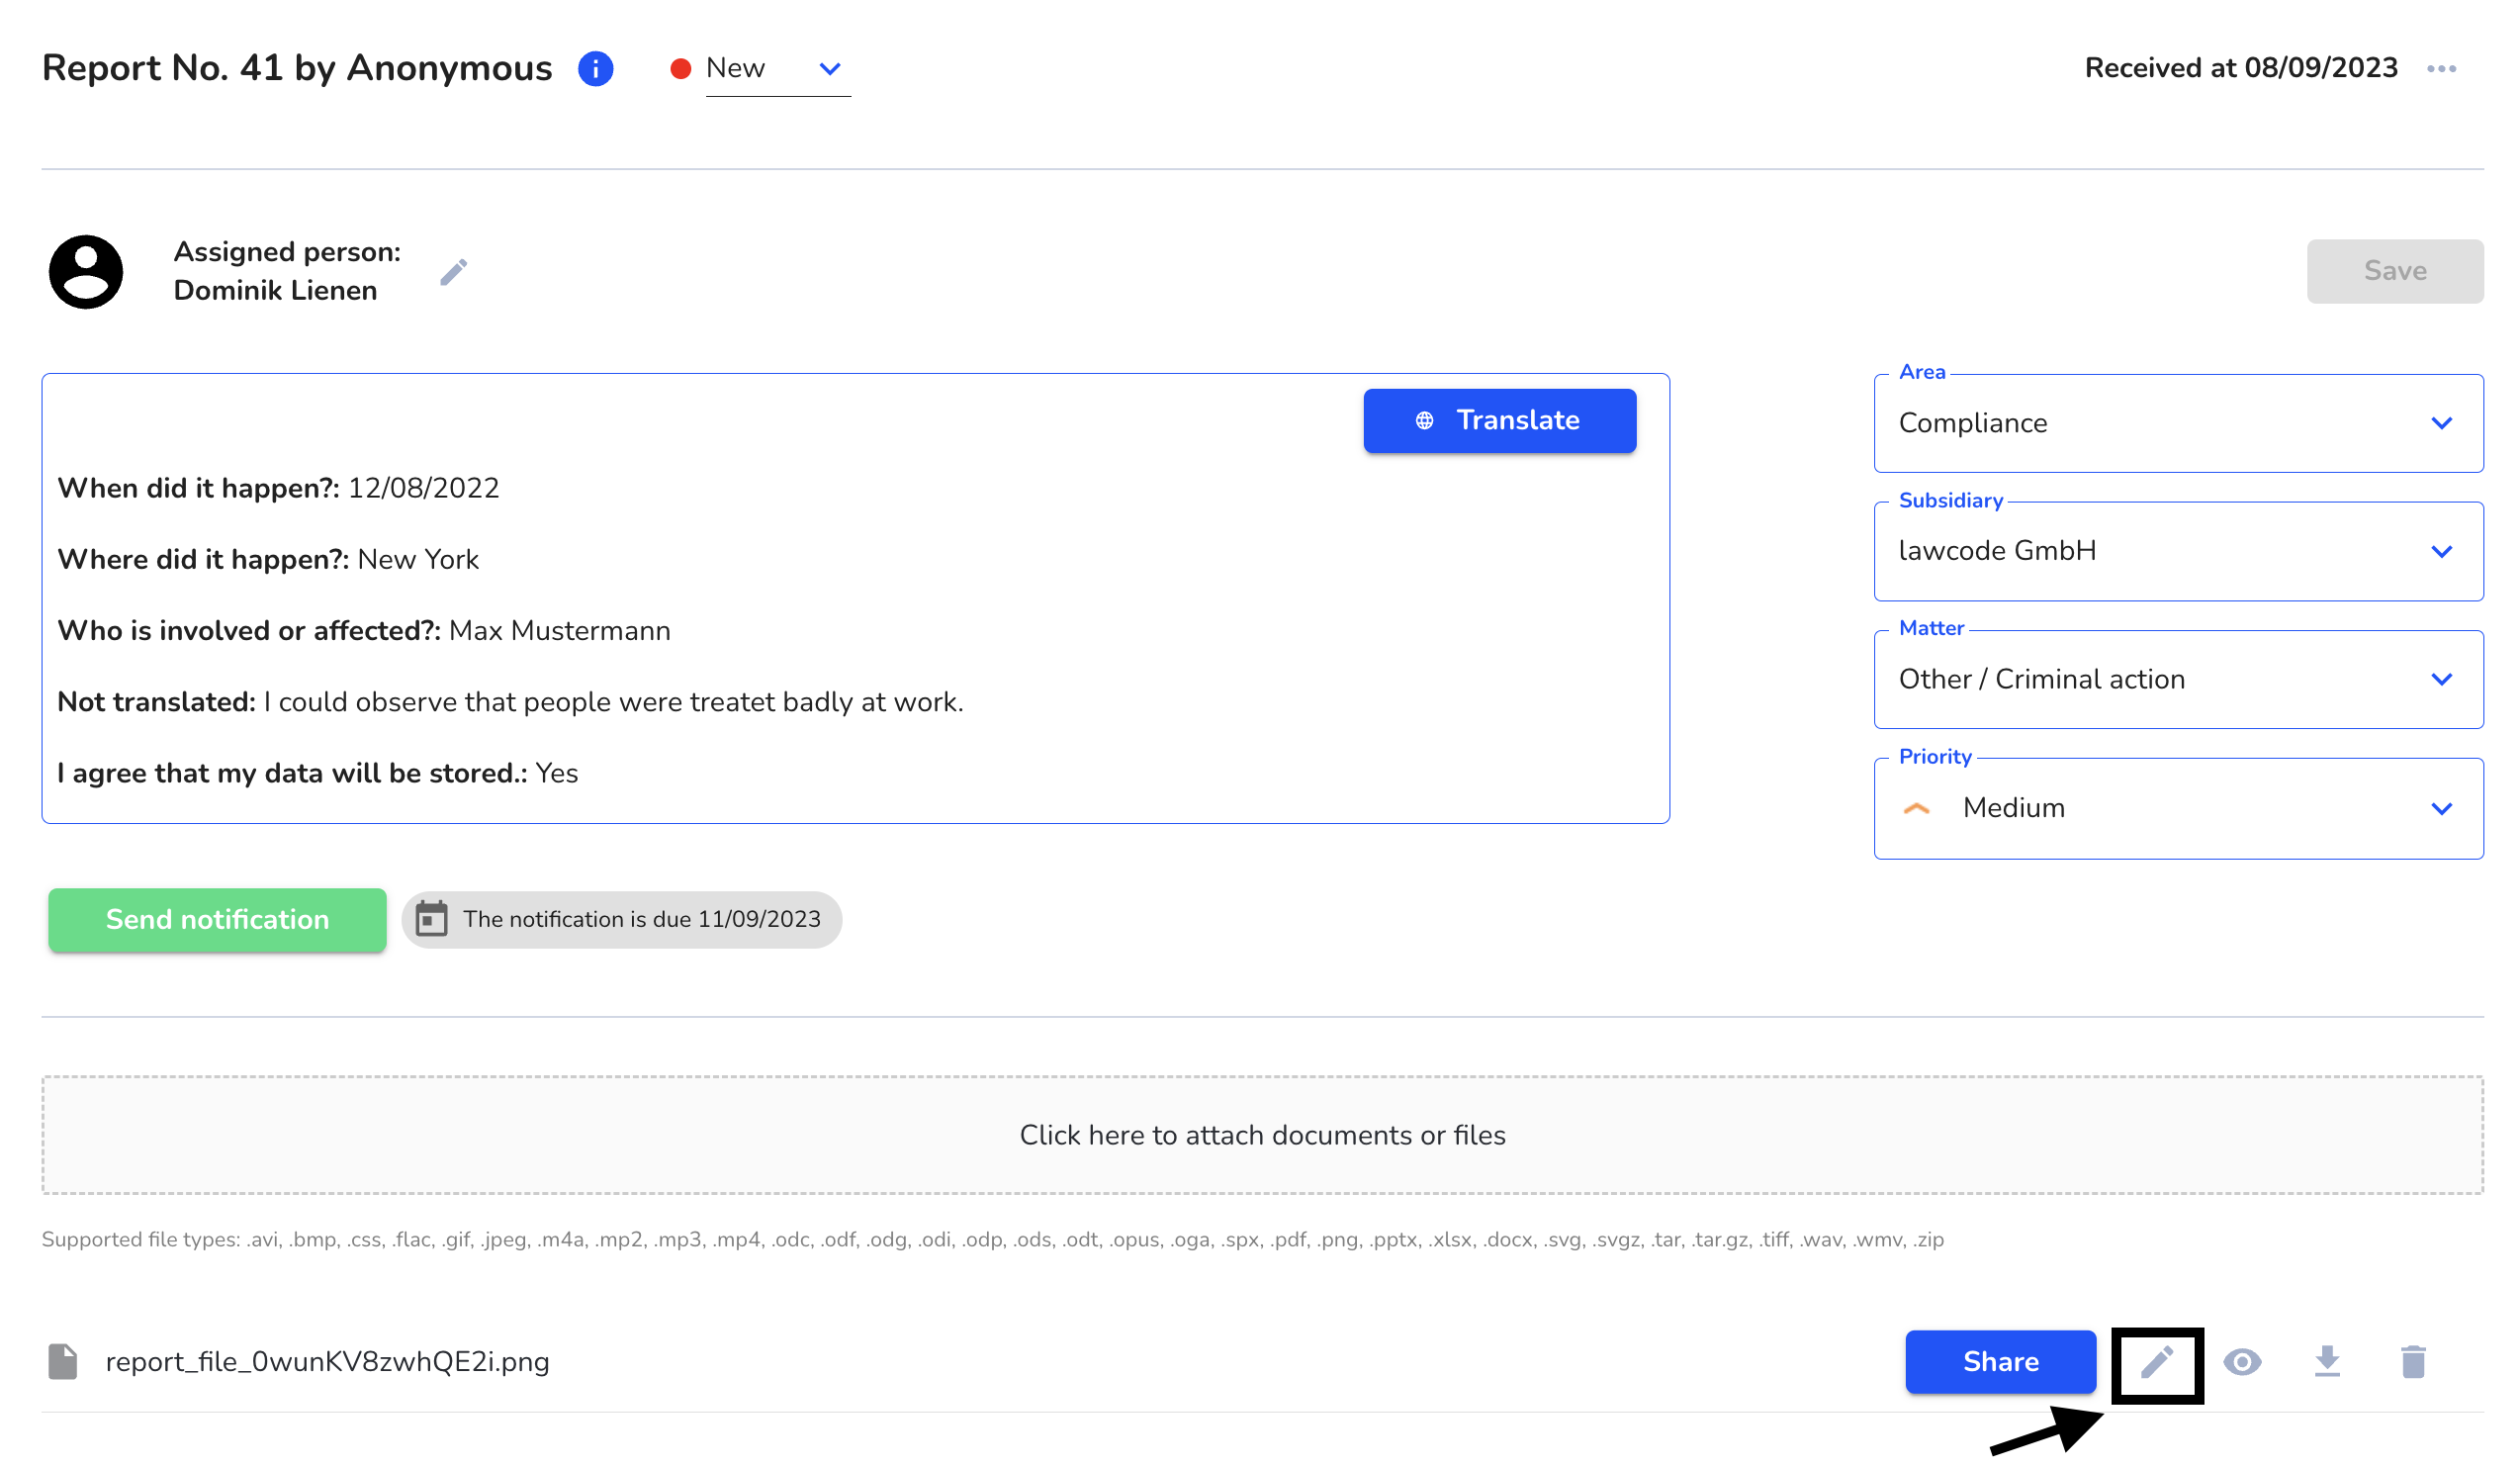
Files that are already uploaded in the report can be renamed afterwards with a click on the pencil.
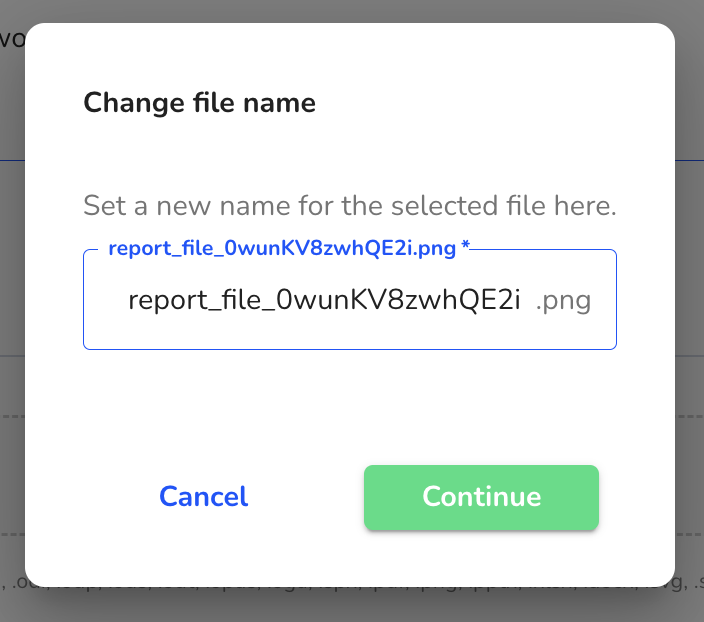
A dialog window opens in which the file can be given a new name.
By clicking in the text field, the desired name can be assigned.
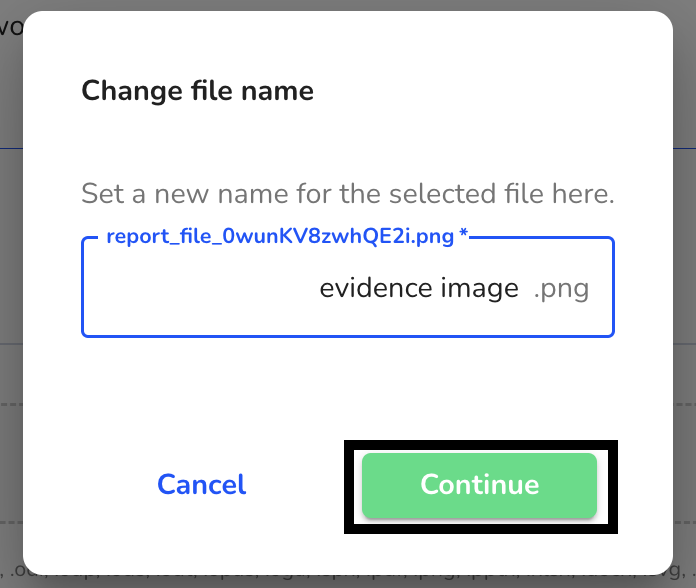
The name change can be saved by clicking Continue.
Share files and documents to the whistleblower
To share a file or document, you can simply click the "Share" button after uploading. Afterwards, the file is directly accessible for the whistleblower.
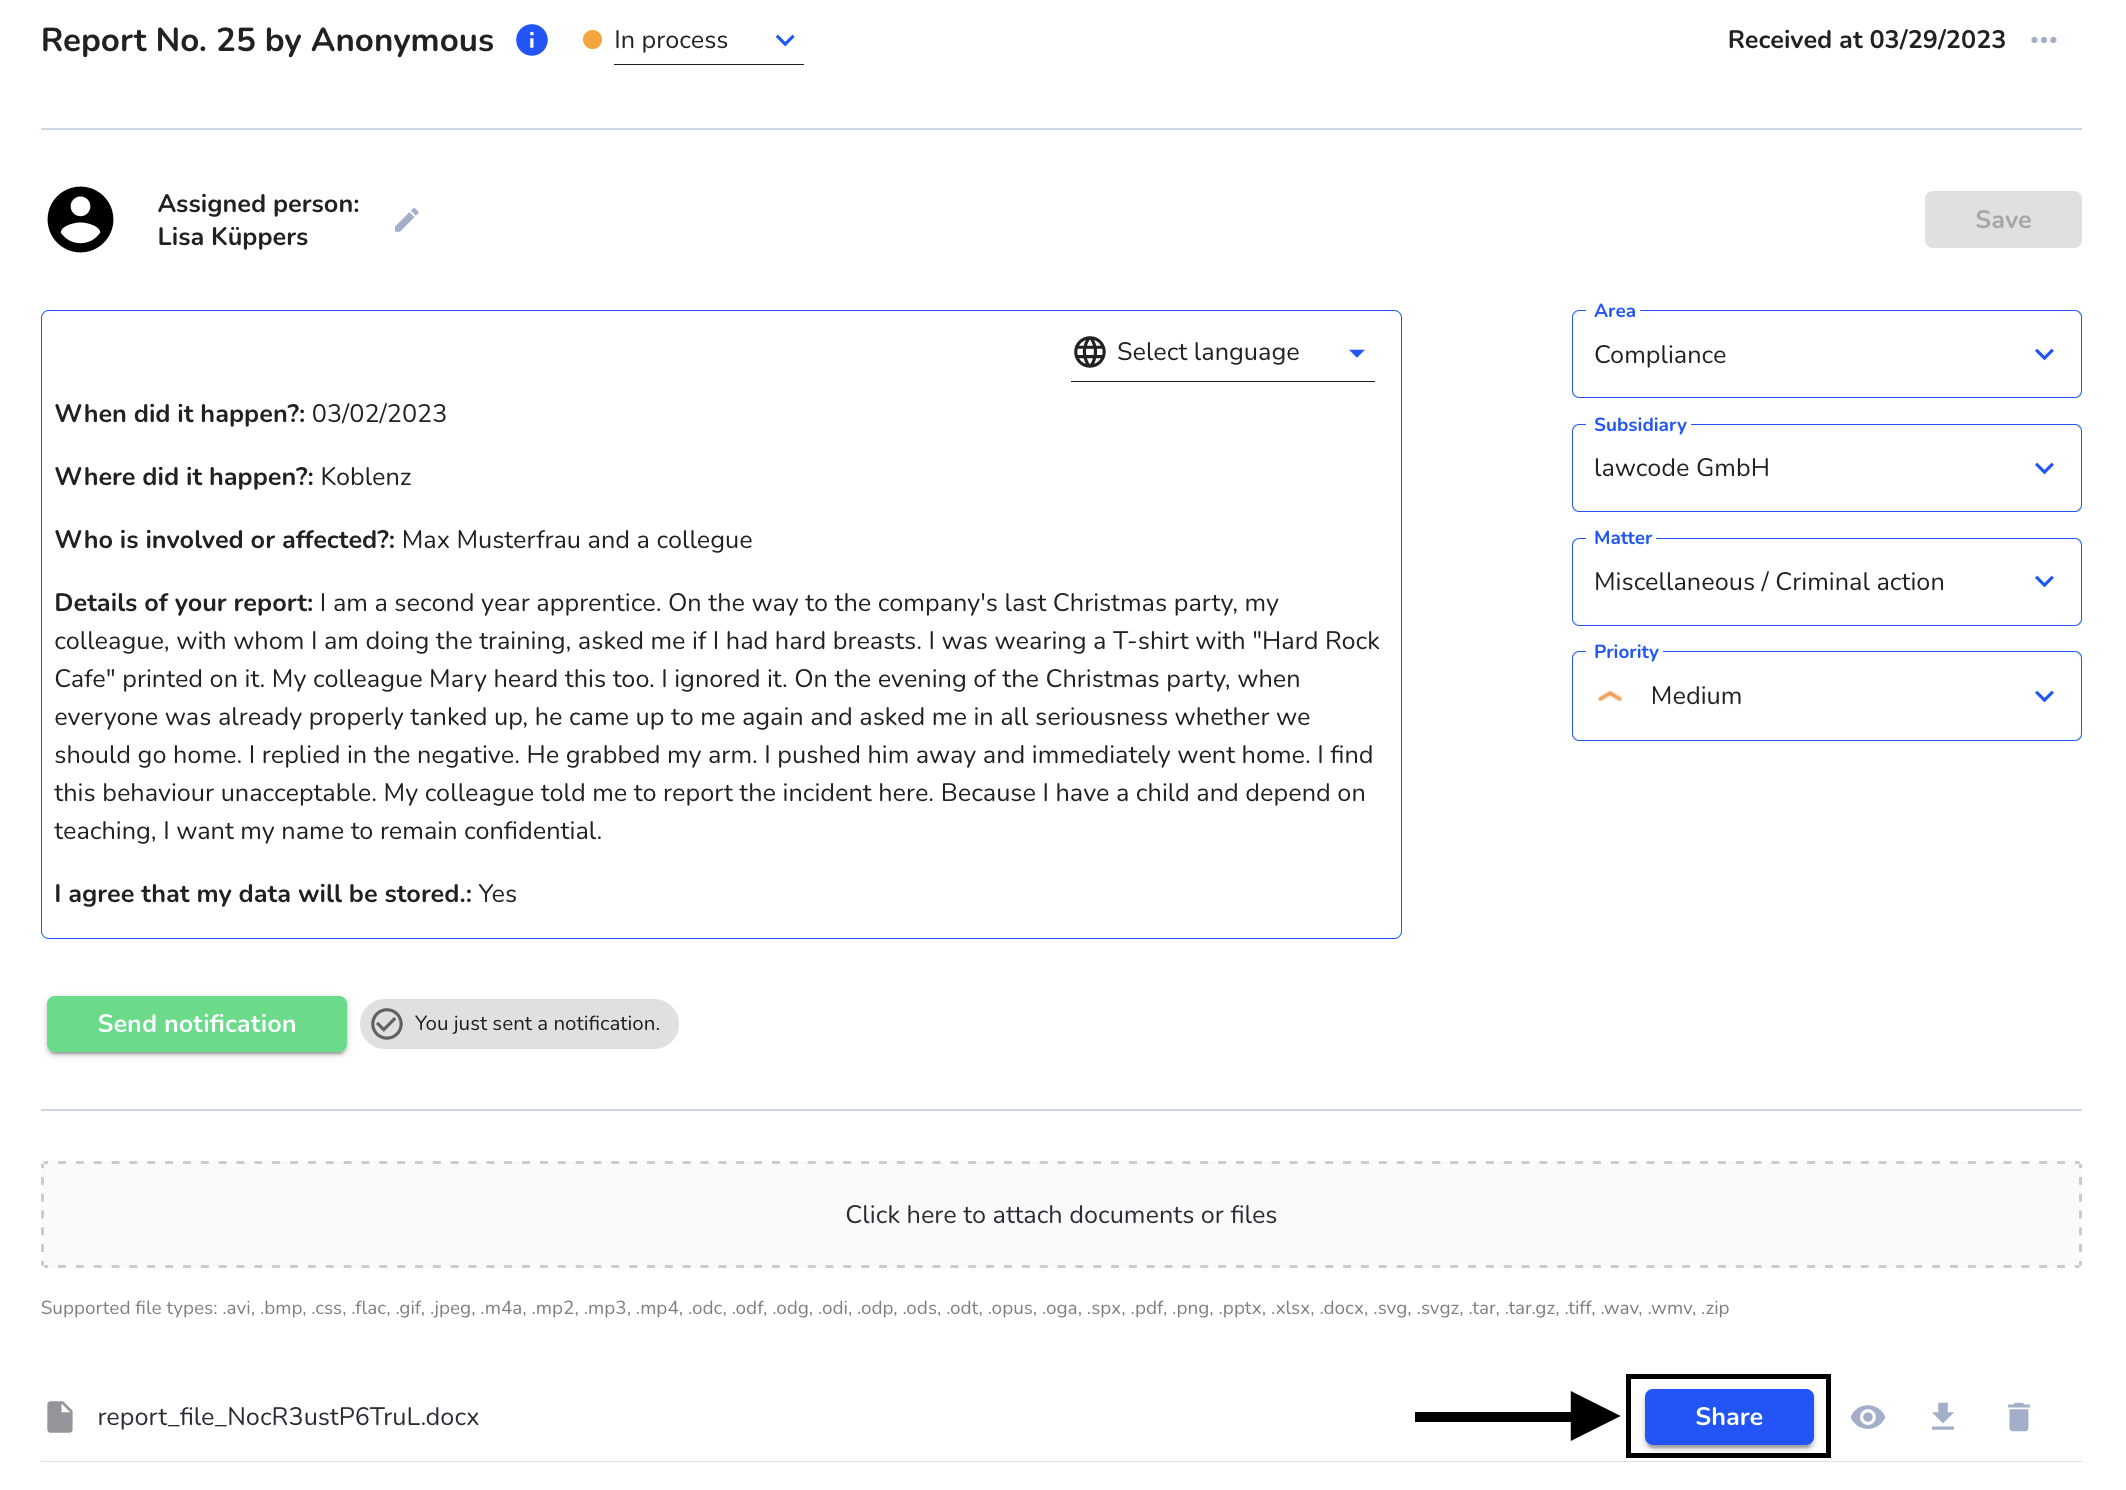
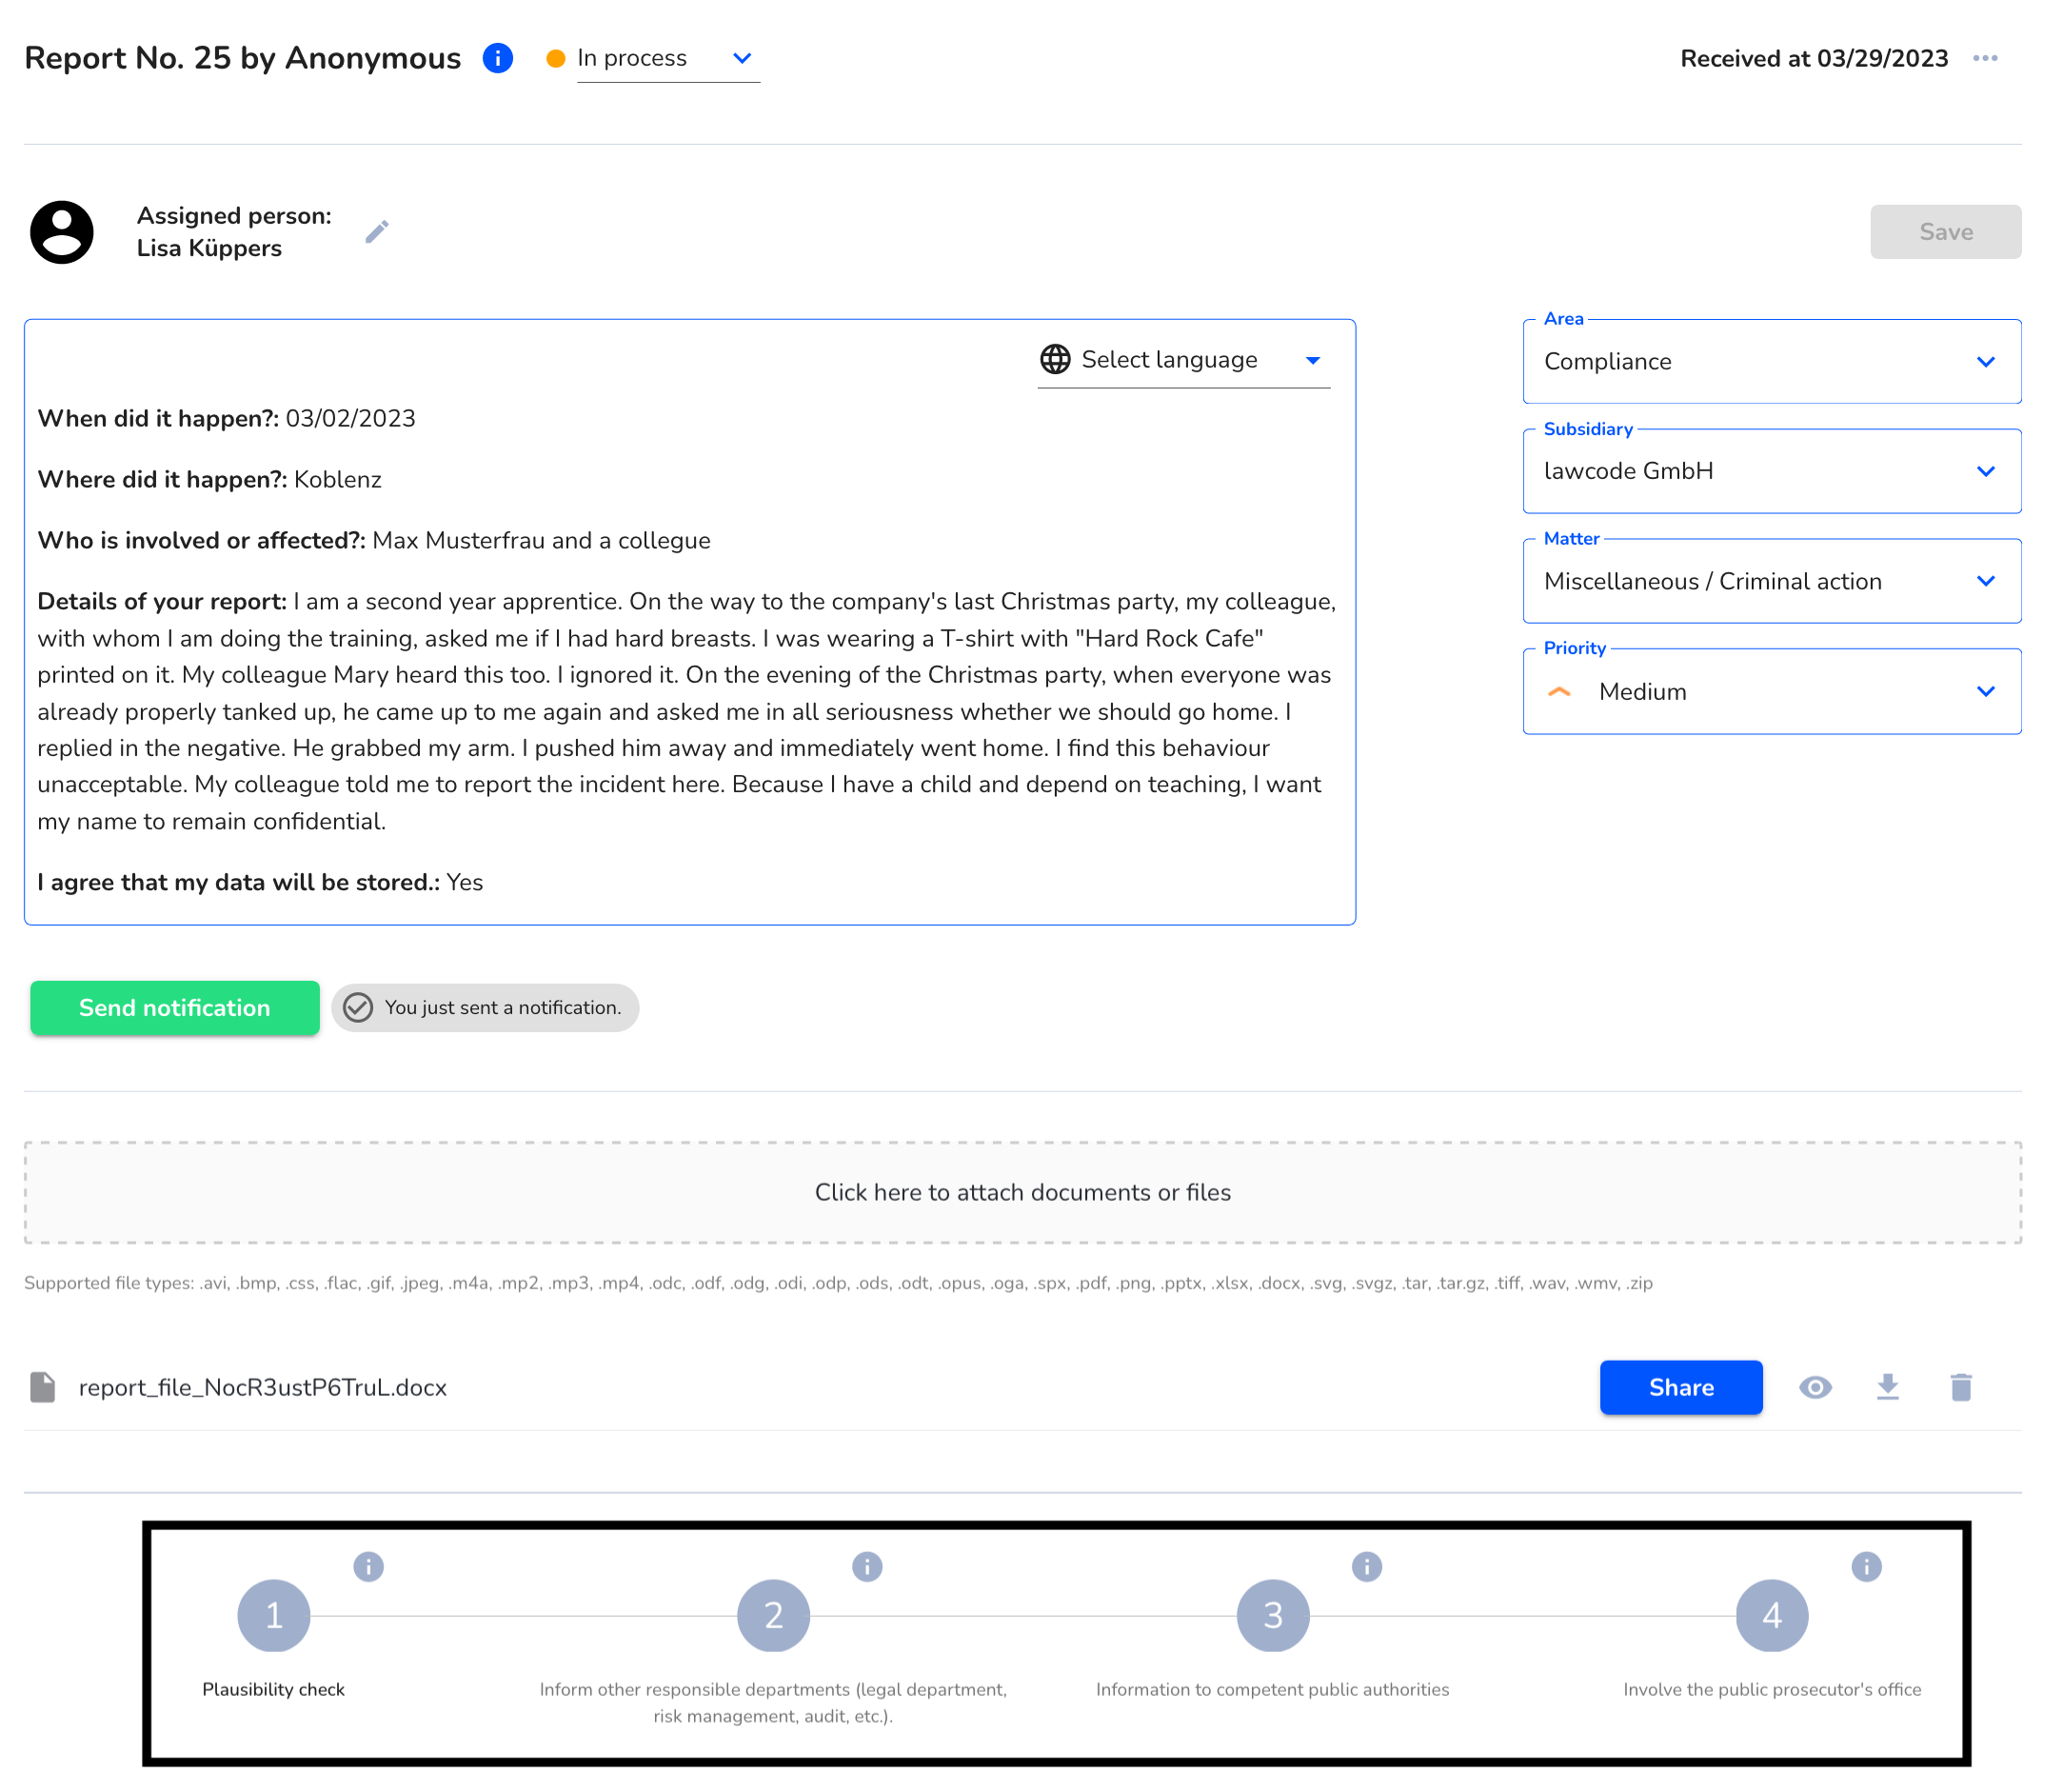
Process steps
Process steps within the note are used to process the note. By clicking on the respective step, you can check it off like on a to-do list. This way, you know exactly where you stand in the processing.
By clicking on the process step "Plausibility check", the first step of the process steps is checked off and the change is saved.
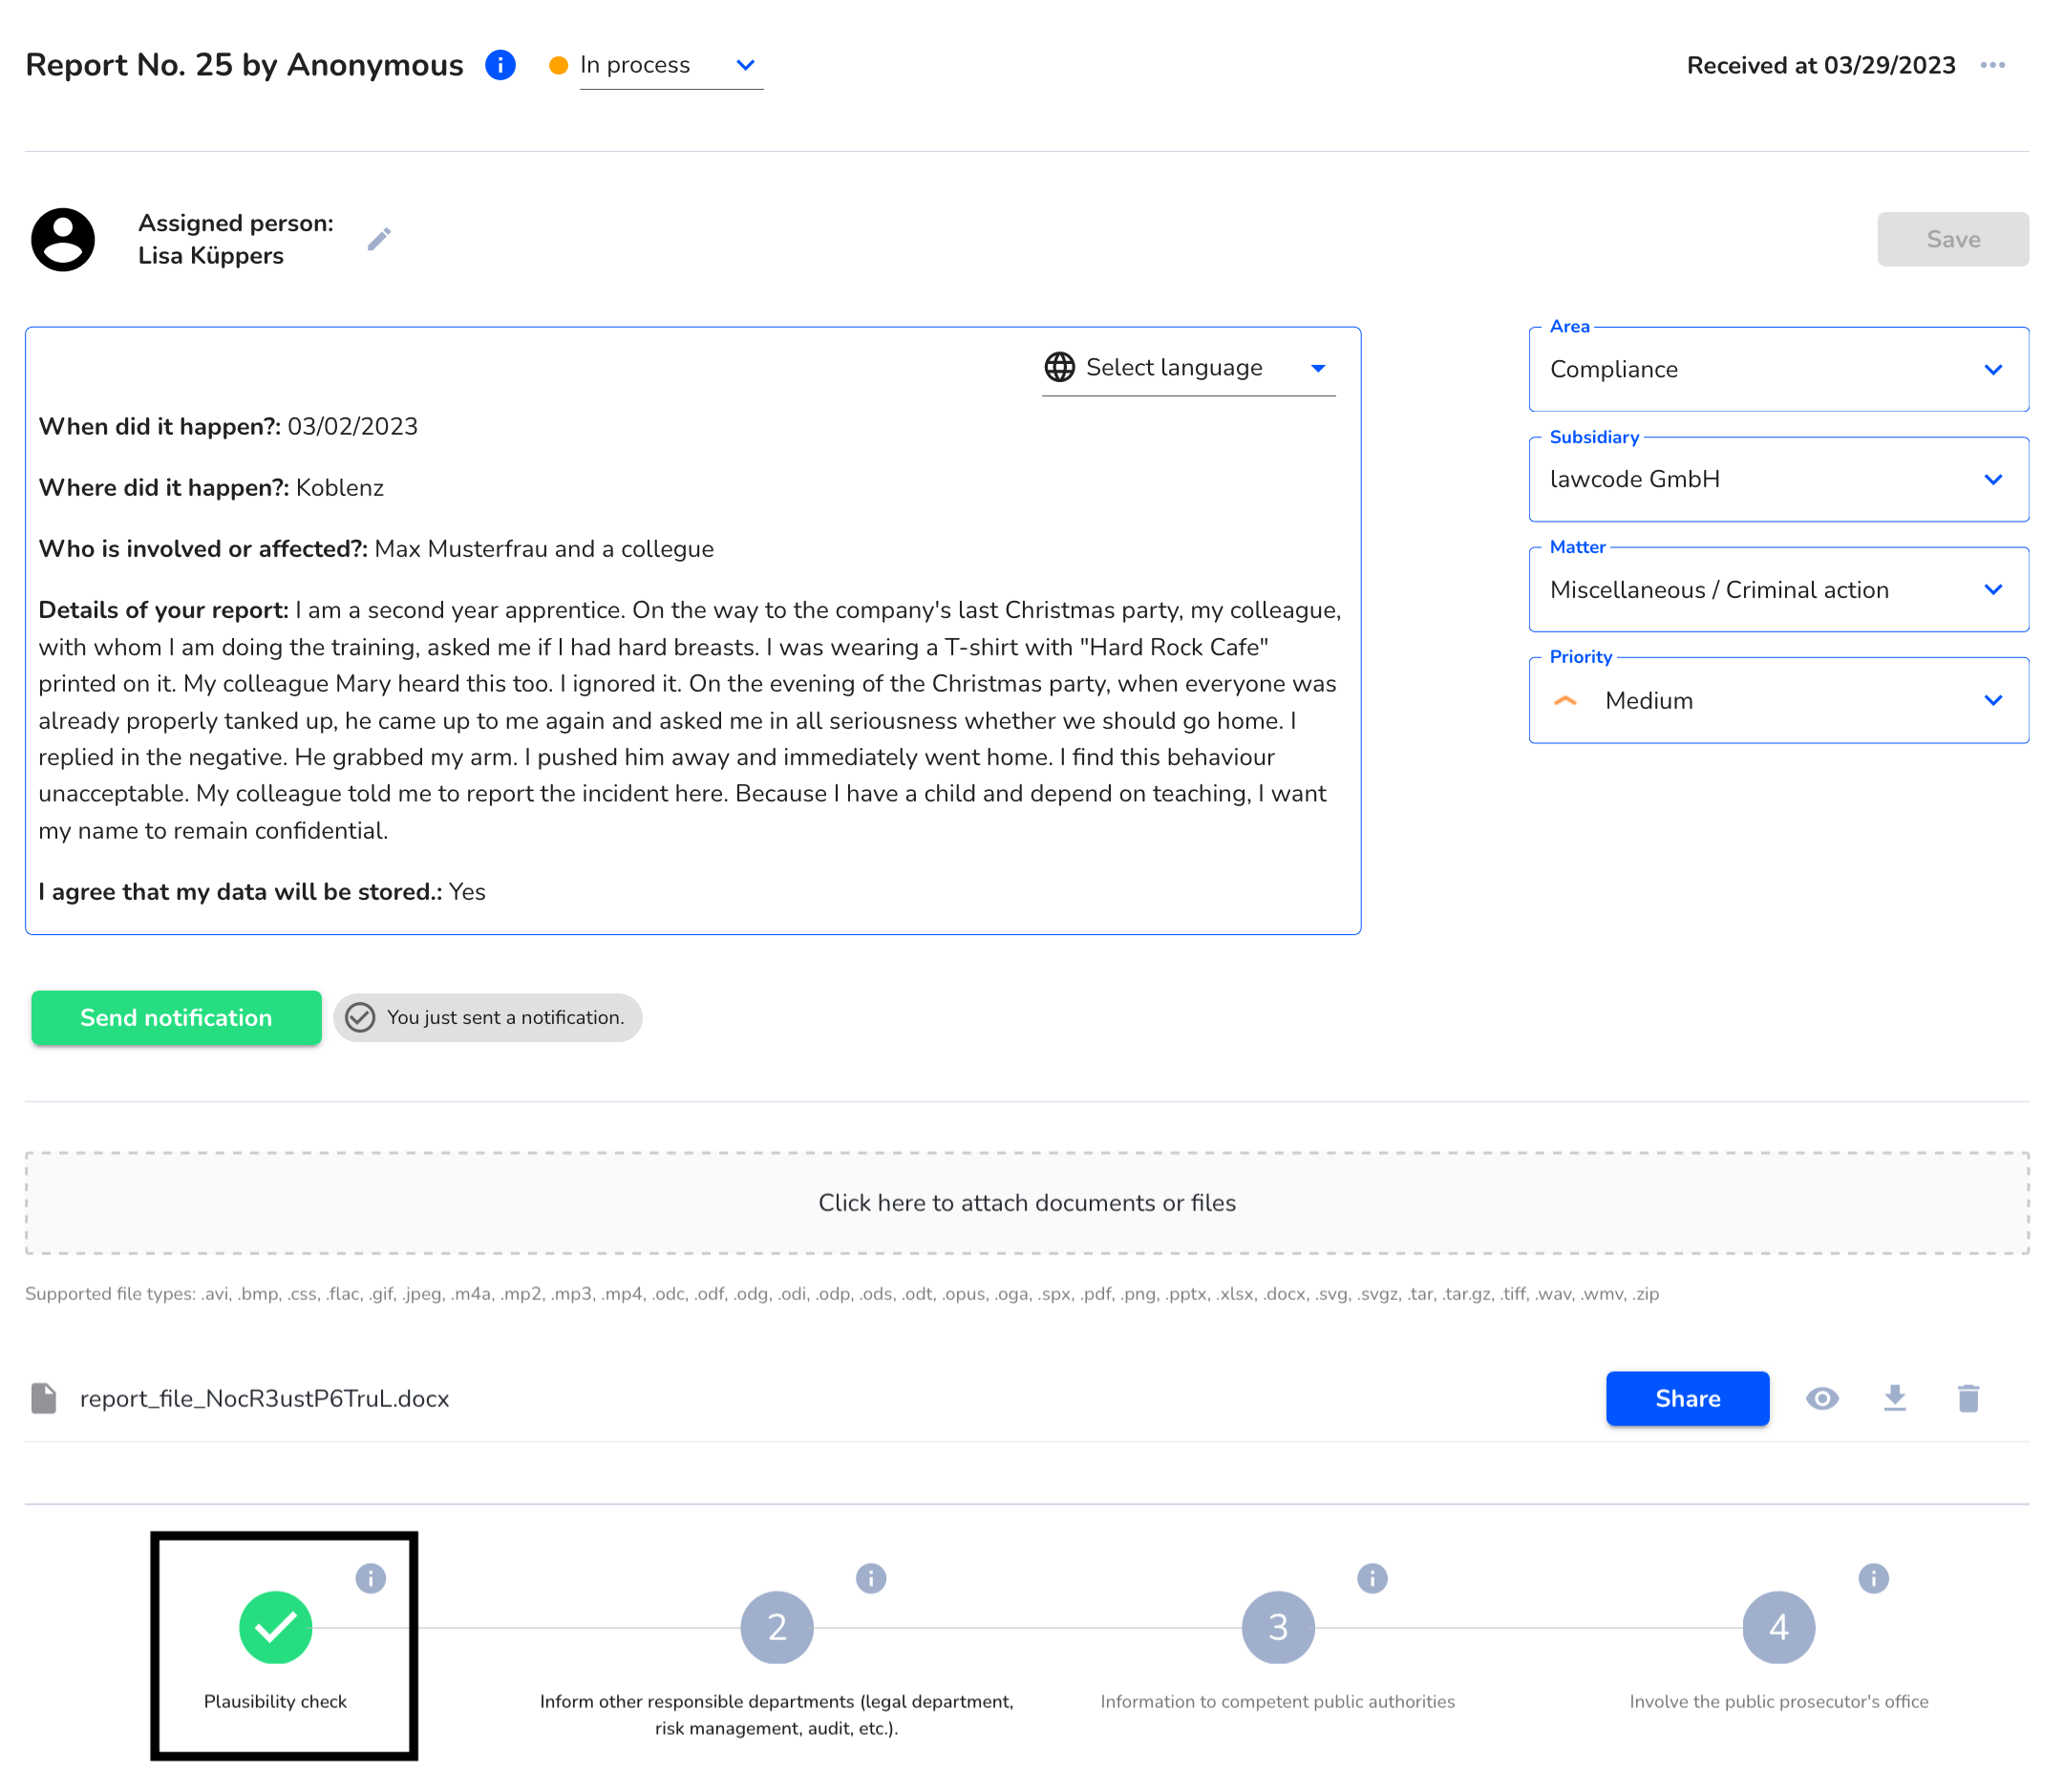
Thus, all compliance managers with access to the notice can see in which processing phase the notice is.
Capture notes
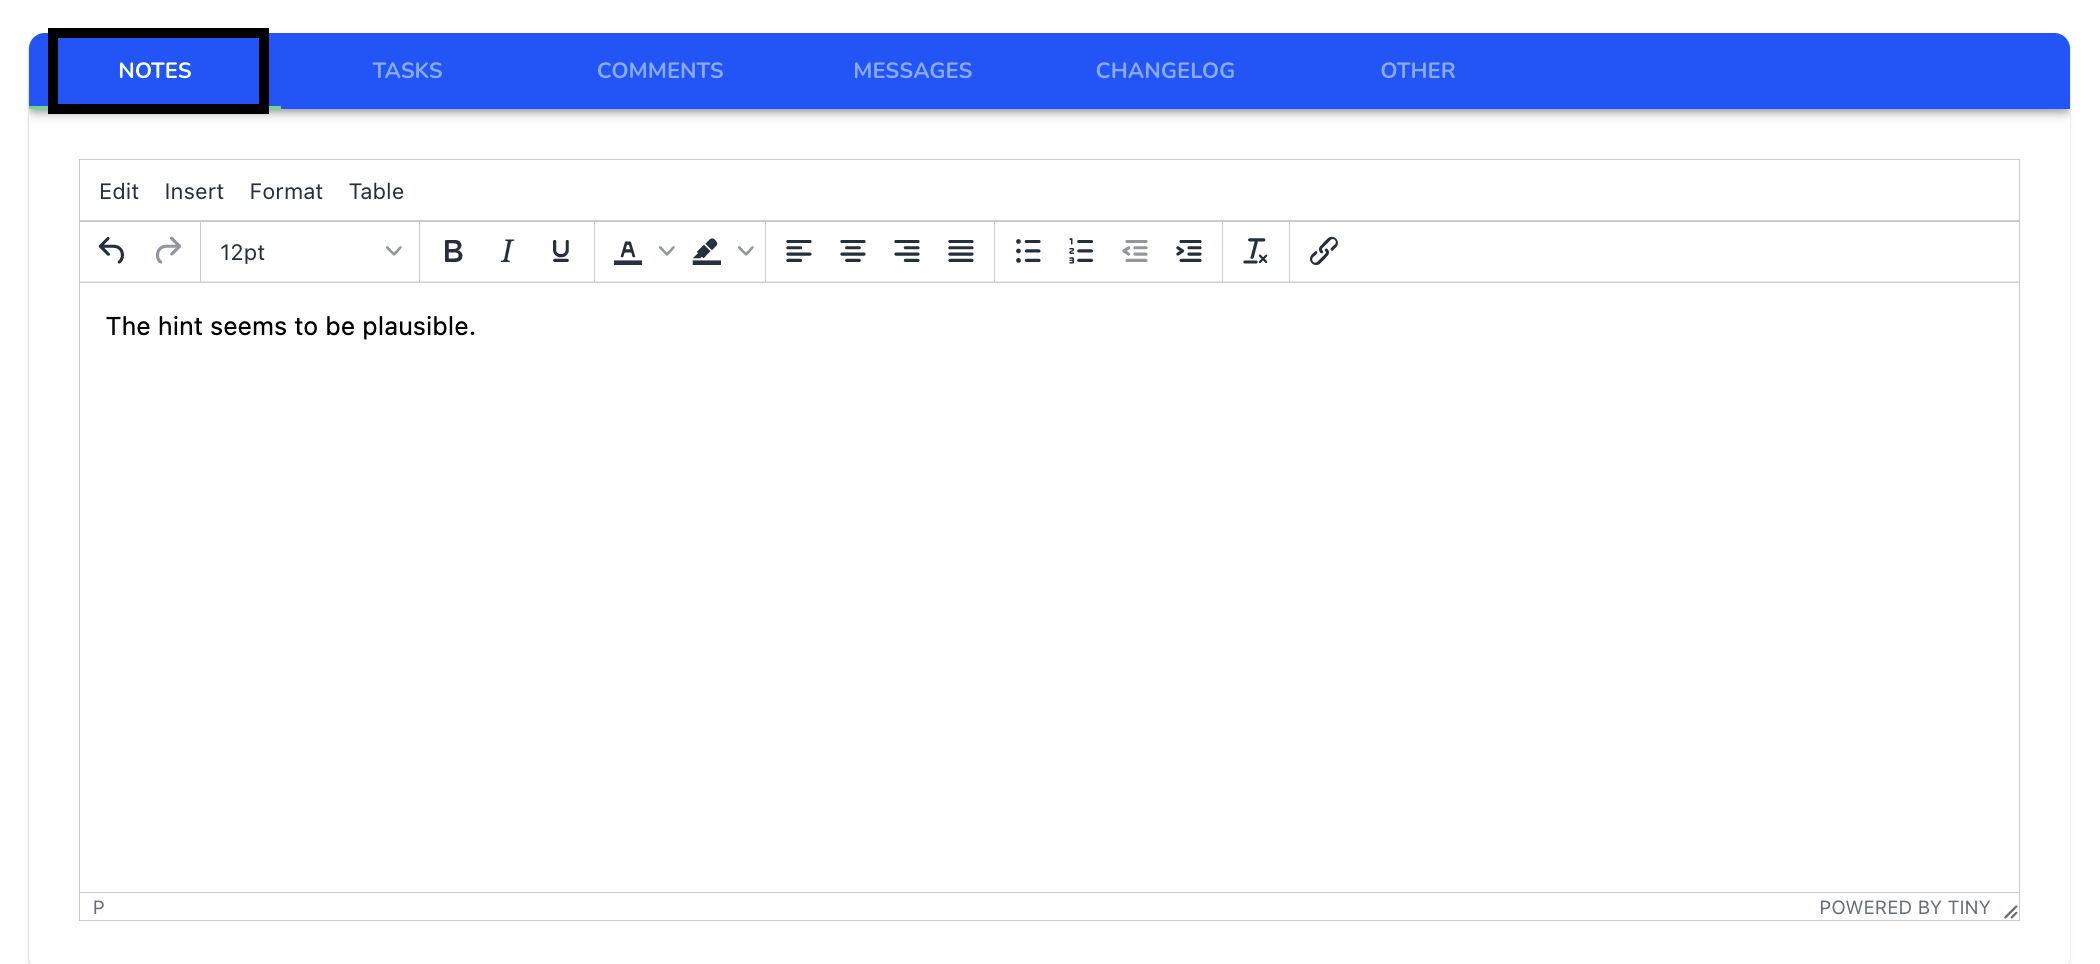
Notes can be recorded for an SAP Note. To do this, click on "Notes" in the Note detail view and you should then be able to use the text editor to record your notes. The notes must be saved in the note editing view using the "Save" button.
Create tasks
Tasks can be entered for a note; to do this, click on "Tasks" in the note detail view and the task overview should open.

Then you can create a task and confirm it with "Add".

After saving, you should see the task in the overview and also be able to edit or delete it if needed.

Edit tasks
Created tasks can be edited by clicking on "Tasks" in the note detail view and the task overview should open. There you can now select a task and edit it by clicking on the edit pencil.

After clicking, the edit dialog opens where you can, for example, adjust and select the task text, due date and the person responsible.
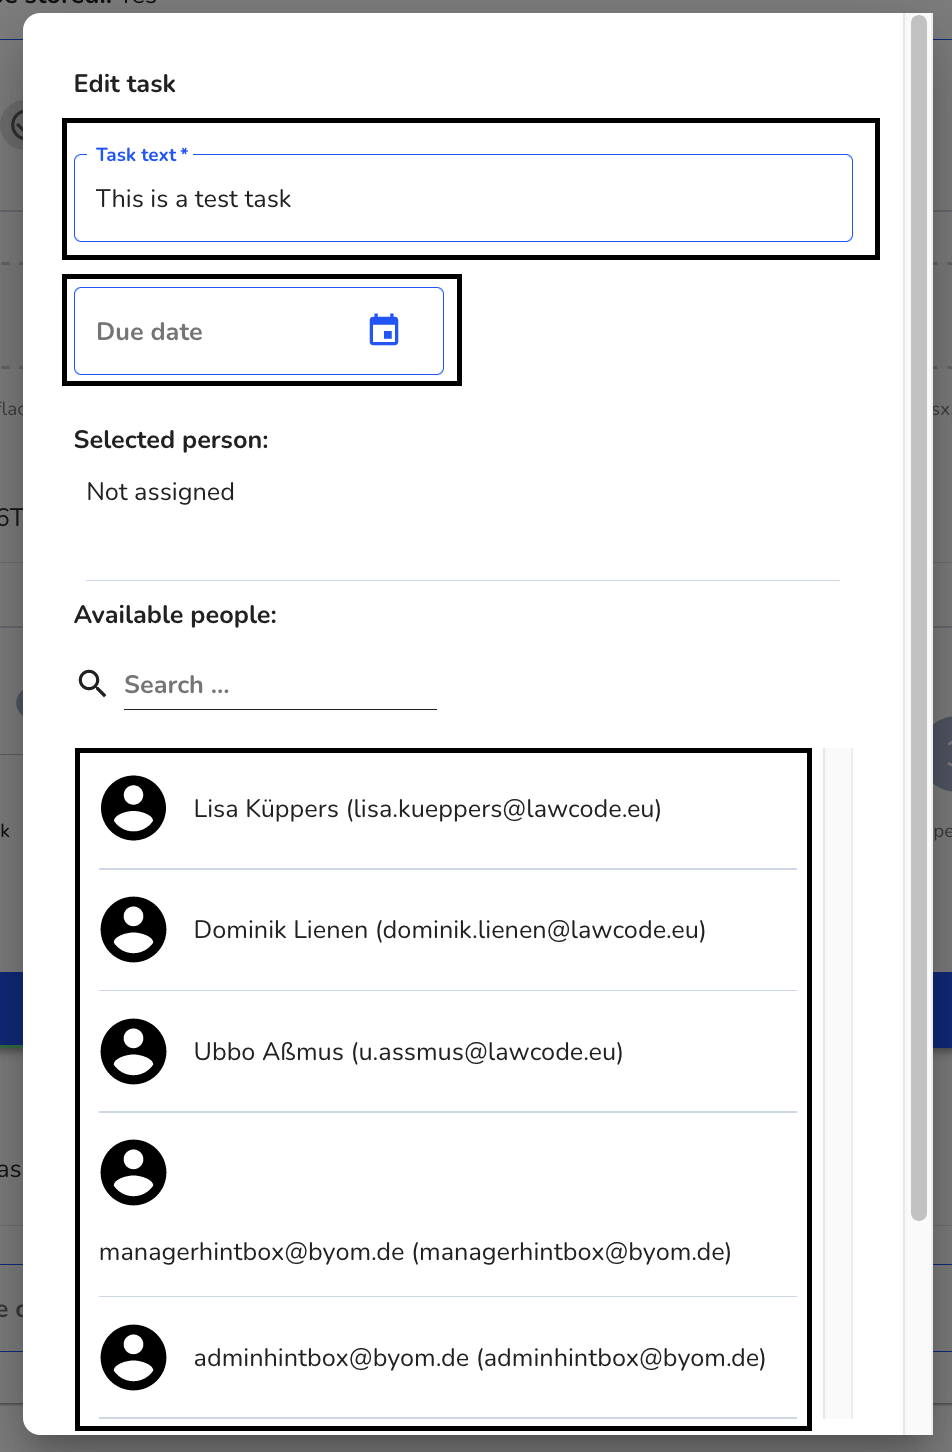
You must then confirm your adjustments by clicking the "Save" button. Afterwards, your changes should be visible in the tasks overview.

Enter comments
If you want to quickly exchange information about a case with other caseworkers, use the comment function. With the help of these functions, you can quickly exchange information with caseworkers within a case.
Use the text line to enter your desired sentence and confirm it with the "Send" button. As soon as this comment has been sent, every caseworker with access to the note can view this comment.

In the comment overview you will now see the comment you have sent.

Read & write messages
Messages can be sent between the manager and the whistleblower for a tip. To do this, click on "Messages" in the tip detail view and the message overview should open. Here you can see all messages written between whistleblowers and case managers
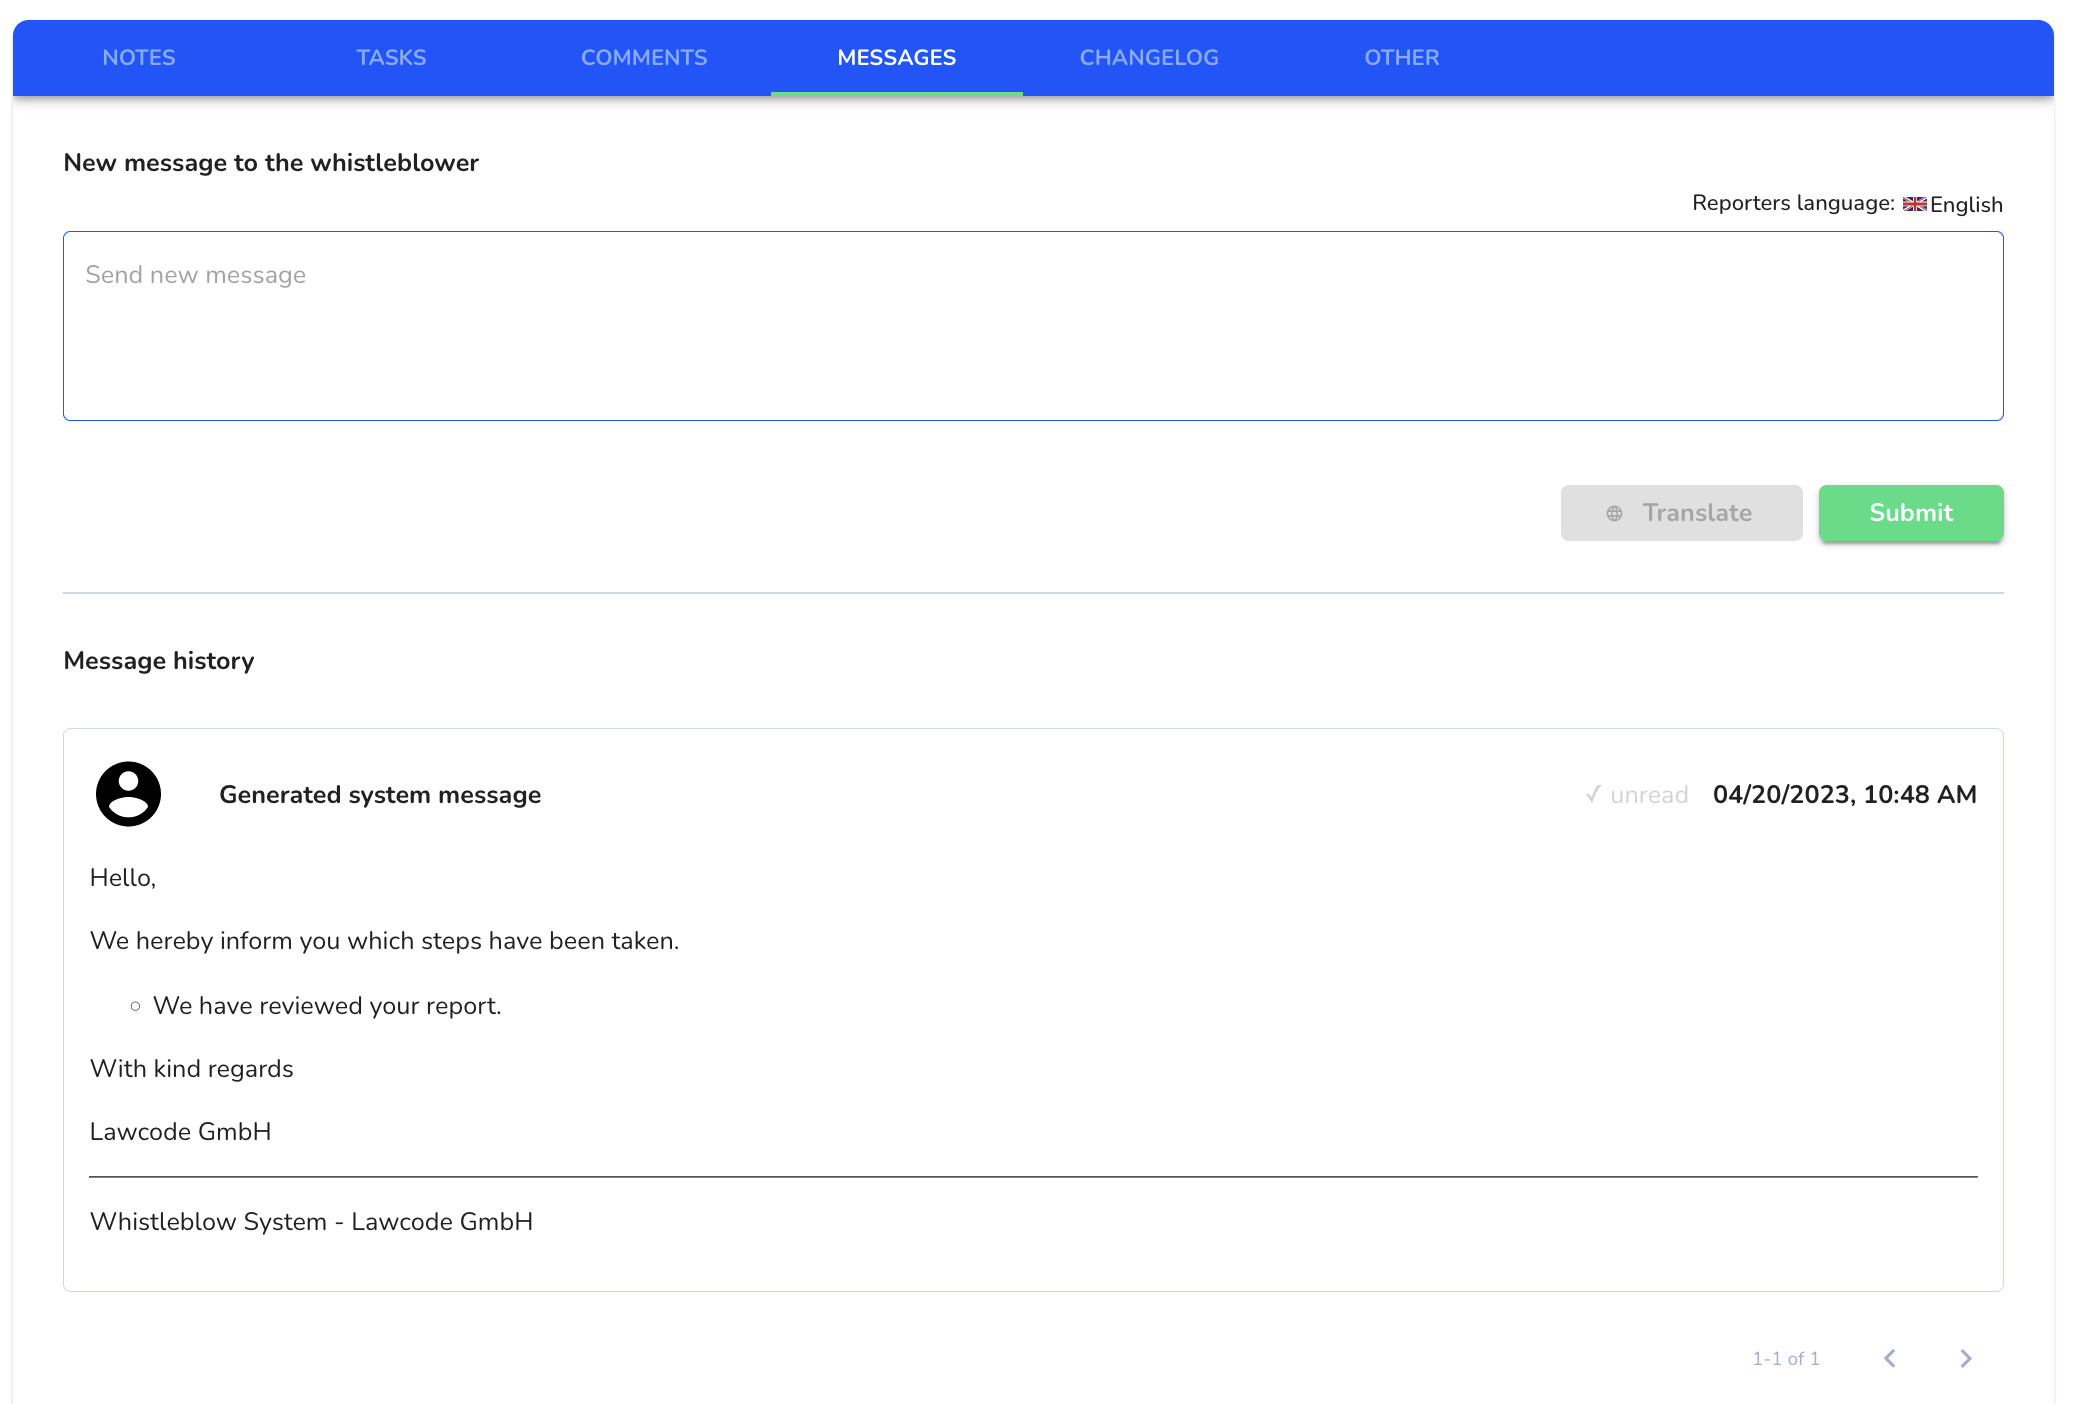
Use the input field to enter messages, write your desired message in the text field and click the "Send" button to send the message to the whistleblower.

Anonymize messages
Messages can be sent between the manager and the whistleblower for a report. To do this, click on "Messages" in the report detail view and the overview of messages should then open. Here you can see all written messages between whistleblowers and case handlers
You can hide your identity in the message if you activate this.
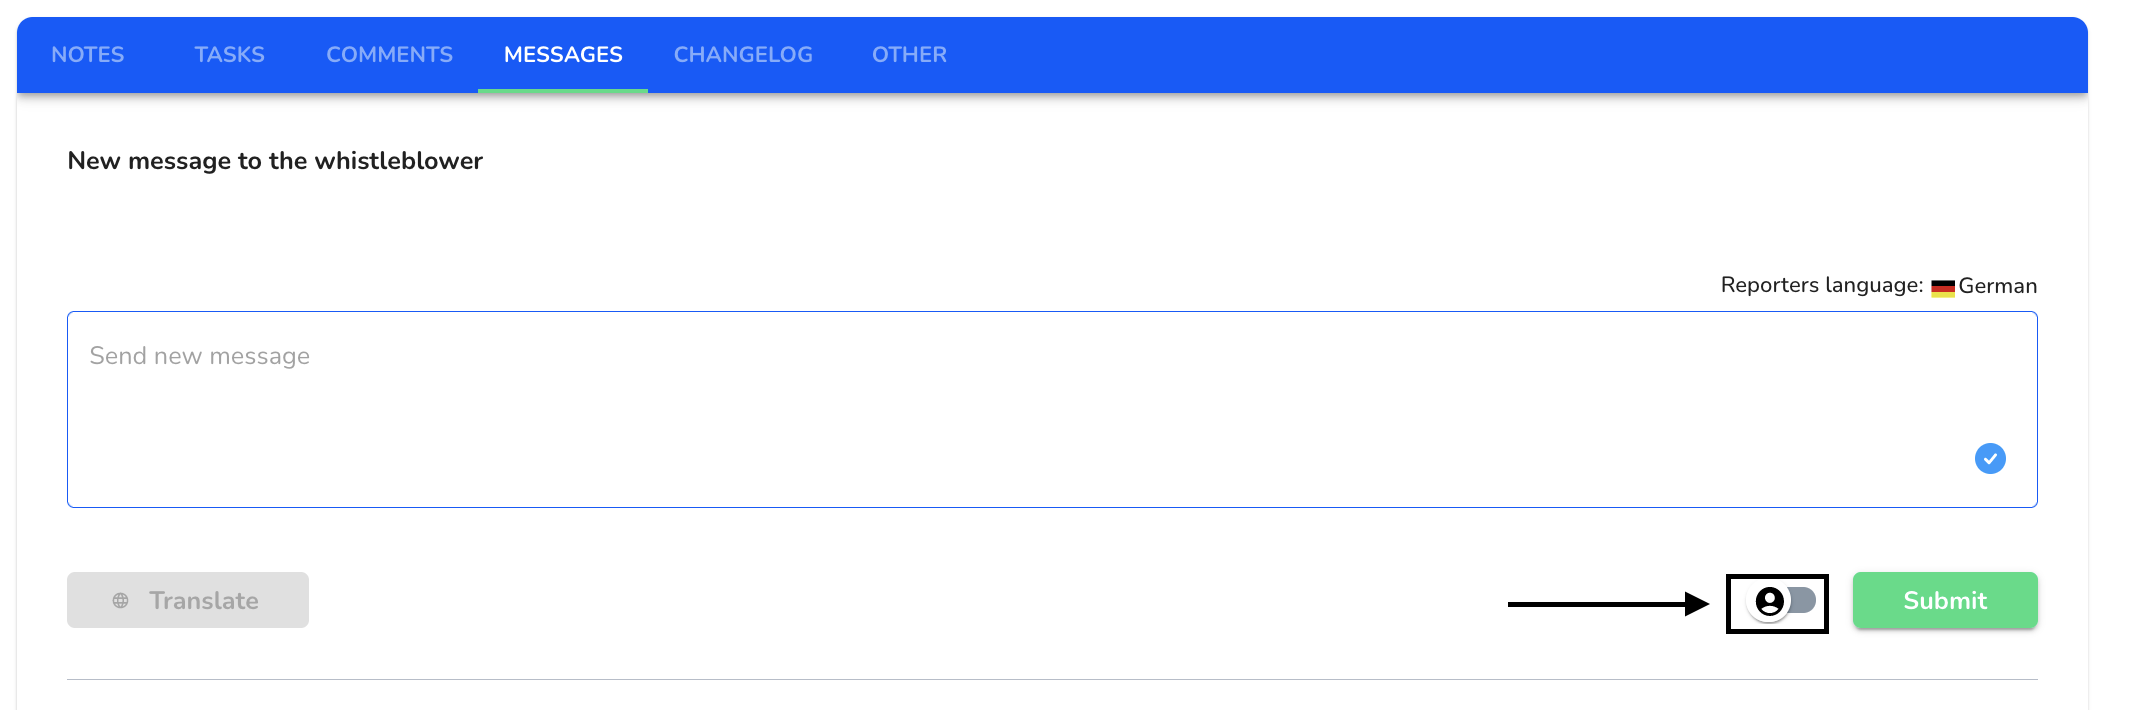
Use the input field to enter messages, write your desired message in the text field, make sure that anonymization is activated and click on the "Send" button to send the message to the whistleblower
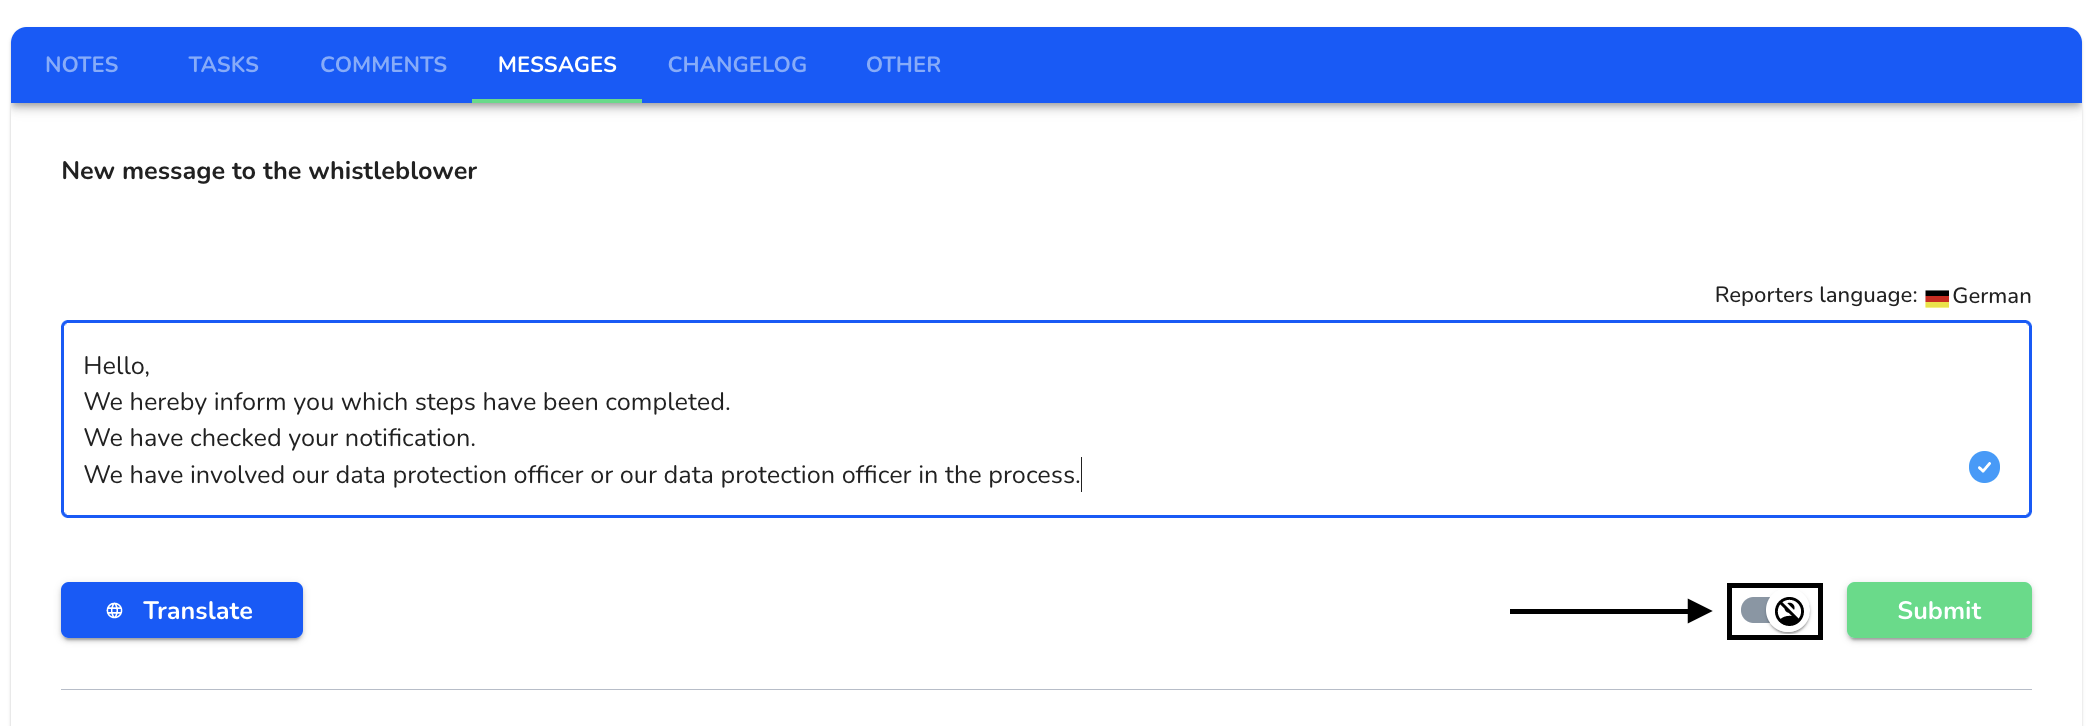
Your message was sent anonymously to the whistleblower.

Anonymize sent messages
Sent messages can still be anonymized by the manager afterwards. To do this, click on "Messages" in the whistleblowing details view and the overview of messages should then open. Here you can see all written messages between whistleblowers and case handlers
To anonymize a message that has already been sent, activate identity hiding.

The whistleblower can no longer see your identity as a manager.

Removing the anonymization of a message
The anonymization of sent messages can still be removed by the manager afterwards. To do this, click on "Messages" in the whistleblowing details view and the overview of messages should then open. Here you can see all written messages between whistleblowers and case handlers
To remove the anonymization of a message that has already been sent, activate the identity.

The whistleblower can now see your identity as a manager.

View change history
All changes and adjustments within an SAP Note are tracked by the change history. Thus, with a click on "Change History" you can view all changes made to the note in the history.

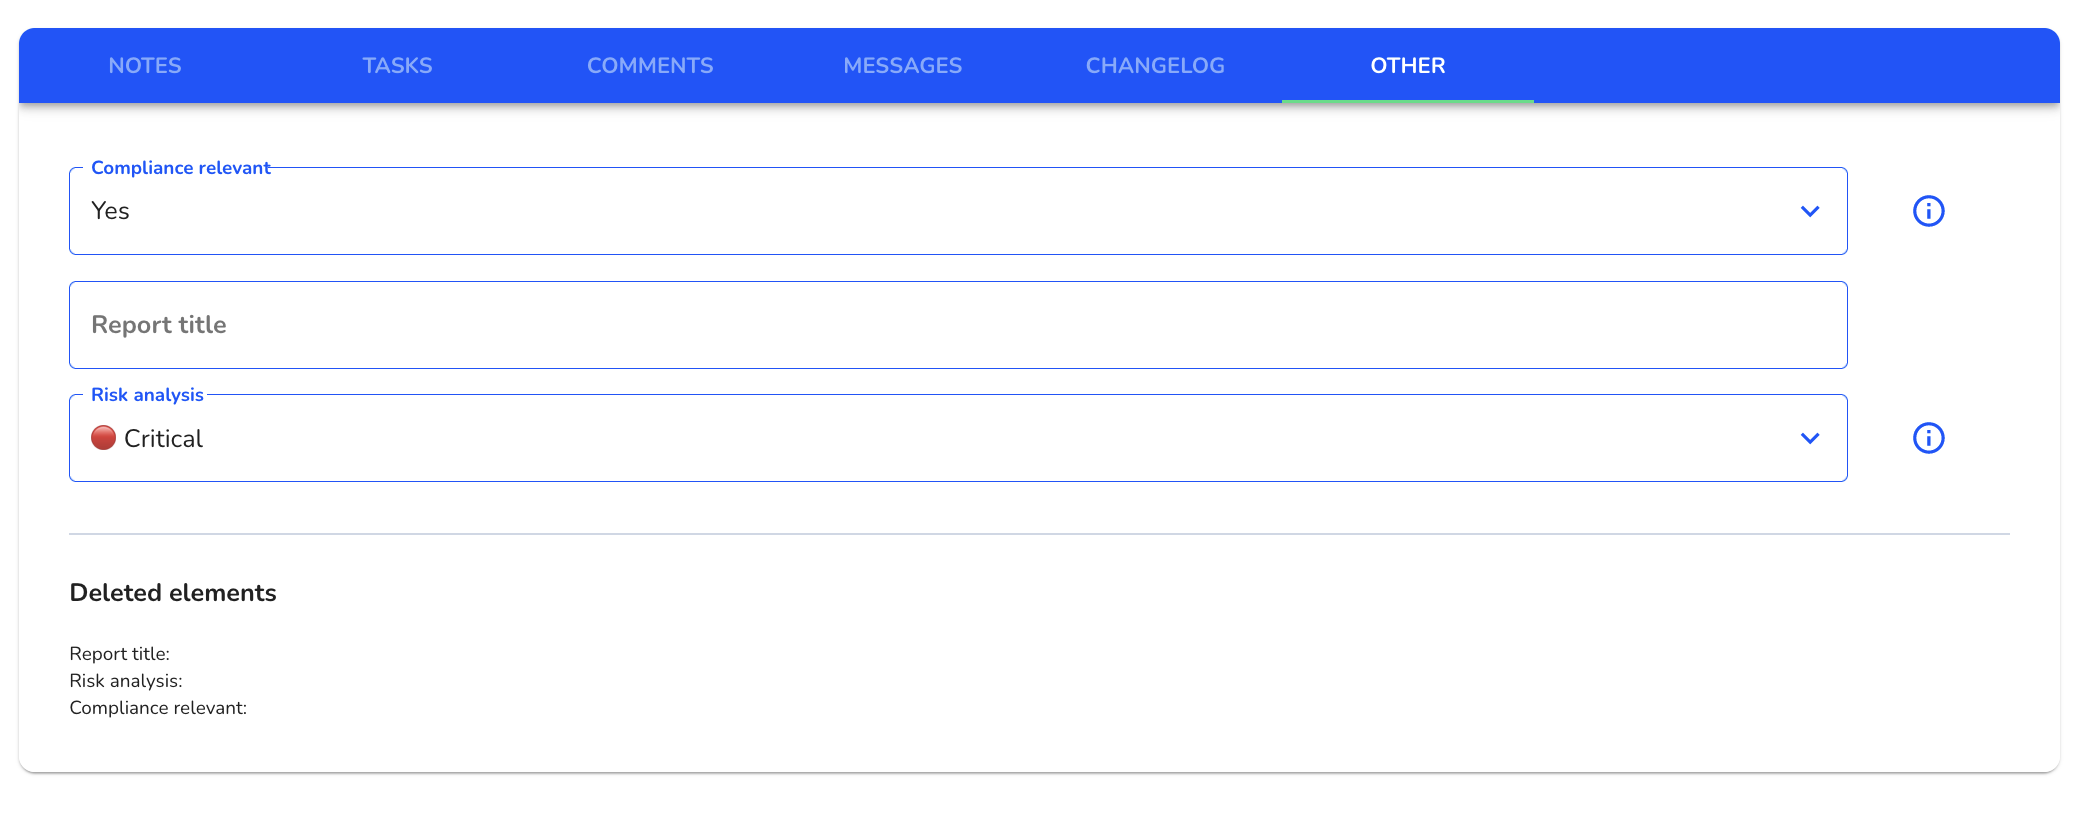
Other
The menu item "Other" serves as a display area for internal fields. Internal fields can be used for internal editing of the notes you want to know more about internal fields?
